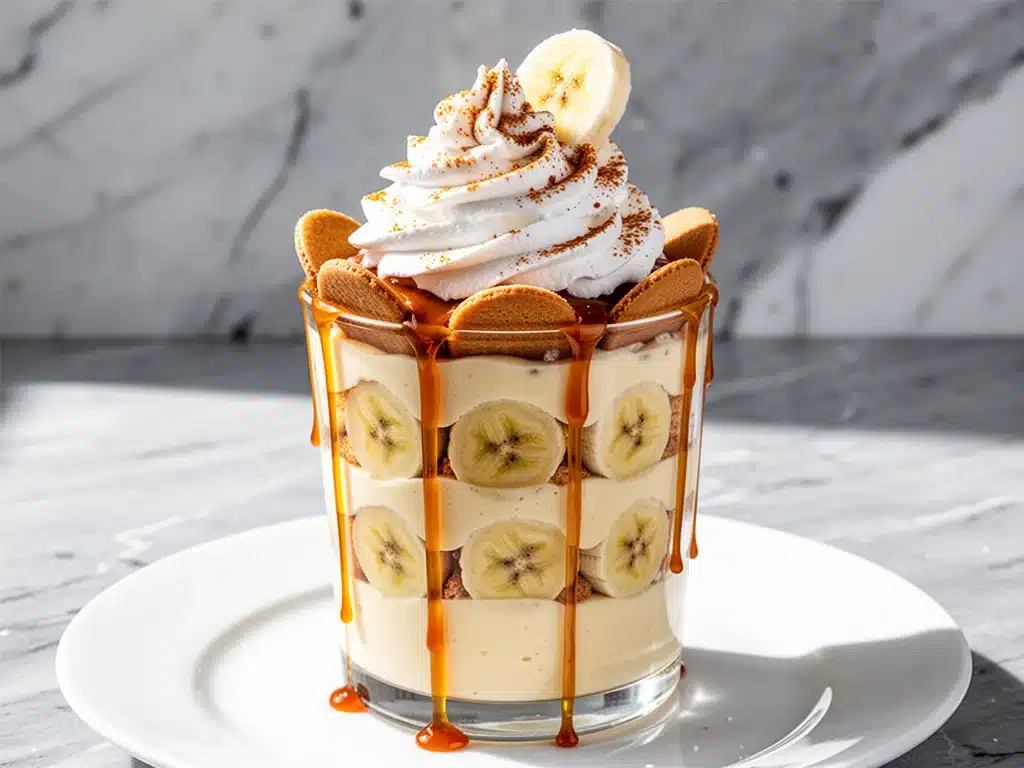
Last Tuesday, I was standing in my kitchen at 8:30 PM, staring into the refrigerator with the kind of desperation that only comes after a long day of work, a chaotic school run, and a dishwasher that wouldn’t close properly. My kids were already in their pajamas, complaining about being “hangry” (which is a real thing, by the way), and I had exactly zero energy to bake a cake. I didn’t want to order takeout. I didn’t want to eat cereal. I wanted something sweet, something creamy, and something that didn’t involve turning my kitchen into a flour bomb.
So, I improvised. I grabbed a carton of heavy cream, a jar of salted caramel sauce I’d been hoarding since last Christmas, and a bunch of bananas that were looking a little too brown to eat raw. I thought it would be a quick five-minute treat. Instead, it became a ten-minute miracle that saved our evening. My kids went from grumpy to giggling in seconds. My husband walked in, took one bite, and asked if I’d been hiding a secret pastry chef identity from him.
That’s how I discovered this **salted caramel banana pudding**. It’s not the kind of dessert that takes all day to set in the fridge or requires a temperamental double boiler. It’s the kind of dessert that comes together while you’re finishing up dinner cleanup. It’s rich, it’s sweet, it’s salty, and it’s incredibly easy. I’ve made it at least twelve times since that chaotic Tuesday, tweaking the ratios until it was perfect. And I’m sharing it with you because I know you’re tired too, and you deserve a dessert that actually works for a busy weeknight.
Why You’ll Love This Salted Caramel Banana Pudding
There are about ten reasons I keep making this, but here are the big ones. This isn’t just another banana pudding recipe; it’s the answer to “what’s for dessert?” when you have nothing left in the tank.
Stupid Simple — Seriously, if you can whip cream and slice a banana, you can make this. I’ve walked my teenage son through it over FaceTime while I was at work. He made it without burning the house down. That’s how easy it is.
Lightning Fast — 10 minutes from start to finish. No baking, no cooling racks, no waiting for layers to set overnight. You eat it immediately. I make this on weeknights when I get home at 7 PM and need dessert on the table by 7:15.
Texture Heaven — Most banana puddings are soggy. This one isn’t. The key is using stabilized whipped cream and assembling it right before serving. It’s fluffy, creamy, and holds its structure. It’s the opposite of mushy.
Pantry-Friendly — You probably have most of this already. Heavy cream, sugar, vanilla, bananas, and caramel sauce are staples in my house. I keep the caramel sauce stocked just so I can make this on a whim.
Crowd-Pleaser — I’ve served this to my vegetarian sister, my gluten-free neighbor (using gluten-free wafers), and my I-only-eat-chocolate dad. Everyone loved it. It’s universal comfort food.
Budget-Smart — Feeds 6-8 people for under $10. That’s less than one dessert at a restaurant. It feels fancy, but it costs pennies.
This is my go-to when I need dessert to just work. No complicated techniques, no weird ingredients, just reliable, delicious food that makes everyone happy. It’s the kind of treat that makes you feel like a hero without the effort.
Ingredients You’ll Need
Here’s the best part: you probably have most of this already. I’m particular about three ingredients here, and I’ll tell you exactly why. This looks like a short list, but each item plays a huge role in the final texture and flavor.
For the Creamy Base
Heavy whipping cream (2 cups / 480ml) — This is non-negotiable. You need high-fat cream to get those stiff peaks. Half-and-half won’t whip. I buy the heavy cream in the big plastic jugs; it’s cheaper and lasts longer in the fridge.
Granulated sugar (¼ cup / 50g) — Just enough to sweeten the cream without overpowering the banana flavor. You can reduce this to 2 tablespoons if your caramel sauce is very sweet.
Vanilla extract (2 teaspoons / 10ml) — Use real vanilla, not imitation. It makes a huge difference in the flavor profile. I use McCormick or Nielsen-Massey. The clear stuff works fine too.
Cream cheese (4 oz / 113g) — This is the secret weapon. It stabilizes the whipped cream so it doesn’t deflate or get soupy. Make sure it’s softened to room temperature. I learned this the hard way with lumpy pudding.
For the Fruit and Crunch
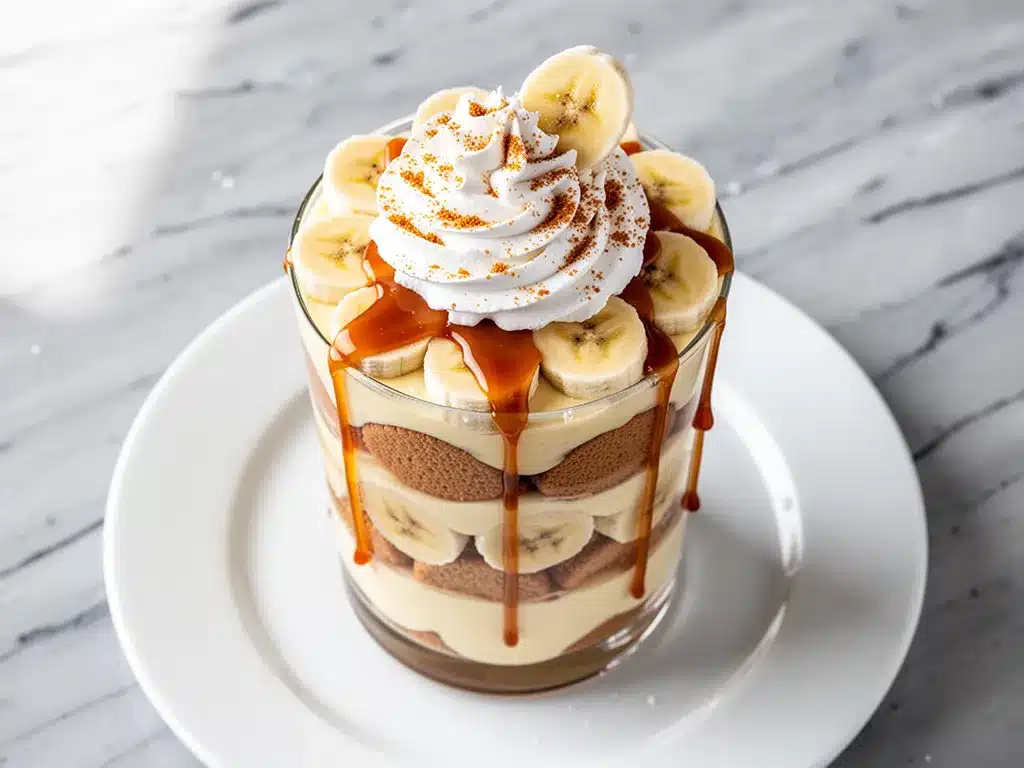
Ripe bananas (3 large / about 450g) — Use bananas that are yellow with some brown spots. They’re sweeter and have more flavor. If they’re too green, they’ll be starchy. If they’re black, they’ll be mushy. Yellow-brown is the sweet spot.
Lemon juice (1 tablespoon / 15ml) — This seems odd in a pudding, but it prevents the bananas from browning and adds a bright note that cuts through the richness. Don’t skip it.
Nilla Wafers or vanilla wafers (1 package / about 30-40 wafers) — I prefer Nilla Wafers because they’re sturdy and don’t get soggy instantly. Vanilla wafers work too, but they’re thinner. Do not use butter cookies; they’ll dissolve.
For the Salted Caramel
Salted caramel sauce (½ cup / 120ml) — I use store-bought because it’s consistent. Buttery Kettle Brand is my favorite. You can make your own, but for a weeknight dessert, store-bought saves time. Make sure it’s pourable, not the thick dipping sauce kind.
Optional: Sea salt flakes — For garnish. A little sprinkle on top adds that gourmet touch.
Personal Tips:
– Brand recommendations: I always use Anchor cream; it whips up beautifully every time.
– Shopping shortcuts: I buy pre-sliced bananas if I’m really lazy, but slicing them yourself ensures you can pick out the bad spots.
– Substitutions: No cream cheese? You can use mascarpone, but it’s richer. No lemon juice? Use a tiny bit of cream of tartar to stabilize the cream, but the lemon flavor is nice.
Equipment Needed
You don’t need fancy equipment for this. Here’s what I actually use.
Electric hand mixer or stand mixer — I use a hand mixer because it’s faster for small batches. A stand mixer works great too. You need something that can whip the cream to stiff peaks quickly.
Large mixing bowl — A 4-quart bowl is ideal. Make sure it’s clean and dry; any grease will stop the cream from whipping.
Medium bowl — For whipping the cream cheese and sugar.
Knife and cutting board — For slicing the bananas. A sharp knife makes clean slices without mashing the fruit.
Spatula — For folding the cream and caramel together. Silicone spatulas are best because they scrape the bowl clean.
Serving dish — A glass trifle bowl looks beautiful, but a simple ceramic bowl or even individual cups work great. I use a 9-inch pie dish for easy slicing.
Optional but nice:
– Piping bag — If you want it to look fancy, pipe the cream into cups. It’s not necessary, but it’s fun.
– Microplane — For grating a little chocolate on top if you want to be extra fancy.
How to Make It: Step-by-Step
Alright, let’s make this! I’m walking you through exactly how I do it, including the little tricks I’ve picked up. This whole process takes about 10 minutes.
Step 1: Prep the Bananas (2 minutes)
Slice your bananas into ¼-inch rounds. Toss them immediately with the lemon juice. This is crucial. If you don’t do this, they’ll turn brown in minutes, and while it’s safe to eat, it doesn’t look appetizing. Set them aside.
Step 2: Whip the Cream Cheese (1 minute)
In a medium bowl, beat the softened cream cheese with the sugar and vanilla extract until smooth and creamy. There should be no lumps. This takes about 30 seconds with an electric mixer. If you’re doing this by hand, it’ll take a minute or two, but it’s still easy.
Step 3: Whip the Heavy Cream (3 minutes)
In a large, cold bowl, whip the heavy cream on medium-high speed until soft peaks form. This means when you lift the beaters, the cream peaks over slightly but falls back down. Don’t over-whip yet!
Step 4: Combine and Fold (2 minutes)
Add the whipped cream to the cream cheese mixture. Gently fold them together using a spatula. You want to maintain as much air as possible, so don’t stir vigorously. Just fold until combined. Then, drizzle in half of the salted caramel sauce and fold that in too. The mixture will be fluffy and swirled with caramel.
Step 5: Assemble (2 minutes)
Now, let’s build it. In your serving dish, place a layer of Nilla Wafers on the bottom. Add a layer of the banana slices. Then, dollop a generous amount of the cream mixture over the bananas. Spread it out. Repeat the layers: wafers, bananas, cream. Finish with a final layer of cream on top.
Step 6: The Caramel Drizzle (1 minute)
Drizzle the remaining salted caramel sauce over the top. Use a knife to swirl it into the cream for a marbled effect. Sprinkle with a pinch of sea salt if you have it. This adds that perfect salty contrast.
Total Time: About 10 minutes (all active cooking). No waiting time required.
Built-in Troubleshooting:
– Cream won’t whip? Make sure your bowl and beaters are cold. Put them in the freezer for 10 minutes before starting.
– Pudding too sweet? Reduce the sugar to 2 tablespoons and use a less sweet caramel sauce.
– Too runny? You didn’t whip the cream enough. It needs to hold stiff peaks to hold its structure.
Expert Tips & Tricks
Here’s everything I’ve learned from making this dozens of times. These tips will save you from my mistakes.
Cold Everything Matters
The heavier the cream, the colder it needs to be. I keep my heavy cream in the fridge until the last second. If it’s warm, it’ll never whip. This is the #1 reason people fail at this recipe.
Don’t Over-Fold
When you combine the cream cheese and whipped cream, be gentle. Over-mixing deflates the air you worked so hard to whip in. You want light, airy pudding, not dense paste.
Use Ripe Bananas
I know, I said this in the ingredients, but it’s worth repeating. Brown-spotted bananas are sweeter and softer. Green bananas will be hard and bland. Yellow bananas are okay, but they won’t have that deep flavor.
Assemble Right Before Serving
This is not a make-ahead dessert in the traditional sense. If you let it sit for hours, the wafers will get soggy and the bananas will release water. Make it 30 minutes before you eat it, or even right before. It’s meant to be fresh and fluffy.
The Salted Caramel Choice
Not all caramel sauces are created equal. Some are too thin, some are too thick. Look for a sauce that is pourable but has some body. If it’s too watery, it’ll make the pudding soupy. If it’s too thick, it’ll clump. The Buttery Kettle brand is my go-to because it’s just right.
Common Mistakes (and how to avoid them):
– Mistake: Lumpy pudding. Fix: Make sure the cream cheese is fully softened before you start. If you’re in a hurry, microwave it for 10 seconds.
– Mistake: Soggy wafers. Fix: Don’t assemble too early. Eat it the same day.
– Mistake: Bland flavor. Fix: Add more vanilla. And don’t skip the sea salt on top.
Variations & Substitutions
Once you’ve nailed the basic version, here’s how you can mix it up. I’ve tried all of these.
Chocolate Lover’s Version
Add a layer of chocolate pudding mix or a drizzle of chocolate sauce between the layers. Or, fold cocoa powder into the whipped cream. It’s decadent and changes the whole vibe.
Strawberry Swap
Replace bananas with sliced strawberries. Toss them with a little sugar instead of lemon juice. It’s a classic strawberry shortcake vibe in pudding form.
Coffee Flavor
Add 1 tablespoon of instant espresso powder to the cream cheese mixture. It pairs amazingly with the caramel and banana. It’s like a caramel macchiato in a bowl.
Gluten-Free
Use gluten-free vanilla wafers. Most brands work fine. Just check the label to make sure they’re sturdy enough to hold the layers. I’ve used Keebler GF wafers with good results.
Dairy-Free
This is harder because the base is dairy-heavy. You can use coconut cream (the hard part from a can of full-fat coconut milk) instead of heavy cream, and vegan cream cheese. It’s different, but still creamy and delicious. My lactose-intolerant friend loves this version.
Lighter Version
Use Greek yogurt instead of cream cheese for part of the base, and reduce the heavy cream to 1 cup. It’s lighter and tangier. Not as rich, but still good.
Serving & Storage
How to Serve
I usually serve this straight from the bowl at the dinner table—it looks rustic and stays cold. But here are other ways I’ve enjoyed it:
Individual Cups: Layer it in clear glasses or mason jars. It looks beautiful and makes portion control easier. Perfect for potlucks.
Sides: It’s rich, so it doesn’t need much else. But a simple green salad on the side balances the meal. Or serve it with some fresh berries on the side for extra color.
Wine Pairing: Not a wine expert, but my wine-snob friend says a Moscato or a sweet Riesling works great with this. It’s sweet enough to pair with dessert wines.
Storage Instructions
Refrigerator:
Store in an airtight container for up to 2 days. After 2 days, the bananas will start to brown and the wafers will get very soft. It’s still safe to eat, but the texture won’t be as good. I usually eat it all within 24 hours.
Reheating:
Do not reheat this. It’s a cold dessert. Reheating will melt the cream and separate the ingredients. Eat it cold.
Freezing:
Honestly, this doesn’t freeze well. The whipped cream separates when thawed, and the bananas get mushy. Make it fresh. If you need to prep ahead, you can slice the bananas and store them in an airtight container with lemon juice for up to 24 hours. But assemble the pudding the day you want to eat it.
Pro tip: If you’re making this for a party, assemble it in individual cups. It’s easier to serve and less likely to get messy. Plus, people can’t accidentally take the whole bowl home.
Nutrition Information
I’m not a nutritionist, but here’s the breakdown if you’re tracking.
Per Serving (based on 6 servings):
- Calories: 380
- Protein: 4g
- Carbs: 45g
- Fiber: 2g
- Sugar: 32g
- Fat: 22g
- Saturated Fat: 14g
- Cholesterol: 75mg
- Sodium: 280mg
What’s Good:
– Bananas provide potassium and vitamin B6
– It’s a quick treat, so it’s not a huge portion
– Can be made lighter with substitutions
What to Know:
– Higher in calories and sugar from the cream and caramel
– Contains dairy and gluten
– Moderate sodium
My Take:
Look, this is dessert with cream, sugar, and caramel. It’s not a diet recipe. It’s a treat. But it’s way better than store-bought pudding, and you know exactly what’s in it. When I want to make it lighter, I use the Greek yogurt version and skip the extra caramel drizzle. But usually? I just eat a reasonable portion and enjoy it. Life’s too short to skip dessert.
Final Thoughts
So that’s my go-to **salted caramel banana pudding**! I’ve probably talked your ear off at this point, but when you make a recipe this often, you have a lot to say about it. This has saved weeknight dinners more times than I can count. It’s my answer to “what’s for dessert?” when I’m tired, don’t want takeout, and still want something that tastes really good. My kids are happy, my husband’s happy, and I’m happy because I’m not stressed about cooking.
Make it yours! Try different add-ins, swap in your favorite fruit, adjust the caramel. The best recipes are the ones you adapt to your family’s tastes. If you make this, drop a comment and let me know what you think! I love hearing how recipes turn out in your kitchen. And if something doesn’t work, tell me that too—I’m here to help troubleshoot.
Happy cooking! And I hope your kitchen smells half as good as mine does right now.
Frequently Asked Questions
Can I use whipped topping instead of heavy cream?
You can, but the texture will be different. Cool Whip is lighter and less rich. It won’t hold up as well to the weight of the bananas, so the pudding might get a bit watery. If you use it, add the cream cheese to stabilize it. But for the best texture, use real heavy cream.
Why did my pudding turn out watery?
Usually, this happens because the bananas released too much water, or the cream wasn’t whipped stiff enough. Make sure your cream reaches stiff peaks. Also, toss the bananas in lemon juice to help them hold their structure. And don’t assemble it too far in advance.
Can I make this ahead for a dinner party?
Sort of. You can prep the components ahead. Slice the bananas and store them in an airtight container with lemon juice. Whip the cream and store it in the fridge. Assemble the pudding about 30 minutes before serving. It won’t be quite as good as fresh, but it’s close and saves you stress during the party.
Can I use frozen bananas?
No. Frozen bananas thaw into mush. They’ll make the pudding watery and gloppy. Use fresh bananas only. If you have overripe bananas, freeze them for smoothies, but not for this pudding.
What if I don’t have Nilla Wafers?
Vanilla wafers are a good substitute. You can also use shortbread cookies, but they’re richer. Do not use graham crackers; they’ll get soggy and have a different flavor. The wafers are key for the texture.
How long does this last in the fridge?
Up to 2 days. After that, the bananas will brown and the wafers will get too soft. It’s best eaten fresh. If you have leftovers, eat them within 24 hours for the best experience.
Can I add alcohol to this?
Yes! A splash of rum or bourbon in the caramel sauce adds a nice depth of flavor. It’s like a banana split cocktail in a bowl. Just add 1 tablespoon to the caramel mixture before folding it in.
Is this recipe similar to other desserts on your site?
It’s definitely in the same family as my pumpkin spice tiramisu—both are no-bake, creamy, and perfect for busy nights. If you like sweet and salty combinations, you’ll also love my apple harvest salted caramel skillet crisp. And if you’re looking for other easy weeknight treats, check out my small batch vanilla bean birthday cake. They’re all designed to be simple, delicious, and stress-free.
Pin This Recipe!
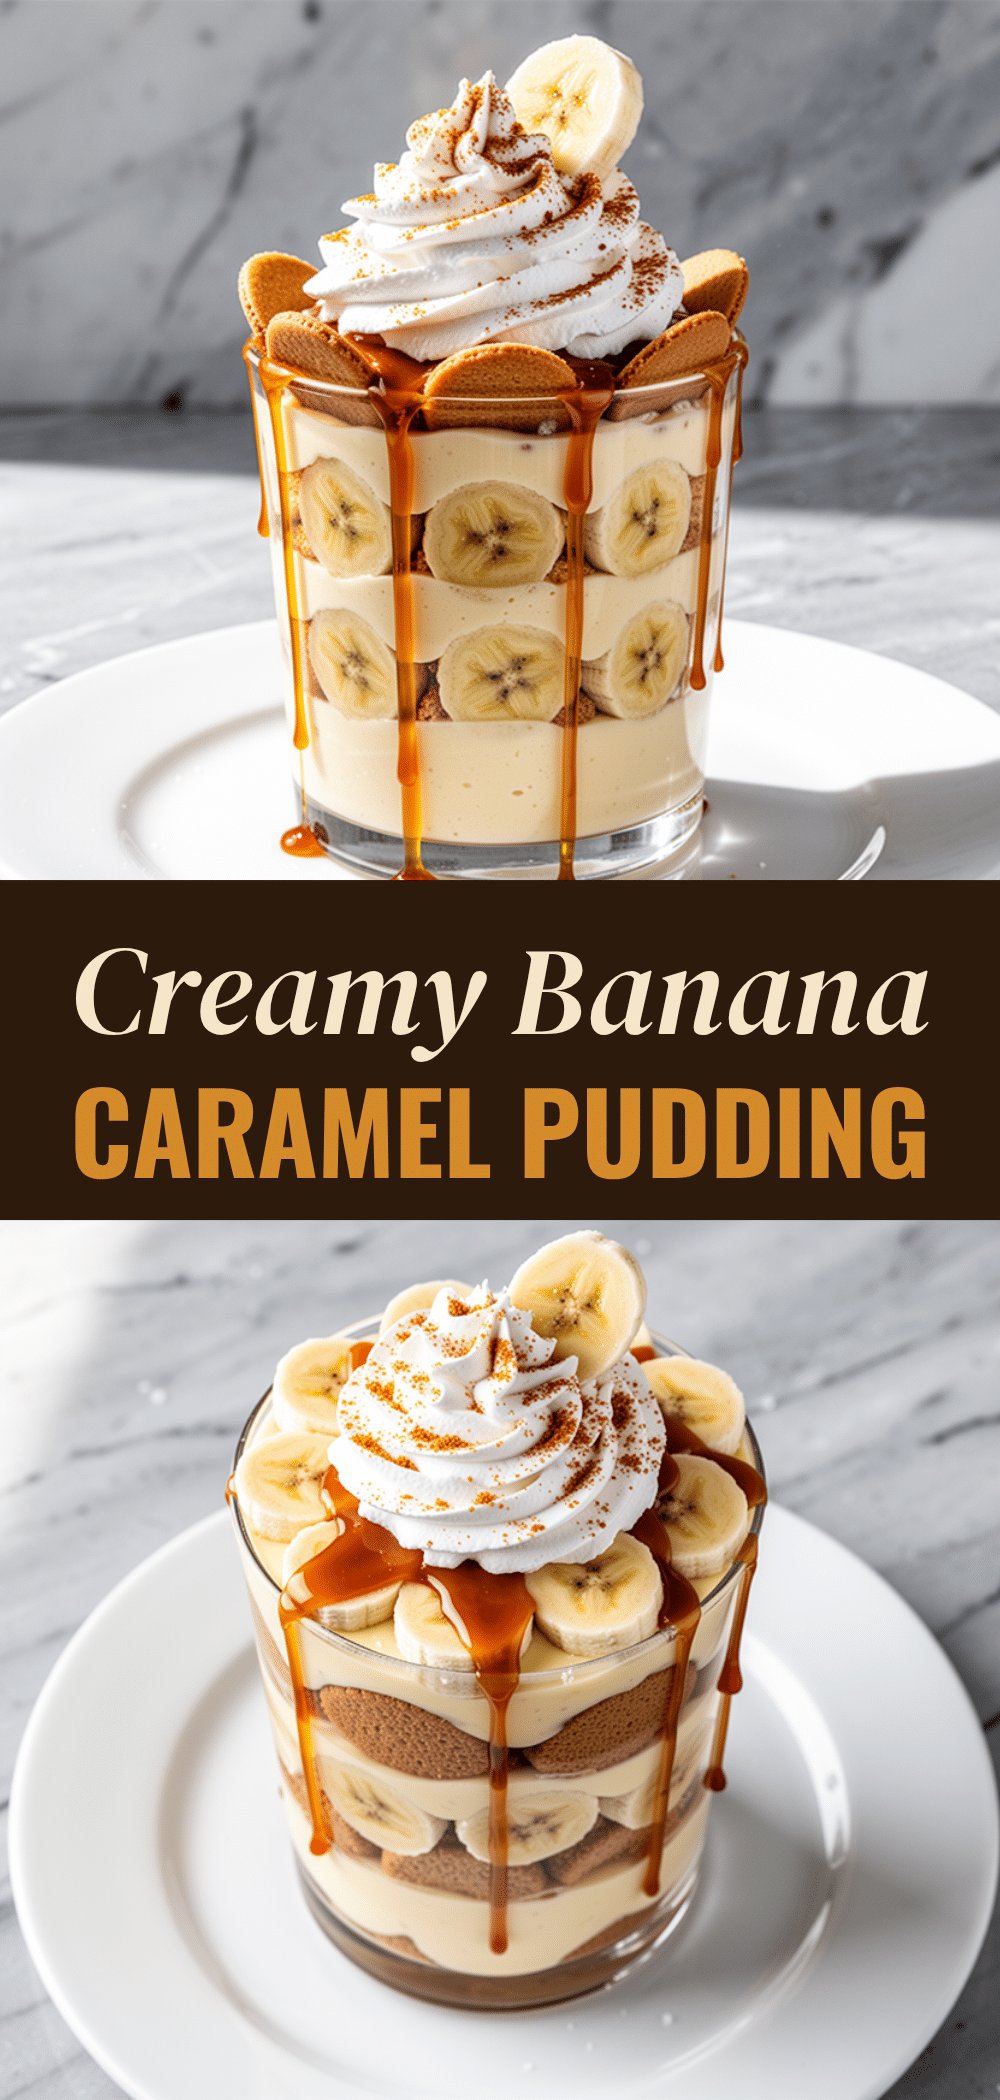
Salted Caramel Banana Pudding: 10 Min Easy Weeknight Dessert
- Total Time: 10 minutes
- Yield: 6 servings 1x
Description
A quick, no-bake dessert that comes together in just 10 minutes. This stabilized whipped cream pudding features layers of ripe bananas, vanilla wafers, and rich salted caramel sauce for a perfect sweet and salty treat.
Ingredients
- 2 cups heavy whipping cream
- 1/4 cup granulated sugar
- 2 teaspoons vanilla extract
- 4 oz cream cheese, softened to room temperature
- 3 large ripe bananas
- 1 tablespoon lemon juice
- 1 package Nilla Wafers or vanilla wafers (about 30–40 wafers)
- 1/2 cup salted caramel sauce
- Sea salt flakes (optional, for garnish)
Instructions
- Slice bananas into 1/4-inch rounds and toss immediately with lemon juice to prevent browning. Set aside.
- In a medium bowl, beat the softened cream cheese with sugar and vanilla extract until smooth and creamy.
- In a large, cold bowl, whip the heavy cream on medium-high speed until soft peaks form.
- Gently fold the whipped cream into the cream cheese mixture until combined. Drizzle in half of the salted caramel sauce and fold gently to create swirls.
- In a serving dish, layer Nilla Wafers, banana slices, and the cream mixture. Repeat layers, finishing with a final layer of cream on top.
- Drizzle the remaining salted caramel sauce over the top and swirl with a knife. Sprinkle with sea salt flakes if desired.
- Serve immediately for the best texture.
Notes
Ensure all equipment and cream are cold for best whipping results. Do not assemble too far in advance as wafers will get soggy. This dessert is best eaten fresh within 24 hours. For a gluten-free version, use gluten-free vanilla wafers. For a dairy-free version, substitute coconut cream and vegan cream cheese.
- Prep Time: 10 minutes
- Cook Time: 0 minutes
- Category: Dessert
- Cuisine: American
Nutrition
- Serving Size: 1 serving
- Calories: 380
- Sugar: 32
- Sodium: 280
- Fat: 22
- Saturated Fat: 14
- Carbohydrates: 45
- Fiber: 2
- Protein: 4
Keywords: salted caramel banana pudding, easy weeknight dessert, no bake dessert, 10 minute dessert, banana pudding recipe, family friendly dessert



