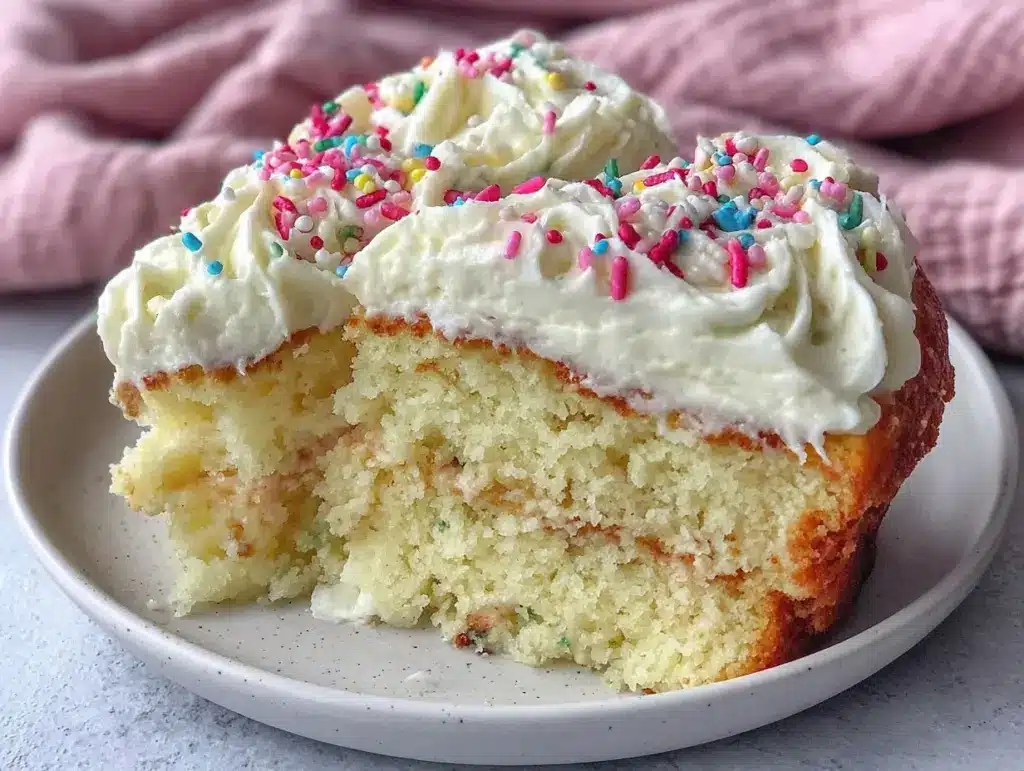
Last Tuesday, I was standing in my kitchen at 6:30 PM, staring at a calendar on my phone with red circles around it. My daughter’s birthday was literally tomorrow. Tomorrow! And I had just come home from work, exhausted, with a grocery list that said “milk, eggs, bread” and absolutely zero mention of cake ingredients. No vanilla beans. No fancy buttercream supplies. Not even a box mix.
Most people would have panicked. Or worse, bought a gas station cake. But I’ve been a budget-savvy parent long enough to know that panic leads to bad decisions. So, I did what I always do when the clock is ticking and the pantry is bare: I looked at what I had.
I had flour. I had sugar. I had a sad-looking stick of butter. I had eggs. And, miraculously, I had a tiny jar of vanilla bean paste in the back of my spice cabinet that I’d forgotten about. That’s when I remembered the Small Batch Vanilla Bean Birthday Cake I’d been testing for months. It’s designed specifically for this scenario—the “I need a celebration dessert right now, but I only have time for one bowl and thirty minutes” scenario.
What happened next was a bit of a miracle. I mixed the batter in a single bowl, baked it in a small 6-inch pan (or even two small loaf pans if that’s what you had), and by the time my kids walked through the door from soccer practice, the house smelled like a bakery. We lit a single candle, sang a slightly off-key song, and cut into this incredibly moist, tender cake. My daughter didn’t care that it wasn’t a three-tier masterpiece from a high-end patisserie. She cared that it was homemade, it was vanilla, and it was made by Mom on a Tuesday night.
This Small Batch Vanilla Bean Birthday Cake isn’t just for birthdays. It’s for random Tuesdays. It’s for when you need to celebrate a small win, like finally getting the toddler to nap past 2 PM. It’s for when you want to treat yourself to something sweet without spending $8 on a slice of cake or spending hours decorating. It’s simple, it’s affordable, and it tastes like pure comfort.
I’ve made this cake over a dozen times since that Tuesday. Sometimes I add sprinkles. Sometimes I just eat it with a spoon. But it never fails to turn a stressful weeknight into a sweet memory. If you’ve ever felt like you couldn’t afford the time or money for a “special” dessert, this recipe is your permission slip to keep it simple and delicious.
Why You’ll Love This Small Batch Vanilla Bean Birthday Cake
There are about ten reasons I keep coming back to this cake, but let’s be real—you’re here because you want something that works, tastes good, and doesn’t break the bank. Here’s why this Small Batch Vanilla Bean Birthday Cake has become my go-to weeknight dessert hack:
- Stupid Simple One-Bowl Method — Seriously, if you can whisk, you can make this. I mix everything in one large bowl. No stand mixer needed. No creaming butter and sugar for twenty minutes. Just dump, whisk, bake. I’ve made this while helping my son with his math homework, and it turned out perfectly.
- Actually Budget-Friendly — Most cake recipes call for ingredients you’ll buy just for this one time: vanilla beans, almond extract, fancy chocolate chips. This recipe uses pantry staples. Flour, sugar, butter, eggs, milk, and vanilla. If you have those, you already have the cake. It costs less than $3 to make.
- Perfect for One or Two People — Big 9×13 cakes are great, but they sit in the fridge for a week, getting drier every day. This small batch makes just enough to feed a family of four with leftovers, or a couple of people for a few days. No waste. No guilt.
- Ready in 45 Minutes — From mixing to cooling, it takes less time than ordering takeout. The prep is 10 minutes. The bake is 25 minutes. It’s faster than waiting for a delivery driver to find your house.
- Kid-Approved Simplicity — My kids love vanilla. They don’t want fancy flavors or complex textures. They want soft, sweet, familiar cake. This hits that sweet spot perfectly. It’s the kind of cake that makes them ask, “Can we have cake for dinner?” which, honestly, is a win in my book.
- Freezer-Friendly Leftovers — Because it’s a small batch, if you make it on Sunday, you’ll have pieces for lunch on Wednesday. And because it freezes well, you can wrap it up and pull it out when you need a quick pick-me-up. It thaws in about 20 minutes at room temperature.
This isn’t about fancy techniques or expensive ingredients. It’s about making something special with what you have. It’s about proving that you don’t need a big event to justify a little bit of joy. And honestly? It’s the best way to get back into baking without feeling overwhelmed.
Ingredients You’ll Need for the Small Batch Vanilla Bean Birthday Cake
Here’s the best part: you probably have most of this already. This isn’t a recipe that requires a trip to three different specialty stores. It’s built on the foundation of a well-stocked, budget-conscious pantry.
For the Cake
All-purpose flour (1 ½ cups / 190g) — The base. Don’t use self-rising flour unless you adjust the leavening, which I’ll explain below. All-purpose gives that tender, classic crumb.
Baking powder (1 ½ teaspoons) — The lift. Make sure it’s fresh! I check my baking powder by dropping a teaspoon in hot water—if it doesn’t fizz, toss it. Old baking powder = dense cake.
Salt (½ teaspoon) — Not optional. Salt makes the vanilla taste more like vanilla. It balances the sweetness. I use table salt or fine sea salt.
Unsalted butter (½ cup / 115g, softened) — Softened means cool to the touch but squishable. If it’s melted, the texture will be wrong. If it’s hard as a rock, it won’t mix properly. Leave it out for 30 minutes before you start.
Granulated sugar (¾ cup / 150g) — White sugar keeps the cake light and tender. Brown sugar makes it chewy and dense, which isn’t what we want for this classic vanilla vibe. You can reduce to ⅔ cup if you prefer less sweet, but don’t go much lower or it affects the texture.
Large eggs (2) — Room temperature eggs mix into the batter more evenly. If you’re in a rush, just drop them in a bowl of warm water for 5 minutes. Cold eggs can cause the butter to seize up.
Vanilla extract or vanilla bean paste (1 teaspoon extract OR 1 tablespoon paste) — This is the star. Vanilla extract works fine, but if you want those beautiful black specks and a deeper flavor, use vanilla bean paste. It’s a bit pricier, but a little goes a long way. You can find it in the baking aisle next to the extracts. If you can’t find it, use high-quality pure vanilla extract. Avoid “imitation” vanilla at all costs—it tastes chemical.
Whole milk (½ cup / 120ml) — Adds moisture and richness. You can use skim milk in a pinch, but the cake will be slightly less tender. Buttermilk is also fantastic here if you have it—it adds a slight tang that complements the vanilla beautifully.
For the Simple Vanilla Buttercream
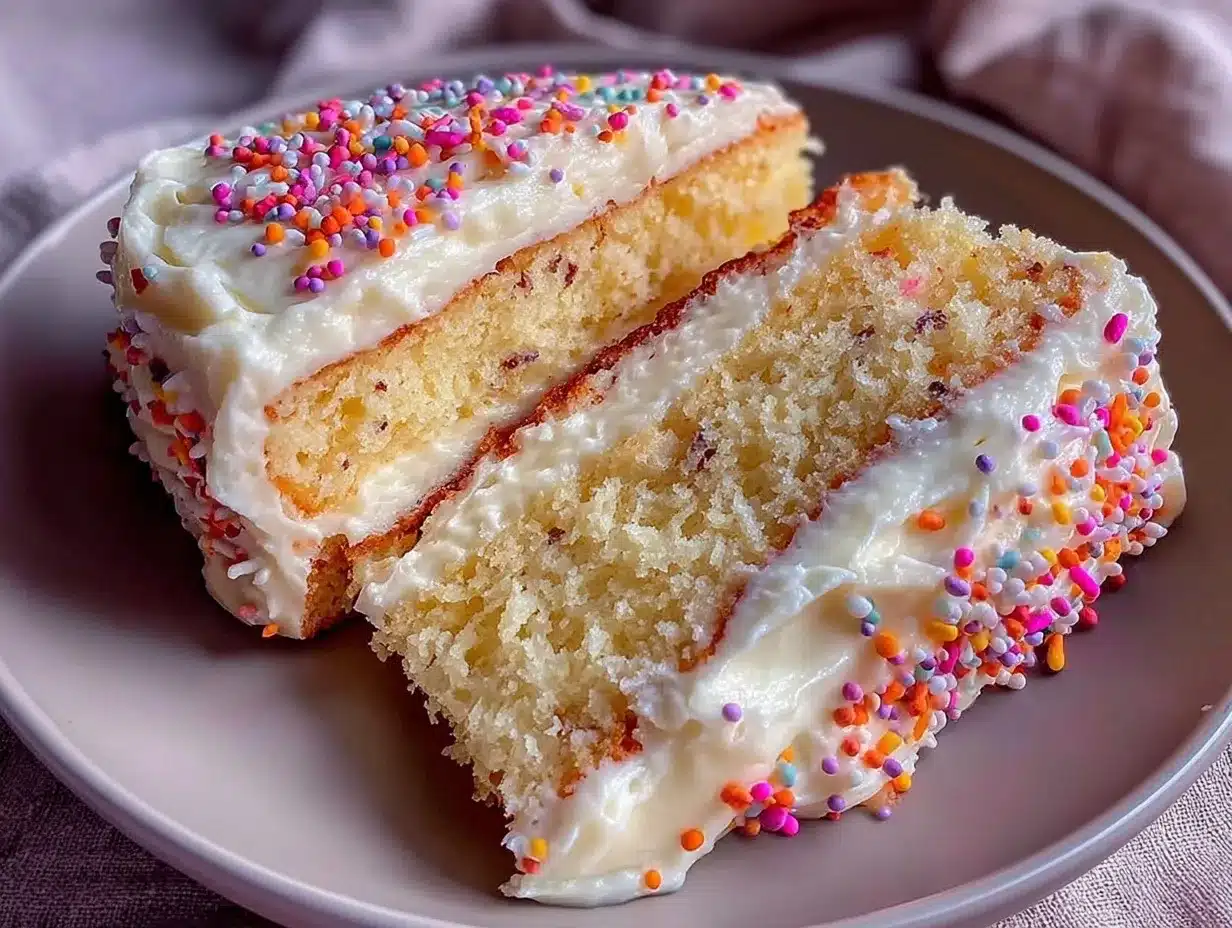
Unsalted butter (½ cup / 115g, softened) — Same rule as above. Softened, not melted.
Confectioners’ sugar (2 cups / 240g) — Also known as powdered sugar. Sift it if it’s lumpy. Lumpy frosting is no one’s friend.
Heavy cream or milk (1-2 tablespoons) — Just enough to loosen the frosting to a spreadable consistency. Start with 1 tablespoon; you can always add more.
Vanilla extract (1 teaspoon) — Double down on the vanilla flavor here.
Salt (a pinch) — Again, crucial for balancing the sweetness.
Optional: Sprinkles — Because it’s a birthday cake. Use whatever you have. Jimmies, nonpareils, or just nothing. I usually keep rainbow sprinkles on hand for these moments.
Equipment Needed
You don’t need fancy gear for this. Here’s what I actually use:
6-inch round cake pan — This is the ideal size for a small batch. You can also use two 4-inch pans, or even two small loaf pans if you want “mini cakes.” Just adjust the baking time slightly (check at 20 minutes for loaves). If you only have an 8-inch pan, the cake will be thinner and bake faster, so keep an eye on it.
Mixing bowl — A large bowl, about 4-quart size. Something deep so the flour doesn’t fly out when you whisk.
Whisk — A standard balloon whisk works perfectly. No need for an electric mixer.
Spatula — For scraping the bowl and folding in the last bits of flour.
Parchment paper — Optional but recommended. Line the bottom of the pan to ensure easy release. Grease the sides too.
Cooling rack — Essential for cooling the cake completely before frosting. If you frost a warm cake, the buttercream will melt and slide off. I learned this the hard way with a very sad, messy cake last year.
How to Make It: Step-by-Step
Alright, let’s make this! I’m walking you through exactly how I do it, including the little tricks I’ve picked up over years of weeknight baking.
Step 1: Prep Your Oven and Pan (5 minutes)
Preheat your oven to 350°F (175°C). This is crucial. If the oven isn’t hot enough, the cake won’t rise properly. Grease your 6-inch cake pan with butter or non-stick spray. I like to line the bottom with a circle of parchment paper for guaranteed easy removal. Set it aside.
Step 2: Mix the Dry Ingredients (2 minutes)
In your mixing bowl, whisk together the flour, baking powder, and salt. This distributes the leavening agent evenly, which prevents weird pockets of bitterness. Just whisk it for 30 seconds until it’s all uniform.
Step 3: Cream the Butter and Sugar (3 minutes)
Add the softened butter and granulated sugar to the dry ingredients. Wait, really? Yes. Mix them together with your whisk or a spoon until it looks like wet sand. This step helps create the tender crumb. Then, add the eggs one at a time, whisking well after each addition. The mixture might look a bit curdled at first—don’t panic, it’s normal.
Step 4: Add the Vanilla and Milk (2 minutes)
Pour in the vanilla (extract or paste) and the milk. Whisk everything together until the batter is smooth and glossy. Scrape down the sides of the bowl to make sure everything is incorporated. The batter should be thick but pourable.
Step 5: Bake the Cake (25-30 minutes)
Pour the batter into your prepared pan. Smooth the top with a spatula. Place it in the center of the oven. Bake for 25-30 minutes. How do you know it’s done? The top should be golden brown and spring back when you lightly touch it. A toothpick inserted into the center should come out clean or with just a few moist crumbs. Do not overbake, or the cake will be dry. I usually check at 25 minutes.
Step 6: Cool Completely (30 minutes)
Let the cake cool in the pan for 10 minutes, then turn it out onto a cooling rack. Let it cool completely. This is the hardest part, I know. But frosting a warm cake is a recipe for disaster. While it cools, you can make the frosting.
Step 7: Make the Vanilla Buttercream (5 minutes)
In a separate bowl, beat the softened butter until creamy. Add the powdered sugar, one cup at a time, mixing on low speed (or stirring by hand) to avoid a sugar cloud. Once all the sugar is in, add the vanilla, salt, and 1 tablespoon of heavy cream. Beat on medium-high for 2 minutes until fluffy. If it’s too thick, add another tablespoon of cream. If it’s too thin, add a bit more sugar.
Step 8: Frost and Decorate (5 minutes)
Once the cake is cool, spread the buttercream on top. You don’t need to cover the sides if you don’t want to—this is a rustic, home-style cake. Add sprinkles if you’re feeling festive. Slice and serve.
Expert Tips & Tricks
Here’s everything I’ve learned from making this dozens of times. These tips will save you from my mistakes.
- Room Temperature Ingredients Matter — I can’t stress this enough. Cold butter and eggs won’t emulsify properly, leading to a dense cake. If you forget to take them out, use the warm water trick for eggs and microwave the butter for 5-10 seconds (don’t melt it!).
- Don’t Overmix the Batter — Once you add the flour, mix just until it disappears. Overmixing develops gluten, which makes the cake tough and chewy instead of tender and light.
- Use Vanilla Bean Paste for Specks — If you want that professional look with the black vanilla seeds, vanilla bean paste is your friend. It’s thicker than extract, so you might need to thin it with a teaspoon of milk. But the flavor is superior.
- Check Your Baking Powder — If your cake doesn’t rise, your baking powder is likely old. It loses potency after 6 months. Keep a fresh can in your pantry.
- Frosting Consistency — Buttercream can be finicky. If it’s too stiff, it will tear the cake when you spread it. If it’s too soft, it will slide off. Aim for a consistency like soft-serve ice cream.
Variations & Substitutions
Once you’ve nailed the basic version, here’s how you can mix it up. I’ve tried all of these.
- Chocolate Version — Swap ¼ cup of flour for ¼ cup of unsweetened cocoa powder. Add 2 tablespoons of hot coffee to the milk to deepen the chocolate flavor. It’s like a mini chocolate cake.
- Lemon Vanilla — Add the zest of one lemon to the butter and sugar mixture. Add 1 tablespoon of lemon juice to the batter. Bright and refreshing.
- Gluten-Free — Use a 1:1 gluten-free flour blend. The texture is slightly different but still delicious. I’ve used Bob’s Red Mill and it works well.
- Dairy-Free — Use vegan butter (like Miyoko’s or Earth Balance) and almond milk. The frosting will be slightly less rich, but still tasty.
- Strawberry Swirl — Mix 2 tablespoons of strawberry jam into the batter before baking for a fruity swirl. Or layer jam between two thin cake layers.
Serving & Storage
How to Serve: This cake is best served at room temperature. The flavors are most pronounced then. I usually serve it with a cup of coffee or tea in the afternoon. It pairs beautifully with my creamy iced brown sugar oat milk latte for a cozy afternoon treat.
Leftovers: Store leftover cake in an airtight container at room temperature for up to 2 days. If your house is hot, keep it in the fridge, but let it come to room temperature before eating for the best texture.
Freezing: This cake freezes beautifully. Wrap individual slices tightly in plastic wrap, then in foil. Freeze for up to 3 months. Thaw at room temperature for 20 minutes. It tastes almost as good as fresh.
Meal Prep Tip: I often bake this on Sunday evening. It stays fresh for the rest of the week, making it a perfect grab-and-go snack for school lunches or a mid-afternoon pick-me-up.
Nutrition Information
I’m not a nutritionist, but here’s the breakdown if you’re tracking. This is per slice (assuming 8 slices).
- Calories: 280
- Protein: 3g
- Carbs: 38g
- Fat: 14g
- Sugar: 24g
Look, this is cake. It’s sugar and butter. It’s not a health food. But it’s better than store-bought because you control the ingredients. If you want to lighten it up, you can reduce the sugar to ½ cup and use half-and-half instead of heavy cream in the frosting. But honestly? I usually just enjoy a slice and move on.
Final Thoughts
So that’s my Small Batch Vanilla Bean Birthday Cake! I know I’ve talked a lot about how simple it is, but that’s the point. Life is busy. Kids are loud. Groceries are expensive. But you don’t need a big budget or a lot of time to make something special for the people you love.
This cake has saved me more times than I can count. It’s my answer to “what’s for dessert?” when I’m tired, broke, and out of ideas. It’s soft, it’s sweet, and it smells like home. My kids love it, my husband loves it, and I love that it takes 30 minutes to make.
Make it yours! Try different sprinkles, add some fruit, or just eat it plain. The best recipes are the ones you adapt to your life. If you make this, drop a comment and let me know how it turned out! I love hearing from you.
Happy baking! And I hope your kitchen smells as good as mine does right now.
Frequently Asked Questions
Can I use a different size pan?
Yes! If you use an 8-inch pan, the cake will be thinner and bake faster (check at 20 minutes). If you use a 9×13 pan, you’ll need to double the recipe. For a small batch, the 6-inch pan is ideal because it keeps the cake moist and tender.
Can I make the frosting ahead of time?
Yes! Store the frosting in an airtight container in the fridge for up to 3 days. Let it come to room temperature and beat it with a spoon or whisk before frosting the cake. It might need a splash of cream to loosen it up again.
Why did my cake sink in the middle?
This usually happens if the oven temperature is too low or if you opened the oven door too early. The structure hasn’t set yet, so the collapse causes a sink. Make sure your oven is properly preheated and avoid opening the door for the first 20 minutes of baking.
Can I use vanilla extract instead of vanilla bean paste?
Absolutely. Use 1 teaspoon of high-quality vanilla extract. You won’t get the black specks, but the flavor will still be delicious. Just make sure it’s pure vanilla, not imitation.
How do I store leftover cake?
Keep it in an airtight container at room temperature for up to 2 days. If you live in a humid climate, refrigerate it, but bring it to room temperature before serving for the best texture.
Can I freeze the cake?
Yes! Wrap the whole cake or individual slices tightly in plastic wrap and foil. Freeze for up to 3 months. Thaw at room temperature before eating.
Pin This Recipe!
Small Batch Vanilla Bean Birthday Cake
- Total Time: 45 minutes
- Yield: 8 servings 1x
Description
A budget-friendly, one-bowl vanilla bean cake that is perfect for weeknight celebrations. This small batch recipe yields a moist, tender cake with simple vanilla buttercream, ready in under 45 minutes.
Ingredients
- 1 ½ cups all-purpose flour
- 1 ½ teaspoons baking powder
- ½ teaspoon salt
- ½ cup unsalted butter, softened
- ¾ cup granulated sugar
- 2 large eggs, room temperature
- 1 teaspoon vanilla extract OR 1 tablespoon vanilla bean paste
- ½ cup whole milk
- ½ cup unsalted butter, softened (for frosting)
- 2 cups confectioners’ sugar
- 1–2 tablespoons heavy cream or milk (for frosting)
- 1 teaspoon vanilla extract (for frosting)
- Pinch of salt (for frosting)
- Optional: Sprinkles
Instructions
- Preheat oven to 350°F (175°C). Grease a 6-inch round cake pan and line the bottom with parchment paper.
- In a large mixing bowl, whisk together the flour, baking powder, and salt.
- Add the softened butter and granulated sugar to the dry ingredients. Mix until it resembles wet sand.
- Add eggs one at a time, whisking well after each addition until combined.
- Pour in the vanilla (extract or paste) and milk. Whisk until the batter is smooth and glossy.
- Pour batter into the prepared pan and smooth the top.
- Bake for 25-30 minutes, or until the top is golden brown and a toothpick inserted in the center comes out clean.
- Let the cake cool in the pan for 10 minutes, then turn it out onto a cooling rack to cool completely.
- While the cake cools, make the frosting: Beat softened butter until creamy. Add powdered sugar one cup at a time, then add vanilla, salt, and 1 tablespoon of cream. Beat until fluffy.
- Spread the buttercream over the cooled cake and add sprinkles if desired.
Notes
Ensure ingredients are at room temperature for best results. Do not overmix the batter to avoid a tough texture. If using vanilla bean paste, it may need to be thinned slightly with milk. The cake can be stored at room temperature for up to 2 days or frozen for up to 3 months.
- Prep Time: 10 minutes
- Cook Time: 25 minutes
- Category: Dessert
- Cuisine: American
Nutrition
- Serving Size: 1 slice
- Calories: 280
- Sugar: 24
- Sodium: 150
- Fat: 14
- Saturated Fat: 8
- Carbohydrates: 38
- Fiber: 1
- Protein: 3
Keywords: small batch cake, vanilla bean cake, birthday cake, budget-friendly dessert, weeknight baking, one bowl cake, easy vanilla cake



