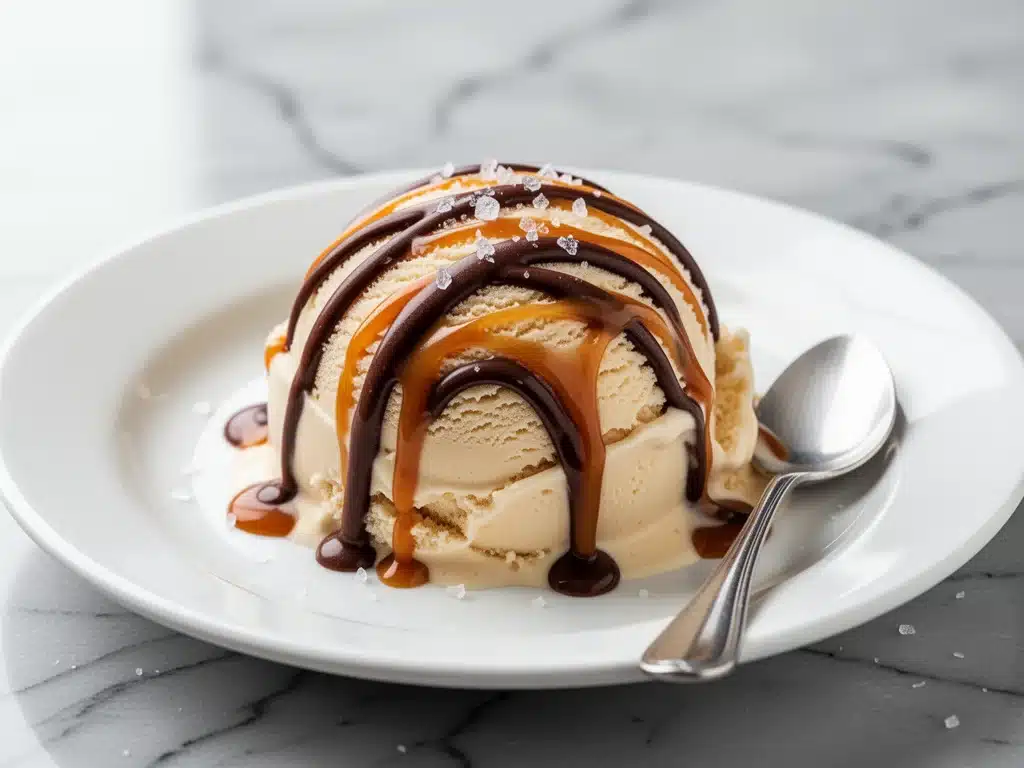
Last July, I was trying to impress a group of friends who claimed they “don’t really like ice cream.” You know the type. They’re the people who order a glass of water at a dessert place. I wanted to prove them wrong, so I pulled out my biggest, baddest dessert recipe: a complicated, three-day custard-based ice cream that requires an ice cream machine, a tempering station, and a level of patience I simply did not possess at 10 PM on a Tuesday.
It failed. Obviously. The custard curdled. The texture was icy and sad. I was staring at a bowl of frozen egg salad, ready to give up on dessert entirely.
Then I remembered my neighbor, Mrs. Gable, who once told me that the best ice cream she ever had was made with just heavy cream, sweetened condensed milk, and a secret ingredient. She laughed when she said it. I thought she was joking. But desperate times call for desperate measures, so I threw together a batch of no-churn salted caramel ice cream with chocolate ribbons using ingredients I already had in the pantry. I didn’t even have a machine. Just a mixing bowl, a whisk, and a loaf pan.
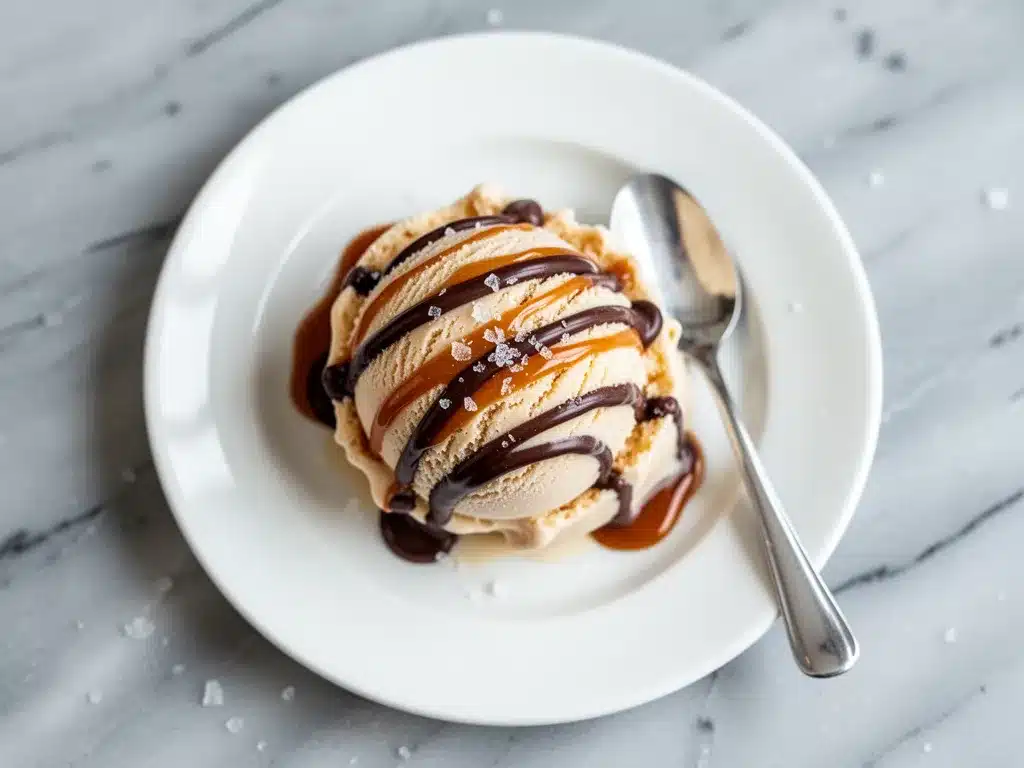
I froze it for six hours. When I scooped it out, the texture was impossibly smooth. The salted caramel swirled through it like molten gold. And those chocolate ribbons? They melted into the cream in the most luxurious way. My skeptical friends devoured it. Two of them actually asked for the recipe. One asked if I had a “secret” ingredient. I told them the secret was that I stopped overthinking it.
That was three summers ago. Since then, I’ve made this no-churn salted caramel ice cream with chocolate ribbons at least a dozen times. It’s become my go-to when I want to feel fancy without the fuss. It’s creamy, it’s salty, it’s sweet, and it’s ridiculously easy. If you’ve ever been intimidated by ice cream making, this is your invitation to stop worrying and start eating.
Why You’ll Love This No-Churn Salted Caramel Ice Cream
There are about ten reasons I keep making this no-churn salted caramel ice cream with chocolate ribbons, but here are the big ones that will change your summer dessert game.
No Machine Required — Seriously, if you can whisk heavy cream, you can make this. I don’t own an ice cream maker, and I’m pretty sure my neighbors think I’m weird for not having one. You just need a bowl, a whisk (or hand mixer), and a freezer. That’s it. No churning, no custard tempering, no crying over curdled eggs.
Stupidly Creamy Texture — I was skeptical at first. How can two main ingredients create ice cream that tastes like it came from an expensive artisanal shop? The answer is science. The sugar in the condensed milk lowers the freezing point, preventing ice crystals from forming. The fat in the heavy cream creates that rich, velvety mouthfeel. I’ve tested this against machine-made ice cream, and honestly? This version wins on flavor intensity because the caramel and chocolate flavors aren’t diluted by air.
The Salted Caramel Swirl — Plain vanilla is nice. But this no-churn salted caramel ice cream with chocolate ribbons is *addictive*. The salt cuts through the sweetness, and the homemade caramel swirl creates these pockets of flavor that hit you out of nowhere. It’s not just ice cream; it’s an experience.
Chocolate Ribbons Are Easier Than You Think — I used to think making chocolate ribbons was some professional pastry chef trick. It’s not. It’s just melted chocolate spread thin and frozen. It adds a visual wow factor and a crunchy-chewy contrast that elevates the whole dessert. Plus, it looks incredible on a plate (and on Instagram, if that matters to you).
Makes Amazing Leftovers — Unlike cake, which gets dry, this ice cream actually stays good for weeks. I make a big batch on Sunday, and it’s still creamy and delicious on Thursday. It’s the perfect make-ahead dessert for when unexpected guests show up or when you just need a pick-me-up on a rough day.
This is my answer to “what’s for dessert?” when I want something special but don’t want to spend hours in the kitchen. It’s reliable, it’s delicious, and it makes everyone happy. Even the people who say they don’t like ice cream.
Ingredients You’ll Need for No-Churn Salted Caramel Ice Cream
Here’s the best part: you probably have most of these ingredients already. This no-churn salted caramel ice cream with chocolate ribbons relies on high-quality basics because there are so few of them, every single ingredient needs to shine.
For the Ice Cream Base
Heavy Cream (2 cups / 480ml) — Full-fat only. Do not try to substitute with half-and-half or skim milk. You need the fat content to create that airy, creamy texture. I use organic heavy cream because I taste the difference. Make sure it’s very cold—straight out of the fridge. If it’s warm, it won’t whip properly.
Sweetened Condensed Milk (1 can / 14 oz / 397g) — This is the magic ingredient. It sweetens the cream and prevents ice crystals. I always buy the regular version, not the evaporated milk (which is unsweetened and salty). Check the expiration date; old condensed milk can get weirdly thick or crystallized.
Vanilla Extract (2 teaspoons) — Use real vanilla extract, not imitation. The flavor is subtle in the base, but it ties everything together. I like using a good bourbon vanilla for a deeper note.
Salt (½ teaspoon) — Just a pinch to balance the sweetness. I use kosher salt because it’s easier to control. If you use table salt, use a bit less.
For the Salted Caramel Swirl
Granulated Sugar (½ cup / 100g) — This is for the caramel sauce. White sugar works best here because it melts evenly into a clear syrup before turning amber. Brown sugar can work, but it changes the color and adds a molasses note that might clash with the chocolate ribbons.
Heavy Cream (¼ cup / 60ml) — You’ll add this to the caramel at the end. It’s hot, so be careful. This thickens the caramel and makes it pourable.
Butter (2 tablespoons / 30g) — Unsalted butter. This adds richness and helps the caramel stay smooth. I use European-style butter like Plugra if I’m feeling fancy, but regular salted butter works too (just reduce the salt in the ice cream base slightly).
Salt (½ teaspoon flaky sea salt) — This is the “salted” part. Flaky sea salt like Maldon adds those nice crunches of salt that pop in your mouth. Regular table salt works, but you won’t get the texture.
For the Chocolate Ribbons
Semi-Sweet Chocolate Chips (½ cup / 85g) — I use Ghirardelli semi-sweet chocolate chips because they melt smoothly and have a balanced sweetness. You can also use chopped chocolate bars. Avoid white chocolate chips for the ribbons—they’re too sweet and don’t have enough contrast.
Heavy Cream (1 tablespoon / 15ml) — Just a splash to help the chocolate melt smoothly if it’s thick. If your chips are high quality, you might not even need this.
Optional Add-ins — I’ve tried adding chopped toffee bits or crushed pretzels to the caramel swirl. They’re good, but I usually stick to the pure caramel and chocolate. Simpler is often better.
Shopping Tips & Substitutions
Brand Recommendations: I always buy the same brand of sweetened condensed milk—Goya or Carnation. Both work great. For chocolate, I stick to Ghirardelli or Lindt. Cheap chocolate chips can have waxy textures that don’t melt well into ribbons.
Substitutions: Can’t find heavy cream? You can try whipping coconut cream (the thick part from a can of full-fat coconut milk), but the flavor will be coconutty. For the caramel, you can buy high-quality store-bought caramel sauce, but homemade is so much better and takes only 10 minutes. I’ve tried both, and homemade wins every time.
Storage: Heavy cream lasts a week in the fridge. Sweetened condensed milk lasts months unopened, and weeks once opened if you transfer it to an airtight container. Chocolate chips last forever in a cool, dry place.
Equipment Needed
You don’t need fancy equipment for this. Here’s what I actually use.
Large Mixing Bowl — I use a 4-quart stainless steel bowl. It needs to be big enough to hold the whipped cream without spilling. A glass bowl works too, but steel keeps the cream colder longer.
Hand Mixer or Stand Mixer — I use a hand mixer because it’s easier to clean. A stand mixer with the whisk attachment works too. You need to whip the cream to stiff peaks, so a mixer is much easier than a whisk. I’ve tried whisking by hand—it takes forever and my arm hurts.
Loaf Pan — A standard 9×5 inch loaf pan is perfect. It’s the right size for a small batch. I line it with parchment paper for easy removal later.
Saucepan — A small, heavy-bottomed saucepan for the caramel. I use a 2-quart saucepan. Thin pans can burn the sugar quickly, so go for something with some weight.
Whisk and Spatula — A silicone spatula for folding the cream. A whisk for the caramel. Standard stuff.
Small Baking Sheet — For freezing the chocolate ribbons. I use a rimmed baking sheet because it’s sturdy.
Parchment Paper — For lining the loaf pan and the baking sheet. Non-stick is helpful here.
Optional but nice:
Offset Spatula — Makes it easier to spread the chocolate ribbons evenly. I use my offset spatula for everything, honestly.
Candy Thermometer — Not strictly necessary, but helpful if you’re worried about burning the caramel. I eyeball it, but if you’re nervous, get a thermometer.
How to Make It: Step-by-Step
Alright, let’s make this! I’m walking you through exactly how I do it, including the little tricks I’ve picked up. This no-churn salted caramel ice cream with chocolate ribbons comes together in about 30 minutes of active time, plus freezing time.
Step 1: Make the Salted Caramel Swirl (10 minutes)
Before you start the ice cream base, make the caramel. It needs time to cool slightly so it doesn’t melt the ice cream when you swirl it in. Pour ½ cup of sugar into a small saucepan over medium heat. Do not stir! Just let it melt. You’ll see it start to liquefy around the edges. Gently swirl the pan to help it melt evenly. It will turn from clear to amber. This takes about 5-7 minutes.
Once it’s a deep amber color (think honey), remove it from the heat. Carefully pour in ¼ cup of heavy cream. It will bubble up violently—step back! Stir constantly until the cream is fully incorporated and the sauce is smooth. Stir in 2 tablespoons of butter and ½ teaspoon of flaky sea salt. The sauce will thicken as it cools. Pour it into a small bowl and let it cool to room temperature. It should be thick but pourable. If it’s too thick, microwave it for 10 seconds.
Step 2: Whip the Heavy Cream (5 minutes)
Pour 2 cups of cold heavy cream into your large mixing bowl. Using a hand mixer or stand mixer, whip on medium-high speed until you see soft peaks. Then, keep whipping. I know it looks done, but keep going. You need stiff peaks. When you lift the beaters, the cream should stand up straight and not droop. If it’s over-whipped, it might look grainy. That’s okay—it’ll still work, but it might be slightly less smooth.
Step 3: Fold in the Condensed Milk (3 minutes)
Pour the entire can of sweetened condensed milk into the whipped cream. Add 2 teaspoons of vanilla extract and ½ teaspoon of salt. Now, the important part: fold. Use a silicone spatula to gently fold the mixture. Don’t stir vigorously or you’ll deflate the air you just whipped in. Fold until the mixture is uniform and no white streaks remain. It should look like thick, fluffy frosting. This is your ice cream base.
Step 4: Prepare the Chocolate Ribbons (5 minutes)
While the caramel cools and you’re folding the cream, make the ribbons. Melt ½ cup of semi-sweet chocolate chips in a microwave-safe bowl. Heat in 30-second intervals, stirring between each, until smooth. If it’s too thick, add 1 tablespoon of heavy cream and stir. You want a smooth, pourable chocolate mixture.
Line a small baking sheet with parchment paper. Spoon the melted chocolate onto the parchment in thin, uneven lines. Don’t worry about making them perfect—uneven lines create better ribbons. Spread it out slightly with a spatula if the lines are too thick. The goal is thin layers that will freeze hard and crack into ribbons later. Place the baking sheet in the freezer for 15-20 minutes until the chocolate is completely hard.
Step 5: Assemble the Ice Cream (5 minutes)
Line your 9×5 loaf pan with parchment paper, leaving an overhang on the sides for easy removal later. Spoon half of the ice cream base into the pan. Use an offset spatula to smooth it out. Drizzle half of the cooled caramel sauce over the top. Use a knife or skewer to gently swirl the caramel into the cream. Don’t over-swirl—you want visible streaks, not a uniform brown mix.
Spoon the remaining ice cream base on top. Smooth it out. Drizzle the rest of the caramel sauce. Swirl again.
Now for the ribbons. Take the frozen chocolate sheet out of the freezer. Break it into large shards with your hands. Sprinkle the shards over the top of the ice cream. Press them down slightly so they stick. You want a mix of large and small pieces.
Step 6: Freeze (6 hours minimum)
Cover the loaf pan tightly with plastic wrap or a lid. Place it in the freezer. Let it freeze for at least 6 hours, but overnight is better. The longer it freezes, the firmer and smoother it will be. I usually make this the night before I want to eat it.
Step 7: Serve
When you’re ready to serve, lift the ice cream out of the pan using the parchment paper overhang. Let it sit at room temperature for 5-10 minutes to soften slightly. This makes it easier to scoop. Use a sturdy ice cream scoop. If you don’t have one, a spoon works, but it might be harder. Scoop into bowls and enjoy immediately.
Total Time: About 30 minutes active, plus 6+ hours freezing.
Expert Tips & Tricks
Here’s everything I’ve learned from making this no-churn salted caramel ice cream with chocolate ribbons dozens of times. These tips will save you from my mistakes.
Keep Everything Cold
This is the #1 tip. Your heavy cream must be ice cold. If it’s warm, it won’t whip. I keep my bowl and beaters in the freezer for 15 minutes before starting. If your kitchen is hot, work quickly. Warm cream = flat ice cream.
Don’t Over-Fold
When you fold the condensed milk into the cream, be gentle. You want to keep the air in. If you stir like you’re making pancake batter, you’ll lose the fluffiness. The ice cream will be dense and icy. Fold until just combined.
Make the Caramel Ahead
Make the caramel sauce the day before. It thickens as it cools, and it’s easier to handle when it’s not hot. I make it on Sunday and store it in the fridge in a jar. It lasts for a week.
Break the Chocolate Properly
Don’t just chop the chocolate. Freeze it first, then break it with your hands. This creates irregular shapes that look more like ribbons and less like chopped chunks. It also helps the chocolate integrate better with the caramel swirls.
Let It Soften Before Scooping
No-churn ice cream can be rock hard straight out of the freezer. Let it sit on the counter for 5-10 minutes before scooping. This makes a huge difference in texture. If you scoop it frozen, it’ll be like eating a brick.
Common Mistakes (and how to avoid them):
Mistake: Ice cream is icy
Fix: You didn’t whip the cream enough, or you folded too aggressively. Make sure you have stiff peaks, and fold gently. Also, make sure your freezer is at 0°F or below. If your freezer is weak, the ice cream won’t freeze hard enough.
Mistake: Caramel is too thin
Fix: You didn’t cook the sugar long enough. It needs to reach a deep amber color. If it’s too thin, it will make the ice cream watery. Cook it until it’s the color of copper.
Mistake: Chocolate ribbons are too thick
Fix: You didn’t spread the chocolate thin enough. Thin lines freeze into thin ribbons. Thick blobs just look like chunks of chocolate. Spread it out as much as possible.
Pro Tricks I’ve Learned:
For Extra Crunch
Add a handful of chopped pretzels or toffee bits to the caramel swirl. It adds a nice textural contrast. I tried this once and never went back.
For Better Flavor
Add a teaspoon of espresso powder to the chocolate ribbons. It enhances the chocolate flavor without making it taste like coffee. My husband thinks it’s just “more chocolatey.”
For Easier Removal
Run the loaf pan under warm water for 10 seconds before lifting it out. The heat helps release the parchment from the sides. Just be quick so you don’t melt the ice cream.
Variations & Substitutions
Once you’ve nailed the basic version, here’s how you can mix it up. I’ve tried all of these.
White Chocolate Salted Caramel
Replace the semi-sweet chocolate with white chocolate chips. The ribbons will be creamy and sweet. It’s less intense but very pretty. I like this version when I want something less chocolatey.
Cookie Butter Swirl
Replace the caramel with Biscoff cookie butter. Swirl it in like the caramel. It adds a spicy, gingery note that’s amazing with the chocolate ribbons. This is my new favorite version.
Espresso Ice Cream
Add 2 teaspoons of instant espresso powder to the heavy cream before whipping. It turns the base into a mocha ice cream. Pair it with the semi-sweet chocolate ribbons. It’s like a mocha frappe in ice cream form.
Strawberry Swirl
Replace the caramel with a homemade strawberry sauce. Cook down fresh strawberries with sugar and lemon juice. Swirl it in like the caramel. It’s a classic combination. I make this in summer when strawberries are cheap.
Dairy-Free Version
Use full-fat coconut cream instead of heavy cream, and dairy-free chocolate chips. The flavor will be coconutty, but it’s still creamy and delicious. My lactose-intolerant friend loves this version.
Gluten-Free
This recipe is naturally gluten-free! Just make sure your chocolate chips and caramel ingredients are certified gluten-free. I use Ghirardelli chips, which are gluten-free.
Lighter Version
I don’t recommend lightening this recipe. The texture suffers. But if you must, use half-and-half instead of heavy cream. It won’t whip as well, so the texture will be denser. It’s still good, just not as airy.
Serving & Storage
I usually serve this straight from the loaf pan at the dinner table—it looks rustic and stays cold. But here are other ways I’ve enjoyed it:
How to Serve:
Scoop into small bowls. Top with extra caramel sauce, a drizzle of chocolate syrup, or a few fresh berries. I like serving it with apple harvest salted caramel skillet crisp on the side for a double caramel hit. Or serve it with brown butter salted caramel blondies for a dessert platter. It pairs well with football tailgate chocolate peanut butter buckeye bars if you’re hosting a party.
Side Dishes:
This is a dessert, so it doesn’t need sides. But it goes well with coffee or tea. I like serving it with a cup of black coffee to cut the sweetness.
Toppings Bar:
When I have guests, I put out: extra caramel sauce, chocolate shavings, crushed peppermint, whipped cream, and fresh fruit. Everyone customizes their bowl.
Storage Instructions:
Refrigerator:
Don’t store ice cream in the fridge. It’ll melt. Store it in the freezer.
Freezer:
Store in an airtight container or covered loaf pan for up to 2 weeks. The longer it sits, the harder it gets. Let it soften before serving. It won’t last more than two weeks in my house, so I rarely test the limits.
Reheating:
You don’t reheat ice cream. You soften it. Let it sit on the counter for 5-10 minutes. If you need to soften it quickly, microwave it for 10-15 seconds. Don’t overdo it or you’ll melt the ribbons.
Meal Prep:
Make this on Sunday. It’s perfect for meal-prepping desserts. I make a batch, and it’s ready whenever I need a treat. It’s way better than store-bought ice cream, which I’ve been buying less and less of since I started making this.
Pro tip:
If you’re serving this at a party, make two batches. One for eating immediately, and one for freezing. It’s hard to resist eating it all at once.
Nutrition Information
I’m not a nutritionist, but here’s the breakdown if you’re tracking.
Per Serving (based on 8 servings, ½ cup each):
- Calories: 380
- Protein: 4g
- Carbs: 32g
- Fiber: 1g
- Sugar: 30g
- Fat: 26g
- Saturated Fat: 16g
- Cholesterol: 70mg
- Sodium: 120mg
What’s Good:
- It’s a small serving size, so it’s easy to control portions.
- Contains calcium from the dairy.
- Homemade means you know exactly what’s in it.
What to Know:
- High in sugar and fat because it’s ice cream. It’s a treat, not a health food.
- Contains dairy and gluten (unless you use gluten-free chocolate).
- Moderate sodium from the salted caramel.
My Take:
Look, this is ice cream with salted caramel and chocolate ribbons. It’s not a diet recipe. It’s a dessert. But it’s way better than store-bought, costs less, and I know exactly what’s in it. When I want to make it lighter, I use half-and-half and reduce the sugar. But usually? I just eat a reasonable portion and enjoy it. Life’s too short for mediocre ice cream.
Final Thoughts
So that’s my no-churn salted caramel ice cream with chocolate ribbons! I’ve probably talked your ear off at this point, but when you make a recipe this often, you have a lot to say about it.
This has saved summer dinners more times than I can count. It’s my answer to “what’s for dessert?” when I want something special but don’t want to stress. My kids are happy, my husband’s happy, and I’m happy because I’m not stressed about cooking.
Make it yours! Try different add-ins, swap in your favorite chocolate, adjust the caramel. The best recipes are the ones you adapt to your family’s tastes. If you make this, drop a comment and let me know what you think! I love hearing how recipes turn out in your kitchen. And if something doesn’t work, tell me that too—I’m here to help troubleshoot.
Happy cooking! And I hope your kitchen smells half as good as mine does right now.
Frequently Asked Questions
Can I use a different type of chocolate for the ribbons?
Yes! I’ve tried dark chocolate, milk chocolate, and even white chocolate. Semi-sweet is my favorite because it balances the sweetness of the caramel. Dark chocolate adds a nice bitterness, and milk chocolate is sweeter. Avoid chocolate chips with add-ins like nuts or caramel, as they won’t melt as smoothly. Stick to plain chips or chopped chocolate bars.
Why did my ice cream turn out icy?
This usually happens if the heavy cream wasn’t whipped stiff enough, or if you folded the condensed milk too aggressively, deflating the air. Air is what makes ice cream creamy. Make sure you whip until stiff peaks form, and fold gently. Also, check your freezer temperature. If it’s not cold enough, the ice cream won’t freeze properly.
Can I make this ahead for a dinner party?
Absolutely! This is actually better when made ahead. Make it 24 hours before you want to serve it. This gives the flavors time to meld and the texture to firm up. Just let it sit on the counter for 10 minutes before scooping. I make this the night before every time I have guests.
Can I use store-bought caramel sauce?
You can, but homemade is so much better. Store-bought caramel is often too thin and too sweet. Homemade caramel has a deeper flavor and a better texture. If you must use store-bought, heat it slightly to make it pourable, and add a pinch of sea salt to balance the sweetness. But I really recommend making it yourself—it takes only 10 minutes.
How long does this ice cream last?
It lasts up to 2 weeks in the freezer. After that, it might develop ice crystals or absorb freezer odors. I usually eat it within a week because it’s that good. Store it in an airtight container to prevent freezer burn.
Can I make this in a different pan?
Yes! You can use any freezer-safe container. A 9×5 loaf pan is ideal because it’s the right size for a small batch. If you want a larger batch, double the recipe and use a 9×13 pan. Just adjust the freezing time—it might take longer to freeze completely.
Is this recipe gluten-free?
Yes, this recipe is naturally gluten-free. Just make sure your chocolate chips and caramel ingredients are certified gluten-free. Most heavy cream, condensed milk, and sugar are gluten-free. I use Ghirardelli chocolate chips, which are gluten-free.
Pin This Recipe!
No-Churn Salted Caramel Ice Cream with Chocolate Ribbons
- Total Time: 6 hours 40 minutes
- Yield: 8 servings 1x
Description
A ridiculously easy, creamy no-churn ice cream made with just a few ingredients. This recipe features a rich salted caramel swirl and crunchy chocolate ribbons, requiring no ice cream machine.
Ingredients
- 2 cups heavy cream (very cold)
- 1 can (14 oz) sweetened condensed milk
- 2 teaspoons vanilla extract
- ½ teaspoon salt (kosher)
- ½ cup granulated sugar (for caramel)
- ¼ cup heavy cream (for caramel)
- 2 tablespoons unsalted butter (for caramel)
- ½ teaspoon flaky sea salt (for caramel)
- ½ cup semi-sweet chocolate chips (for ribbons)
- 1 tablespoon heavy cream (optional, for chocolate)
Instructions
- Make the caramel: Melt ½ cup sugar in a saucepan over medium heat until deep amber. Carefully stir in ¼ cup hot heavy cream, then add butter and flaky sea salt. Cool to room temperature.
- Whip the cream: In a large bowl, whip 2 cups cold heavy cream until stiff peaks form.
- Fold in base: Gently fold in the sweetened condensed milk, vanilla extract, and ½ teaspoon salt until uniform.
- Prepare ribbons: Melt chocolate chips (with optional splash of cream). Spread thin lines on a parchment-lined baking sheet and freeze for 15-20 minutes until hard.
- Assemble: Line a 9×5 loaf pan with parchment. Spoon half the ice cream base into the pan, drizzle with half the caramel, and swirl. Add remaining base, drizzle with remaining caramel, and swirl again.
- Add ribbons: Break the frozen chocolate sheet into shards and press them onto the top of the ice cream.
- Freeze: Cover tightly and freeze for at least 6 hours or overnight.
- Serve: Let sit at room temperature for 5-10 minutes to soften before scooping.
Notes
Ensure heavy cream is very cold for best whipping results. Do not over-fold the mixture to maintain airiness. Let ice cream soften for 5-10 minutes before scooping for easier serving. Store in an airtight container in the freezer for up to 2 weeks.
- Prep Time: 30 minutes
- Cook Time: 10 minutes
- Category: Dessert
- Cuisine: American
Nutrition
- Serving Size: ½ cup
- Calories: 380
- Sugar: 30
- Sodium: 120
- Fat: 26
- Saturated Fat: 16
- Carbohydrates: 32
- Fiber: 1
- Protein: 4
Keywords: no-churn ice cream, salted caramel, chocolate ribbons, easy dessert, summer dessert, ice cream without machine



