Last month, I was standing in the kitchen at 11 PM, staring at an empty pantry and a kid who was begging for “just one cookie” before bed. I didn’t have chocolate chips. I didn’t have fancy sprinkles. But I did have butter, brown sugar, and a jar of salted caramel sauce I’d bought on sale two weeks prior. I threw them together with some pantry staples, and the smell that filled the house? It stopped the kids in their tracks. They didn’t ask for cookies anymore; they asked for the “magic bar thing.”
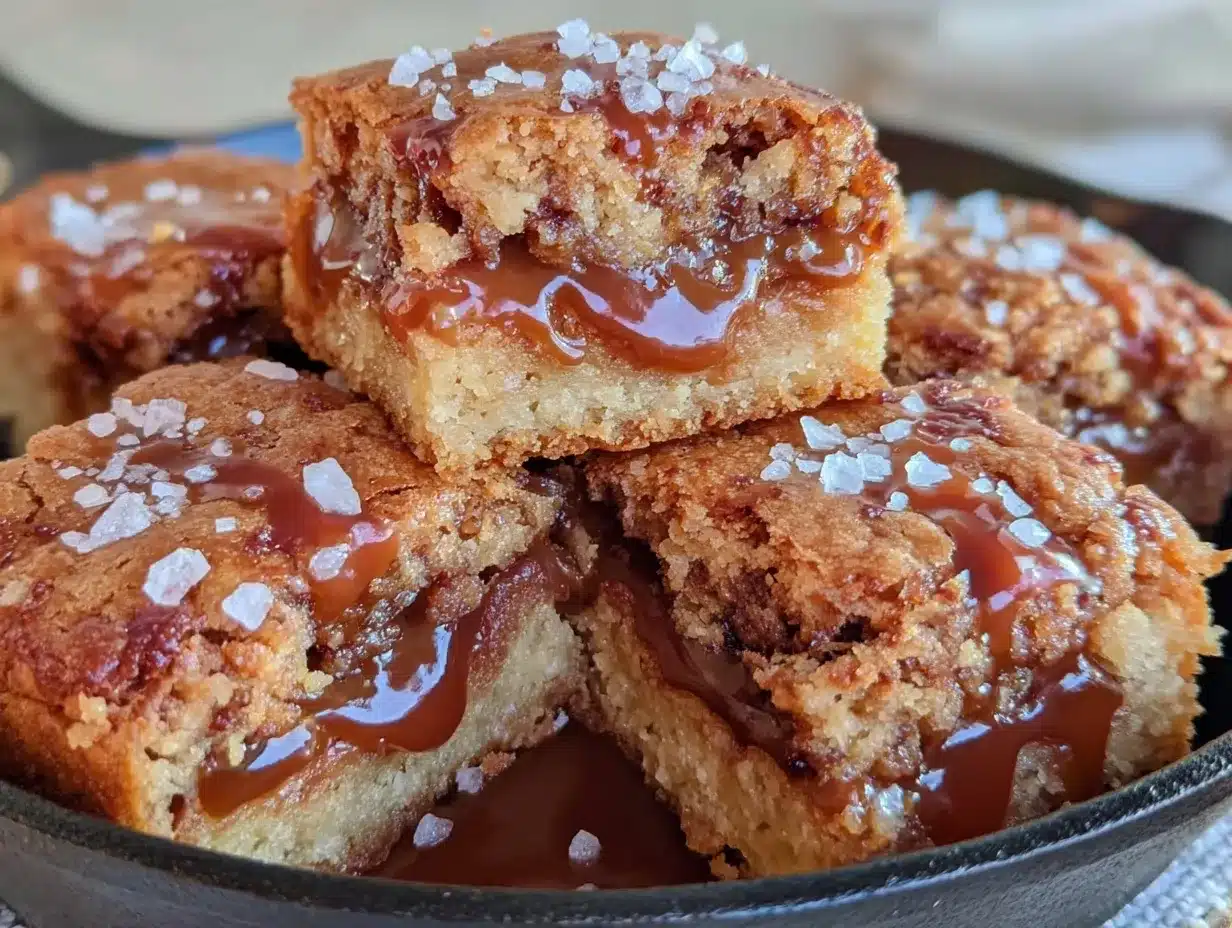
That was the moment I realized these brown butter salted caramel blondies aren’t just a treat. They’re my secret weapon for weeknight cravings, last-minute playdate host gifts, and those moments when I need to feel like a baking genius without spending a fortune or buying ten different ingredients. I’ve tested this recipe so many times now that I can probably make it with my eyes closed. And let me tell you, the first time I made them, I burned the butter. Twice. (Don’t judge me. Butter goes from golden to bitter in about three seconds flat.) But once I got the timing down, these became the most requested dessert in our house. Even my husband, who usually prefers savory snacks, fights me for the last one.
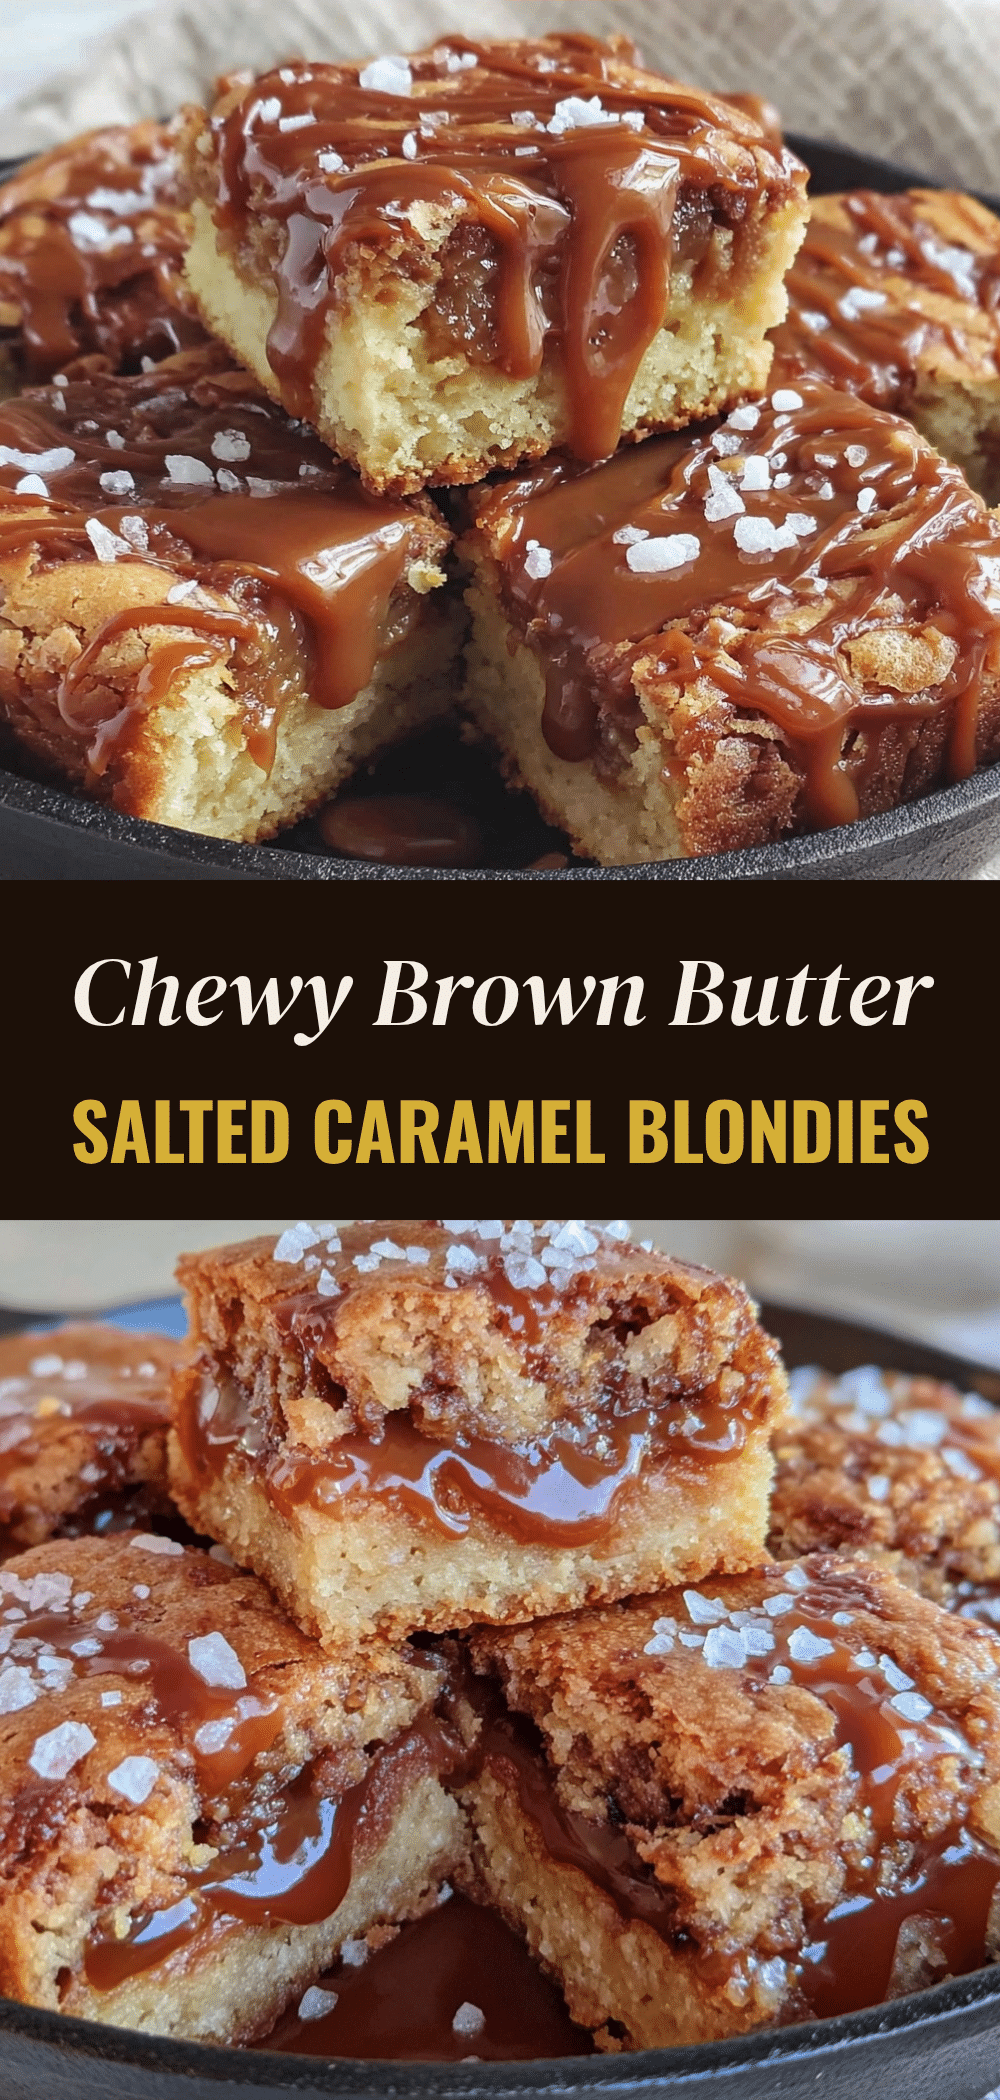
What makes these brown butter salted caramel blondies you’ll make on repeat special isn’t just the flavor—it’s the simplicity. You’re using five main ingredients that you likely already have or can grab at any grocery store on the way home. No expensive gourmet chocolate. No exotic flours. Just rich, nutty brown butter, chewy blondie dough, and ribbons of salty-sweet caramel. It’s comfort food in bar form. And because they’re so forgiving, they’re perfect for busy parents who don’t have hours to spend whisking in the kitchen.
Why You’ll Love This Recipe
There are a lot of dessert recipes out there, but few offer this specific combination of ease, flavor, and budget-friendliness. Here’s why these brown butter salted caramel blondies have taken over our weekly dinner rotation (yes, even dinner time—don’t ask):
- Stupid Simple Ingredients — Seriously, five core items. Flour, butter, sugars, eggs, and caramel. If you can boil water, you can make these. I’ve made them on busy weeknights when I was exhausted from soccer practice drop-offs, and they turned out perfect every single time.
- Budget-Friendly — Let’s be real: dessert doesn’t have to break the bank. Using pantry staples and a bottle of caramel sauce (which is cheaper than making it from scratch) keeps the cost per bar under 50 cents. That’s a fraction of what you’d pay at a bakery. We’ve been stretching our grocery budget by making our own treats instead of buying them.
- Rich, Complex Flavor — The brown butter step adds this deep, nutty, toasty flavor that regular melted butter just can’t match. It makes the blondies taste like they came from a high-end patisserie, but you’re making them in your regular non-stick pan.
- Kid-Approved Texture — They’re chewy, not cakey. My picky eaters love the gooey caramel pockets, and the brown sugar keeps them moist for days. They don’t dry out by Thursday, which is rare for baked goods in our house.
- Great for Meal Prep — I make a double batch on Sunday. They store well in the fridge for up to a week or freeze beautifully for later. It’s like having a dessert emergency kit ready to go whenever the sugar cravings hit.
This is my go-to when I need to feed a crowd or just want something sweet that feels homemade but requires minimal effort. No complicated techniques, no weird ingredients you can’t pronounce, just reliable, delicious food that makes everyone happy. And honestly? The smell of brown butter wafting through the house feels like a warm hug.
Ingredients You’ll Need
Here’s the best part: you probably have most of this already in your pantry. I’m particular about a few things here, but mostly, this is straightforward stuff. I’ll tell you exactly why each ingredient matters so you don’t end up with a dry brick.
For the Base:
Unsalted butter (1 cup / 226g) — This is the star of the show. We’re browning it, so use good quality butter. If you can get unsalted, it’s better because you control the salt. I usually buy the standard store brand because it works perfectly fine here. Don’t skimp on the amount; the fat is what makes them chewy.
Light brown sugar (2 cups / 400g) — This is non-negotiable for the chewy texture. Dark brown sugar works too if you want a deeper molasses flavor, but light is classic. Make sure it’s packed down firmly when you measure it. If it’s hard as a rock, microwave it for 10 seconds to soften it up.
Granulated white sugar (½ cup / 100g) — This helps with the crispy edges. It balances out the moisture from the brown sugar. I keep a big bag of this in my pantry at all times because it’s used in everything from cookies to marinades.
Eggs (2 large) — Room temperature eggs mix better into the batter. If you’re in a rush, just crack them into a bowl and let them sit for 10 minutes while you brown the butter. Don’t use cold eggs straight from the fridge; they can seize the butter if you’re not careful.
Vanilla extract (1 teaspoon) — Use real vanilla, not imitation. It makes a huge difference in flavor. I keep a bottle of pure vanilla extract in my baking cabinet. If you’re out, you can skip it, but you’ll miss that warm aroma.
For the Dry Mix:
All-purpose flour (2 cups / 250g) — Standard flour works great. Don’t try to substitute with almond flour or gluten-free blends unless you want to experiment; this recipe is tested specifically with AP flour for that perfect chew. Spoon it into the cup and level it off. Don’t scoop directly from the bag, or you’ll pack it down and end up with dry blondies.
Baking powder (1 teaspoon) — Just a little bit to give them a slight lift. You want them dense and chewy, not fluffy like a cupcake.
Salt (½ teaspoon) — Since we’re using unsalted butter, this is crucial to balance the sweetness. If you’re using salted butter, reduce this to ¼ teaspoon. Taste your caramel sauce too; if it’s super salty, you might want to skip adding extra salt here.
The Star: Salted Caramel Sauce
Salted caramel sauce (1 cup / 240ml) — I’m not going to lie: I use store-bought. Brands like Smucker’s or Kraft work perfectly fine and save you hours of stirring. If you have homemade caramel, use that! But for a busy weeknight, the jar is your friend. Make sure it’s at room temperature so it mixes in smoothly.
Equipment Needed
You don’t need fancy equipment for this. Here’s what I actually use in my everyday kitchen:
Medium saucepan — I use a 2-quart saucepan for browning the butter. It has a light bottom, which makes it easier to see the color change. If your pan is dark, it’s harder to tell when the butter is done, so keep a close eye on it.
9×9 inch baking pan — This is the standard size for bar cookies. Line it with parchment paper for easy removal. I usually grease it lightly first, then lay the parchment down. It makes cleanup a breeze—just lift the bars out and toss the paper.
Whisk — For mixing the wet ingredients. A regular balloon whisk works fine. I don’t bother with an electric mixer for this; it’s easier to mix by hand to avoid overmixing the flour.
Spatula — A silicone spatula is great for scraping the bowl and folding in the caramel. It gets into the corners better than a spoon.
Cooling rack — Essential. Letting them cool completely is the hardest part, but it helps them set so they don’t fall apart when you cut them.
How to Make It: Step-by-Step
Alright, let’s make this! I’m walking you through exactly how I do it, including the little tricks I’ve picked up over dozens of batches.
Step 1: Prep Your Pan and Oven (5 minutes)
Preheat your oven to 350°F (175°C). Line your 9×9 inch baking pan with parchment paper, leaving an overhang on the sides. This is your “handle” for lifting the blondies out later. Grease the parchment lightly with butter or cooking spray. It sounds like extra work, but it saves you from fighting with stuck bars later.
Step 2: Brown the Butter (5-7 minutes)
This is the most important step. Melt your butter in the saucepan over medium heat. Stir constantly with a wooden spoon. At first, it’ll foam up and look weird. Don’t panic. As the water evaporates, the foam will settle, and you’ll see little brown bits forming at the bottom. The butter will turn a deep golden amber color and smell nutty, like toasted hazelnuts. This takes about 5-7 minutes. As soon as it hits that color, remove it from the heat immediately and pour it into a heatproof bowl. If you wait until it smells burnt, it’s too late.
Step 3: Mix the Wet Ingredients (2 minutes)
While the butter is still warm (not hot!), whisk in the brown sugar and white sugar. The sugars will melt slightly into the butter. Whisk in the eggs one at a time, then add the vanilla. The mixture will look a bit separated at first—just keep whisking until it’s smooth and glossy. This step incorporates air and ensures even baking.
Step 4: Add the Dry Ingredients (2 minutes)
Stir in the flour, baking powder, and salt. Use a spatula and mix just until no dry streaks remain. Do not overmix! Overmixing develops gluten, which makes blondies tough. You want them tender and chewy. It should take about 30 seconds of stirring.
Step 5: Fold in the Caramel (1 minute)
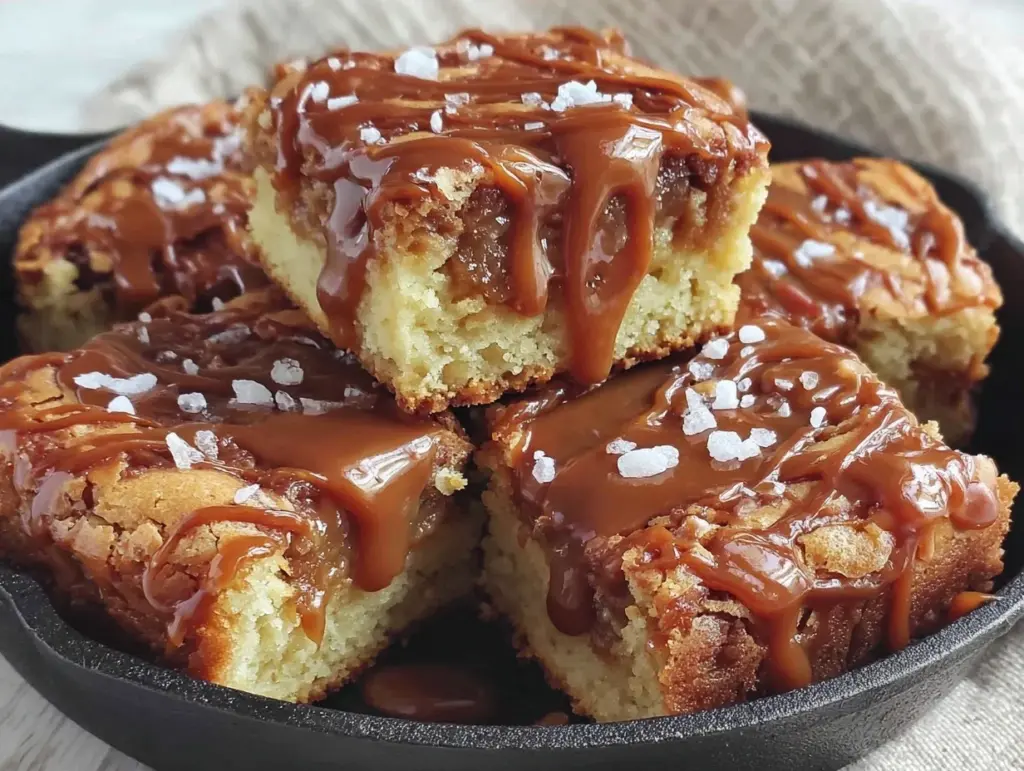
Drizzle in the salted caramel sauce. Gently fold it into the batter. Don’t stir too much, or you’ll lose the pretty swirls. You want pockets of caramel throughout, not a uniform brown color. Some people like to save a little caramel for drizzling on top—I highly recommend doing that for the Instagram-worthy look.
Step 6: Bake (25-30 minutes)
Pour the batter into your prepared pan and spread it out evenly. Bake for 25-30 minutes. The edges should be golden brown and pulling away slightly from the sides. The center might still look a little soft, but that’s okay—it will firm up as it cools. If you insert a toothpick, it should come out with a few moist crumbs, not wet batter. If it’s clean, you’ve baked them too long.
Step 7: Cool and Cut (1 hour)
Let the blondies cool in the pan for at least 30 minutes, then transfer to a wire rack to cool completely. This is the hard part. I usually resist the urge to cut them early, but if you do, they’ll be gooey and messy. Once cool, lift them out using the parchment overhang and cut into squares. Dust with flaky sea salt if you want that fancy finish.
Expert Tips & Tricks
Here’s everything I’ve learned from making this dozens of times. These tips will save you from my mistakes.
- Watch the Butter Like a Hawk — Brown butter burns fast. I keep a timer set for 5 minutes. Check it every 30 seconds after that. The smell is your best indicator. It should smell like toasted nuts, not burnt toast.
- Don’t Skip the Cool Down — I know you want to eat them now. But cutting warm blondies results in a crumbly mess. Let them set. The texture improves dramatically after an hour.
- Room Temperature Eggs — If you forget to take them out, crack them into a small bowl of warm water for 5 minutes. It’s a quick hack that prevents the butter from seizing.
- Double the Batch — These freeze beautifully. I always make two pans. One for now, one for the freezer. They thaw in about 20 minutes at room temperature. Perfect for unexpected guests or last-minute school bake sales.
- Flaky Salt on Top — A sprinkle of Maldon sea salt right after baking adds a professional touch and balances the sweetness. It’s worth the extra dollar.
Variations & Substitutions
Once you’ve nailed the basic version, here’s how you can mix it up. I’ve tried all of these.
White Chocolate Chip Blondies — Skip the caramel sauce and fold in 1 cup of white chocolate chips. They’re still delicious, but the caramel adds that unique salty-sweet kick that makes these special.
Peanut Butter Swirl — Drizzle ½ cup of peanut butter over the batter before baking. Use a knife to swirl it in. It adds protein and a nice crunch.
Gluten-Free Option — Use a 1-to-1 gluten-free flour blend. I’ve used Bob’s Red Mill and it works well. Just make sure the blend includes xanthan gum, or add ½ teaspoon yourself.
Dairy-Free — Use a high-quality vegan butter stick (not tub margarine) and dairy-free caramel sauce. The texture might be slightly less chewy, but still tasty.
Extra Crunch — Add ½ cup of chopped pecans or walnuts. Toast them first for extra flavor. It pairs beautifully with the caramel.
Serving & Storage
How to Serve:
I usually serve these plain, but they’re great with a glass of cold milk. For a dinner party, pair them with something light, like my labor day watermelon mint sangria to cut through the richness. They also go well with coffee or tea.
Side Dishes:
Since these are dessert, they don’t need sides. But if you’re having a barbecue, they pair nicely with spicy chipotle corn on the cob for a sweet-and-spicy contrast.
Storage Instructions:
Refrigerator: Store in an airtight container for up to 5 days. They stay moist in the fridge.
Freezer: Wrap tightly in plastic wrap and foil. They last up to 3 months. Thaw at room temperature.
Reheating: Warm in the microwave for 10 seconds if you like them gooey. Not necessary, but nice.
Nutrition Information
I’m not a nutritionist, but here’s the breakdown if you’re tracking. These are indulgent treats, so keep portions in mind.
Per Bar (makes 16 bars):
- Calories: 320
- Protein: 3g
- Carbs: 48g
- Fat: 14g
- Sugar: 34g
Look, this is dessert with brown butter and caramel. It’s not a health food. But it’s way better than store-bought bars, costs less, and I know exactly what’s in it. When I make these, I usually cut them into smaller squares to stretch them further. A little goes a long way.
Final Thoughts
So that’s my go-to brown butter salted caramel blondies! I’ve probably talked your ear off at this point, but when you make a recipe this often, you have a lot to say about it. These have saved my sanity more times than I can count. They’re my answer to “what’s for dessert” when I’m tired, don’t want takeout, and still want something that tastes really good. My kids are happy, my husband’s happy, and I’m happy because I’m not stressed about cooking.
Make it yours! Try different add-ins, swap in your favorite nuts, or just enjoy them as is. The best recipes are the ones you adapt to your family’s tastes. If you make this, drop a comment and let me know what you think! I love hearing how recipes turn out in your kitchen. And if something doesn’t work, tell me that too—I’m here to help troubleshoot.
Happy baking! And I hope your kitchen smells half as good as mine does right now.
Frequently Asked Questions
Can I use salted butter instead of unsalted?
Yes, but reduce the added salt in the recipe to ¼ teaspoon. Salted butter varies in salt content, so taste your caramel sauce too. If it’s very salty, you might want to skip the extra salt entirely.
Why did my blondies turn out dry?
Probably overbaked. Check them at 25 minutes. The center should look slightly soft. They continue to cook in the pan after you take them out of the oven. Also, make sure you’re measuring your flour correctly—scooping directly from the bag packs it down and leads to dryness.
Can I make these ahead for a party?
Absolutely. They taste even better the next day as the flavors meld. Make them 1-2 days ahead and store in an airtight container. They freeze well too, so make them a week ahead if you’re planning.
Why did my brown butter taste burnt?
The milk solids in butter brown quickly. If you left the pan on the heat too long, or if the heat was too high, they burned. Always use medium heat and stir constantly. When it smells nutty, it’s done. Trust your nose, not just your eyes.
Can I use homemade caramel sauce?
Yes! If you have leftover homemade caramel, like from my salted caramel no-churn ice cream recipe, use that. Just make sure it’s cooled to room temperature before folding it in. Homemade caramel might be thicker, so you might need to warm it slightly to make it pourable.
How do I store leftovers?
Keep them in an airtight container at room temperature for up to 3 days, or in the fridge for up to 5 days. They freeze well for up to 3 months. Wrap tightly in plastic wrap to prevent freezer burn.
Pin This Recipe!
Brown Butter Salted Caramel Blondies
- Total Time: 45 minutes
- Yield: 16 servings 1x
Description
Chewy, rich blondies made with nutty brown butter and ribbons of salty-sweet caramel sauce. This simple recipe uses just five pantry staples for a delicious, budget-friendly dessert that is perfect for busy weeknights.
Ingredients
- 1 cup (226g) unsalted butter
- 2 cups (400g) light brown sugar, packed
- 1/2 cup (100g) granulated white sugar
- 2 large eggs, room temperature
- 1 teaspoon vanilla extract
- 2 cups (250g) all-purpose flour
- 1 teaspoon baking powder
- 1/2 teaspoon salt
- 1 cup (240ml) salted caramel sauce, room temperature
Instructions
- Preheat oven to 350°F (175°C). Line a 9×9 inch baking pan with parchment paper, leaving an overhang on the sides, and grease lightly.
- Melt butter in a medium saucepan over medium heat. Stir constantly until the butter turns deep golden amber and smells nutty (about 5-7 minutes). Immediately remove from heat and pour into a heatproof bowl.
- While the butter is still warm, whisk in the brown sugar and white sugar until combined. Whisk in eggs one at a time, then add vanilla, mixing until smooth and glossy.
- Stir in flour, baking powder, and salt using a spatula just until no dry streaks remain. Do not overmix.
- Gently fold in the salted caramel sauce, leaving some swirls visible.
- Pour batter into the prepared pan and spread evenly. Bake for 25-30 minutes, until edges are golden and a toothpick comes out with moist crumbs.
- Cool in the pan for at least 30 minutes, then transfer to a wire rack to cool completely before cutting into squares.
Notes
Brown butter burns quickly, so watch it closely. Ensure eggs are at room temperature to prevent the butter from seizing. Do not overmix the batter to maintain a chewy texture. For best results, let the blondies cool completely before cutting to ensure they set properly.
- Prep Time: 15 minutes
- Cook Time: 30 minutes
- Category: Dessert
- Cuisine: American
Nutrition
- Serving Size: 1 bar
- Calories: 320
- Sugar: 34
- Sodium: 250
- Fat: 14
- Saturated Fat: 8
- Carbohydrates: 48
- Fiber: 1
- Protein: 3
Keywords: brown butter, salted caramel, blondies, easy dessert, pantry staples, chewy bars, weeknight baking