My husband has been gluten-free for about five years now. Not because of a trendy diet choice, but because his stomach literally rebels if he eats even a crumb of wheat. For a family that grew up on pizza nights, bread baskets, and crispy chicken tenders, this was a tough adjustment. I spent the first year feeling guilty every time I served dinner, constantly worrying that the “gluten-free” version would taste like cardboard or that we’d end up ordering expensive takeout because I couldn’t be bothered to make it from scratch.
Then came the Tuesday that changed everything. I was staring at a package of chicken breasts and a jar of marinara, wondering how to make something that felt indulgent without the gluten. I tried a recipe I found online, and it was dry. And bland. I almost threw it in the trash.
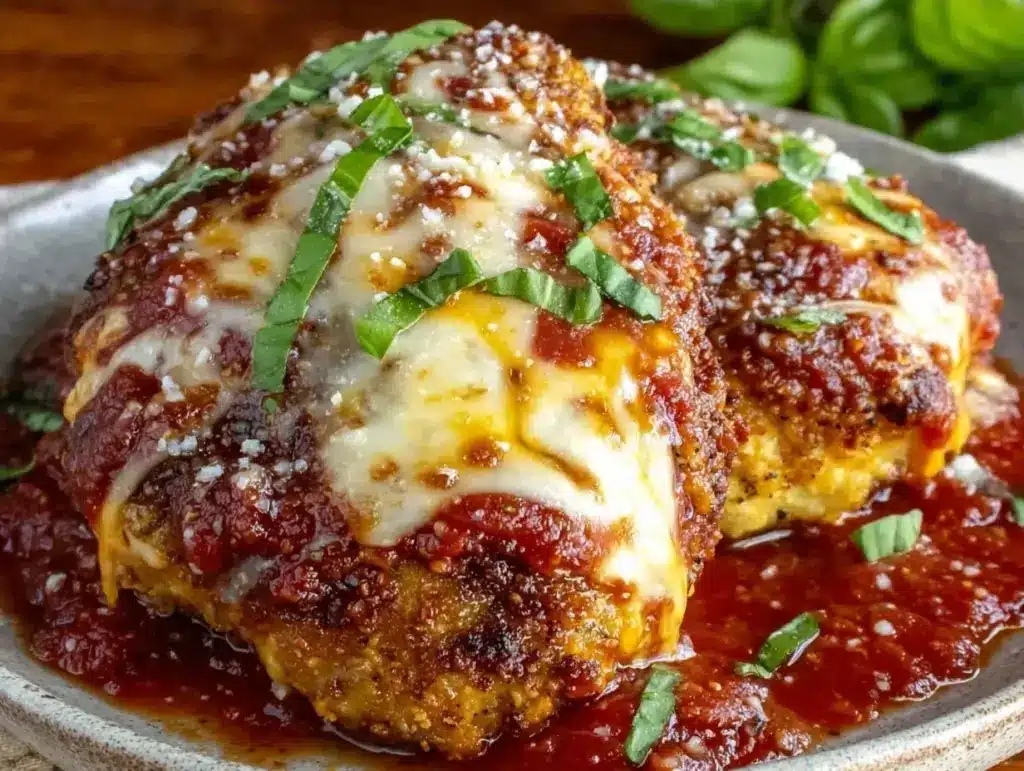
But I refused to give up. I tweaked the breading, swapped in cheaper ingredients I already had, and adjusted the baking time. The result? Crispy, golden, juicy chicken that my kids actually fought over. My husband took one bite and said, “Wait, is this gluten-free?” I said yes. He took another bite before I could even finish the sentence.
That was three years ago. This gluten-free baked chicken parmesan has become our Sunday ritual. It’s budget-friendly, uses pantry staples, and yes, it’s crispy enough to fool anyone who isn’t watching their gluten intake. If you’ve been avoiding chicken parm because of dietary restrictions, or just want a cheaper, healthier alternative to frying, this is the recipe you need.
Why You’ll Love This Gluten-Free Baked Chicken Parmesan
I’ve made this dish probably 50 times since that first Tuesday. Here’s why it stays in our weekly rotation:
- Actually Crispy — Most gluten-free breading turns soggy or powdery. Not this one. By using a mix of almond flour and gluten-free panko, you get that satisfying crunch that holds up under the sauce and cheese. I’ve tested this with my picky 8-year-old, and he prefers this over the fried version.
- Budget-Friendly — Chicken breasts are often on sale. Marinara sauce is cheap. And by baking instead of frying, you save on oil. This feeds four people for under $15, which is half the cost of a family meal at a casual restaurant.
- Meal-Prep Magic — I bake the chicken on Sunday, store it in the fridge, and just reheat and add cheese during the week. It takes 10 minutes on a Tuesday night. This is a lifesaver when I’m tired after work.
- Family-Approved — My non-gluten-free kids love it. My husband loves it. Even my gluten-intolerant mother-in-law says it’s better than what she gets at her local Italian place. It’s one of those rare dishes where everyone is happy.
This isn’t just a “diet” meal. It’s real, honest, comfort food that fits into a busy, budget-conscious life. No fancy ingredients, no complicated techniques, just solid, delicious food.
Ingredients You’ll Need
Here’s the best part: you probably have most of this already. I’m not asking you to order exotic items from three different stores. Here’s what you need to make this gluten-free baked chicken parmesan work.
For the Chicken:
Chicken breasts (4 large, about 1.5 lbs / 680g) — I buy the family pack when they’re on sale. If they’re super thick, pound them down so they cook evenly. Uniform thickness is key for crispiness.
Almond flour (1 cup / 110g) — This is the base of the crunch. It adds fat and flavor that rice flour lacks. Don’t skip it. It keeps the breading from being too dry. You can use gluten-free oat flour if you’re nut-free, but the texture is slightly different.
Gluten-free panko breadcrumbs (½ cup / 45g) — This is the secret weapon. Regular panko is too airy and falls off. GF panko is denser and stays put. Brands like King Arthur or Simple Mills work well. If you can’t find it, crush up some gluten-free crackers, but panko is better.
Eggs (2 large) — Whisked with a little salt and pepper. This acts as the glue for the breading. Don’t skip the seasoning here; it adds flavor to the chicken itself.
Garlic powder & onion powder (1 tsp each) — Simple flavor boosters. If you’re out, dried garlic and onion flakes work too.
Italian seasoning (1 tsp) — Dried basil, oregano, thyme. This gives that classic Italian profile without needing fresh herbs (which are pricey and often go bad).
For the Sauce & Topping:
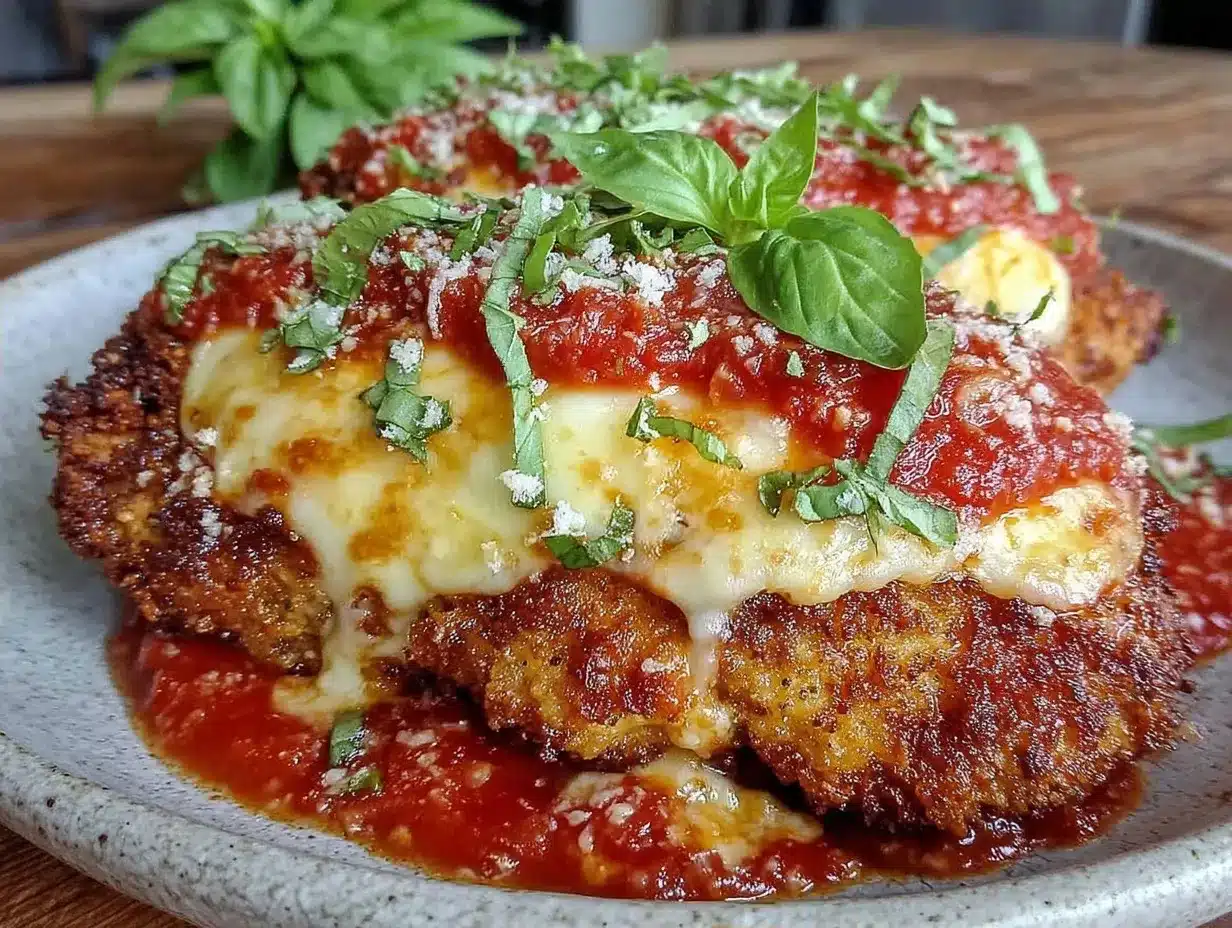
Marinara sauce (2 cups / 480ml) — I use a jarred sauce to save time. Look for one with low sugar. Rao’s is great if you have the budget, but store brands like Prego or Classico work fine. Just check the label for hidden gluten (rare, but possible in some thickeners).
Mozzarella cheese (2 cups / 200g, shredded) — Buy a block and shred it yourself. Pre-shredded cheese has cellulose that prevents it from melting smoothly. You want gooey, stringy cheese, not grainy.
Parmesan cheese (½ cup / 50g, grated) — For the topping. Freshly grated is best. It melts better and has a sharper flavor that cuts through the richness of the mozzarella.
Olive oil (2 tablespoons) — For drizzling. This helps the browning happen in the oven. You don’t need a lot, just enough to coat the tops.
Equipment Needed
You don’t need fancy gadgets for this. Here’s what I actually use:
- Baking sheet — A large rimmed sheet pan. I line it with parchment paper for easy cleanup. Aluminum foil works too, but parchment prevents sticking better.
- Wire rack — Optional but recommended. Placing the chicken on a wire rack over the baking sheet allows air to circulate, making the bottom crispy too. If you don’t have one, just bake directly on the parchment.
- Meat mallet or rolling pin — To pound the chicken breasts to even thickness. This ensures they cook at the same rate and stay juicy.
- Three shallow bowls — For the breading station: one for flour (optional, helps adhesion), one for egg, one for breadcrumbs. I skip the flour step now, but if your chicken is very wet, a light dusting helps.
- Cheese grater — Box grater or microplane. Just keep your fingers safe!
Pro Tip: If you’re making this for a crowd, I double the batch. It freezes beautifully. Just bake the chicken, let it cool, wrap it tightly in foil, and freeze. Reheat in the oven at 350°F (175°C) for 15 minutes, add sauce and cheese, and bake for another 10. It’s like fresh.
How to Make It: Step-by-Step
Alright, let’s make this! I’m walking you through exactly how I do it, including the little tricks I’ve picked up over the years.
Step 1: Prep Your Chicken (10 minutes)
Preheat your oven to 400°F (200°C). Line a baking sheet with parchment paper. Place the chicken breasts on a cutting board. If they’re thick, place another piece of plastic wrap or parchment on top and pound them with a meat mallet or rolling pin until they’re about ½-inch thick all over. This is crucial. Uneven chicken means some parts are dry while others are raw. Aim for uniformity.
Season the chicken generously with salt and pepper on both sides. This isn’t just for the breading; the chicken itself needs flavor.
Step 2: Set Up Your Breading Station (5 minutes)
Take three shallow bowls. In the first, whisk the eggs with a pinch of salt, pepper, and a splash of milk or water (this makes the breading lighter). In the second, mix the almond flour, gluten-free panko, garlic powder, onion powder, and Italian seasoning. Mix it well so the spices are evenly distributed.
Real talk: Don’t skip the panko. Almond flour alone can be dense. The panko adds the airy crunch that makes it feel like real chicken parm.
Step 3: Bread the Chicken (10 minutes)
Dip each chicken breast into the egg mixture, letting the excess drip off. Then press it firmly into the breadcrumb mixture. Use your hands to press the crumbs into the chicken—don’t just lay them on top. Flip and repeat. Make sure there are no bare spots. If a spot is exposed, press more crumbs onto it. The goal is a thick, even coat.
Place the breaded chicken on the prepared baking sheet. Don’t crowd them. Give each piece room so the heat can circulate. If you’re baking a double batch, use two sheets.
Step 4: Bake Until Crispy (20 minutes)
Drizzle a light mist of olive oil over the tops of the chicken. This helps them brown in the oven. Bake for 20 minutes. The breading should be golden and crispy. Check at 18 minutes to avoid burning the almond flour, which can turn bitter if it gets too dark.
While the chicken bakes, warm up your marinara sauce in a small saucepan over low heat. You want it hot when you add it to the chicken so the cooking process continues smoothly.
Step 5: Add Sauce and Cheese (5-10 minutes)
Remove the baking sheet from the oven. Spoon about ¼ cup of warm marinara sauce over each chicken breast. Don’t drown it; just enough to cover the top. Then sprinkle with shredded mozzarella and a little grated Parmesan.
Return the sheet to the oven and bake for another 5-7 minutes, or until the cheese is bubbly and melted. Watch it closely—cheese burns faster than you think. You want it golden, not black.
Step 6: Rest and Serve
Let the chicken rest for 3-5 minutes before serving. This allows the juices to redistribute so the chicken stays juicy when you cut into it. Serve with your favorite sides.
Expert Tips & Tricks
Here’s everything I’ve learned from making this dozens of times. These tips will save you from my mistakes.
Don’t Overcrowd the Pan
If you put the chicken pieces too close together, they steam instead of bake. Steam is the enemy of crispiness. Give them space. If you’re baking a double batch, use two pans or bake in two rounds. It’s worth the extra time.
Almond Flour Can Burn
Almond flour has a lower smoke point than wheat flour. Keep an eye on the oven around the 20-minute mark. If the tops are getting too dark, cover them loosely with foil for the cheese-baking step.
Warm Your Sauce
Adding cold sauce to hot chicken can cool it down too much. Warm the marinara in the microwave or on the stove before spooning it on. This ensures the chicken finishes cooking through without drying out.
Shred Your Own Cheese
I know it’s tempting to grab the bag. But pre-shredded cheese has anti-caking agents that prevent it from melting properly. You’ll end up with a layer of cheese that sits on top rather than blending into the sauce. Block cheese melts smoothly and tastes better. It takes 2 minutes.
Variations & Substitutions
Once you’ve nailed the basic version, here’s how you can mix it up. I’ve tried all of these.
Chicken Parmesan Sliders
Use smaller chicken cutlets or even chicken tenders. Top with sauce and cheese, then place on a mini roll. Bake for 5 minutes. Great for kids’ lunchboxes or parties. Serve with a side of loaded baked potato salad for a complete meal.
Veggie Parmesan
Substitute the chicken with thick slices of eggplant or zucchini. Bread them the same way. Bake until tender. It’s a lighter option that still satisfies the craving for cheesy, saucy comfort food. I use this method for vegan lentil bolognese nights too, when we want something plant-based.
Spicy Version
Add red pepper flakes to the breadcrumb mixture and use a spicy marinara sauce. It adds a nice kick without overwhelming the dish.
Dairy-Free Option
Use dairy-free mozzarella shreds (like Daiya or Violife) and almond milk instead of egg. The texture won’t be identical, but it’s still tasty. I’ve made this for my lactose-intolerant friend, and she loved it.
Serving & Storage
How to serve this gluten-free baked chicken parmesan for maximum satisfaction:
Side Dishes
- Gluten-free pasta — Toss with a little olive oil and garlic. Barilla GF pasta works well.
- Green salad — Simple arugula with lemon vinaigrette cuts through the richness.
- Roasted vegetables — Broccoli or asparagus roasted with garlic and lemon.
- Garlic bread — If you’re eating gluten, serve regular garlic bread on the side. If not, use GF bread or skip it.
Storage
Refrigerator: Store leftovers in an airtight container for up to 4 days. The breading may soften slightly, but it’s still good.
Reheating: The best way is in the oven or toaster oven at 350°F (175°C) for 10-15 minutes. This restores the crispiness. Microwave reheating will make the breading soggy. If you must microwave, do it in short bursts and let it sit to steam a bit.
Freezing: Freeze the baked chicken (without sauce and cheese) for up to 3 months. Thaw in the fridge, add sauce and cheese, and bake as directed. This is my go-to for meal prep.
Nutrition Information
I’m not a nutritionist, but here’s the breakdown if you’re tracking. Note that this is an estimate based on standard ingredients.
Per Serving (1 piece of chicken with sauce and cheese):
- Calories: 380
- Protein: 35g
- Carbs: 12g
- Fiber: 3g
- Fat: 22g
- Sodium: 650mg
This is a high-protein, moderate-fat meal. The carbs come mainly from the almond flour and marinara sauce. If you’re watching carbs, you can reduce the panko or use a low-sugar sauce. It’s not a diet food, but it’s definitely lighter than fried chicken parm.
Final Thoughts
So that’s my gluten-free baked chicken parmesan! I’ve probably talked your ear off at this point, but when you make a recipe this often, you have a lot to say about it.
This has saved weeknight dinners more times than I can count. It’s my answer to “what’s for dinner” when I’m tired, don’t want takeout, and still want something that tastes really good. My kids are happy, my husband’s happy, and I’m happy because I’m not stressed about cooking.
Make it yours! Try different add-ins, swap in your favorite vegetables, adjust the garlic (though more is always better in my opinion). The best recipes are the ones you adapt to your family’s tastes.
If you make this, drop a comment and let me know what you think! I love hearing how recipes turn out in your kitchen. And if something doesn’t work, tell me that too—I’m here to help troubleshoot.
Happy cooking! And I hope your kitchen smells half as good as mine does right now.
Frequently Asked Questions
Can I use regular breadcrumbs?
No, regular breadcrumbs contain gluten. You must use gluten-free panko or almond flour for this recipe to be safe for those with celiac disease or gluten sensitivity. Regular breadcrumbs will also change the texture significantly.
Why is my chicken parmesan soggy?
This usually happens if the chicken wasn’t pounded to an even thickness, or if the breading wasn’t pressed firmly enough. Also, adding cold sauce can cool the chicken down too much. Make sure your sauce is warm, and bake on a wire rack if possible to allow air circulation.
Can I make this ahead?
Yes! Bread the chicken and bake it for the first 20 minutes. Let it cool, then store in the fridge for up to 2 days. When ready to serve, add sauce and cheese and bake for 5-10 minutes until hot and bubbly. This is great for busy weeknights.
What if I don’t have almond flour?
You can use gluten-free oat flour, but the texture will be slightly denser. You can also use crushed gluten-free crackers. Just make sure the breading is thick enough to provide crunch.
How do I reheat leftovers without losing crispiness?
Avoid the microwave. Use an oven or toaster oven at 350°F (175°C) for 10-15 minutes. This will restore the crispiness of the breading. If you only have a microwave, heat in short bursts and let it sit to steam a bit, but expect softer breading.
Is this recipe kid-friendly?
Absolutely. The crispy breading and cheesy topping are huge hits with kids. My 8-year-old prefers this over fried chicken tenders. Just make sure the cheese is melted and the sauce isn’t too spicy.
Can I use chicken thighs?
Yes, but they have more fat and may cook faster. Adjust the baking time accordingly. Thighs are juicier but may not get as crispy on the outside. I prefer breasts for this recipe because they hold the breading better.
Pin This Recipe!
Gluten-Free Baked Chicken Parmesan: Budget-Friendly Family Meal
- Total Time: 50 minutes
- Yield: 4 servings 1x
Description
A crispy, juicy, and budget-friendly gluten-free baked chicken parmesan that uses almond flour and GF panko for a satisfying crunch without frying. Perfect for families and meal prep.
Ingredients
- 4 large chicken breasts (about 1.5 lbs / 680g)
- 1 cup almond flour (110g)
- ½ cup gluten-free panko breadcrumbs (45g)
- 2 large eggs
- 1 tsp garlic powder
- 1 tsp onion powder
- 1 tsp Italian seasoning
- Salt and pepper to taste
- 2 cups marinara sauce (low sugar)
- 2 cups shredded mozzarella cheese
- ½ cup grated Parmesan cheese
- 2 tablespoons olive oil
Instructions
- Preheat oven to 400°F (200°C). Line a baking sheet with parchment paper.
- Pound chicken breasts to an even ½-inch thickness. Season generously with salt and pepper.
- In a shallow bowl, whisk eggs with salt, pepper, and a splash of milk or water.
- In a second bowl, mix almond flour, gluten-free panko, garlic powder, onion powder, and Italian seasoning.
- Dip chicken in egg mixture, then press firmly into breadcrumb mixture to coat evenly. Place on baking sheet.
- Drizzle tops lightly with olive oil. Bake for 20 minutes until breading is golden and crispy.
- While chicken bakes, warm marinara sauce in a saucepan.
- Remove chicken from oven. Spoon about ¼ cup warm marinara over each breast.
- Sprinkle with mozzarella and Parmesan cheese.
- Return to oven and bake for 5-7 minutes until cheese is bubbly and melted.
- Let rest for 3-5 minutes before serving.
Notes
Ensure chicken is pounded to uniform thickness for even cooking. Do not overcrowd the pan to maintain crispiness. Almond flour can burn, so watch closely around the 20-minute mark. Warm the sauce before adding to keep the chicken hot. For best results, shred your own cheese to avoid anti-caking agents.
- Prep Time: 25 minutes
- Cook Time: 25 minutes
- Category: Main Course
- Cuisine: Italian
Nutrition
- Serving Size: 1 piece of chicken w
- Calories: 380
- Sodium: 650
- Fat: 22
- Carbohydrates: 12
- Fiber: 3
- Protein: 35
Keywords: gluten-free, chicken parmesan, baked chicken, budget-friendly, family meal, dairy-free option, meal prep, healthy dinner



