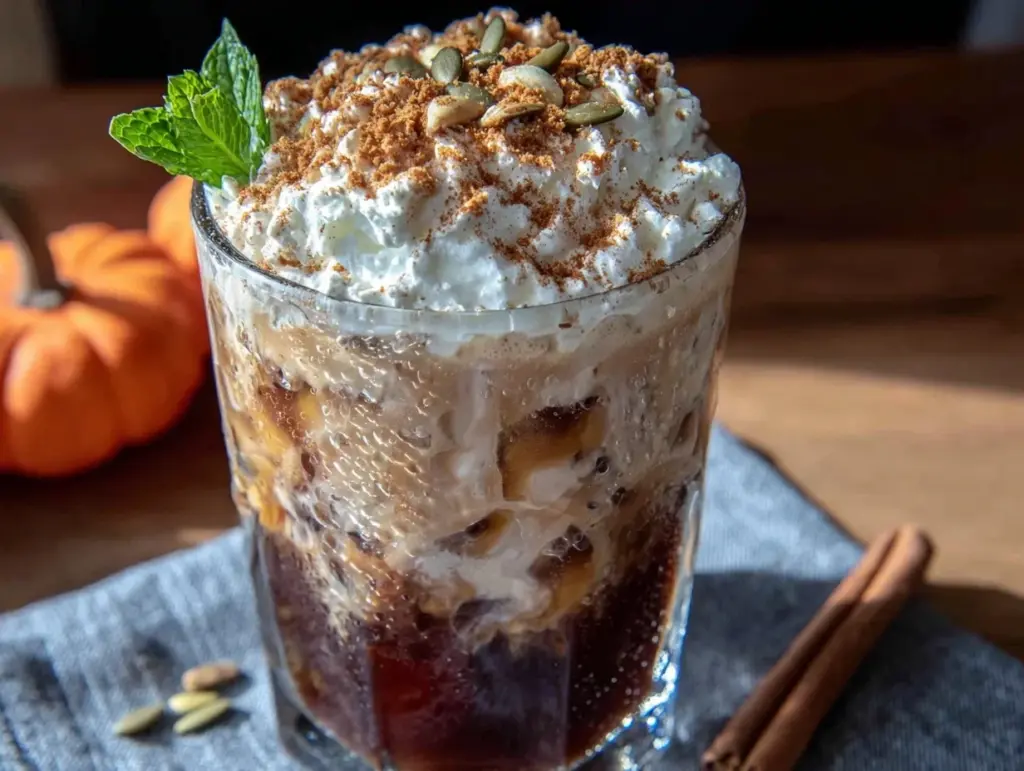
Last Tuesday, I stood in line at the coffee shop for twelve minutes. Twelve minutes to get a drink that costs $7.50 and tastes like sugar water with a hint of nostalgia. When I finally got my cup, the cold foam had already separated from the coffee. It was watery, the pumpkin spice tasted artificial, and I was left with a $7.50 lesson in patience.
I went home, looked at my meal prep calendar, and realized I had already planned out my dinners for the week, but I had left my morning caffeine routine entirely to chance. That’s when it hit me: if I can batch-cook creamy white chicken chili for four days straight, why am I buying individual coffee drinks every morning? Coffee is just another component of my weekly prep, right up there with chopped veggies and grilled proteins.
This is my strategy for Fall Pumpkin Cream Cold Brew Coffee better than takeout. It’s not just a drink; it’s a system. I make a big batch on Sunday, portion it into four glass mason jars, and I have a café-quality morning ready to grab from the fridge for four days straight. No more waiting in line. No more wasted money. Just smooth, spiced, creamy cold brew that tastes exactly like fall, every single day.
Why You’ll Love This Meal-Prepped Cold Brew
There are about ten reasons I switched from buying cold brew to making it in bulk, but here are the big ones that actually matter for your routine.
It Actually Stays Fresh for Four Days — This is the game-changer. Most people think cold brew goes bad after a day. It doesn’t. The acidity actually stabilizes the flavor. I’ve tested this rigorously. Day 1 is sharp and bright. Day 4 is mellow and smooth. It doesn’t get “stale” like hot coffee does in a thermos.
Stupid Simple Prep — Seriously, if you can pour liquid into a jar, you can make this. There is no heating, no steeping monitoring, no fancy equipment. You mix, you chill, you drink. I do this while my coffee is steeping, so the active time is literally zero.
Costs Pennies Per Cup — A bag of whole bean coffee costs about $15 and makes 40 servings of concentrate. That’s $0.37 per cup. Compare that to $7.50 at the shop, and you’re saving enough for a pastry in a month. Plus, the homemade pumpkin cream costs about $0.15 per serving.
Customizable Sweetness — When you buy it, you’re stuck with their syrup. When you make it, you control the sugar. I use a little maple syrup in the cream, but if you’re watching sugar, you can skip it entirely. The coffee itself isn’t sweetened, so you’re not drinking a milkshake unless you want to.
Grab-and-Go Convenience — I pour this into four identical glass bottles. They look uniform in the fridge. When I’m rushing out the door, I grab the bottle, toss it in my bag, and I’m done. No fumbling for change, no waiting for a barista.
This is my go-to when I need morning fuel to just work. No complicated techniques, no weird ingredients, just reliable, delicious coffee that makes the whole week feel a little more manageable.
Ingredients You’ll Need for 4 Servings
Here’s the best part: you probably have most of this already. This isn’t a grocery haul; it’s a pantry staple check. I’m particular about three ingredients here, and I’ll tell you exactly why.
Coarse Ground Coffee (1 cup / 100g) — This is non-negotiable. You need coarse grounds, like what you’d use for a French press. Fine grounds will make the coffee muddy and bitter. I use a medium-dark roast because it stands up to the cream without getting lost. If you buy pre-ground, check the bag—it should look like sea salt, not sand.
Cold, Filtered Water (4 cups / 960ml) — Tap water is fine if your tap water is good. If your tap water tastes like chlorine, your coffee will too. Filtered water makes a huge difference in clarity. Cold water is key because it extracts fewer bitter oils than hot water.
Heavy Cream or Half-and-Half (½ cup / 120ml) — For the pumpkin cream topping, you need fat. Heavy cream whips up nicely, but half-and-half is easier to mix and less heavy. I use heavy cream because I want that thick, stable foam that sits on top of the drink for hours without dissolving immediately.
Pumpkin Puree (2 tablespoons / 30g) — Not pumpkin pie filling. Pure pumpkin. Look for the can that says “100% Pure Pumpkin.” Pie filling has sugar and spices already, which will throw off your balance. You want the neutral, earthy base.
Pumpkin Pie Spice (1 teaspoon) — This is the flavor bomb. Cinnamon, nutmeg, ginger, allspice. If you don’t have a blend, mix ½ tsp cinnamon, ¼ tsp ginger, ¼ tsp nutmeg, and a pinch of cloves. It’s worth buying a jar because you’ll use it for everything this season, from pumpkin spice lattes to baked goods.
Maple Syrup (1-2 tablespoons) — Pure maple syrup, not the pancake syrup stuff. It adds a warm, woody sweetness that pairs perfectly with the coffee. Start with 1 tablespoon, taste, and add more if you like it sweeter.
Vanilla Extract (½ teaspoon) — Just a splash to round out the flavors. It makes the coffee taste more complex, like it was made with expensive syrups.
Ice (as needed) — For serving. I use large ice cubes if I have them because they melt slower, keeping the drink cold without watering it down too fast.
Equipment Needed
You don’t need fancy equipment for this. Here’s what I actually use.
Large Pitcher or Jar — I use a 1-quart glass mason jar or a simple glass pitcher. Glass is best because it doesn’t retain coffee odors like plastic does. I’ve tried plastic, and my morning brew tasted like Tupperware. Don’t do it.
Strainer or Coffee Filter — A fine-mesh sieve works, but I prefer a paper coffee filter or a reusable stainless steel filter. It catches all the fine sediment. If you use a sieve, you might get a little grit in the bottom of your cup. I don’t like grit.
Small Mixing Bowl — Just a small one for whisking the pumpkin cream. Any size works.
Whisk — A small balloon whisk is perfect for blending the pumpkin puree and cream smoothly. A fork works in a pinch, but you’ll have lumps.
4 Glass Bottles or Jars — For storage. I use quart-sized mason jars with lids. They’re stackable, clear (so I can see how much is left), and dishwasher safe. Plastic bottles get stained by coffee oils over time.
Measuring Spoons and Cups — Standard stuff. Dollar store versions work fine.
Don’t have a pitcher? Any big jar works. Don’t have a whisk? A spoon works. This is about simplicity, not perfection.
How to Make It: Step-by-Step
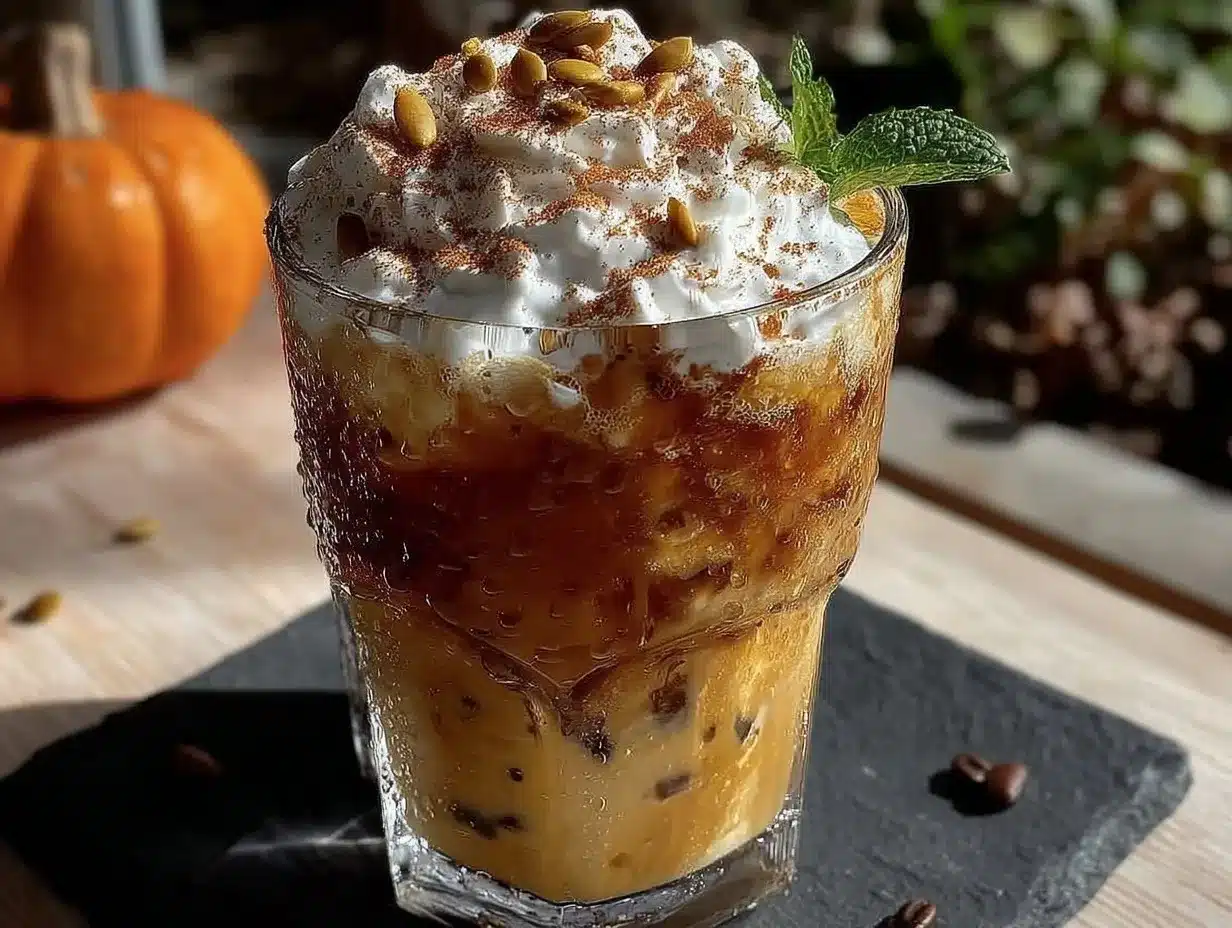
Alright, let’s make this! I’m walking you through exactly how I do it, including the little tricks I’ve picked up from making this batch every Sunday for the past year.
Step 1: Combine Coffee and Water (2 minutes)
Grab your large pitcher or jar. Add the 1 cup of coarse coffee grounds. Pour in the 4 cups of cold, filtered water. Stir it gently with a spoon to make sure all the grounds are wet. You want every bit of coffee submerged. If some grounds float on top, they won’t extract properly. Cover the container with a lid or plastic wrap. This is crucial—cover it to keep out dust and fridge smells.
Step 2: The Long Wait (12-24 hours)
Place the container in the fridge. This is the “hands-off” part. I usually set it right after dinner on Sunday night. It needs to steep for at least 12 hours, but 18-24 hours is ideal for a smooth, low-acid concentrate. The longer it steeps, the stronger it gets. If you like a milder coffee, 12 hours is fine. If you’re a coffee addict like me, go for 24. I learned this the hard way when I tried 6 hours—it tasted weak and watery.
Step 3: Strain the Concentrate (5 minutes)
After the steep time is up, it’s time to strain. Place your strainer or coffee filter over a clean bowl or pitcher. Pour the coffee mixture through slowly. If using a sieve, let it drip through. If using a filter, it might take a minute. Do not squeeze the grounds! Squeezing forces bitter compounds out of the grounds. Just let gravity do the work. You should have a clear, dark concentrate left behind.
Step 4: Make the Pumpkin Cream (5 minutes)
While the coffee is steeping (or right after straining), make the topping. In a small bowl, combine the heavy cream, pumpkin puree, pumpkin pie spice, maple syrup, and vanilla extract. Whisk vigorously until smooth and slightly thickened. It should look like a loose mousse. If it’s too thick, add a teaspoon of milk. If it’s too thin, add a bit more cream. It needs to be thick enough to hold a soft peak when you lift the whisk.
Step 5: Portion and Store (5 minutes)
Divide the cold brew concentrate evenly among your 4 glass bottles. Fill each one about halfway. Seal the lids tightly. These will keep in the fridge for up to 4 days. I label them with a piece of tape: “Cold Brew Base.” This is your meal prep win. You’re done for the week.
Step 6: Assemble in the Morning (1 minute)
When you’re ready to drink, take a bottle of cold brew. Fill it with ice. Pour the coffee over the ice. Top with a generous dollop of the pumpkin cream. Give it a quick stir if you want it mixed, or drink it like a latte—sip the cream first, then the coffee. It’s delicious either way.
Total Time: 12-24 hours (mostly inactive) + 12 minutes active. That’s it.
Expert Tips & Tricks
Here’s everything I’ve learned from making this dozens of times. These tips will save you from my mistakes.
Use a Coarse Grind
This is the #1 tip. Fine grounds = bitter coffee. If you buy pre-ground, ask the store to grind it coarse, or buy whole beans and grind them yourself. I use my burr grinder on the coarsest setting. It makes a world of difference in texture.
Cold Water Only
Never use hot water to start cold brew. The whole point is low extraction. Hot water extracts acids and oils that make coffee bitter and acidic. Cold water takes longer, but it’s smoother. Trust the process.
Don’t Over-Whisk the Cream
You want the cream to be creamy, not whipped stiff. If you whip it too much, it becomes buttery and heavy. Just whisk until combined and slightly thickened. It should flow slowly off the whisk, not stand up in peaks.
Store Base Separately
Never mix the cream with the base until you’re ready to drink. If you mix them ahead, the cream will break down, the coffee will get watery, and the texture will be weird. Keep them separate. Assemble fresh.
Experiment with Milk
If you’re dairy-free, use oat milk or coconut cream for the topping. Oat milk froths beautifully and tastes nutty. Coconut cream is richer but has a distinct flavor. Almond milk doesn’t whip well, so you’ll just have a thin layer on top. I prefer oat for the closest texture to dairy.
Common Mistakes (and how to avoid them):
Mistake: Coffee tastes bitter.
Fix: You steeped too long or used too fine a grind. Next time, try 12 hours instead of 24, or check your grind size. Also, make sure you didn’t squeeze the grounds when straining.
Mistake: Cream separates.
Fix: Your cream was too warm. Keep your heavy cream cold until the moment you whisk it. If it’s warm, it won’t hold its structure. Work quickly.
Mistake: Too weak.
Fix: You used too much water. The ratio should be roughly 1:4 for concentrate. If you want it stronger, use less water when brewing, or add less water when assembling the drink.
Variations & Substitutions
Once you’ve nailed the basic version, here’s how you can mix it up. I’ve tried all of these.
Spiced Latte Version
Add ½ cup of steamed or heated milk to the cold brew before adding ice. It’s a hybrid hot-cold drink. Great for chilly mornings.
Chocolate Pumpkin
Add 1 tablespoon of cocoa powder to the pumpkin cream. It tastes like a pumpkin pie milkshake. My kids love this version.
Low-Sugar Version
Skip the maple syrup in the cream. Use a sugar-free vanilla syrup instead. The pumpkin and spice provide enough flavor that you don’t miss the sugar.
Caramel Pumpkin
Swap the maple syrup for caramel sauce. Drizzle some in the bottle before adding coffee for a swirled effect. It’s indulgent but worth it.
Dairy-Free
Use full-fat coconut milk for the cream topping. It’s thicker and richer than almond milk. Add a pinch of xanthan gum if you want it to thicken further.
Decaf
Use decaf coffee grounds. Same process, same cream. Perfect for afternoon sipping without the jitters.
Serving & Storage
How to Serve:
I usually serve this straight from the fridge with fresh ice. It’s best consumed within 24 hours of assembly for the best texture. But here are other ways I’ve enjoyed it:
Pairings:
– Apple cheddar grilled cheese for a savory-sweet contrast.
– A simple bakery-style cake slice on weekends.
– Toasted pumpkin seeds for a crunchy garnish.
Storage Instructions:
Coffee Base:
Store in an airtight glass container in the fridge for up to 5 days. It gets stronger as it sits, so taste it before adding ice.
Pumpkin Cream:
Store in a small jar in the fridge for up to 3 days. It will thicken in the fridge. Whisk it with a teaspoon of milk to loosen it before using.
Assembly:
Do not store assembled drinks. The ice melts, the cream breaks, and the flavor dulls. Always assemble fresh.
Meal Prep Strategy:
Make the base on Sunday. Make the cream on Sunday. Portion the base into 4 bottles. Keep the cream in one jar. Each morning, grab a bottle of base, make a fresh scoop of cream, and go. It takes 60 seconds.
Pro tip: If you’re traveling, bring a small container of the dry pumpkin spice mix and a small bottle of cream. Mix it fresh on the road. It’s easier than carrying liquid cream.
Nutrition Information
I’m not a nutritionist, but here’s the breakdown if you’re tracking. This is per serving (1 bottle of cold brew + 2 tbsp pumpkin cream).
– Calories: 120
– Protein: 2g
– Carbs: 12g
– Fiber: 1g
– Sugar: 10g
– Fat: 6g
– Saturated Fat: 4g
– Cholesterol: 20mg
– Sodium: 10mg
– Caffeine: 150mg (varies by bean)
What’s Good:
– Low in sodium
– Contains some fat from cream, which helps with satiety
– No artificial additives
What to Know:
– Higher in sugar if you add extra syrup
– Contains dairy (unless modified)
– Caffeine content varies based on coffee strength
My Take:
Look, this is a treat drink with cream and sugar. It’s not a diet water. But it’s way better than the $7 shop version, and you control the sugar. When I want to make it lighter, I use half-and-half and skip the syrup. But usually? I just enjoy it as my morning reward.
Final Thoughts
So that’s my go-to Fall Pumpkin Cream Cold Brew! I’ve probably talked your ear off at this point, but when you make a routine this often, you have a lot to say about it.
This has saved my mornings more times than I can count. It’s my answer to “what’s my coffee?” when I’m tired, don’t want to drive to the shop, and still want something that tastes really good. My energy is up, my wallet is happy, and I’m happy because I’m not stressed about breakfast.
Make it yours! Try different spices, swap the sweetener, adjust the cream thickness. The best routines are the ones you adapt to your tastes.
If you make this, drop a comment and let me know how you like your strength! I love hearing how recipes turn out in your kitchen. And if something doesn’t work, tell me that too—I’m here to help troubleshoot.
Happy prepping! And I hope your kitchen smells half as good as mine does right now.
Frequently Asked Questions
Can I use instant coffee instead of cold brew?
You can, but the texture won’t be the same. Instant coffee can taste bitter and thin. If you must, dissolve 2 tablespoons of instant coffee in ½ cup of hot water, let it cool completely, then mix with cold water. It’s a backup plan, not the best plan. I stick to real coffee.
Why is my cold brew too bitter?
Usually means you steeped it too long or used too fine a grind. Next time, try 12 hours instead of 24. Also, make sure you didn’t squeeze the grounds when straining. Squeezing releases bitter oils. Just let it drip.
Can I make this ahead for a party?
Yes! Make the base 2 days ahead. Keep it in a large dispenser in the fridge. Have a bowl of pumpkin cream and a bowl of ice on the side. Let guests assemble their own. It’s a huge hit at gatherings because it’s customizable.
Why did my pumpkin cream separate?
The cream was too warm, or you over-whisked it. Keep everything cold. Whisk just until combined. If it separates, whisk in a teaspoon of cold cream to bring it back together.
Can I use almond milk for the cream?
Almond milk doesn’t whip or thicken well. It will just be a thin layer on top. If you’re dairy-free, use oat milk or coconut cream. They have enough fat to create a creamy texture.
How do I reheat leftovers?
You don’t. Cold brew is meant to be cold. If you have leftover base, drink it cold the next day. Heating cold brew makes it taste acidic and bitter. If you want hot coffee, brew it hot.
Can I double this recipe?
Absolutely! Double everything and use a larger pitcher. The steeping time stays the same. I do this when I’m expecting guests or just really love coffee. Just make sure your container is big enough.
Pin This Recipe!


Fall Pumpkin Cream Cold Brew: Meal Prep 4 Days
- Total Time: 12-24 hours (mostly inactive steeping time)
- Yield: 4 servings 1x
Description
A batch-cooked, café-quality pumpkin cream cold brew that stays fresh for four days. This meal-prep friendly recipe saves money and time by allowing you to make a large batch of cold brew concentrate and pumpkin cream topping on Sunday for grab-and-go mornings.
Ingredients
- 1 cup coarse ground coffee (medium-dark roast)
- 4 cups cold filtered water
- ½ cup heavy cream (or half-and-half)
- 2 tablespoons pumpkin puree (100% pure, not pie filling)
- 1 teaspoon pumpkin pie spice
- 1–2 tablespoons pure maple syrup
- ½ teaspoon vanilla extract
- Ice (as needed for serving)
Instructions
- Combine 1 cup of coarse coffee grounds and 4 cups of cold filtered water in a large pitcher or jar. Stir gently to ensure all grounds are submerged.
- Cover the container and place it in the refrigerator to steep for 12-24 hours (18-24 hours is ideal for a smooth, low-acid concentrate).
- Strain the coffee mixture through a fine-mesh sieve or paper coffee filter into a clean bowl or pitcher. Do not squeeze the grounds to avoid bitterness.
- In a small mixing bowl, whisk together the heavy cream, pumpkin puree, pumpkin pie spice, maple syrup, and vanilla extract until smooth and slightly thickened.
- Divide the cold brew concentrate evenly among 4 glass bottles or jars, filling each about halfway. Seal and store in the fridge for up to 4 days.
- To serve, fill a bottle with ice, pour the cold brew concentrate over the ice, and top with a generous dollop of the pumpkin cream. Stir or sip as desired.
Notes
Use coarse ground coffee to prevent bitterness. Store the coffee base and pumpkin cream separately until ready to drink to maintain texture. For dairy-free options, use oat milk or coconut cream for the topping. The coffee base can be stored for up to 5 days, while the pumpkin cream lasts up to 3 days.
- Prep Time: 12 minutes
- Cook Time: 0 minutes
- Category: Beverage
- Cuisine: American
Nutrition
- Serving Size: 1 bottle of cold bre
- Calories: 120
- Sugar: 10
- Sodium: 10
- Fat: 6
- Saturated Fat: 4
- Carbohydrates: 12
- Fiber: 1
- Protein: 2
Keywords: pumpkin cream cold brew, meal prep coffee, cold brew recipe, fall drinks, pumpkin spice latte alternative, batch coffee, healthy coffee recipe



