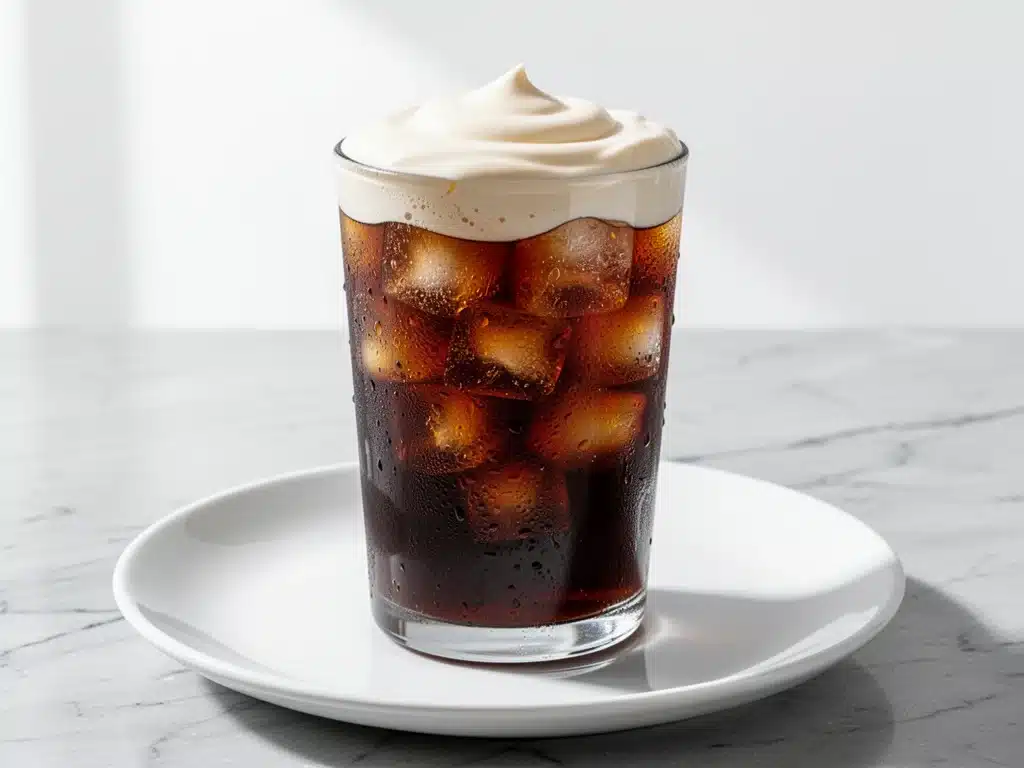
I have a confession to make. For the last three years, I’ve been a sucker for that $8 cold brew at the coffee shop down the street. You know the one—tall glass, condensation dripping down the sides, topped with that thick, sweet vanilla cream that looks like it came from a magazine. I told myself it was an “affordable luxury.” A little treat for surviving another Monday.
Then, last summer, I was stuck at home with a broken car and a caffeine withdrawal headache that felt like a drum solo in my skull. I had zero cash and zero time to go out. So, I raided my pantry. I had coffee grounds, heavy cream, vanilla extract, and ice. I threw together a desperate, half-baked mixture in my blender, expecting the worst. What I got was… actually incredible.
It was creamy, sweet, bold, and completely unlike the watery instant coffee I usually resort to. I finished that first homemade cup and immediately ordered a second batch. That was the moment I realized I’d been overpaying for something I could make in five minutes flat. This creamy vanilla sweet cream cold brew isn’t just a drink; it’s a lifestyle change for your wallet and your taste buds. It’s better than takeout because it’s fresher, cheaper, and made exactly how you like it.
I’ve made this drink dozens of times since that car-breaking incident. Sometimes I use a French press, sometimes I use cold brew concentrate, and sometimes I just steep coarse grounds overnight. But the secret always lies in that vanilla cream layer. It’s the difference between “I need caffeine” and “I’m having a coffee experience.” If you’re tired of spending a fortune on cafe drinks, you’re in the right place. Let’s get brewing.
Why You’ll Love This Recipe
There are about a dozen reasons I keep coming back to this simple drink, but here are the big ones that make it my new morning ritual.
Stupid Simple — Seriously, if you can pour water and mix cream, you can make this. There’s no fancy espresso machine required. I’ve made this while half-asleep, and it still turned out perfect. It’s the ultimate low-effort, high-reward drink.
Lightning Fast — The actual assembly takes about 3-5 minutes. The coffee part? That’s just waiting. If you already have cold brew in the fridge (which I always do), you’re looking at a 3-minute drink. That’s faster than waiting for the water to boil for tea.
Pantry-Friendly — You probably have 90% of these ingredients already. Coffee (obviously), heavy cream, vanilla, and sugar. No weird syrups or specialized powders. It’s basic kitchen staples working in harmony.
Crowd-Pleaser — I’ve served this to my coffee-snob friend who usually demands single-origin pour-overs, and even she couldn’t resist the sweet cream layer. It’s rich enough to satisfy the serious drinkers but sweet enough to win over anyone who usually sticks to chai lattes.
Massively Budget-Smart — This costs about $0.75 to $1.00 per serving. That’s less than a quarter of the price of the shop version. Over a year, that’s hundreds of dollars saved. Plus, no plastic lids or cups to worry about. It’s good for your wallet and the planet.
Makes Amazing Leftovers (Well, Prep) — You can make the sweet cream base ahead of time. Just mix it up and keep it in the fridge. When you want a drink, just pour your coffee, add the cream, and go. It’s the ultimate meal-prep hack for your morning routine.
This is my go-to when I need a pick-me-up that feels like a treat but doesn’t feel like a chore. No lines, no tipping, no waiting. Just perfect coffee.
Ingredients You’ll Need
Here’s the best part: this recipe is incredibly minimalist. You don’t need a dozen weird ingredients. Here’s what I use and why each one matters.
Heavy Cream (½ cup / 120ml) — This is the star of the show. You want full-fat heavy whipping cream. Half-and-half or milk won’t give you that thick, luxurious layer that floats on top. I buy the small cartons since I use it for other things like my small batch vanilla bean birthday cake too. If you buy too much, freeze it in ice cube trays for baking.
Vanilla Extract (1 teaspoon) — Don’t skimp here. Use real vanilla extract, not “vanilla flavoring” or imitation. The alcohol in the extract helps it blend smoothly, and the flavor is distinctively better. If you have pure vanilla bean paste, even better—I use that for special occasions, but extract is fine for daily drinking.
Sugar (1-2 tablespoons) — I use granulated white sugar because it dissolves easiest in the cold cream. Powdered sugar works too but can leave a slightly chalky texture if not mixed well. Brown sugar adds a molasses note, which is nice, but white keeps it classic. Adjust to taste. I like it sweet, so I use 2 tablespoons.
Cold Brew Coffee or Concentrate (1 ½ cups / 350ml) — You can use strong cold brew concentrate, regular cold brew, or even chilled strong drip coffee. If using hot-brewed coffee, let it cool completely in the fridge first. Warm coffee will melt the cream instantly, which is a tragedy. I prefer a medium-dark roast for this because it stands up to the sweetness. If you’re using beans, try grinding them coarse for a smoother taste, similar to how I grind for my sourdough discard cinnamon sugar pancakes batter (just kidding, different grind, but you get the idea).
Ice Cubes — Plenty of them. I use large cubes if I have them because they melt slower, keeping the drink cold without watering it down too quickly. Regular cubes work fine too.
Optional: Simple Syrup — If you want extra sweetness without granules, a quick simple syrup (equal parts sugar and water, heated until dissolved) works great. But honestly? Whisking sugar into the cream is easier.
Optional: Flavored Syrups — I usually keep it vanilla, but a dash of hazelnut or caramel syrup can be fun. Just reduce the sugar in the cream if you add syrup.
Pro Tip: I always keep a jar of homemade vanilla extract in my cabinet. It’s expensive to buy pre-made, but making it takes two months of steeping vanilla beans in vodka. Once it’s ready, it’s endless. But store-bought is totally fine for this recipe.
Equipment Needed
You don’t need fancy gear for this. Here’s what I actually use.
Mason Jar or Tumbler — I use a 16oz mason jar because it’s sturdy and looks cute on my counter. Any tall glass works. I like seeing the layers.
Small Whisk or Fork — To mix the cream and sugar. A small whisk is best, but a fork works in a pinch. I keep a tiny whisk just for coffee drinks.
Cold Brew Maker or French Press — If you’re making cold brew from scratch, a French press is the easiest tool. Cheap, durable, and easy to clean. I use my old French press that I’ve had since college. It still works perfectly.
Measuring Spoons — For the cream and sugar. Accuracy helps, but eyeballing is okay if you know your taste.
Strainer (if using grounds) — If you steep grounds directly in a jar, you’ll need a fine-mesh strainer to remove them. I usually use a French press to avoid this step.
Optional: Blender — Some people like to blend the cream layer to make it frothier. I don’t bother. Whisking is faster and gives a smoother consistency.
Tool Tip: Don’t have a French press? You can steep coffee in a jar with a coffee filter over the top. It’s a bit messy but works. I’ve done it when I was traveling.
How to Make It: Step-by-Step
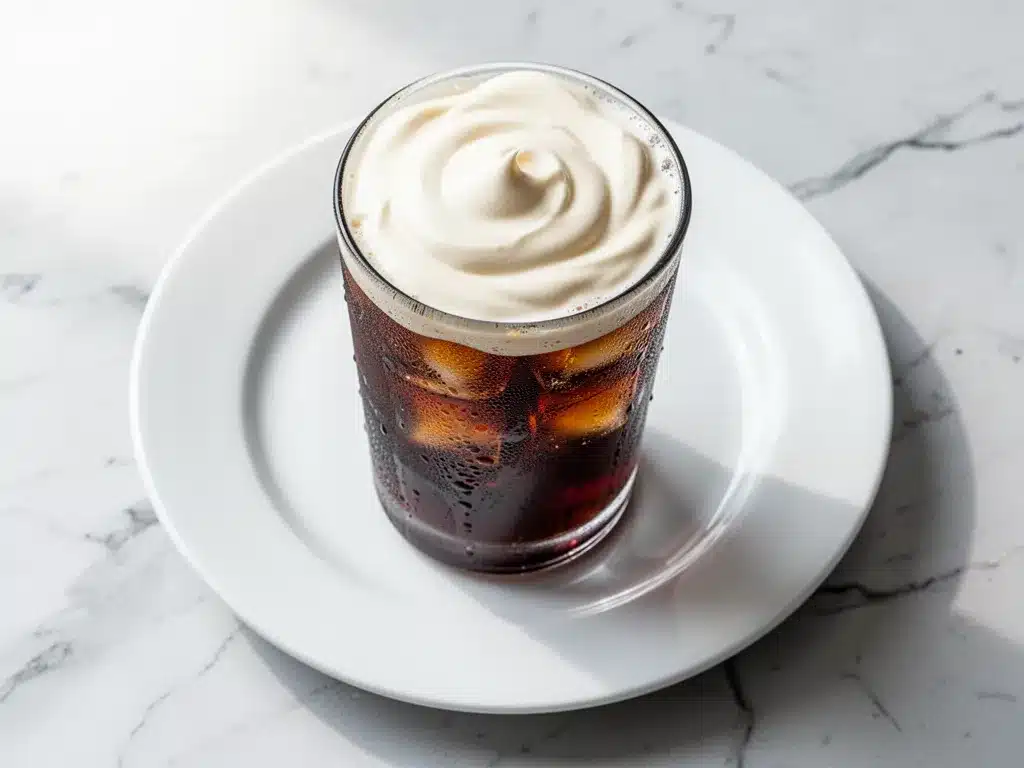
Alright, let’s make this! I’m walking you through exactly how I do it, including the little tricks I’ve picked up.
Step 1: Prepare Your Cold Brew (If Not Already Made)
If you’re starting from scratch, combine 1 cup of coarse ground coffee with 4 cups of cold or room-temperature water in a jar or French press. Stir gently to saturate the grounds. Cover and let it steep in the fridge for 12-24 hours. Longer steeping means stronger, more bitter coffee. I usually do 16 hours. After steeping, press or strain the grounds out. You should have a strong concentrate. Chill it if it’s at room temp.
Step 2: Make the Sweet Cream
In a small bowl or mason jar, combine ½ cup heavy cream, 1 tablespoon sugar, and 1 teaspoon vanilla extract. Whisk vigorously for about 30-60 seconds. You want the sugar to dissolve completely and the cream to become slightly thickened but still pourable. It shouldn’t be stiff peaks like whipped cream—just a smooth, sweet cream. If it’s too thick, add a teaspoon of milk. If too thin, add a bit more cream.
Step 3: Fill Your Glass with Ice
Take your tall glass or mason jar and fill it to the top with ice cubes. This is crucial. The ice keeps the coffee cold and slows down the melting process, preserving the layers. I pack it in tight.
Step 4: Pour the Cold Brew
Slowly pour your cold brew coffee over the ice, leaving about an inch of space at the top. If using concentrate, you might want to dilute it slightly with water or milk first, depending on strength. I like it strong, so I pour it straight.
Step 5: Float the Sweet Cream
This is the fun part. Hold a spoon upside down just above the surface of the coffee. Slowly pour the sweet cream mixture over the back of the spoon. This helps it float on top rather than mixing in immediately. You want a distinct layer of white cream on top of the dark coffee. It looks beautiful.
Step 6: Serve and Enjoy
Drink it as is for the layered experience, or stir it up for a uniform sweet coffee. I usually take a few sips of the creamy top first, then stir it in for the rest. Add a straw if you want to get to the coffee underneath without disturbing the cream too much.
Total Time: About 5 minutes (plus 12+ hours for brewing coffee if starting from scratch).
Expert Tips & Tricks
Here’s everything I’ve learned from making this dozens of times. These tips will save you from my mistakes.
Keep It Cold
The number one mistake people make is using warm coffee. It melts the cream instantly. If you’re in a rush, brew strong coffee and put it in the freezer for 15 minutes to chill it quickly. But fridge-cold is best.
Dissolve the Sugar First
If you add sugar directly to the cold cream and don’t whisk enough, you’ll get gritty pockets of sugar. Whisk it well until smooth. Or, use simple syrup for zero grit.
Don’t Over-Whisk the Cream
You want liquid cream, not whipped cream. If you whisk too long, it might start to thicken into whipped cream. That’s not bad, but it changes the texture. Stop when it’s smooth and pourable.
Use Quality Coffee
Since this drink is simple, the coffee flavor shines through. Use fresh beans. If your coffee tastes stale or burnt, this drink will too. I buy beans from local roasters when I can.
Customize the Sweetness
Everyone’s sweet tooth is different. Start with 1 tablespoon of sugar and taste the cream. Add more if needed. I like it sweet, so I use 2 tablespoons. Adjust to your preference.
Make a Batch of Cream
I often make double the sweet cream and store it in the fridge for 3-4 days. It’s ready to go whenever I need a quick drink. Just give it a quick whisk before using.
Pro Trick: Add a Pinch of Salt
A tiny pinch of salt in the cream cuts the bitterness of the coffee and enhances the vanilla. It’s a chef’s secret that works wonders.
Variations & Substitutions
Once you’ve nailed the basic version, here’s how you can mix it up. I’ve tried all of these.
Caramel Sweet Cream
Add 1 teaspoon of caramel syrup to the cream mixture instead of vanilla. It’s rich and indulgent. Great for weekend mornings.
Hazelnut Sweet Cream
Swap vanilla for hazelnut extract. It adds a nutty, warm flavor that pairs beautifully with dark roast coffee. My favorite winter variation.
Lighter Version
Use half-and-half instead of heavy cream. It’s less rich but still creamy. Or use almond milk for a dairy-free option, though it won’t float as well. I use oat milk for a creamier dairy-free option.
Matcha Cold Brew
Skip the coffee and use cold matcha tea. Top with the same sweet cream. It’s a green tea version that’s surprisingly good.
Chocolate Sweet Cream
Add a teaspoon of cocoa powder to the cream mixture. Whisk well. It’s like a mocha without the hot chocolate.
Dietary Modifications:
– Vegan: Use coconut cream (the thick part from a chilled can) and maple syrup. It’s richer and works well.
– Sugar-Free: Use a liquid stevia or erythritol sweetener in the cream.
– Dairy-Free: Use full-fat coconut milk or oat milk. Note: It won’t float as distinctly.
Serving & Storage
How to Serve:
I serve this straight up in a mason jar with a reusable straw. It looks rustic and inviting. Add a sprinkle of cocoa powder or cinnamon on top for garnish if you’re feeling fancy.
Side Dishes:
This pairs well with anything breakfast-ish. I often have this with soft batch snickerdoodle cookies or a quick Denver-style ham and cheese egg muffin for a complete morning meal.
Storage Instructions:
– Sweet Cream: Store in an airtight container in the fridge for up to 4 days. Whisk before using.
– Cold Brew: Keep in the fridge for up to 2 weeks. It gets stronger over time, so adjust your ratios.
– Assembled Drink: Best consumed immediately. The ice will melt and dilute it. Don’t store mixed drinks.
Pro Tip: If your sweet cream separates in the fridge, just give it a good whisk. It’s normal.
Nutrition Information
I’m not a nutritionist, but here’s the breakdown if you’re tracking. This is a treat, so enjoy it mindfully.
Per Serving (1 drink):
– Calories: 180
– Protein: 2g
– Carbs: 10g
– Fiber: 0g
– Sugar: 9g
– Fat: 14g
– Saturated Fat: 8g
– Cholesterol: 40mg
– Sodium: 10mg
What’s Good:
– Low carb (if you skip sugar)
– No artificial additives
– Made with real ingredients
What to Know:
– High in fat and calories from the cream
– Contains dairy
– Can be made dairy-free and sugar-free easily
My Take:
Look, this is a sweet treat. It’s not a health drink. But it’s way better than the sugary syrups at the coffee shop. When I want to make it lighter, I use less cream or skip the sugar. But usually? I just enjoy it and move on with my day.
Final Thoughts
So that’s my go-to creamy vanilla sweet cream cold brew! I’ve probably talked your ear off at this point, but when you make a recipe this often, you have a lot to say about it.
This has saved me hundreds of dollars and so much time. It’s my answer to “I need coffee” when I’m tired of the coffee shop grind. My mornings are happier, my wallet is fuller, and I feel like a barista without the apron.
Make it yours! Try different extracts, adjust the sweetness, or experiment with different coffees. The best drinks are the ones you customize to your taste.
If you make this, drop a comment and let me know what you think! I love hearing how recipes turn out in your kitchen. And if something doesn’t work, tell me that too—I’m here to help troubleshoot.
Happy brewing! And I hope your kitchen smells half as good as mine does right now.
Frequently Asked Questions
Q: Can I use hot coffee instead of cold brew?
A: You can, but you must chill it completely first. Warm coffee will melt the cream instantly. Brew strong coffee, let it cool to room temp, then refrigerate for a few hours. It won’t be as smooth as true cold brew, but it works in a pinch.
Q: Why did my cream mix into the coffee instead of floating?
A: The coffee was probably too warm, or you poured the cream too fast. Make sure the coffee is ice cold, and pour the cream slowly over the back of a spoon to help it float on top.
Q: Can I make this ahead of time?
A: You can prep the components. Make the sweet cream and store it in the fridge for up to 4 days. Keep your cold brew in the fridge for up to 2 weeks. Assemble the drink right before you want to drink it for the best experience.
Q: Is this better than store-bought sweet cream cold brew?
A: In my opinion, yes. It’s fresher, you control the sugar content, and it’s way cheaper. Plus, there’s something satisfying about making it yourself. I’ve compared them side-by-side, and homemade wins on flavor and value.
Q: Can I use milk instead of heavy cream?
A: You can, but it won’t be as thick or rich. Half-and-half is a good middle ground. If you use milk, the cream layer will be thinner and might mix in faster. Heavy cream gives that signature luxurious texture.
Q: How long does cold brew last?
A: Properly stored in the fridge, cold brew lasts up to 2 weeks. After that, it starts to lose flavor and can develop off-tastes. I usually make a batch once a week.
Q: Can I make this without sugar?
A: Absolutely. Skip the sugar in the cream, or use a sugar substitute. The vanilla extract still provides flavor. You can also add a sugar-free vanilla syrup if you want extra sweetness without the calories.
Pin This Recipe!

Creamy Vanilla Sweet Cream Cold Brew
- Total Time: 5 minutes
- Yield: 1 serving 1x
Description
A quick, budget-friendly homemade version of the popular coffee shop drink. This recipe combines cold brew coffee with a sweet, vanilla-infused heavy cream layer for a rich and refreshing treat.
Ingredients
- 1 ½ cups cold brew coffee or concentrate
- ½ cup heavy cream
- 1–2 tablespoons granulated white sugar
- 1 teaspoon vanilla extract
- Ice cubes
Instructions
- Prepare cold brew coffee by steeping coarse grounds in cold water for 12-24 hours, then strain. Chill completely.
- In a small bowl or jar, combine heavy cream, sugar, and vanilla extract. Whisk vigorously for 30-60 seconds until sugar is dissolved and cream is smooth but not whipped.
- Fill a tall glass or mason jar to the top with ice cubes.
- Pour the cold brew coffee over the ice, leaving about an inch of space at the top.
- Hold a spoon upside down just above the coffee surface and slowly pour the sweet cream mixture over the back of the spoon to create a distinct floating layer.
- Serve immediately, either drinking the layered experience or stirring the cream into the coffee.
Notes
Ensure coffee is completely cold to prevent the cream from melting. The cream should be pourable, not whipped. You can make the sweet cream base ahead of time and store it in the fridge for up to 4 days. For a dairy-free version, use coconut cream and maple syrup.
- Prep Time: 5 minutes
- Cook Time: 0 minutes
- Category: Beverage
- Cuisine: American
Nutrition
- Serving Size: 1 tall glass
- Calories: 180
- Sugar: 9
- Sodium: 10
- Fat: 14
- Saturated Fat: 8
- Carbohydrates: 10
- Protein: 2
Keywords: cold brew, sweet cream, vanilla coffee, homemade coffee, budget coffee, 5 minute recipe, iced coffee



