
It’s 6:45 AM. The alarm didn’t go off. Your kid is still half-asleep, dragging their feet toward the bathroom, and you’re staring at the clock thinking, “How am I supposed to pack a lunch, find a clean shirt, and get us out the door by 7:30?” This is the reality of the back-to-school rush, and let me tell you, cereal is not going to cut it. Cereal is messy, it’s sugary, and frankly, it doesn’t keep you full until pickup at 3 PM.
That’s exactly why I started making Back to School Apple Cinnamon Oatmeal Cups. They are my secret weapon for those chaotic mornings when I need breakfast to be handled before I even open my eyes. Think of them as portable apple pie, but in a muffin tin. They’re warm, they’re filling, and they taste like a treat, even though they’re basically just oats and fruit.
I’ve tested this recipe about a dozen times now—some mornings I add extra cinnamon, other times I throw in some raisins—but the core recipe is foolproof. The best part? You make them on Sunday night, and for the rest of the week, breakfast is literally already done. No cooking required in the morning. Just pop them in the microwave for 60 seconds, grab your backpack, and go. If you’re looking for easy, budget-friendly ways to feed a family without spending hours in the kitchen, these oatmeal cups are the answer.
Why You’ll Love This Recipe
I know, another oatmeal recipe? But hear me out. These aren’t the gloopy, sad oatmeal you ate in college. These are structured, portable, and actually taste good cold or reheated. Here’s why they’ve earned a permanent spot in my weekly meal prep rotation:
- Zero Morning Stress — Seriously. I can make these in 10 minutes on a Sunday. For the next five days, I don’t have to think about breakfast. I just microwave them. This has saved my sanity more times than I can count.
- Pantry Staples Only — You probably have almost everything you need right now. Rolled oats, apples, brown sugar, cinnamon, eggs. If you have a pantry and a fridge, you’re good. No fancy superfood powders or expensive specialty ingredients.
- Actually Healthy — These are packed with fiber from the oats and natural sweetness from the apples. No refined sugar overload. My kids think they’re eating dessert, but they’re getting a solid start to their day.
- Freezer Friendly — I usually make a double batch. Half goes in the fridge for the first three days, and the rest goes straight into the freezer. When we run out of fresh ones, I grab a handful from the freezer bag. They thaw and reheat perfectly.
- Kid-Approved — My pickiest eater (who usually refuses anything with “oats” in the name) devours these. The apple and cinnamon flavor masks the whole-grain texture. If you need to sneak nutrition into your kids, this is a great way to do it.
This is my go-to when I need to stretch a dollar and save time. It’s affordable, it’s delicious, and it just works.
Ingredients You’ll Need
Here’s the best part: this recipe is incredibly simple. You don’t need a mixer or fancy tools. Just a bowl, a whisk, and a muffin tin. I’m particular about only two things here: the type of oats and the apple. Let’s break it down.
For the Base
Rolled Oats (2 cups / 160g) — Do not use instant oatmeal packets. Do not use steel-cut oats. You need old-fashioned rolled oats. They hold their shape better in these cups. I buy the big store-brand bags; it’s the same quality as the fancy stuff for half the price.
Milk (1 cup / 240ml) — Any milk works. I use whatever is in my fridge—usually 2% dairy milk or unsweetened almond milk. Just make sure it’s not skim if you can help it; you want a little richness.
Eggs (2 large) — These act as the binder. They hold everything together so the cups don’t fall apart when you pick them up. Room temperature eggs mix in easier, but cold ones work fine too.
Unsweetened Applesauce (½ cup / 120g) — This adds moisture and sweetness without extra sugar. I use unsweetened to control the sugar content, but if you really want them sweeter, you can use sweetened applesauce and cut back on the brown sugar.
For the Flavor

Granny Smith Apples (1 large, finely diced / about 1 cup) — This is my non-negotiable. Granny Smith apples hold their shape when baked and provide a nice tart contrast to the sweet cinnamon. Red Delicious apples turn to mush in these cups. I dice them super small so my kids don’t pick them out.
Brown Sugar (3 tablespoons / 40g) — Gives that classic apple pie flavor. I like light brown sugar for a subtle molasses note. You can use white sugar if that’s all you have, but brown is better.
Cinnamon (1 teaspoon) — The star of the show. Don’t skimp. If your cinnamon is old and dusty, throw it out and buy new. Fresh cinnamon makes all the difference.
Nutmeg (¼ teaspoon) — Just a pinch. It adds depth. If you don’t have nutmeg, leave it out, but it’s worth having in the spice cabinet.
Salt (¼ teaspoon) — Essential. It balances the sweetness. Never skip the salt in baking.
Optional Add-ins — I sometimes add ½ cup of walnuts or pecans for crunch. Or a handful of chocolate chips if I’m feeling indulgent. But honestly, plain is best for weekday mornings.
Equipment Needed
You don’t need much. Here’s what I actually use:
12-Cup Muffin Tin — I use my standard non-stick muffin tin. It’s the most common size and works perfectly. If you want smaller snacks, use a mini muffin tin, but the baking time will be shorter.
Large Mixing Bowl — Just a regular bowl big enough to hold the oats and liquid. I have a bunch of these; any size works.
Whisk — For mixing the wet ingredients. A fork works in a pinch, but a whisk is faster.
Microplane or Fine Grater — I use this to grate the apples instead of dicing them. It’s faster and ensures the apple pieces are tiny enough to eat easily. But if you don’t have one, a sharp knife and some patience works too.
Freezer-Safe Bags or Container — For storing leftovers. I use gallon-sized Ziploc bags. They stack neatly in the freezer.
Microwave — Obviously, for reheating. But you can also bake them fresh if you have time in the morning.
How to Make It: Step-by-Step
Alright, let’s make these! It’s super simple. I’m walking you through exactly how I do it, including the little tricks I’ve picked up over the years.
Step 1: Prep Your Pan and Oven (2 minutes)
Preheat your oven to 350°F (175°C). Spray your muffin tin generously with non-stick cooking spray. I use the kind in the can with a little oil in it. If you don’t have that, brush the cups with a little melted butter or coconut oil. You want to make sure these don’t stick, especially since they have sugar in them.
Step 2: Mix the Wet Ingredients (3 minutes)
In your large bowl, whisk together the milk, eggs, applesauce, brown sugar, cinnamon, nutmeg, and salt. Whisk until the sugar is mostly dissolved and everything is smooth. It doesn’t need to be perfect, just combined. The mixture should look like a sweet, spiced liquid.
Step 3: Add the Oats and Apples (2 minutes)
Add the rolled oats and the finely diced (or grated) apples to the wet mixture. Stir well with a spoon until all the oats are coated. Let it sit for about 5 minutes. This is a crucial step. It lets the oats absorb some of the liquid so they don’t end up crunchy and raw in the middle. I usually do this while I’m getting the kids ready for school.
Step 4: Fill the Muffin Tin (3 minutes)
Divide the mixture evenly among the 12 muffin cups. Use a cookie scoop if you have one—it makes this super fast and ensures they’re all the same size. If you don’t have a scoop, just use a spoon and try to eyeball it. Press down gently on each cup with the back of the spoon to flatten the top. This helps them bake evenly.
Step 5: Bake (20-25 minutes)
Place the muffin tin in the preheated oven. Bake for 20-25 minutes. You’ll know they’re done when the tops are golden brown and a toothpick inserted into the center comes out clean. The edges might look a little crispy, and that’s perfect. Don’t overbake them, or they’ll dry out.
Step 6: Cool and Store (15 minutes)
Let them cool in the pan for 5 minutes. Then, transfer them to a wire rack to cool completely. If you try to move them while they’re hot, they’ll fall apart. Once cool, store them in an airtight container in the fridge for up to 5 days, or freeze them for up to 3 months.
Total Time: About 45 minutes (10 minutes prep, 35 minutes cook/cool). But most of that is hands-off.
Expert Tips & Tricks
Here’s everything I’ve learned from making these dozens of times. These tips will save you from my mistakes.
Dice the Apples Small — This is the biggest mistake people make. If the apple chunks are too big, they won’t cook through, and the texture will be weird. I grate mine on a box grater. It takes 30 seconds and makes the apples disappear into the oatmeal, leaving just the flavor.
Let the Oats Soak — I cannot stress this enough. Letting the mixture sit for 5-10 minutes before baking makes a huge difference. The oats soften up, and the final product is chewy and tender, not hard and crunchy.
Don’t Overfill the Cups — These expand slightly as they bake. If you fill them to the brim, they’ll spill over and make a mess in your oven. Fill them about ¾ full.
Freeze in Batches — If you’re making a double batch, freeze them in groups of 5 or 6. That way, you can grab a “week’s worth” at a time without thawing the whole batch. I put them in labeled freezer bags: “Week 1,” “Week 2,” etc.
Add a Crumble Topping — For a fancier touch, mix 1 tablespoon of flour, 1 tablespoon of cold butter, and a pinch of cinnamon. Sprinkle this on top before baking. It adds a nice crunchy texture, like a streusel topping.
Variations & Substitutions
Once you’ve nailed the basic version, here’s how you can mix it up. I’ve tried all of these, and they all work.
Banana Nut Version — Swap the apples for 1 large mashed banana. Add ½ cup chopped walnuts. It’s like banana bread in cup form. My kids love this one.
Blueberry Lemon — Swap the apples for 1 cup fresh blueberries. Add the zest of 1 lemon and swap cinnamon for ½ teaspoon cardamom. It’s lighter and brighter.
Pumpkin Spice — Swap the apples for ½ cup pumpkin puree. Add 1 teaspoon pumpkin pie spice. Great for fall.
Dairy-Free — Use almond milk or oat milk instead of dairy milk. Use coconut oil or vegan butter for greasing the pan. Everything else is naturally dairy-free.
Egg-Free — Replace the eggs with 2 “flax eggs” (2 tablespoons ground flaxseed mixed with 5 tablespoons water, let sit for 5 minutes). They bind well enough for these cups.
Gluten-Free — Use certified gluten-free rolled oats. Make sure your other ingredients (like baking powder if you add it) are also gluten-free. Otherwise, the recipe is naturally gluten-free.
Serving & Storage
How to Serve:
I usually serve these warm. Just pop 1 or 2 in the microwave for 60 seconds. They come out soft and steamy, smelling like apple pie. You can eat them plain, or with a dollop of Greek yogurt or a drizzle of peanut butter if you want extra protein.
Side Dishes:
These are complete breakfasts on their own, but if you need more, they pair well with fresh fruit, a glass of milk, or a piece of toast with jam. I rarely serve them with anything else because they’re so filling.
Storage Instructions:
Refrigerator:
Store in an airtight container for up to 5 days. They stay moist and soft. If they start to dry out, microwave them with a cup of water next to them to add steam.
Freezer:
Freeze for up to 3 months. Wrap them individually in plastic wrap if you want to prevent freezer burn, or just toss them in a freezer bag. They reheat well from frozen—just add an extra 30 seconds to the microwave time.
Reheating:
Microwave is best. 60 seconds for a fresh one, 90 seconds for a frozen one. You can also reheat them in a toaster oven at 350°F for 10 minutes, but who has time for that in the morning? Microwave wins.
Pro Tip:
If you’re meal prepping for the whole week, make a double batch. I usually make 24 cups. Half for the fridge, half for the freezer. This way, you’re never caught short when you have a busy week ahead.
Nutrition Information
I’m not a nutritionist, but here’s the breakdown if you’re tracking. This is per cup (makes 12).
| Nutrient | Amount per Cup |
|---|---|
| Calories | 140 |
| Protein | 5g |
| Carbs | 24g |
| Fiber | 3g |
| Sugar | 8g |
| Fat | 4g |
| Saturated Fat | 1g |
| Sodium | 110mg |
What’s Good:
– Decent fiber from the oats and apples.
– Low in added sugar (especially if you use unsweetened applesauce).
– Good source of complex carbs for energy.
What to Know:
– The calories can vary depending on the size of the apple and how much brown sugar you use.
– Contains gluten (unless using GF oats) and eggs.
My Take:
Look, these are oatmeal cups. They’re not a diet food, but they’re not junk food either. They’re a solid, balanced breakfast that will keep you full. When I want to make them lighter, I use unsweetened applesauce and reduce the brown sugar to 2 tablespoons. But usually? I just eat a reasonable portion and enjoy the convenience.
Final Thoughts
So that’s my go-to Back to School Apple Cinnamon Oatmeal Cups! I know I’ve talked a lot about how great they are, but when you make a recipe this often, you realize why it works. It’s simple, it’s cheap, and it solves a real problem.
This has saved our mornings more times than I can count. It’s my answer to “what’s for breakfast?” when I’m tired, don’t want to cook, and still want something healthy. My kids are happy, I’m happy because I’m not stressed, and we’re all fueled up for the day.
Make it yours! Try different add-ins, swap in your favorite fruit, or adjust the spices. The best recipes are the ones you adapt to your family’s tastes. If you make this, drop a comment and let me know what you think! I love hearing how recipes turn out in your kitchen. And if something doesn’t work, tell me that too—I’m here to help troubleshoot.
Happy cooking! And I hope your kitchen smells half as good as mine does right now.
Frequently Asked Questions
Can I use steel-cut oats instead of rolled oats?
I don’t recommend it. Steel-cut oats are much harder and take longer to cook. They won’t soften up properly in the short baking time, and you’ll end up with hard, chewy bits. Old-fashioned rolled oats are the right choice for this texture. If you only have quick oats, you can use them, but the cups will be softer and more cake-like. Rolled oats give the best chew.
How do I reheat frozen oatmeal cups?
Just put them in the microwave straight from the freezer. Add an extra 30 seconds to the cooking time. So, if fresh ones take 60 seconds, frozen ones take about 90 seconds. You can also let them thaw in the fridge overnight, but I rarely do that. I just microwave them frozen. They reheat surprisingly well.
Can I make these ahead for a month?
Yes! I make a big batch and freeze them. They last up to 3 months in the freezer. I usually make 24 cups at a time. Half go in the fridge for the first week, and the rest go in the freezer. They stack well in gallon-sized bags. Just make sure to squeeze out as much air as possible to prevent freezer burn.
Why did my oatmeal cups fall apart?
This usually happens if you didn’t use enough binder (eggs) or if you tried to move them while they were still hot. The eggs need to set to hold everything together. Let them cool in the pan for at least 5 minutes before trying to remove them. If they’re still crumbly, next time add an extra egg or a little more applesauce.
Can I use apple sauce instead of fresh apples?
You can, but you’ll lose the texture. Fresh apples provide little bursts of fruitiness. If you use applesauce, the cups will be more uniform and mushy. I prefer fresh apples for the texture, but if you’re in a rush, applesauce works. Just reduce the milk slightly if you use applesauce, since it adds extra moisture.
Are these safe for school lunch boxes?
Absolutely. They are a great grab-and-go breakfast. They don’t need refrigeration until you eat them, so they’re safe in a lunch box for a few hours. Just pack them in a small container. They’re also great for snacks. My kids love taking them to school as a mid-morning snack.
Can I double this recipe?
Yes! Double everything and use two muffin tins. The cooking time stays the same. I do this all the time when I’m meal-prepping. Just make sure you have enough space in your oven. If your oven is small, you might need to bake them in batches. But doubling is the best way to save time.
Pin This Recipe!
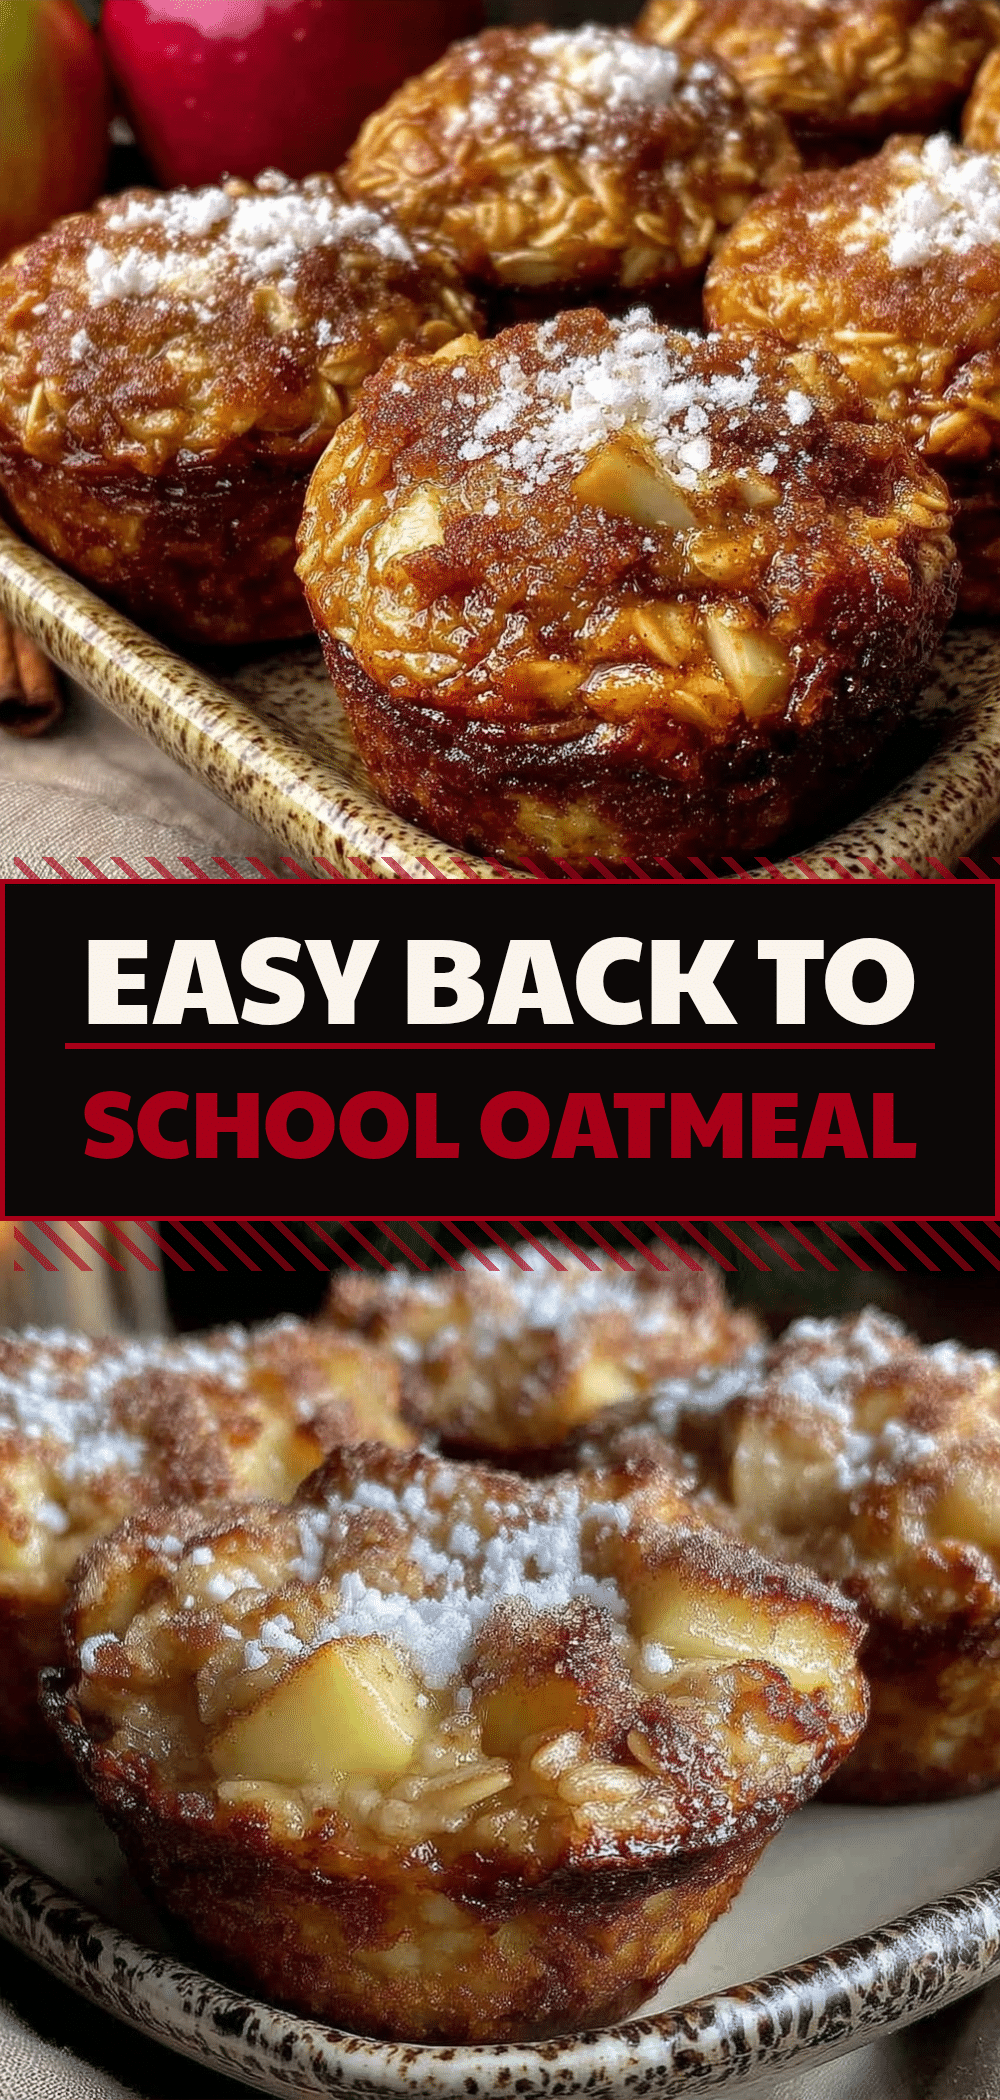

Back to School Apple Cinnamon Oatmeal Cups
- Total Time: 45 minutes
- Yield: 12 servings 1x
Description
Portable, healthy oatmeal cups made with rolled oats, Granny Smith apples, and cinnamon. Perfect for meal prep, these cups are freezer-friendly and provide a stress-free breakfast option for busy school mornings.
Ingredients
- 2 cups (160g) old-fashioned rolled oats
- 1 cup (240ml) milk (dairy or unsweetened almond milk)
- 2 large eggs
- ½ cup (120g) unsweetened applesauce
- 1 large Granny Smith apple, finely diced or grated (about 1 cup)
- 3 tablespoons (40g) brown sugar
- 1 teaspoon cinnamon
- ¼ teaspoon nutmeg
- ¼ teaspoon salt
- Non-stick cooking spray or melted butter/coconut oil for greasing
Instructions
- Preheat oven to 350°F (175°C). Generously spray a 12-cup muffin tin with non-stick cooking spray.
- In a large mixing bowl, whisk together the milk, eggs, applesauce, brown sugar, cinnamon, nutmeg, and salt until smooth and sugar is mostly dissolved.
- Add the rolled oats and finely diced/grated apples to the wet mixture. Stir well to coat the oats.
- Let the mixture sit for 5 minutes to allow the oats to absorb some liquid.
- Divide the mixture evenly among the 12 muffin cups, filling them about ¾ full. Press down gently with the back of a spoon to flatten the tops.
- Bake for 20-25 minutes, or until the tops are golden brown and a toothpick inserted into the center comes out clean.
- Let the cups cool in the pan for 5 minutes, then transfer to a wire rack to cool completely before storing.
- Store in an airtight container in the refrigerator for up to 5 days or freeze for up to 3 months.
Notes
Do not use instant oatmeal packets or steel-cut oats; old-fashioned rolled oats are required for the correct texture. Letting the oats soak for 5 minutes is crucial to prevent a crunchy texture. For a crumble topping, mix 1 tbsp flour, 1 tbsp cold butter, and a pinch of cinnamon before baking. To make dairy-free, use almond/oat milk and coconut oil. To make egg-free, use 2 flax eggs (2 tbsp ground flaxseed + 5 tbsp water).
- Prep Time: 10 minutes
- Cook Time: 25 minutes
- Category: Breakfast
- Cuisine: American
Nutrition
- Serving Size: 1 oatmeal cup
- Calories: 140
- Sugar: 8
- Sodium: 110
- Fat: 4
- Saturated Fat: 1
- Carbohydrates: 24
- Fiber: 3
- Protein: 5
Keywords: oatmeal cups, apple cinnamon, breakfast meal prep, healthy breakfast, kid-friendly breakfast, freezer breakfast, gluten-free option



