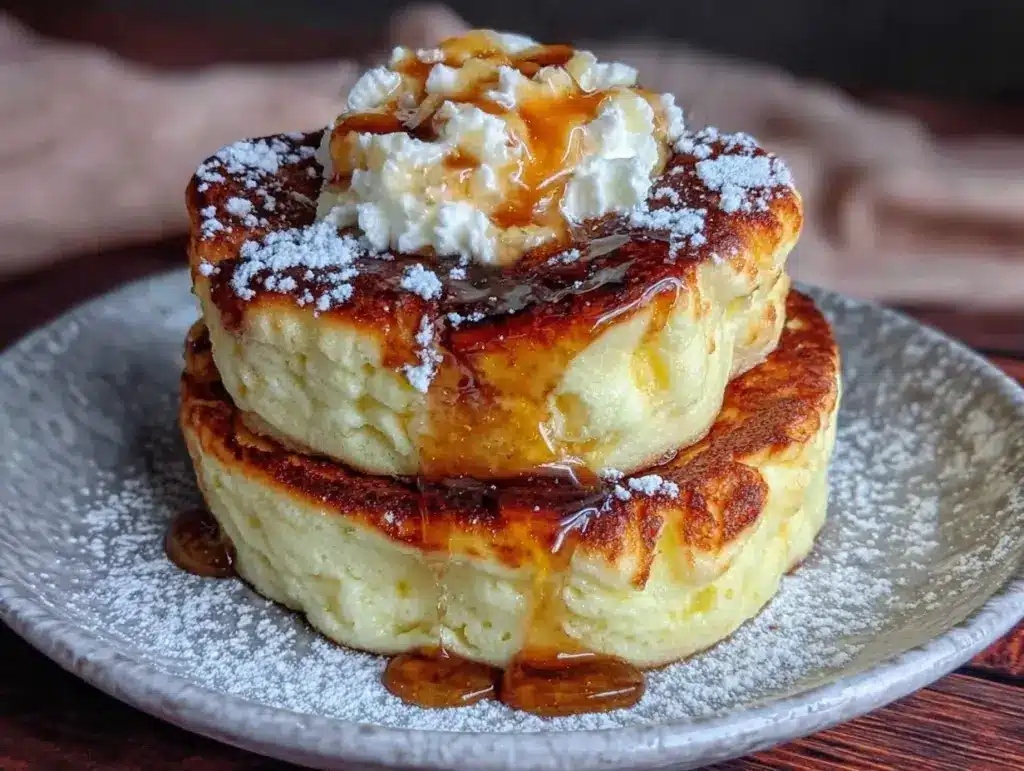
I have a confession to make. For three years, I refused to admit that I couldn’t make fluffy pancakes. I’d buy the box mix, or worse, I’d use that weird batter from the frozen waffle aisle because I was tired. But then, last Sunday morning, I was scrolling through Instagram while sipping my third cup of coffee, and I saw it. Those impossibly tall, jiggly, cloud-like pancakes stacking three high on a plate. They looked less like breakfast and more like a dessert that had given up on being a dessert.
I was hooked. I bought every ingredient I needed and attempted what I thought would be a simple swap for my usual Saturday stack. I followed a recipe, I whisked the eggs, I flipped the pancakes. And what came out of the pan? Disks. Flat, rubbery, sad disks. They tasted okay, sure. But they were dense. They were heavy. And they definitely weren’t the airy, soufflé-like clouds I had dreamed of.
I spent the next month trying to figure out what I was doing wrong. I watched videos. I read forums. I cried over a ruined batch of batter that separated in the bowl. But here’s the thing: once you understand the science of the meringue, it’s not magic. It’s just technique. And now? I make these ultra-fluffy Japanese soufflé pancakes at least once a month. They are the crown jewel of my weekend brunch. They’re so light they practically float off the spatula, and when you drizzle maple syrup over them, the whole kitchen smells like comfort and happiness.
If you’ve ever wanted to feel like a professional pastry chef without actually being one, this is your moment. It takes a little patience, but the result is worth every second of whisking. Plus, if you’re looking for other ways to elevate your weekend treats, these are way more impressive than your average bakery-style Neapolitan layer cake, but just as fun to make.
Why You’ll Love This Recipe
There are about ten reasons I keep making these, but here are the big ones that have me coming back for seconds every single time.
The Texture is Unreal — Seriously, if you’ve never had a pancake that jiggles like a gelatin dessert, you are missing out. They’re crisp on the outside, but the inside is soft, airy, and melts in your mouth. It’s like eating a cloud that decided to have breakfast with you.
It’s a Weekend Ritual — I love that these require a bit of time. In a world where everything is “quick and easy,” this recipe demands your attention. I put on some jazz, make fresh coffee, and take my time. It turns a lazy Saturday into a special occasion. It’s the perfect companion to a cozy cozy fall roasted butternut squash soup with crispy sage if you’re feeling fancy, though these pancakes stand beautifully on their own.
They’re Naturally Lighter — Because the lift comes from whipped egg whites and not just baking powder, these pancakes feel less heavy on the stomach than traditional thick griddles. You can eat two (or three) and still feel ready to tackle the day. No food coma here.
Customizable Toppings — The blank canvas of the pancake is perfect for whatever is in season. Right now, I’m obsessed with fresh berries and a dollop of whipped cream. In the winter, I do warm fruit compotes. The versatility is endless.
Impressive but Doable — You don’t need a culinary degree. You just need a whisk, a clean bowl, and a non-stick pan. I’ve walked my teenage nephew through this over FaceTime, and he nailed it on the first try. If he can do it, you can too.
This is my go-to when I want to treat myself or my family to something that feels restaurant-quality. No complicated techniques, no weird ingredients you can’t find, just reliable, delicious food that makes everyone happy.
Ingredients You’ll Need
Here’s the best part: you probably have most of this already. The ingredients list is short, but the quality matters. Since there are only six main components, each one has to pull its weight.
For the Batter Base:
Self-Rising Flour (1 cup / 120g) — This is key. Self-rising flour already has baking powder and salt mixed in. If you only have all-purpose flour, you’ll need to add 1 ½ teaspoons of baking powder and ¼ teaspoon of salt to 1 cup of flour. But honestly? Just buy the self-rising. It saves a step and ensures consistent lift.
Egg Yolks (2 large / from 2 large eggs) — These add richness and structure. Don’t skip them. The whites are for the lift, the yolks are for the flavor and tenderness. I use room temperature eggs because they whip up faster and create a more stable meringue.
Milk (2 tablespoons / 30ml) — Whole milk is best for richness. If you’re dairy-free, oat milk works surprisingly well here because of its creaminess. Just don’t use skim; you want that fat content for texture.
Vanilla Extract (½ teaspoon) — Pure vanilla, not imitation. A little goes a long way in these delicate pancakes. It adds that warm, nostalgic scent that fills the kitchen.
For the Meringue (The Secret Weapon):
Egg Whites (2 large / from 2 large eggs) — These are the engine of the recipe. They need to be whipped to stiff peaks. I always separate my eggs when they’re cold because it’s easier, but I let them come to room temperature before whipping. Cold whites whip up slower and don’t get as voluminous.
Cream of Tartar (¼ teaspoon) — This is non-negotiable for me. It stabilizes the egg whites so they don’t collapse when you fold them in. It keeps those air bubbles intact, which is what makes the pancakes so tall. You can use lemon juice if you’re out, but cream of tartar is the pro move.
Granulated Sugar (2 tablespoons / 25g) — This sweetens the meringue and helps stabilize the peaks. Don’t use brown sugar; it has too much moisture and will weigh down the whites.
Butter (1 tablespoon, melted) — I fold a little melted butter into the yolk mixture for extra tenderness. It keeps the pancakes from getting too dry.
For Cooking:
Unsalted Butter (for the pan) — I use a tiny bit to grease the pan. Too much butter will make the edges burn before the center cooks. I prefer to use a paper towel to wipe a thin layer of butter around the pan.
Cooking Spray — I often use a light spray of avocado oil spray for the first pancake to ensure nothing sticks, then switch to butter for the rest.
Equipment Needed
You don’t need fancy equipment for this. Here’s what I actually use.
Two Large Bowls — One for the yolk mixture, one for the whites. Make sure the bowl for the whites is completely clean and dry. Even a tiny drop of yolk or oil will prevent the whites from whipping up. I use glass bowls because I can see the peaks clearly.
Hand Mixer or Stand Mixer — You can do this by hand with a whisk, but it takes about 10-15 minutes of arm workout. A hand mixer takes 3-4 minutes. I recommend the mixer because you want those stiff peaks, and it’s hard to tell if you’ve reached them by hand.
Non-Stick Skillet — A 8-inch or 10-inch non-stick pan is ideal. I use a Le Creuset enameled cast iron skillet because it holds heat evenly, but a good T-fal or Calphalon non-stick works perfectly. Avoid stainless steel; these pancakes will stick and tear.
Spatula — A flexible silicone spatula is essential for folding. You want to gently incorporate the meringue without deflating it. A metal spoon will tear the air bubbles out.
Lid — Your pan needs a lid. This is crucial. The lid traps steam, which cooks the center of the thick pancakes without burning the bottom. If your pan doesn’t have a lid, you can use a smaller pan inverted over the pancakes, but that’s awkward. I keep a spare lid in my drawer just for this recipe.
Timer — Seriously. These pancakes are precise. Set a timer for the cooking stages. I’ve ruined batches because I got distracted talking to my kids.
How to Make It: Step-by-Step
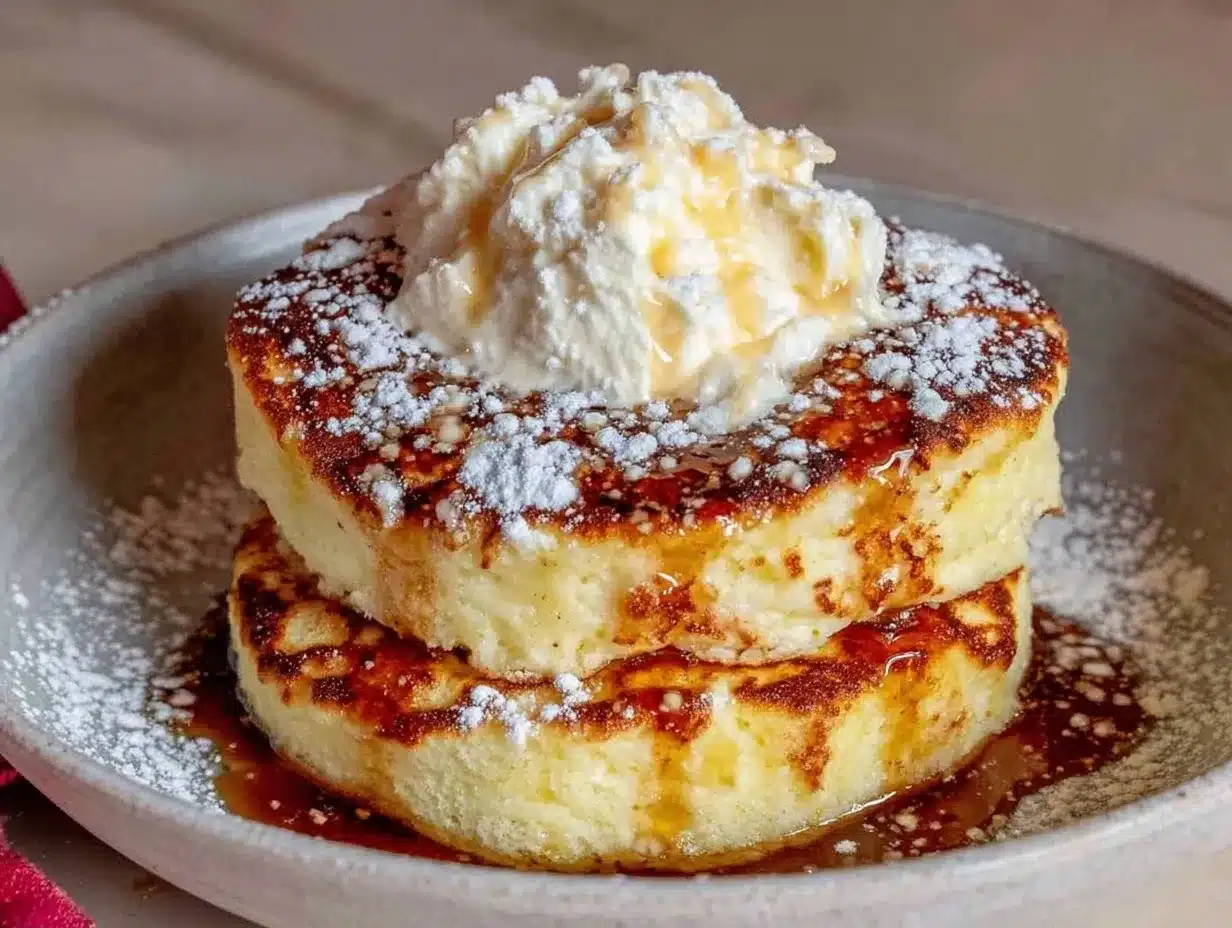
Alright, let’s make this! I’m walking you through exactly how I do it, including the little tricks I’ve picked up. This method yields about 4-6 large, tall pancakes.
Step 1: Prep Your Ingredients (5 minutes)
Separate your eggs. Put the yolks in one bowl and the whites in another. Make sure the bowl for the whites is spotless. Measure out your flour, milk, vanilla, and sugar. Have your cream of tartar ready. I know it seems fussy, but having everything measured out before you start makes the folding process less stressful.
Step 2: Make the Yolk Mixture (2 minutes)
To the bowl with the egg yolks, add the milk, vanilla extract, and melted butter. Whisk them together until smooth. Then, sift in the self-rising flour. Whisk gently until just combined. It’s okay if there are a few small lumps; you don’t want to overmix this part. Set it aside. It should look like a thick, smooth batter.
Step 3: Whip the Egg Whites (3-4 minutes)
This is the most important step. Add the cream of tartar to the egg whites. Start whipping on medium speed. As they start to foam and turn white, gradually add the sugar. Continue whipping on high speed until you have stiff, glossy peaks. To test this, lift the beaters—the peaks should stand straight up without drooping. If they curl over, keep whipping. This meringue is what gives the pancakes their height.
Step 4: Fold the Batter (3 minutes)
Add about one-third of the meringue to the yolk mixture. Whisk it in gently to lighten the batter. Then, add the rest of the meringue. Using your silicone spatula, gently fold the mixture. Cut down through the center, scrape the bottom, and fold over the top. Rotate the bowl and repeat. Stop as soon as the white streaks disappear. Do not overmix! You want to keep as much air in there as possible. The batter should look airy and slightly voluminous, not dense.
Step 5: Cook the Pancakes (15-20 minutes)
Heat your non-stick skillet over low-medium heat. Grease lightly with butter or spray. Using a ladle or scoop, pour the batter into the pan. Shape it into a circle with the back of the spoon. You want them about 1 inch tall initially. They will rise more as they cook.
Immediately cover the pan with a lid. This is crucial for trapping steam. Cook for 3-4 minutes. You’ll see bubbles forming on the surface and the edges will start to set.
Now, the tricky part: flipping. Slide your spatula under the pancake. It should be firm enough to hold its shape. Gently flip it over. Cover again and cook for another 3-4 minutes. The second side should be golden brown.
Transfer to a plate and keep warm in a 200°F (95°C) oven while you cook the rest. Grease the pan between each pancake. You should get 4-6 pancakes from this batter.
Step 6: Serve Immediately
Stack them high! Top with fresh berries, a dusting of powdered sugar, and a generous drizzle of warm maple syrup. Serve immediately while they’re still jiggly and warm.
Total Time: About 30 minutes (10 minutes active, 20 minutes cooking)
Built-in Troubleshooting:
- Pancakes are flat: You overmixed the batter or didn’t whip the whites stiff enough. Next time, fold more gently and whip longer.
- Bottom burns, center raw: Heat is too high. Lower the heat to medium-low. The lid traps heat, so you don’t need much fire.
- Pancakes fall after flipping: They weren’t cooked enough on the first side. Give them an extra minute before flipping.
Expert Tips & Tricks
Here’s everything I’ve learned from making these dozens of times. These tips will save you from my mistakes.
Room Temperature Eggs
I can’t stress this enough. Cold egg whites take much longer to whip and don’t reach the same volume. Take your eggs out of the fridge 30 minutes before you start. If you forget, you can warm the shells in a bowl of warm water for 5 minutes.
Clean Bowls Only
Any trace of yolk or oil in the white bowl will ruin the meringue. I wash my bowls with hot soapy water and dry them thoroughly before starting. I even wipe them down with a bit of vinegar or lemon juice to remove any grease films.
Low and Slow
These pancakes are thick. They need time to cook through. If you crank up the heat, you’ll burn the outside before the inside sets. Patience is a virtue here. Low heat, covered pan, and steady hands.
Don’t Press Down
When you flip the pancake, don’t press down on it with the spatula. You’re compressing all that hard-won air. Just let it sit gently. If you press, it will deflate and become dense.
Keep Them Warm
Place finished pancakes on a baking sheet in a 200°F oven. This keeps them warm without continuing to cook them. Stack them loosely so steam doesn’t make them soggy.
Variations & Substitutions
Once you’ve nailed the basic version, here’s how you can mix it up. I’ve tried all of these.
Berry Burst
Fold in ½ cup of fresh blueberries or raspberries into the batter right before cooking. The berries add bursts of tartness that cut through the sweetness. I love this version with a lemon glaze.
Chocolate Chip
Add ¼ cup of mini chocolate chips to the batter. It’s like a pancake version of those brown butter chocolate chip cookies—rich, indulgent, and perfect for a special treat.
Lemon Poppy Seed
Add the zest of one lemon and 1 teaspoon of poppy seeds to the yolk mixture. It adds a bright, citrusy flavor that pairs beautifully with vanilla. Serve with a lemon syrup.
Gluten-Free
Use a 1:1 gluten-free flour blend that includes xanthan gum. The texture will be slightly different, but still fluffy. I’ve used Bob’s Red Mill 1:1 blend with success.
Dairy-Free
Swap the milk for oat milk and the butter for coconut oil or vegan butter. The meringue stays the same. These are naturally egg-heavy, so the dairy swap doesn’t affect the structure much.
Serving & Storage
How to Serve:
I usually serve these straight from the pan at the dinner table—it looks rustic and stays warm. But here are other ways I’ve enjoyed them:
- Classic: Maple syrup and a pat of butter. Simple is best.
- Fancy: Whipped cream, fresh strawberries, and a dusting of powdered sugar.
- Indulgent: Nutella drizzle and banana slices.
Storage Instructions:
Refrigerator: Store leftovers in an airtight container for up to 2 days. They will lose some of their fluffiness, but they’re still good.
Reheating: Best method: Microwave for 20-30 seconds. They’ll regain some softness. Alternatively, toast them lightly in a dry pan over low heat. Avoid the oven, as it can dry them out.
Freezing: Yes, you can freeze them! Let them cool completely, then layer them with parchment paper in a freezer bag. Freeze for up to 3 months. Reheat in the toaster or microwave. They’re not quite as jiggly as fresh, but still delicious.
Nutrition Information
I’m not a nutritionist, but here’s the breakdown if you’re tracking. Per serving (based on 2 pancakes):
- Calories: 180
- Protein: 6g
- Carbs: 22g
- Fiber: 1g
- Fat: 7g
- Sugar: 8g
What’s Good: They’re naturally lower in fat than traditional pancakes because the lift comes from egg whites, not extra butter or oil in the batter. They provide a good source of protein from the eggs.
What to Know: The sugar content is moderate, mostly from the meringue and any toppings you add. If you’re watching sugar, reduce the sugar in the meringue to 1 tablespoon and skip the syrup.
My Take: Look, this is a treat. It’s fluffy, sweet, and fun. It’s not a health food, but it’s lighter than a stack of buttermilk pancakes. When I make these, I enjoy them fully. Life’s too short for boring breakfasts.
Final Thoughts
So that’s my go-to ultra-fluffy Japanese soufflé pancakes! I’ve probably talked your ear off at this point, but when you make a recipe this often, you have a lot to say about it.
This has saved weekend mornings more times than I can count. It’s my answer to “what’s for brunch” when I want to feel special but don’t want to leave the house. My family is happy, my friends are impressed, and I’m happy because I finally mastered the technique.
Make it yours! Try different toppings, swap in your favorite fruits, adjust the sweetness. The best recipes are the ones you adapt to your tastes. If you make these, drop a comment and let me know what you think! I love hearing how recipes turn out in your kitchen. And if something doesn’t work, tell me that too—I’m here to help troubleshoot.
Happy cooking! And I hope your kitchen smells half as good as mine does right now.
Frequently Asked Questions
Q: Why did my pancakes collapse after flipping?
A: This usually means they weren’t cooked enough on the first side. The center was still too raw to support the weight. Give them an extra 1-2 minutes on the first side. Also, make sure you’re not pressing down on them after flipping.
Q: Can I use regular flour instead of self-rising?
A: Yes! For 1 cup of self-rising flour, use 1 cup all-purpose flour + 1 ½ teaspoons baking powder + ¼ teaspoon salt. Mix the baking powder and salt into the flour before adding it to the yolks.
Q: Why are my pancakes flat?
A: Two reasons: either your egg whites didn’t reach stiff peaks, or you overmixed the batter when folding in the meringue. Whip the whites longer and fold more gently. Also, make sure your baking powder is fresh.
Q: Can I make the batter ahead of time?
A: No. The meringue will deflate if you let it sit. You need to cook these immediately after folding the batter. The magic is in the fresh air bubbles.
Q: What’s the best syrup to use?
A: Pure maple syrup is the classic choice. But if you want something different, try a honey-lemon drizzle, a berry compote, or even a salted caramel sauce. These pancakes are a blank canvas!
Q: Can I double this recipe?
A: Absolutely. Just use a larger bowl for the egg whites and fold in batches. You’ll need to cook them in more batches, so keep the finished ones warm in the oven.
Pin This Recipe!
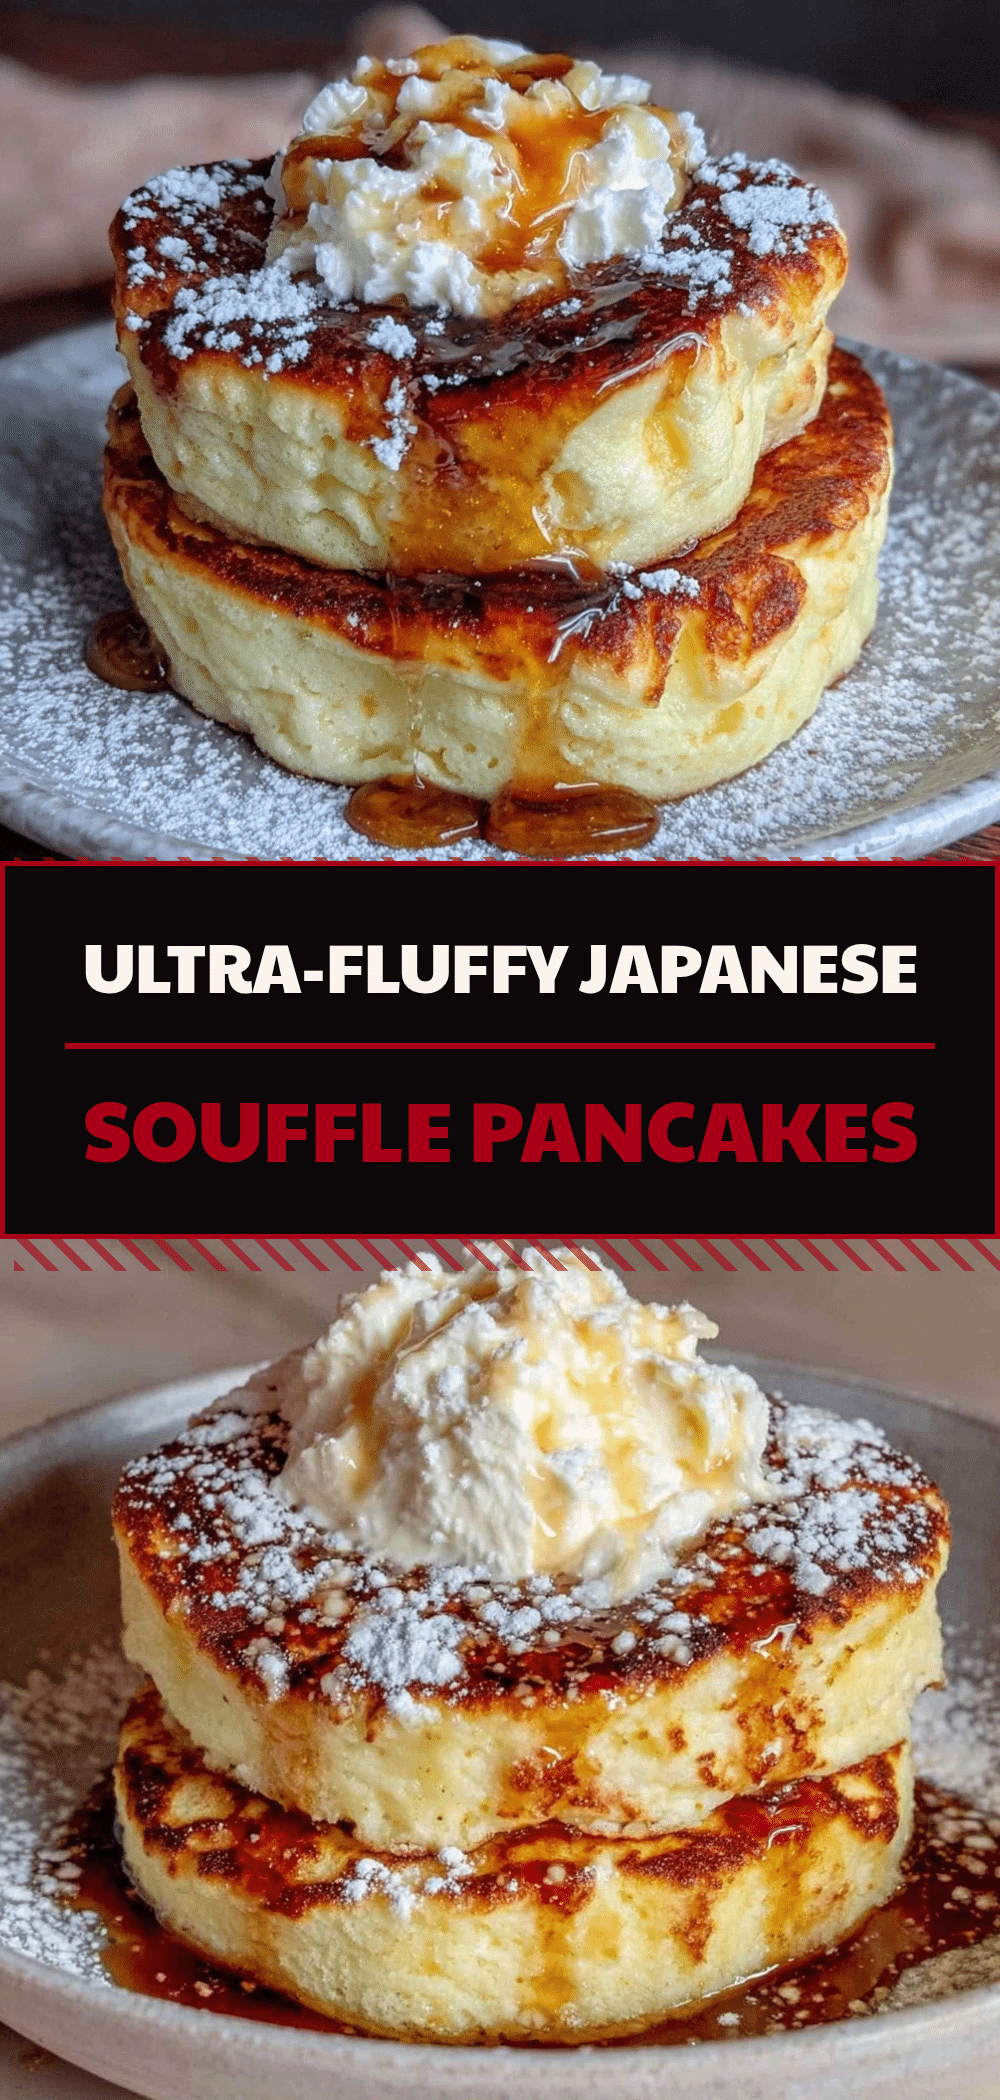
Ultra-Fluffy Japanese Souffle Pancakes
- Total Time: 30 minutes
- Yield: 4-6 servings 1x
Description
These ultra-fluffy Japanese soufflé pancakes are light, airy, and jiggly, achieved through a stable meringue technique. They are crisp on the outside and soft on the inside, making them an impressive weekend brunch treat.
Ingredients
- 1 cup (120g) self-rising flour
- 2 large egg yolks
- 2 tablespoons whole milk
- 1/2 teaspoon pure vanilla extract
- 2 large egg whites
- 1/4 teaspoon cream of tartar
- 2 tablespoons granulated sugar
- 1 tablespoon unsalted butter, melted
- Unsalted butter or cooking spray for the pan
Instructions
- Separate eggs, placing yolks in one bowl and whites in a separate, completely clean and dry bowl. Measure all ingredients beforehand.
- Whisk egg yolks, milk, vanilla extract, and melted butter until smooth. Sift in self-rising flour and whisk gently until just combined; set aside.
- Add cream of tartar to egg whites. Whip on medium speed until foamy, then gradually add sugar. Whip on high speed until stiff, glossy peaks form.
- Fold one-third of the meringue into the yolk mixture to lighten it. Gently fold in the remaining meringue using a silicone spatula until just combined; do not overmix.
- Heat a non-stick skillet over low-medium heat and grease lightly. Ladle batter into the pan, shaping into 1-inch tall circles.
- Cover the pan with a lid and cook for 3-4 minutes until bubbles form and edges set.
- Carefully flip pancakes, cover again, and cook for another 3-4 minutes until golden brown.
- Transfer to a plate and keep warm in a 200°F oven. Serve immediately with toppings.
Notes
Ensure egg whites are at room temperature for best volume. Use a clean bowl for whites to ensure proper whipping. Cook on low heat to prevent burning the bottom before the center is set. Do not press down on pancakes after flipping.
- Prep Time: 10 minutes
- Cook Time: 20 minutes
- Category: Breakfast
- Cuisine: Japanese
Nutrition
- Serving Size: 2 pancakes
- Calories: 180
- Sugar: 8
- Sodium: 150
- Fat: 7
- Saturated Fat: 3
- Carbohydrates: 22
- Fiber: 1
- Protein: 6
Keywords: Japanese pancakes, soufflé pancakes, fluffy pancakes, brunch recipe, weekend breakfast, egg white meringue



