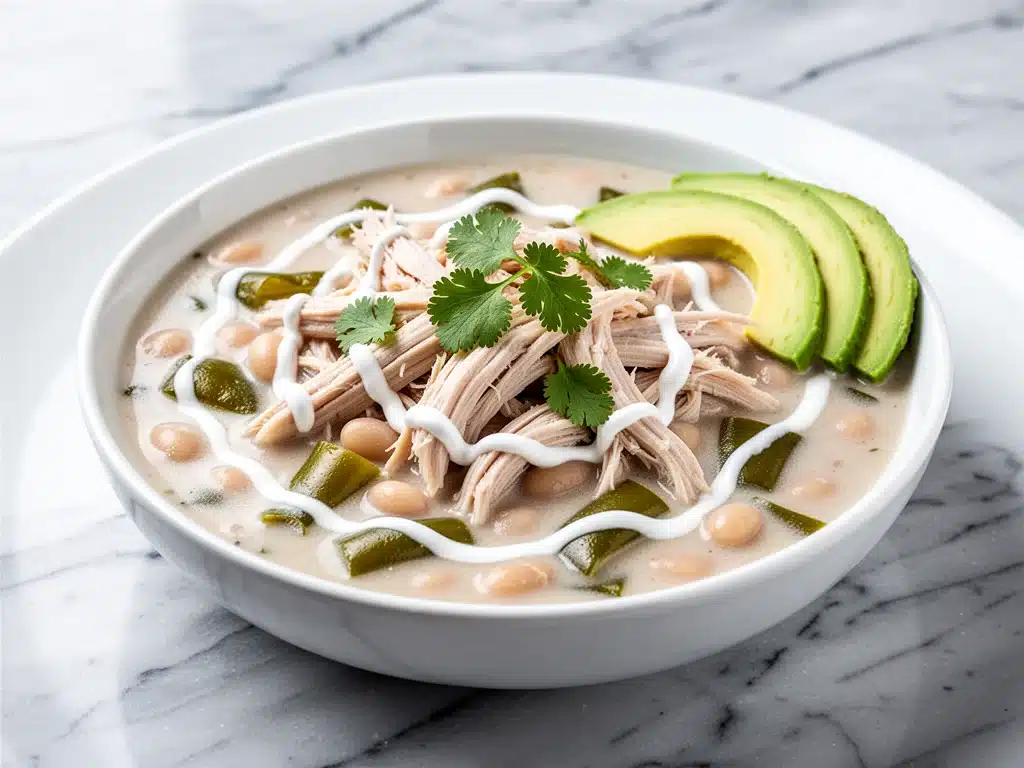
I have a confession to make: I used to hate white chicken chili. Not because it tasted bad, but because it was usually a watery, bland mess of overcooked beans and dry chicken that looked like it had been sitting in a slow cooker since the Bush administration. I would stare at the pot, stir it skeptically, and wonder why I bothered making it at all when I could just order takeout.
That changed last Tuesday. It was one of those evenings where I came home exhausted, my brain completely fried from work, and the last thing I wanted to do was chop vegetables or manage three different pans. I needed comfort. I needed something warm and filling that would make my family stop asking “what’s for dinner?” and start asking “where did you learn to cook like this?”
So I pulled out the can of cream cheese. Yes, cream cheese. It’s the secret weapon that turns a basic chili into something restaurant-quality. I threw together what I thought would be a mediocre dinner in about 20 minutes. But when I took that first spoonful, I stopped. It was thick, velvety, and packed with flavor. The chicken stayed tender, the beans were creamy (not mushy), and the green chiles added just enough kick without overwhelming the palate.
This ultra-creamy white chicken chili is now my holy grail for busy weeknights. It’s the kind of meal that feels indulgent but comes together faster than I can change into sweatpants. I’ve tested it at least a dozen times, tweaking the spice levels and cream ratios until it was perfect. If you’re tired of dry, watery chilis, this is the recipe you’ve been waiting for. It’s rich, it’s cozy, and it’s going to save your dinner routine.
Why You’ll Love This Recipe
There are plenty of chicken chili recipes out there, but this one is different. It’s not just about the ingredients; it’s about the texture and the speed. Here’s why this ultra-creamy white chicken chili has completely replaced my takeout habit:
- Stupidly Simple — Seriously, if you can open cans and boil chicken, you can master this. I’ve walked my teenage daughter through it over the phone while I was at work. No fancy techniques, no hours of prep.
- Lightning Fast — 30 minutes from start to finish. That’s it. I make this on the nights I’m too tired to think. While the chicken simmers, I’m already chopping the onions and getting the spices ready.
- Pantry-Friendly — You probably have 90% of these ingredients already. Canned chicken, green chiles, cream cheese, beans, and spices. It’s the ultimate “I don’t want to go to the store” dinner.
- Crowd-Pleaser — I’ve served this to my vegetarian sister (she skips the chicken, adds extra beans), my spicy-food-loving brother, and my picky toddler. Everyone finds something to love. The cream cheese makes it mild enough for kids but flavorful enough for adults.
- Makes Amazing Leftovers — This actually tastes better the next day. The flavors meld together overnight, and the chicken gets even more tender. I deliberately make extra for lunch because it reheats perfectly.
- Budget-Smart — Feeds 4-6 people for under $15. That’s cheaper than a single pizza delivery and infinitely healthier.
This is my go-to when I need dinner to just work. No stress, no complicated steps, just reliable, delicious food that makes everyone happy. It’s the ultimate weeknight hero.
Ingredients You’ll Need
Here’s the best part: you probably have most of this already in your pantry or fridge. This recipe relies on high-quality basics rather than obscure ingredients. I’m particular about a few things here, and I’ll tell you exactly why they matter.
For the Base
Chicken (2 pounds / 900g) — I use boneless, skinless chicken breasts or thighs. Thighs are juicier and more forgiving if you overcook them slightly, but breasts work great if you’re watching calories. You can also use rotisserie chicken to save time, but fresh chicken cooked in the broth adds more flavor.
Chicken broth (4 cups / 960ml) — Use low-sodium broth so you can control the saltiness. The cream cheese and cheese topping can add sodium, so starting low gives you the best balance. I love Swanson or Kitchen Basic, but any good brand works.
Onion (1 large yellow onion, diced / about 300g) — Yellow onions are sweet and savory, perfect for a base. White onions are sharper, and red onions are too sweet. Stick with yellow for that classic chili depth.
Garlic (4 cloves, minced / about 2 tablespoons) — Fresh garlic is non-negotiable here. Jarred garlic has a metallic taste that clashes with the creamy sauce. Mince it yourself—it takes 30 seconds.
Cream cheese (8 ounces / 225g, softened) — This is the secret ingredient. It’s what makes the chili ultra-creamy instead of watery. Use full-fat brick cream cheese, not the spreadable kind in a tub. Soften it in the microwave for 15 seconds or leave it on the counter for 30 minutes.
Canned green chiles (1 can, 4 oz / 113g, diced) — Mild green chiles add that signature “white chili” tang. Do not substitute with jalapeños unless you want it spicy. Ro-tel tomatoes with green chiles work too, but drain the liquid first.
For the Flavor
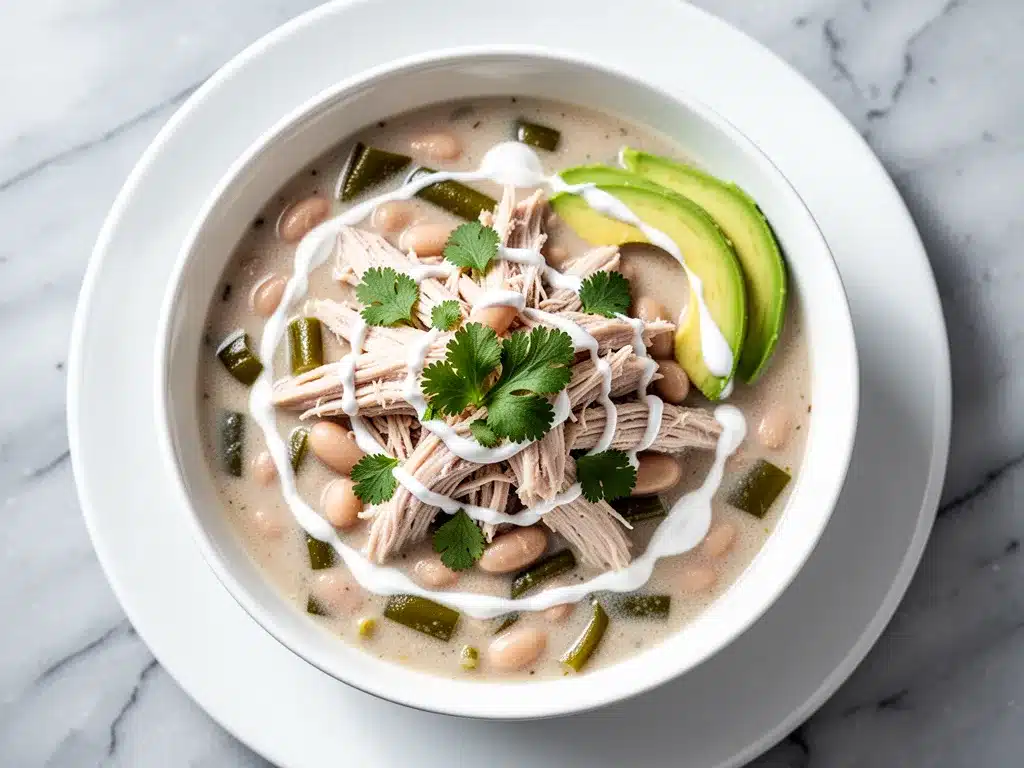
Cumin (2 teaspoons) — Ground cumin is the backbone of chili flavor. Toast it in the pan for 30 seconds before adding other ingredients to release its oils. It makes a huge difference.
Chili powder (1 tablespoon) — Not just cayenne! Chili powder is a blend of paprika, garlic, oregano, and cumin. It adds color and warmth without extreme heat. I use McCormick or my own blend.
Olive oil (2 tablespoons) — For sautéing the onions and garlic. I use extra virgin for flavor, but regular olive oil works fine.
Salt and black pepper — To taste. Start with 1 teaspoon salt and adjust at the end.
For the Body
White beans (2 cans, 15 oz / 425g each, drained and rinsed) — Cannellini or Great Northern beans are traditional. They’re creamy and mild. Rinse them well to remove the starchy canning liquid. I also add one can of corn for sweetness and crunch.
Corn (1 can, 15 oz / 425g, drained) — Or use 1 cup frozen corn. It adds a nice pop of sweetness that balances the savory spices.
Monterey Jack or Cheddar cheese (1 cup / 100g, shredded) — For topping or stirring in at the end. Monterey Jack melts beautifully. Sharp cheddar adds a tangy kick. I use a mix of both.
Equipment Needed
You don’t need fancy equipment for this. Here’s what I actually use.
Large Dutch oven or stockpot — I use a 6-quart pot. It needs to be big enough to hold all the liquid and beans without boiling over. My heavy-bottomed pot distributes heat evenly, preventing scorching.
Large skillet — For sautéing onions and garlic first. I prefer stainless steel for better browning, but non-stick works too.
Wooden spoon — For stirring. Silicone works too. Don’t use metal on non-stick pots.
Knife and cutting board — For dicing onion and mincing garlic. A sharp knife makes this faster and safer.
Can opener — Obvious, but essential. I keep a cheap one in the drawer and a fancy one on the counter.
Measuring spoons — For spices. Accurate measurements matter for chili.
Optional but nice:
- Immersion blender — If you like your chili super thick and creamy, blend a cup of the beans and broth right in the pot. It thickens the base without mashing everything.
- Ladle — For serving. Soup ladles work best for chili.
How to Make It: Step-by-Step
Alright, let’s make this! I’m walking you through exactly how I do it, including the little tricks I’ve picked up.
Step 1: Prep Your Ingredients (5 minutes)
Before you turn on the stove, dice your onion, mince your garlic, and drain your beans and corn. Soften the cream cheese. I know it seems fussy, but once you start cooking, things move fast. Having everything ready means you won’t burn the garlic while looking for the cumin.
Step 2: Sauté the Aromatics (3-4 minutes)
Heat olive oil in your large skillet or Dutch oven over medium heat. Add the diced onion and cook for 3-4 minutes until it’s translucent and soft. Add the minced garlic and cook for 1 minute, stirring constantly. The garlic should smell fragrant, not brown. Browned garlic tastes bitter.
Step 3: Bloom the Spices (1 minute)
Add the cumin, chili powder, salt, and pepper to the onions. Stir constantly for 30-60 seconds. This “blooms” the spices, releasing their essential oils and intensifying the flavor. It’s a small step that makes a big difference.
Step 4: Build the Chili (15 minutes)
Pour in the chicken broth, scraping up any browned bits from the bottom of the pot. Add the chicken breasts (or thighs), the drained beans, corn, and diced green chiles. Stir well. Bring the mixture to a boil, then reduce heat to low. Cover and simmer for 15 minutes, or until the chicken is cooked through (internal temperature of 165°F / 74°C).
Step 5: Shred and Cream (5 minutes)
Remove the chicken from the pot and place it on a cutting board. Use two forks to shred the chicken into bite-sized pieces. While the chicken shreds, stir in the softened cream cheese. It will melt into the broth, creating a thick, velvety base. Return the shredded chicken to the pot and stir to combine.
Step 6: Finish and Serve (2 minutes)
Taste the chili. Add more salt or pepper if needed. If it’s too thick, add a splash of broth. If it’s too thin, let it simmer uncovered for 5 more minutes. Serve hot, topped with shredded cheese, sour cream, and fresh cilantro.
Total Time: About 30 minutes (10 minutes active, 20 minutes mostly hands-off)
Troubleshooting Tips:
- Chili too thin? Simmer uncovered for 5-10 minutes, or use an immersion blender to puree some of the beans.
- Chili too thick? Add more broth or water, a quarter cup at a time.
- Chicken dry? Don’t overcook it. Remove it as soon as it hits 165°F. It will continue cooking slightly from residual heat.
Expert Tips & Tricks
Here’s everything I’ve learned from making this dozens of times. These tips will save you from my mistakes.
Soften That Cream Cheese
This is the #1 tip. If you add cold cream cheese, it will clump and not melt properly. Cube it and microwave for 15 seconds, or leave it out for 30 minutes. It should be soft enough to squish with your finger.
Toast Your Spices
Adding cumin and chili powder to hot oil for 30 seconds before adding liquid unlocks their full flavor. Raw spices taste dusty. Toasted spices taste deep and complex.
Shred, Don’t Dice
Shredded chicken absorbs the chili flavors better than diced chunks. It also gives that comforting, homemade texture. Use two forks or your hands (if you’re brave enough).
Don’t Skip the Rinse
Rinsing your beans removes the starchy liquid that can make the chili slimy. It also reduces sodium. Just dump them in a colander and rinse under cold water.
Pro Trick: The Corn Starch Slurry
If you want extra thickness without blending, mix 1 tablespoon cornstarch with 2 tablespoons cold water. Stir it into the simmering chili. It thickens instantly.
Variations & Substitutions
Once you’ve nailed the basic version, here’s how you can mix it up. I’ve tried all of these.
Spicy White Chicken Chili
Add 1-2 diced jalapeños (seeds removed for less heat) with the onions. Use chipotle peppers in adobo sauce (1-2 peppers, minced) instead of green chiles. This adds a smoky, spicy kick. My brother loves this version.
Black Bean Version
Swap the white beans for black beans. It changes the color but keeps the creamy texture. Black beans hold their shape well and add a earthier flavor.
Turkey White Chili
Use ground turkey instead of chicken breasts. Brown it with the onions first. It’s leaner and cooks faster. I use this version when I’m watching my fat intake.
Vegan White Chili
Skip the chicken and use extra beans and diced tofu. Replace cream cheese with coconut cream or cashew cream. Use vegetable broth. It’s surprisingly good and hearty.
Gluten-Free
This recipe is naturally gluten-free! Just check your broth and spice blends to ensure they’re certified GF. I use Gluten-Free Swanson broth.
Dairy-Free
Replace cream cheese with full-fat coconut cream. Use dairy-free shredded cheese for topping. It’s richer than the original but still creamy.
Serving & Storage
How to Serve:
I usually serve this straight from the pot with crusty bread or tortilla chips. But here are other ways I’ve enjoyed it:
- Toppings Bar: Set out bowls of shredded cheese, sour cream, diced avocado, chopped cilantro, and sliced jalapeños. Let everyone customize their bowl.
- Sides: Serve with cornbread, garlic bread, or a simple green salad with lime vinaigrette. The chili is rich, so something crisp and acidic cuts through it nicely.
- Wine Pairing: A crisp Sauvignon Blanc or a light Pinot Grigio works well. The acidity cuts through the creaminess.
Storage Instructions:
Refrigerator: Store in an airtight container for up to 4 days. The chili will thicken in the fridge—totally normal. Just add a splash of broth when reheating.
Reheating: Best method: Heat in a pot over low-medium heat, stirring frequently. Add a splash of broth or milk to loosen it up. Microwave method: Heat in 1-minute intervals, stirring between. Add liquid if it’s too thick.
Freezing: This does not freeze well. The cream cheese and dairy can separate and become grainy when thawed. I recommend making it fresh or storing in the fridge. If you must freeze, freeze without the cream cheese and cheese topping, then add fresh when reheating.
Nutrition Information
I’m not a nutritionist, but here’s the breakdown if you’re tracking.
Per Serving (based on 6 servings):
- Calories: 380
- Protein: 32g
- Carbs: 28g
- Fiber: 6g
- Sugar: 4g
- Fat: 16g
- Saturated Fat: 9g
- Cholesterol: 85mg
- Sodium: 650mg
What’s Good:
- High in protein from chicken and beans
- Good fiber content from beans and corn
- Calcium from cheese
What to Know:
- Higher in calories due to cream cheese and cheese topping
- Contains dairy
- Use low-sodium broth to reduce sodium
My Take:
Look, this is comfort food. It’s rich and creamy. It’s not a diet recipe. But it’s way better than takeout, costs less, and I know exactly what’s in it. When I want to make it lighter, I use less cheese and more beans. But usually? I just eat a reasonable portion and enjoy it.
Final Thoughts
So that’s my ultra-creamy white chicken chili! I’ve probably talked your ear off at this point, but when you make a recipe this often, you have a lot to say about it.
This has saved weeknight dinners more times than I can count. It’s my answer to “what’s for dinner” when I’m tired, don’t want takeout, and still want something that tastes really good. My kids are happy, my husband’s happy, and I’m happy because I’m not stressed about cooking.
Make it yours! Try different add-ins, swap in your favorite vegetables, adjust the spice level. The best recipes are the ones you adapt to your family’s tastes. If you make this, drop a comment and let me know what you think! I love hearing how recipes turn out in your kitchen. And if something doesn’t work, tell me that too—I’m here to help troubleshoot.
Happy cooking! And I hope your kitchen smells half as good as mine does right now.
Frequently Asked Questions
Can I use canned chicken instead of fresh?
Yes! Canned chicken works perfectly and saves even more time. Just drain it and add it in Step 5 instead of cooking raw chicken. The flavor won’t be as deep as cooking it in the broth, but it’s still delicious and super fast.
Why is my chili watery?
Usually means you didn’t simmer it long enough after adding the cream cheese, or you used too much broth. Let it simmer uncovered for 5-10 minutes to reduce. Or, use an immersion blender to puree some of the beans. This thickens the base naturally.
Can I make this in a slow cooker?
Absolutely. Sauté the onions and garlic first, then add everything except the cream cheese and cheese topping to the slow cooker. Cook on low for 6-8 hours or high for 3-4 hours. Stir in the cream cheese during the last 30 minutes until melted. It’s a great option for meal prep.
How do I reheat leftovers without it getting dry?
Add a splash of milk, cream, or broth to the pot or microwave dish. Heat gently over low heat, stirring frequently. The extra liquid brings back the creamy texture. If you microwave it, do it in short bursts (30 seconds) and stir in between.
Can I freeze this chili?
Not recommended. The cream cheese and dairy-based cheese will separate and become grainy when thawed. It’s best eaten fresh or stored in the fridge for up to 4 days. If you must freeze, freeze without the dairy, then add fresh cream cheese when reheating.
What’s the difference between white chicken chili and regular chili?
Regular chili is usually made with red beans, tomatoes, and beef. White chicken chili uses white beans (cannellini or Great Northern), chicken, and often cream or cream cheese. It’s milder, creamier, and less acidic than traditional red chili.
Can I add vegetables?
Yes! Add diced bell peppers, zucchini, or spinach in the last 10 minutes of cooking. They’ll wilt right in. I love adding a handful of spinach at the end for extra nutrients. It adds color and freshness.
Pin This Recipe!


Ultra-Creamy White Chicken Chili: 30-Minute Easy Dinner
- Total Time: 30 minutes
- Yield: 6 servings 1x
Description
A rich, velvety white chicken chili that comes together in just 30 minutes using pantry staples like cream cheese, canned chicken, and white beans for a comforting weeknight meal.
Ingredients
- 2 pounds boneless, skinless chicken breasts or thighs
- 4 cups low-sodium chicken broth
- 1 large yellow onion, diced
- 4 cloves garlic, minced
- 8 ounces full-fat brick cream cheese, softened
- 1 can (4 oz) diced green chiles
- 2 teaspoons ground cumin
- 1 tablespoon chili powder
- 2 tablespoons olive oil
- Salt and black pepper to taste
- 2 cans (15 oz each) white beans (cannellini or Great Northern), drained and rinsed
- 1 can (15 oz) corn, drained
- 1 cup shredded Monterey Jack or Cheddar cheese
Instructions
- Prep ingredients: Dice onion, mince garlic, drain beans and corn, and soften cream cheese.
- Heat olive oil in a large Dutch oven or stockpot over medium heat. Add diced onion and cook for 3-4 minutes until translucent.
- Add minced garlic and cook for 1 minute until fragrant, stirring constantly.
- Add cumin, chili powder, salt, and pepper. Stir constantly for 30-60 seconds to bloom the spices.
- Pour in chicken broth, scraping up browned bits. Add chicken, beans, corn, and green chiles. Stir well.
- Bring to a boil, then reduce heat to low. Cover and simmer for 15 minutes until chicken reaches 165°F.
- Remove chicken and shred with two forks. Stir in softened cream cheese until melted and smooth.
- Return shredded chicken to the pot and stir to combine.
- Taste and adjust seasoning. Serve hot topped with shredded cheese, sour cream, and cilantro.
Notes
For best results, soften the cream cheese before adding to prevent clumping. Toasting the spices in oil releases their essential oils for deeper flavor. This chili does not freeze well due to the dairy; store in the fridge for up to 4 days. If the chili is too thin, simmer uncovered or use an immersion blender to puree some beans.
- Prep Time: 10 minutes
- Cook Time: 20 minutes
- Category: Main Course
- Cuisine: American
Nutrition
- Serving Size: 1 bowl
- Calories: 380
- Sugar: 4
- Sodium: 650
- Fat: 16
- Saturated Fat: 9
- Carbohydrates: 28
- Fiber: 6
- Protein: 32
Keywords: white chicken chili, creamy chili, 30 minute dinner, weeknight meals, comfort food, easy chili, cream cheese chili



