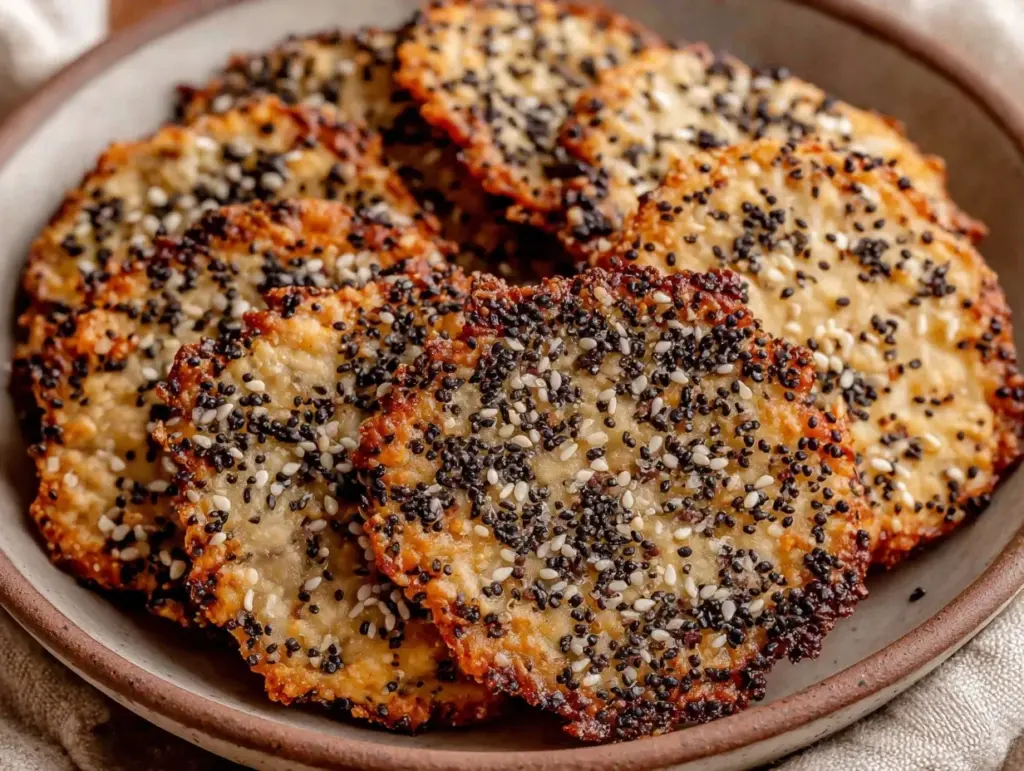
Last Saturday, I was standing in my kitchen with a half-empty jar of sourdough starter staring back at me. It’s that thick, bubbly, slightly tangy discard that accumulates when you’re feeding your culture but not baking bread. Most people toss it. I used to. Then I started making these sourdough discard crackers.
They’ve become my secret weapon for fall entertaining. There’s nothing quite like pulling a tin of crispy, cheesy, herb-flecked crackers off the shelf when guests arrive. They’re better than store-bought, they use ingredients I already have, and they pair perfectly with a glass of wine or a bowl of creamy roasted butternut squash soup. I’ve made these crackers for three different gatherings now, and every time, someone asks for the recipe within ten minutes of tasting them.
Here’s the thing about sourdough discard: it’s often misunderstood. People think it’s just waste. But when you mix it with a little flour, butter, and cheese, it transforms into something incredibly flavorful and texturally complex. The fermentation adds a subtle tang that cuts through the richness of the cheese, and the crackers stay crisp for days if stored properly. This is hands-down the best way to use that leftover starter without feeling guilty.
I’m particular about how I make these. I don’t roll them thin like paper. I like them substantial enough to hold a generous spread of harvest charcuterie board ingredients like sharp cheddar, apple slices, and fig jam. They’re sturdy, savory, and deeply satisfying. If you’ve been looking for a reason to keep your starter alive, this is it.
Why You’ll Love This Sourdough Discard Crackers Recipe
I’ve tested this recipe more times than I care to admit, tweaking the butter-to-flour ratio until it was perfect. These aren’t just “okay” crackers. They’re the kind you eat straight off the baking sheet while the oven is still warm. Here’s why they’ve earned a permanent spot in my autumn rotation:
Zero Waste Cooking — Seriously, this is the ultimate zero-waste recipe. That discard jar in your fridge? It’s about to become dinner. I’ve saved money by not throwing away pounds of starter over the years. Plus, it feels good to use everything.
Stays Crisp for Days — Unlike homemade bread that goes stale by noon, these crackers actually get better as they sit. I keep them in an airtight container for up to a week, and they stay crunchy. I deliberately make a double batch so I have snacks for the week ahead.
Customizable Flavor Profiles — The base is simple, but the toppings are endless. I love rosemary and parmesan, but garlic and cheddar are a close second. You can swap the herbs based on what’s growing in my garden or what’s in season at the farmers market. It’s a blank canvas for savory flavors.
Quick and Easy — You don’t need a mixer or fancy equipment. Just a rolling pin, a baking sheet, and about 20 minutes of active time. I make these while my sourdough bread is proofing. It’s multitasking at its finest.
Perfect for Gifting — I package these in tins with a ribbon and give them as hostess gifts. They’re always a hit. Better than a bottle of wine, in my opinion, because they’re made with love and sourdough tang.
This is my go-to when I need to impress without stress. No complicated techniques, no weird ingredients, just reliable, delicious food that makes everyone happy.
Ingredients You’ll Need for Sourdough Discard Crackers
Here’s the best part: you probably have most of this already. I’m particular about three ingredients here, and I’ll tell you exactly why they matter. The rest is pantry staples and seasonal flair.
Active Sourdough Discard (1 cup / 225g) — This is the star. It needs to be active and bubbly, not dead. If your starter has been in the fridge for a week, feed it once or twice before using it for best results. The fermentation flavor is key.
All-Purpose Flour (1 ½ cups / 190g) — I use unbleached all-purpose. Bread flour makes them too tough, and cake flour is too delicate. AP is the sweet spot for crunch without hardness.
Salted Butter (½ cup / 115g, cold and cubed) — Cold butter is non-negotiable. It creates flaky layers when it melts in the oven. If you use salted butter, reduce the added salt in the recipe. I like the extra flavor from salted butter here.
Grated Parmesan Cheese (½ cup / 50g) — Freshly grate this from a block. Pre-grated cheese has anti-caking agents that prevent proper melting and can make the texture gritty. Parmesan adds umami and helps the crackers brown beautifully.
Garlic Powder (1 teaspoon) — Not fresh garlic. Fresh garlic burns in the oven. Powder gives even flavor distribution. I use a good quality brand like McCormick.
Dried Rosemary (1 teaspoon, finely chopped) — Fresh rosemary can be too woody. Dried is more potent and distributes better. If you have fresh, chop it very finely and use twice the amount.
Sea Salt (½ teaspoon) — Flaky sea salt on top after baking is essential. It adds texture and visual appeal. I use Maldon for this.
Optional Add-ins:
– Cheddar Cheese (½ cup, grated) — Swap half the parmesan for sharp cheddar for a more traditional cracker flavor.
– Poppy Seeds or Sesame Seeds (1 tablespoon) — Adds nice crunch and visual interest.
– Cayenne Pepper (¼ teaspoon) — For a subtle kick. Great with cheddar.
Shopping Shortcuts:
– I buy pre-grated cheese when I’m lazy, but fresh tastes way better. Worth the extra 2 minutes.
– I keep a jar of dried rosemary on my counter year-round. It’s cheap and lasts forever.
Equipment Needed
You don’t need fancy equipment for this. Here’s what I actually use.
Large Mixing Bowl — I use a 4-quart ceramic bowl. Needs to be wide enough to mix the dough easily. My ancient bowl from college still works fine.
Rolling Pin — A standard wooden rolling pin works great. I prefer a French-style straight pin because it gives me better control over thickness.
Baking Sheets — Two large sheet pans. I line them with parchment paper for easy cleanup. Silicone mats work too, but parchment is cheaper and easier to dispose of.
Pastry Cutter or Fork — To cut the butter into the flour. I use a fork because it’s faster for small batches. A pastry blender works too.
Sharp Knife or Pizza Cutter — For scoring the dough before baking. A pizza cutter makes clean lines without sticking.
Whisk — For mixing the dry ingredients. Any size works.
Cooling Rack — Essential for cooling the crackers evenly. Without it, they’ll get soggy from steam.
Airtight Container — For storage. A tin is prettiest for gifting, but a plastic container works fine for home use.
Optional but nice:
– Food Processor — Makes cutting in the butter super fast. Pulse until pea-sized crumbs form.
– Dough Scraper — Helps lift the dough from the counter. Saves frustration.
How to Make It: Step-by-Step
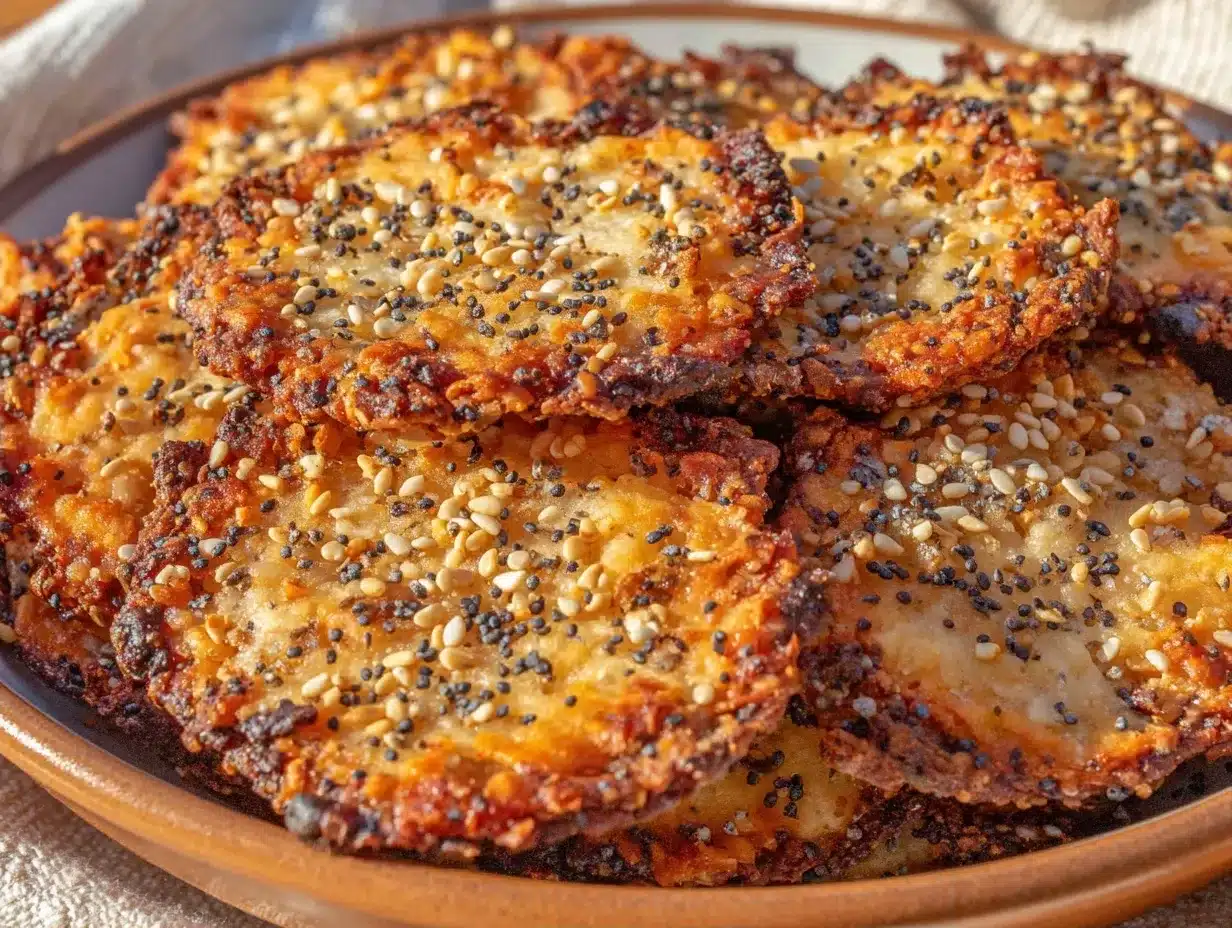
Alright, let’s make this! I’m walking you through exactly how I do it, including the little tricks I’ve picked up.
Step 1: Prep Your Ingredients (5 minutes)
Before you start, measure out your discard, flour, and cheese. Cube your cold butter. I know it seems fussy, but having everything ready makes the assembly way less stressful. Once you start mixing, things move fast.
Step 2: Mix the Dry Ingredients (2 minutes)
In a large bowl, whisk together the flour, garlic powder, dried rosemary, and sea salt. Add the grated Parmesan and toss to combine. This ensures the flavor is distributed evenly throughout the dough.
Step 3: Cut in the Butter (3 minutes)
Add the cold, cubed butter to the flour mixture. Use a pastry cutter or fork to cut the butter into the flour until it resembles coarse crumbs with some pea-sized pieces remaining. Don’t overmix. Those butter bits are what create flaky layers. If using a food processor, pulse 5-6 times.
Step 4: Add the Sourdough Discard (2 minutes)
Gradually pour in the sourdough discard while mixing gently with a wooden spoon. The dough will come together into a shaggy ball. It should be slightly sticky but manageable. If it’s too dry, add a teaspoon of water. If too wet, add a sprinkle of flour.
Step 5: Roll and Score the Dough (5 minutes)
Turn the dough out onto a lightly floured surface. Divide it in half. Roll one half out to about ⅛-inch thickness. This is crucial. Thicker dough won’t crisp up. Use a pizza cutter or sharp knife to score the dough into squares or rectangles. Don’t cut all the way through—just score deep enough to create lines.
Step 6: Bake (15-20 minutes)
Transfer the scored dough to a parchment-lined baking sheet. Bake at 375°F (190°C) for 15-20 minutes, or until the edges are golden brown and the crackers are firm to the touch. Rotate the pan halfway through for even baking. They will continue to crisp up as they cool.
Step 7: Finish and Cool (10 minutes)
While still warm, sprinkle with flaky sea salt. Let them cool completely on a wire rack. This step is vital. If you break them while warm, they’ll crumble. Once cool, they’ll snap cleanly along the scored lines.
Total Time: About 30 minutes (10 minutes active, 20 minutes baking/cooling)
Built-in Troubleshooting:
– Dough too sticky? Add a tablespoon of flour at a time.
– Crackers too soft? Roll them thinner next time. Thickness is key.
– Edges burning? Lower the oven temperature to 350°F (175°C) and watch closely.
Expert Tips & Tricks
Here’s everything I’ve learned from making these dozens of times. These tips will save you from my mistakes.
Keep the Butter Cold
This is the #1 tip. Warm butter melts into the flour instead of creating layers. I even chill my bowl before mixing. If your kitchen is hot, put the dough in the fridge for 15 minutes before rolling.
Roll Thin and Even
Inconsistent thickness leads to uneven baking. Some crackers burn while others are raw. Use a rolling pin with thickness guides if you have them. Or just practice your feel. I aim for a consistent ⅛-inch.
Don’t Skip the Resting Time
After rolling, let the dough rest for 10 minutes before baking. This relaxes the gluten and prevents shrinking. It also helps the butter firm up again.
Use Flaky Salt on Top
Table salt disappears into the dough. Flaky sea salt stays on top, providing bursts of savory flavor and a pretty finish. It’s worth the extra dollar.
Cool Completely
I know it’s tempting to eat them warm. But they’re not fully crisp until they cool. Patience pays off. Warm crackers are chewy; cooled crackers are crunchy.
Common Mistakes (and how to avoid them):
Mistake: Crackers are tough
Fix: You overworked the dough or rolled it too thick. Handle the dough as little as possible. Roll it thin.
Mistake: Crackers are bland
Fix: You didn’t add enough salt or cheese. Taste your discard first—if it’s very sour, you might need a touch more salt to balance it.
Pro Tricks I’ve Learned:
For Extra Crunch
Brush the tops with a little beaten egg wash before baking. It adds a glossy finish and extra crispness.
For Flavor Variations
Add ½ teaspoon of onion powder or smoked paprika to the dry mix. It changes the profile completely.
Make-Ahead Strategy
You can make the dough and freeze it for up to 3 months. Roll and bake straight from frozen, adding 2-3 minutes to the bake time.
Variations & Substitutions
Once you’ve nailed the basic version, here’s how you can mix it up. I’ve tried all of these.
Cheddar & Chive Version
Swap Parmesan for sharp cheddar. Add 2 tablespoons of fresh chopped chives. Classic and comforting. My kids prefer this version.
Garlic & Herb
Double the garlic powder. Add 1 teaspoon of dried thyme and ½ teaspoon of dried oregano. Great with roasted vegetables.
Spicy Jalapeño
Add 1 finely chopped jalapeño and ½ teaspoon cayenne pepper. The heat cuts through the richness of the cheese. Perfect for game day.
Sesame & Soy
Add 1 tablespoon of soy sauce to the discard. Top with black sesame seeds. Asian-inspired and delicious.
Dietary Modifications:
Gluten-Free
Use a 1:1 gluten-free flour blend. The texture will be slightly more crumbly but still tasty. I’ve used Bob’s Red Mill and it works well.
Dairy-Free
Replace butter with cold coconut oil. Use nutritional yeast instead of Parmesan. It’s different but still savory.
Vegan
Use the dairy-free version above. The sourdough discard makes it feel rich and complex.
Serving & Storage
How to Serve:
I usually serve these warm from the oven with a side of roasted chicken and squash or alongside a bourbon apple cider punch for parties. They’re also perfect with a simple cheese board.
Side Dishes:
– Crispy sage butternut squash soup
– Sharp cheddar and apple slices
– Fig jam and honey
Toppings Bar:
When I have guests, I put out: extra sea salt, red pepper flakes, fresh herbs, different cheeses. Everyone customizes their snack.
Storage Instructions:
Refrigerator:
Store in an airtight container for up to 1 week. They stay crisp if sealed well.
Freezer:
These freeze beautifully. Store in a freezer-safe bag for up to 3 months. Reheat at 350°F for 5 minutes to restore crispness.
Pro tip: If they lose their crunch, pop them in the oven at 300°F for 5 minutes. They’ll come back to life.
Nutrition Information
I’m not a nutritionist, but here’s the breakdown if you’re tracking.
Per Serving (based on 24 crackers):
– Calories: 85
– Protein: 2g
– Carbs: 8g
– Fiber: 0g
– Sugar: 0g
– Fat: 5g
– Saturated Fat: 3g
– Cholesterol: 12mg
– Sodium: 120mg
– Calcium: 30mg
What’s Good:
– Low carb compared to bread
– Protein from cheese
– No added sugar
What to Know:
– Contains dairy and gluten
– Moderate sodium (use low-sodium cheese to reduce)
My Take:
“Look, these are a snack. They’re not a health food. But they’re better than store-bought crackers loaded with preservatives. I know exactly what’s in them. When I want to make them lighter, I reduce the butter and use less cheese. But usually? I just enjoy a handful and love the flavor.”
Final Thoughts
So that’s my go-to sourdough discard crackers! I’ve probably talked your ear off at this point, but when you make a recipe this often, you have a lot to say about it.
This has saved my pantry more times than I can count. It’s my answer to “what’s for snack” when I’m tired, don’t want to buy processed food, and still want something that tastes really good. My kids are happy, my husband’s happy, and I’m happy because I’m not wasting my starter.
Make it yours! Try different herbs, swap in your favorite cheese, adjust the garlic. The best recipes are the ones you adapt to your family’s tastes.
If you make this, drop a comment and let me know what you think! I love hearing how recipes turn out in your kitchen. And if something doesn’t work, tell me that too—I’m here to help troubleshoot.
Happy baking! And I hope your kitchen smells half as good as mine does right now.
Frequently Asked Questions
Q: Can I use fresh sourdough starter instead of discard?
A: Yes! In fact, fresh starter works great. Just adjust the flour amount slightly if the starter is very wet. Discard is usually thicker, so you might need a touch more flour. Fresh starter adds more yeast activity, so the crackers might puff up slightly more.
Q: My crackers are too soft—what happened?
A: Usually means you rolled them too thick or didn’t bake them long enough. Roll them to ⅛-inch and bake until the edges are deeply golden. They will continue to crisp as they cool.
Q: Can I make these ahead for a party?
A: Absolutely! Make them 2-3 days ahead and store in an airtight container. They actually taste better after a day as the flavors meld. Just reheat briefly before serving if you want them extra warm.
Q: Why did my crackers burn?
A: The cheese burns easily. Keep an eye on them after 12 minutes. If they’re browning too fast, cover with foil or lower the oven temperature.
Q: Can I freeze the dough?
A: Yes! Shape the dough into a disc, wrap tightly in plastic, and freeze for up to 3 months. Thaw in the fridge overnight before rolling and baking.
Q: Can I use whole wheat flour?
A: You can, but it will make the crackers denser. I recommend substituting only half the all-purpose flour with whole wheat for a lighter texture.
Q: How do I store them to keep them crisp?
A: Airtight is key. Use a tin or a ziplock bag with the air squeezed out. If you live in a humid climate, add a silica packet to the container.
Pin This Recipe!
Sourdough Discard Crackers: Best Seasonal Batch
- Total Time: 30 minutes
- Yield: 24 servings 1x
Description
Crispy, cheesy, and herb-flecked crackers made with active sourdough discard. These zero-waste snacks are perfect for fall entertaining, pair well with soup or charcuterie, and stay crisp for days.
Ingredients
- 1 cup (225g) active sourdough discard
- 1 ½ cups (190g) all-purpose flour
- ½ cup (115g) cold salted butter, cubed
- ½ cup (50g) freshly grated Parmesan cheese
- 1 teaspoon garlic powder
- 1 teaspoon dried rosemary, finely chopped
- ½ teaspoon sea salt
- Flaky sea salt (e.g., Maldon) for topping
Instructions
- Preheat oven to 375°F (190°C) and line two large baking sheets with parchment paper.
- In a large mixing bowl, whisk together the flour, garlic powder, dried rosemary, and sea salt. Add the grated Parmesan and toss to combine.
- Add the cold, cubed butter to the flour mixture. Use a pastry cutter or fork to cut the butter into the flour until it resembles coarse crumbs with some pea-sized pieces remaining.
- Gradually pour in the sourdough discard while mixing gently with a wooden spoon. The dough will come together into a shaggy ball. If too dry, add a teaspoon of water; if too wet, add a sprinkle of flour.
- Turn the dough out onto a lightly floured surface and divide it in half. Roll one half out to about ⅛-inch thickness.
- Use a pizza cutter or sharp knife to score the dough into squares or rectangles. Do not cut all the way through.
- Transfer the scored dough to the prepared baking sheets. Bake for 15-20 minutes, rotating the pan halfway through, until edges are golden brown and crackers are firm.
- While still warm, sprinkle with flaky sea salt. Let cool completely on a wire rack before breaking along the scored lines.
Notes
Keep the butter cold to ensure flaky layers. Roll the dough thin (⅛-inch) for crispiness. Let crackers cool completely to ensure they snap cleanly. If crackers are too soft, roll thinner next time. If edges burn, lower oven temperature to 350°F. Dough can be frozen for up to 3 months.
- Prep Time: 10 minutes
- Cook Time: 20 minutes
- Category: Appetizer
- Cuisine: American
Nutrition
- Serving Size: 1 cracker
- Calories: 85
- Sodium: 120
- Fat: 5
- Saturated Fat: 3
- Carbohydrates: 8
- Protein: 2
Keywords: sourdough discard, crackers, zero waste, fall recipes, appetizer, cheese crackers, sourdough recipes, party snacks



