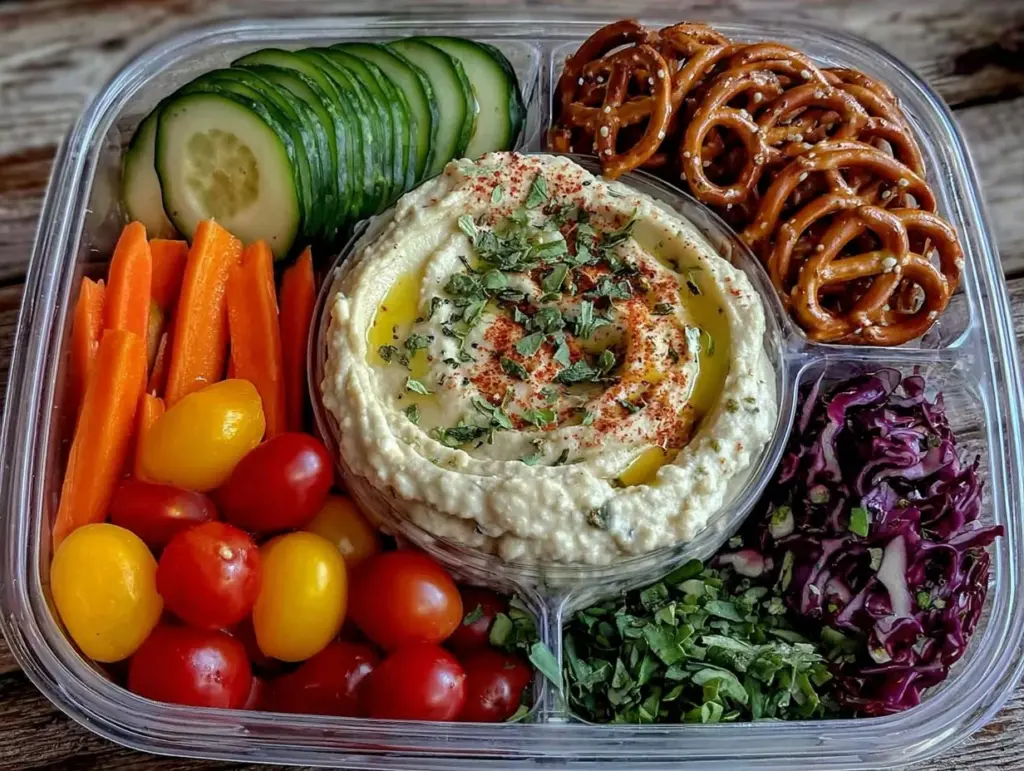
Last Tuesday, I was standing in the kitchen at 6:45 AM, staring into the abyss of my pantry while my kids demanded breakfast. It was the third day of school, and I was already exhausted. The lunchbox situation was a disaster. They were rejecting the same old cheese sticks and apple slices. I knew if I kept serving boring lunches, I’d be buying $8 cafeteria sandwiches every single day, and my bank account definitely wasn’t ready for that. Plus, I wanted them eating something that didn’t come in a plastic wrapper.
I had a half-jar of hummus in the fridge, a bag of baby carrots that had seen better days, and some colorful bell peppers crying for attention. So, I did what any budget-savvy parent does: I improvised. I chopped the veggies into bright, bite-sized pieces, arranged them in a little rainbow pattern in their lunchboxes, and added a generous dollop of that hummus. I expected them to pick out the carrots and leave the rest. Instead, my seven-year-old came home and asked, “Can we have the snack box again tomorrow?”
That was the moment the rainbow veggie hummus snack box was born. It wasn’t planned. It wasn’t fancy. But it solved three huge problems: it was cheap, it was healthy, and it was fun enough to get excited about. I’ve made these boxes for the last month, tweaking the veggies and hummus flavors, and I’m convinced this is the best way to stretch a grocery budget while keeping your kids fed and happy. If you’re tired of spending a fortune on organic snacks or fighting over what to pack, this method is your new best friend.
Why You’ll Love This Lunchbox Hack
I’ve been packing lunches for two picky eaters for six years, and I’ve learned that the secret to success isn’t gourmet ingredients—it’s variety and color. Here’s why this rainbow veggie hummus snack box has completely changed our school mornings:
- It’s Stupidly Cheap — Seriously, if you buy store-brand hummus and seasonal veggies, each box costs less than $1. That’s a fraction of the cost of pre-packaged snack packs. I use up veggies that are about to wilt, which stops them from going in the trash.
- Prep Takes 5 Minutes — I do all the chopping on Sunday night. By Monday, I’m just scooping hummus and dropping in veggies. It’s faster than making a sandwich. I’ve rushed through this process while helping my kids with homework, and it still works.
- They Actually Eat the Veggies — Dipping is key. Kids love dipping. When veggies are paired with creamy hummus, they stop being “vegetables” and start being a fun snack. I’ve seen my son eat three cups of bell peppers because he was having fun with the colors.
- Protein Packed — Chickpeas in hummus give them protein to last until lunch. It’s not just empty carbs. It keeps them full and focused in class, unlike those sugary granola bars that crash an hour later.
- Zero Food Waste — I chop everything into similar sizes so I can use up the ends of carrots, the tops of celery, and the slightly bruised cucumbers. Nothing goes to waste.
This is my go-to when I need lunch to just work. No complicated techniques, no weird ingredients, just reliable, delicious food that makes everyone happy and keeps my wallet intact.
Ingredients You’ll Need for the Perfect Box
Here’s the best part: you probably have most of this already. The beauty of this rainbow veggie hummus snack box is that it relies on pantry staples and whatever produce is on sale. I’m particular about the hummus, but the veggies can be whatever is in your crisper drawer.
For the Hummus Base
Store-bought or homemade hummus (1 jar / 15 oz) — I usually buy the store-brand plain or roasted garlic hummus to save money. It’s creamy and consistent. If you want to make your own, check out my vegan creamy coconut chickpea curry for inspiration on how good chickpeas can be, though this recipe is much simpler. Just make sure it’s smooth so it doesn’t get stuck in the lid of the lunchbox.
Optional flavor boosters (1 teaspoon each) — If the plain hummus is too boring, I swirl in a teaspoon of pesto or a dash of hot sauce. It adds a kick that older kids love. Keep it simple for younger ones.
For the Rainbow Veggies
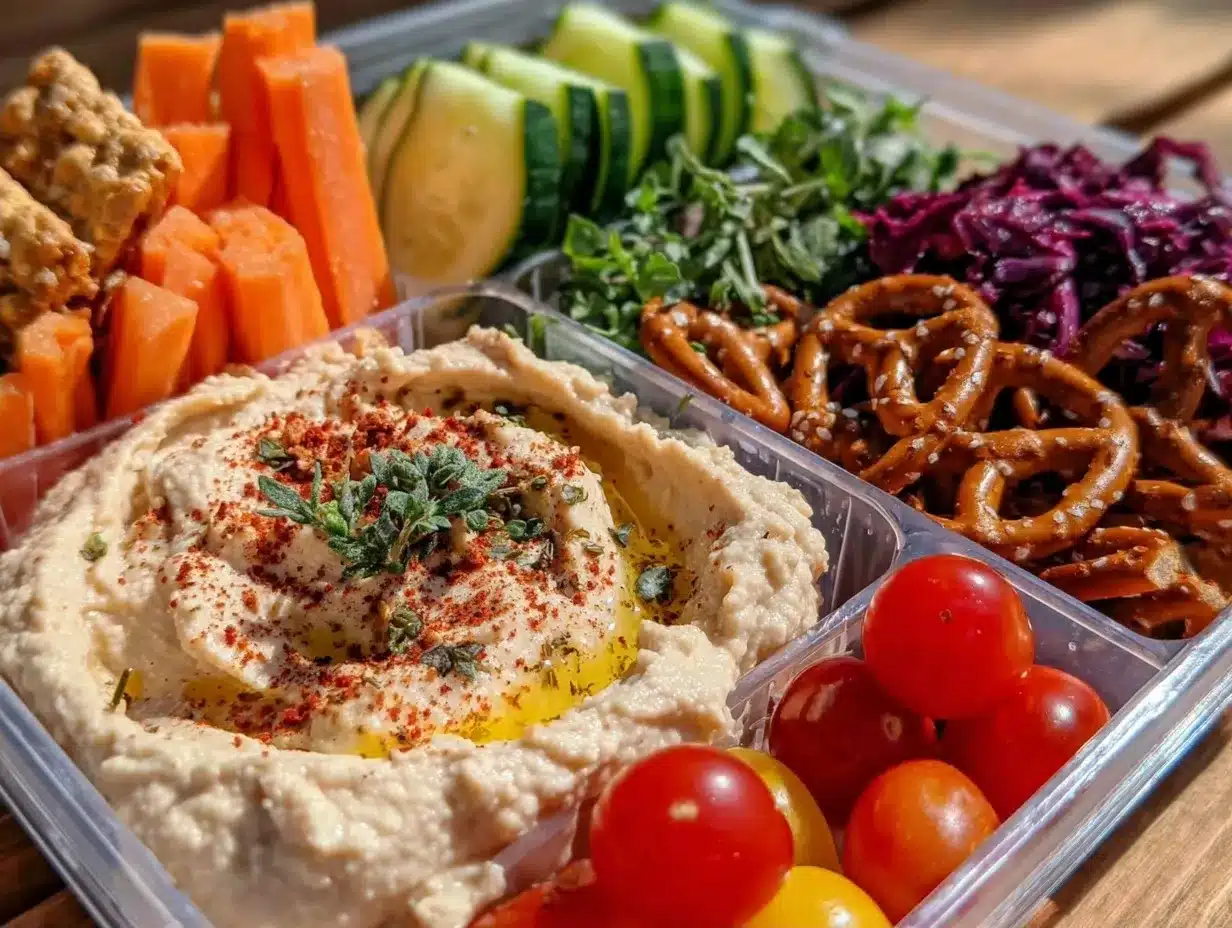
Red bell pepper (1 medium, diced / about 100g) — Sweet and crunchy. I remove the seeds and chop it into small squares. It’s the star of the red section. Sweet peppers can be pricey, so buy them when they’re on sale or look for the slightly dented ones.
Orange bell pepper or carrots (1 medium or 2 small / about 100g) — I alternate between orange peppers and baby carrots. Carrots are cheaper and last longer. If using carrots, chop them into sticks or small coins. They add a nice snap.
Yellow bell pepper or yellow cherry tomatoes (1 medium or 1 cup / about 100g) — Yellow peppers are milder and sweeter. Cherry tomatoes are a great sub, but I recommend putting them in a separate small container so they don’t leak. If they burst, they make a mess. For a budget tip, I often use leftover loaded baked potato salad veggies like diced celery or onions if I have extra, but peppers are the classic choice here.
Green cucumber or snap peas (1 small or 1 cup / about 100g) — Cucumbers are refreshing and cheap. I peel them partially for a striped look, which kids find fun. Snap peas are great too, but they can be pricey out of season.
Red cabbage or purple grapes (1 cup shredded or 1 cup / about 100g) — For the purple section, I use shredded red cabbage. It stays crunchy for days. If I’m in a rush, I use purple grapes, but again, watch for leaks. Cabbage is super cheap and stretches the box visually.
White cauliflower or feta cheese cubes (1 cup / about 100g) — For the white section, I use small cauliflower florets. They’re mild and absorb the hummus flavor well. If my kids are having a dairy day, I swap them for small cubes of feta or mozzarella.
Whole wheat pita chips or pretzels (1 handful / about 30g) — This is the carb component. It makes the snack more filling. I buy the large bags and portion them out into small bags to save money. It also acts as a “dipper” for the veggies.
Equipment Needed
You don’t need fancy equipment for this. Here’s what I actually use:
Sharp knife — For chopping the peppers and cucumbers. A dull knife makes you cry more—learned this the hard way with onions, though these veggies are easier.
Cutting board — Any size works. I use plastic for easier cleanup.
Measuring cups — I eyeball it mostly, but having a 1-cup measure helps me portion the veggies evenly for each box.
Lunchboxes with compartments — You need a box with at least 4-5 compartments. I use the bento-style boxes because they keep the hummus separate from the veggies. If you don’t have one, use small reusable containers or even silicone cupcake liners to create sections.
Spoon or small spatula — For scooping the hummus neatly into its compartment.
Plastic bags — For storing the pre-chopped veggies in the fridge. I use gallon-sized bags and lay them flat to save space.
How to Make It: Step-by-Step
Alright, let’s make this! I’m walking you through exactly how I do it, including the little tricks I’ve picked up from packing hundreds of these boxes.
Step 1: Prep the Veggies (10 minutes)
Wash all your produce thoroughly. This is non-negotiable. If you’re using carrots, peel them and chop them into sticks or coins. For peppers, remove the seeds and white membranes, then chop into bite-sized squares. The key is uniformity. If the pieces are too big, they’re hard to dip. If they’re too small, they fall through the cracks. Aim for 1-inch pieces. Chop your cucumber into rounds or half-moons. If using cabbage, shred it thinly. Put everything into separate piles on your cutting board.
Step 2: Portion the Hummus (2 minutes)
Scoop about 2-3 tablespoons of hummus into one compartment of each lunchbox. If you’re making multiple boxes, do this first so the hummus can settle. I usually make all the boxes at once on Sunday. If the hummus is too thick, stir in a teaspoon of water or olive oil to make it dip-friendly. You want it creamy, not stiff.
Step 3: Arrange the Rainbow (5 minutes)
This is the fun part. Start with the red section: fill it with diced red bell pepper. Next, the orange section: add carrots or orange pepper. Then yellow: yellow pepper or tomatoes. Green: cucumber or snap peas. Purple: cabbage or grapes. White: cauliflower or cheese. Try to keep the colors distinct. If you’re using a round container, arrange them in a circle like a color wheel. If it’s a square bento box, go row by row. The visual appeal is what gets kids excited.
Step 4: Add the Crunch (2 minutes)
Toss a handful of pita chips or pretzels into the remaining compartment or on top of the veggies. This adds texture and makes the snack more substantial. If you’re watching sodium, skip the pretzels and just add extra veggies. But honestly, the carbs help keep them full until lunch.
Step 5: Pack and Go
Close the lid tightly. Shake the box gently to make sure everything stays in place. If you’re using an ice pack, place it on the side or bottom of the lunch bag. These boxes are sturdy, but hummus can leak if the lid isn’t secure. I’ve learned that the hard way with a messy backpack. Put the box in the lunch bag and you’re done.
Total Time: About 20 minutes for 5 boxes. That’s 4 minutes per box. You can’t beat that.
Expert Tips & Tricks
Here’s everything I’ve learned from making these boxes dozens of times. These tips will save you from my mistakes.
Buy Store-Brand Hummus — There’s no need to spend $5 on premium hummus for school lunches. The store-brand stuff is just as good, often creamier, and half the price. I buy the large jars and portion them out. If you run out, you can always make a quick batch using canned chickpeas.
Prep Veggies in Batches — I chop all my veggies for the week on Sunday night. I store them in separate gallon bags in the fridge. This way, Monday morning is just assembly. If you’re short on time, buy pre-cut veggies. It’s more expensive, but worth it if you’re rushing.
Keep Hummus Cold — Hummus is a dairy-adjacent food (it has oil and lemon), so it needs to stay cold. Use a good ice pack. If the hummus gets warm, it can spoil or separate. I always check the temperature of my lunch bag before dropping the box in.
Rotate the Colors — Don’t serve the same veggies every day. Kids get bored. One week it’s peppers, the next it’s radishes and broccoli. As long as it’s colorful and crunchy, it works. I use whatever veggies are on sale. This week, I used purple carrots because they were 50% off.
Use Silicone Liners — If you don’t have a compartmentalized box, use silicone cupcake liners as dividers. They’re cheap, reusable, and make cleanup a breeze. Just wash them and reuse them next week.
Variations & Substitutions
Once you’ve nailed the basic version, here’s how you can mix it up. I’ve tried all of these.
Guacamole Box — Swap hummus for guacamole. Add black beans and corn. It’s a fun twist that feels like a mini taco salad. My kids love the creamy texture.
Tzatziki Box — Use tzatziki instead of hummus. Add cucumber, feta, and olives. It’s a Greek-inspired box that’s refreshing and tangy. Great for hot days.
Alfredo Dip Box — Use a thick alfredo sauce as the dip. Add broccoli florets and cauliflower. It’s indulgent but still veggie-heavy. I use leftover one-pot creamy cajun sausage pasta sauce for this, thinned out slightly.
Gluten-Free — Skip the pita chips and use rice cakes or gluten-free pretzels. The rest is naturally gluten-free.
Nut-Free — This recipe is naturally nut-free, which is perfect for school policies. Just check your hummus label to ensure no cross-contamination.
Lower-Carb — Skip the chips entirely. Add extra veggies and maybe some hard-boiled eggs for protein. It’s still satisfying without the carbs.
Serving & Storage
How to Serve: I usually pack these in the morning and send them off. But if you’re having a party, arrange them on a platter with extra hummus on the side. It’s a hit with kids and adults alike.
Side Dishes: These boxes are complete snacks. But if you need more, add a piece of fruit or a small juice box. I often pair them with a piece of dark chocolate for a treat.
Storage Instructions: Store pre-chopped veggies in the fridge for up to 5 days. Keep them in airtight containers or bags with a paper towel to absorb moisture. This keeps them crisp. Hummus lasts about 5-7 days in the fridge after opening. If you make homemade hummus, it lasts about 3-4 days.
Freezing: Do not freeze hummus. It separates and becomes grainy. Veggies don’t freeze well either, especially peppers and cucumbers, as they get mushy when thawed. Make these fresh every day.
Nutrition Information
I’m not a nutritionist, but here’s the breakdown if you’re tracking. This is per box (approximate):
- Calories: 250
- Protein: 8g
- Carbs: 35g
- Fiber: 6g
- Sugar: 8g
- Fat: 10g
- Sodium: 300mg
What’s Good: High in fiber from the veggies and chickpeas. Low in saturated fat. Good source of plant-based protein. What to Know: Sodium can vary depending on the hummus brand. Use low-sodium hummus if you’re watching salt. It’s not a diet food, but it’s way healthier than most pre-packaged snacks.
Final Thoughts
So that’s my rainbow veggie hummus snack box! I’ve probably talked your ear off at this point, but when you make a recipe this often, you have a lot to say about it. This has saved my lunchbox routine more times than I can count. It’s my answer to “what do I pack?” when I’m tired, don’t want to cook, and still want something healthy. My kids are happy, I’m happy because it’s cheap, and I’m happy because I’m not wasting food.
Make it yours! Try different dips, swap in your favorite veggies, adjust the colors. The best recipes are the ones you adapt to your family’s tastes. If you make this, drop a comment and let me know what you think! I love hearing how recipes turn out in your kitchen. And if something doesn’t work, tell me that too—I’m here to help troubleshoot.
Frequently Asked Questions
Q: Can I use homemade hummus?
A: Absolutely! Homemade hummus is delicious, but it might be thinner than store-bought. If it’s too runny, add more tahini or chickpeas to thicken it. It works great, just make sure it’s chilled before packing.
Q: Why did my veggies get soggy?
A: Usually means they weren’t dried thoroughly after washing. Pat them dry with a paper towel before chopping. Also, keep them in the fridge until the last minute. Moisture is the enemy of crunch.
Q: Can I make this ahead for the whole week?
A: Yes! Chop all the veggies on Sunday and store them in separate containers. Assemble the boxes on Monday morning. This saves you time during the week. Just make sure the hummus is fresh.
Q: My kid hates hummus. What can I use?
A: Try ranch dressing, guacamole, or a yogurt-based dip. Kids often prefer tangy or creamy dips. Experiment until you find one they like. The key is the dipping action.
Q: How do I prevent leaks?
A: Use a tight-fitting lid. If you’re using a bento box, make sure the compartments are sealed. I also recommend placing the box upright in the lunch bag to minimize movement.
Q: Can I add fruit?
A: Yes! Berries, grapes, or apple slices work well. Just keep them in a separate compartment to avoid staining the veggies or making them sweet.
Q: Is this safe for school nut policies?
A: Yes, this recipe is naturally nut-free. Just check your hummus label to ensure no cross-contamination with nuts during processing.
Pin This Recipe!
Rainbow Veggie Hummus Snack Boxes
- Total Time: 15 minutes
- Yield: 5 servings 1x
Description
A budget-friendly, healthy, and fun school lunch hack featuring a rainbow of chopped vegetables paired with creamy hummus and crunchy pita chips.
Ingredients
- 1 jar (15 oz) store-bought or homemade hummus (plain or roasted garlic)
- 1 medium red bell pepper, diced (approx. 100g)
- 1 medium orange bell pepper or 2 small baby carrots, chopped (approx. 100g)
- 1 medium yellow bell pepper or 1 cup yellow cherry tomatoes (approx. 100g)
- 1 small cucumber or 1 cup snap peas, sliced (approx. 100g)
- 1 cup shredded red cabbage or 1 cup purple grapes (approx. 100g)
- 1 cup small cauliflower florets or feta cheese cubes (approx. 100g)
- 1 handful whole wheat pita chips or pretzels (approx. 30g)
Instructions
- Wash all produce thoroughly and pat dry to ensure crispness.
- Chop vegetables into uniform 1-inch pieces: dice peppers, stick or coin carrots, slice cucumber, shred cabbage, and trim cauliflower.
- Scoop 2-3 tablespoons of hummus into one compartment of each lunchbox. If hummus is too thick, stir in a teaspoon of water or olive oil.
- Arrange the chopped vegetables in the remaining compartments by color: red (pepper), orange (carrots/pepper), yellow (pepper/tomatoes), green (cucumber/peas), purple (cabbage/grapes), and white (cauliflower/cheese).
- Add a handful of pita chips or pretzels to the final compartment or on top of the veggies for crunch and substance.
- Close the lid tightly and place the box in a lunch bag with an ice pack to keep the hummus cold.
Notes
Pre-chop veggies on Sunday night and store in airtight bags with a paper towel to absorb moisture. Keep hummus cold with an ice pack. Do not freeze the components as texture will suffer. Ensure hummus is thick enough to prevent leaking.
- Prep Time: 10 minutes
- Cook Time: 0 minutes
- Category: Snack
- Cuisine: American
Nutrition
- Serving Size: 1 snack box
- Calories: 250
- Sugar: 8
- Sodium: 300
- Fat: 10
- Saturated Fat: 2
- Carbohydrates: 35
- Fiber: 6
- Protein: 8
Keywords: school lunch, budget meals, healthy snacks, hummus, veggie boxes, kid-friendly, meal prep, nut-free



