It was late October, the kind of evening where the wind howls just enough to make you want to cancel all plans and stay in your pajamas, and my oven was already running hot enough to melt the hinges. I had promised my in-laws I’d bring dessert to their family gathering, and my first instinct was to bake a traditional pumpkin pie. But then I looked at the clock. It was 4 PM. The party started at 7 PM. I had three hours to bake, cool, chill, and transport a pie that usually takes all day to get right. I was sweating before I even put on my apron.
I’ve been in this kitchen enough times to know that when the clock is ticking and the stakes are high, you don’t reach for complicated recipes. You reach for what works. That afternoon, I raided the pantry for gingersnap cookies—those crisp, spicy little discs that smell like Christmas in July—and whipped together a crust that didn’t need a single minute in the oven. I blended canned pumpkin with a touch of cream cheese and warm spices, poured it into the crumbly, buttery base, and threw it in the fridge while I panicked about whether my husband would remember to buy wine.
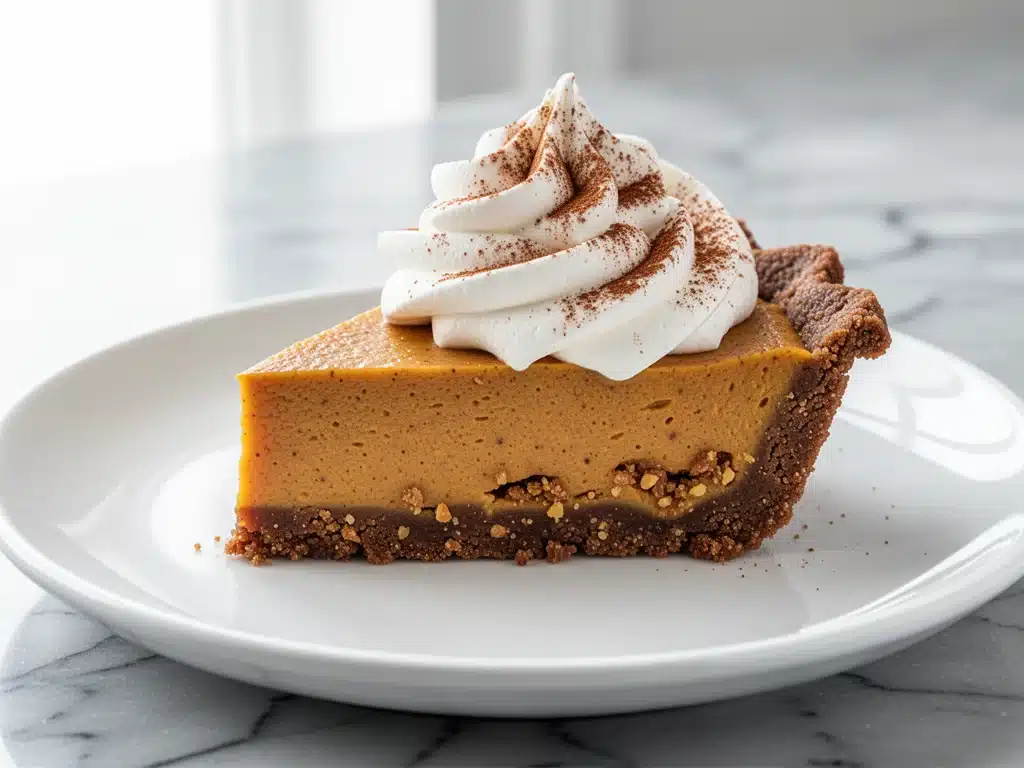
When I pulled it out two hours later, the texture was impossibly smooth, and the gingersnap crust provided this incredible, crunchy contrast that made everyone gasp. My father-in-law, a man who usually sticks to apple pie because he’s “too old for fussy desserts,” went back for seconds. Twice. That’s when I knew I had found the holy grail of autumn desserts. This no-bake pumpkin pie with gingersnap cookie crust is now my official replacement for any oven-baked version. It’s easier, it’s fresher, and honestly? It’s better than takeout from the fancy bakery down the street. I’ve made this for Thanksgiving, for Halloween parties, and just because I was craving pumpkin on a Tuesday. It never fails to impress, and it never fails to save my sanity.
Why You’ll Love This Recipe
There are a lot of pumpkin pie recipes out there, but this no-bake version has completely changed how I approach holiday entertaining. I’ve tested this recipe more times than I care to admit (probably 12 times in the last two years alone), and here’s exactly why it keeps coming back to the top of my list.
- Zero Oven Heat — Seriously, you don’t need to turn on your oven. This is huge in the fall when you’re trying to bake a turkey, roast vegetables, and make stuffing all at once. Keeping your kitchen cool is a game-changer for your sanity.
- Crust That Actually Stays Crunchy — The biggest complaint about no-bake pies is a soggy bottom. Not here. By using crushed gingersnaps and butter, you get a crust that holds up perfectly in the fridge. It stays crisp until the very last bite.
- Texture Heaven — The filling is rich and dense, almost like a cheesecake, but with all the warm flavors of pumpkin pie. The contrast between the silky filling and the crunchy, spiced cookie crust is addictive.
- Make-Ahead Friendly — This pie needs to chill for at least four hours, which means you can make it the day before. I actually prefer it this way because the flavors meld together overnight. It’s the ultimate stress-free dessert.
- Simple Ingredients — You don’t need a trip to a specialty store. Everything is available at your local grocery store. No exotic spices, no hard-to-find creams. Just good, honest fall flavors.
- Customizable Spice Level — Love ginger? Use more gingersnaps. Prefer cinnamon? Adjust the spice blend. This recipe bends to your taste buds, not the other way around.
Real talk: this pie has saved me more holiday disasters than I can count. It’s reliable, it’s delicious, and it looks fancy enough to serve to your most picky relatives. If you’re looking for a dessert that delivers maximum flavor with minimum effort, this is it.
Ingredients You’ll Need
One of the best parts about this no-bake pumpkin pie with gingersnap cookie crust is the simplicity of the ingredient list. You probably have most of this already in your pantry. I’m particular about three things here: the cookies, the cheese, and the pumpkin. Get these right, and you’re golden.
For the Gingersnap Crust
Gingersnap cookies (3 cups / about 240g, crushed) — This is the star of the show. Use the crisp, store-bought kind, not the soft, chewy bakery ones. The crisp ones crush into fine crumbs that bind together perfectly. I usually buy two boxes of the standard brand because they’re cheap and reliable.
Unsalted butter (6 tablespoons / 85g, melted) — This binds the crumbs together. I use unsalted so I can control the saltiness, but if you only have salted, just reduce the added salt in the crust by half. Melt it in the microwave—don’t burn it!
Granulated sugar (2 tablespoons / 25g) — The cookies are already sweet, but a little sugar helps them caramelize slightly in the crust and enhances the ginger flavor. Don’t skip it.
Salt (¼ teaspoon) — Just a pinch to balance the sweetness. It makes the ginger pop.
For the Pumpkin Filling
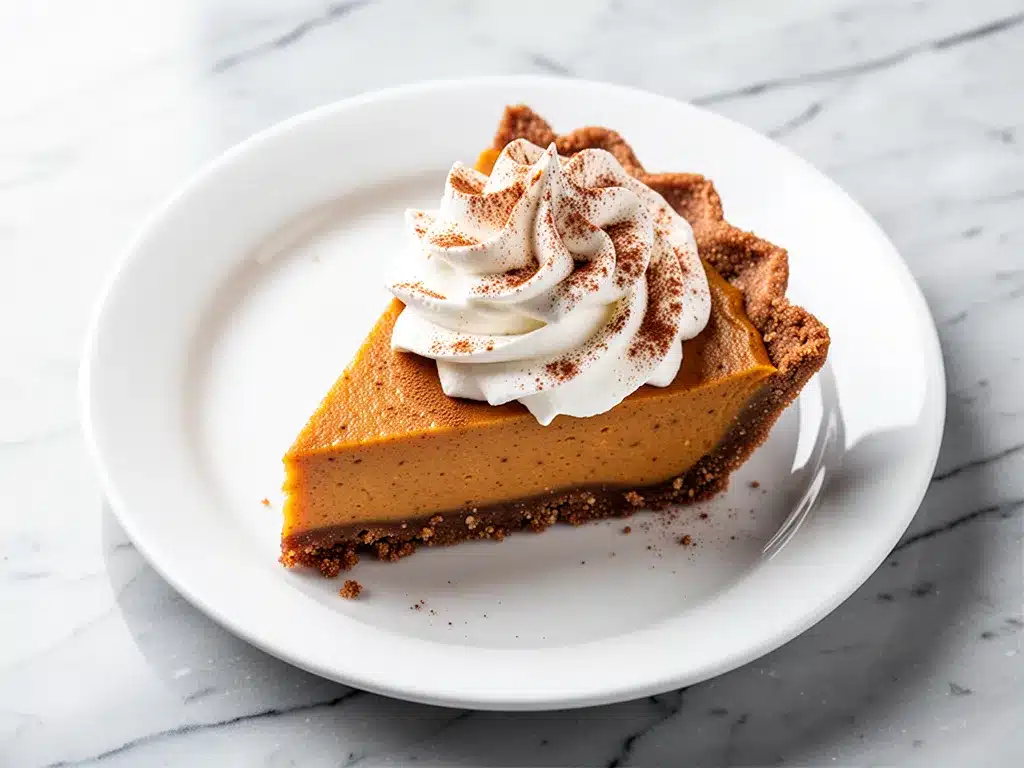
Full-fat cream cheese (8 ounces / 225g, softened) — This is what gives the pie its structure and that rich, cheesecake-like texture. Make sure it’s softened to room temperature before you start mixing, or you’ll end up with lumpy pie. I take it out of the fridge about 30 minutes before I begin.
Canned pumpkin puree (15 ounces / 425g) — Use 100% pure pumpkin puree, NOT pumpkin pie filling. The filling already has sugar and spices added, which will throw off the balance of this recipe. Look for the can that says “100% Pure Pumpkin.”
Heavy cream (1 cup / 240ml, chilled) — I whip this separately to add airiness to the filling. Using chilled cream helps it whip up faster and hold its shape better. Don’t use half-and-half or milk; you need the fat content.
Powdered sugar (½ cup / 60g) — Dissolves instantly into the cream cheese mixture, unlike granulated sugar which can leave gritty bits in the no-bake filling.
Pumpkin pie spice (1 tablespoon) — This blend of cinnamon, ginger, nutmeg, and cloves is essential. If you don’t have a pre-made blend, you can mix your own, but the store-bought kind is consistent and saves time.
Vanilla extract (1 teaspoon) — Pure vanilla, please. Artificial vanilla tastes harsh in a delicate dessert like this.
For the Topping (Optional but Recommended)
Whipped cream (homemade or store-bought) — A dollop on top is classic, but I like to make my own because it’s lighter and less sweet. If you’re in a rush, the canned stuff works fine.
Extra gingersnap crumbs — For garnish. It looks pretty and adds a nice crunch to each bite.
Substitutions & Notes
Gluten-Free? You can use gluten-free gingersnap cookies if you find them. Most major brands have a GF version, and they crush just the same. The rest of the ingredients are naturally gluten-free.
Dairy-Free? This is trickier because of the cream cheese and butter. You can use a vegan cream cheese alternative and coconut oil instead of butter, but the texture will be slightly different. I haven’t tested it extensively, so let me know if you try it!
Less Sweet? Reduce the powdered sugar to ¼ cup if you prefer a less sweet pie. The pumpkin and gingersnaps provide plenty of flavor on their own.
Equipment Needed
You don’t need fancy gadgets for this. Here’s what I actually use, and what you can swap out.
Food processor or Ziploc bag + rolling pin — For crushing the cookies. A food processor is faster and gives you finer crumbs, but if you’re trying to avoid extra cleanup, put the cookies in a heavy-duty Ziploc bag and crush them with a rolling pin or a heavy pan. It takes about 5 minutes and gets the job done.
9-inch springform pan — This is the classic pan for no-bake pies. The sides come off, making it easy to slice and serve. If you don’t have one, a regular 9-inch pie plate works, but slicing might be messier. Just grease it well.
Mixing bowls — Two large bowls. One for the cream cheese mixture, one for whipping the cream.
Electric hand mixer or stand mixer — You can use a whisk, but it’ll take a lot of arm strength. An electric mixer makes whipping the cream and blending the cream cheese smooth in seconds. I use a hand mixer because it’s easier to store.
Spatula — A flexible silicone spatula is best for folding the whipped cream into the pumpkin mixture. You want to keep the air in there, so gentle folds are key.
Measuring cups and spoons — Standard stuff. I’m pretty loose with measurements for this one, but if you’re baking, precision helps.
Refrigerator space — You’ll need room for the pie to chill for at least 4 hours. If your fridge is packed, plan ahead.
How to Make It: Step-by-Step
Alright, let’s make this! I’m walking you through exactly how I do it, including the little tricks I’ve picked up over the years.
Step 1: Crush the Cookies (5 minutes)
Start by crushing your gingersnap cookies into fine crumbs. If you’re using a food processor, pulse until you have a texture similar to wet sand. If you’re using the bag method, lay the cookies in a single layer and crush them thoroughly. You want small crumbs, not big chunks, so the crust holds together nicely. Transfer the crumbs to a medium bowl.
Step 2: Make the Crust (2 minutes)
Add the melted butter, sugar, and salt to the cookie crumbs. Stir with a fork until the crumbs are evenly coated and look like wet sand. Press this mixture firmly into the bottom and slightly up the sides of your springform pan. Use the bottom of a measuring cup or a glass to pack it down tight. A loose crust will crumble when you slice it. Once it’s pressed in, pop it in the freezer for 10 minutes to set. This helps it firm up before we add the filling.
Step 3: Beat the Cream Cheese (3 minutes)
In a large bowl, beat the softened cream cheese and powdered sugar together until completely smooth. This is crucial. If there are any lumps, they’ll show up in the final pie. Scrape down the sides of the bowl with your spatula to make sure everything is incorporated. The mixture should be pale and fluffy.
Step 4: Add Pumpkin and Spices (2 minutes)
Add the pumpkin puree, pumpkin pie spice, and vanilla extract to the cream cheese mixture. Beat on low speed until just combined. Be careful not to overmix once the pumpkin is in, or you might incorporate too much air, which can make the filling weirdly light. You want it dense and creamy. Scrape the bowl one more time.
Step 5: Whip the Cream (3 minutes)
In a separate cold bowl, whip the heavy cream until stiff peaks form. This means when you lift the beaters, the cream stands up straight without drooping. Don’t over-whip it into butter, though. Just stiff peaks.
Step 6: Fold It All Together (2 minutes)
Gently fold the whipped cream into the pumpkin mixture in two additions. Use your spatula and cut down the middle, sweep across the bottom, and fold over the top. This keeps the air in the whipped cream, which makes the pie light and fluffy rather than heavy and dense. Be gentle but thorough—you want no white streaks left.
Step 7: Assemble and Chill (4+ hours)
Pour the filling into the chilled crust. Smooth the top with your spatula. Cover the pan loosely with plastic wrap (don’t press it against the filling, or it might stick) and refrigerate for at least 4 hours, but overnight is best. The longer it chills, the firmer it gets, and the flavors meld together beautifully.
Step 8: Serve
Once set, run a warm knife around the edge of the springform pan to loosen it, then release the sides. Top with whipped cream and a sprinkle of extra gingersnap crumbs. Slice and serve. Enjoy!
Expert Tips & Tricks
Here’s everything I’ve learned from making this dozens of times. These tips will save you from my mistakes.
Room Temperature Cream Cheese is Non-Negotiable
If your cream cheese is cold, it will stay lumpy even after beating. I know it’s tempting to rush, but take the 30 minutes to let it soften. If you forget, you can microwave it for 10-second bursts, checking frequently, but be careful not to melt it.
Don’t Skip the Freezer Step for the Crust
I used to skip this and wonder why my crust fell apart. Chilling the crust in the freezer for 10 minutes solidifies the butter, which helps it hold the pie together when you slice it. It’s a small step that makes a big difference.
Chill Your Bowl for Whipping Cream
If you’re having trouble getting stiff peaks, put your mixing bowl and beaters in the freezer for 15 minutes before whipping. Cold cream whips faster and holds its shape better. This is especially helpful in warm kitchens.
Fold, Don’t Stir
When combining the whipped cream with the pumpkin mixture, use a folding motion. Stirring vigorously deflates the cream, making the pie dense. Fold gently until just combined.
Use a Sharp Knife for Slicing
For clean slices, dip your knife in hot water and wipe it dry between each cut. This prevents the filling from sticking to the blade and getting messy.
Common Mistakes (and how to avoid them):
- Soggy crust? Make sure you pressed it down firmly and chilled it. Also, don’t let the pie sit out at room temperature for more than 30 minutes before serving, or the crust will soften.
- Grainy filling? This usually happens if the powdered sugar wasn’t fully dissolved. Beat the cream cheese and sugar longer before adding the pumpkin.
- Too soft? You didn’t chill it long enough. Patience is key. Let it sit overnight for the best texture.
Variations & Substitutions
Once you’ve nailed the basic version, here’s how you can mix it up. I’ve tried all of these, and they’re all winners.
Spicy Gingersnap Crust
Add ½ teaspoon of ground ginger or a pinch of cayenne pepper to the crust mixture for an extra kick. This is great if you love bold flavors.
Maple Pecan Version
Stir ½ cup of chopped pecans into the filling before pouring it into the crust. It adds a nice crunch and pairs beautifully with the maple notes in the gingersnaps.
White Chocolate Pumpkin
Melt ½ cup of white chocolate chips and mix them into the cream cheese base. It adds a sweet, creamy richness that’s amazing with the pumpkin spice.
Coconut Cream Version
For a dairy-free twist, use coconut cream instead of heavy cream and vegan cream cheese. The coconut flavor pairs surprisingly well with pumpkin and ginger.
Chocolate Gingersnap
Use chocolate gingersnap cookies if you can find them. They add a deeper, richer flavor to the crust. If you can’t find them, add 1 tablespoon of cocoa powder to the regular cookie crumbs.
Gluten-Free
As mentioned, just swap in gluten-free gingersnap cookies. Most brands work perfectly, and the texture is virtually identical.
Less Sweet
Reduce the powdered sugar to ¼ cup and use unsweetened pumpkin puree (which you already should). You can also use less whipped cream on top.
Serving & Storage
How to Serve:
I usually serve this straight from the fridge. It’s best cold, like a cheesecake. Pair it with a hot cup of coffee or tea. I also like to serve it with a side of hot caramel sauce for those who want something extra sweet.
Side Dishes:
This is a dessert, so it doesn’t need sides, but it pairs well with:
- Hot coffee or chai tea
- Vanilla ice cream (if you want to double down on dairy)
- Fresh fruit salad (to cut the richness)
Storage Instructions:
Refrigerator: Store in an airtight container or covered with plastic wrap for up to 5 days. It actually gets firmer and tastier after day 2.
Freezing: You can freeze this pie! Wrap the whole springform pan (or individual slices) tightly in plastic wrap and then aluminum foil. Freeze for up to 2 months. Thaw in the fridge overnight before serving. Note: The texture might be slightly softer after thawing, but it’s still delicious.
Reheating: Do not reheat. This is a no-bake pie. Serve it cold or at room temperature for about 15 minutes if you prefer it less firm.
Nutrition Information
I’m not a nutritionist, but here’s the breakdown if you’re tracking. Keep in mind that this is a rich dessert, so portion control is key.
Per Serving (based on 12 slices):
- Calories: 320
- Protein: 4g
- Carbs: 35g
- Fiber: 1g
- Sugar: 22g
- Fat: 18g
- Saturated Fat: 11g
- Cholesterol: 55mg
- Sodium: 180mg
What’s Good:
- It’s a no-bake option, so you save on energy.
- Uses real pumpkin, which has some vitamin A.
- Can be made gluten-free or dairy-free with swaps.
What to Know:
- Higher in sugar and fat due to the cream cheese, butter, and cookies.
- Contains dairy and gluten (unless modified).
- Moderate sodium.
My Take:
Look, this is a dessert. It’s supposed to be indulgent. It’s not a health food, but it’s better than buying a store-bought pie that’s full of preservatives. When I make this, I’m happy with it. I enjoy a slice or two and move on. Life’s too short to skip dessert.
Final Thoughts
So that’s my go-to no-bake pumpkin pie with gingersnap cookie crust! I’ve probably talked your ear off at this point, but when you make a recipe this often, you have a lot to say about it. This pie has saved me more holiday stress than I can count. It’s my answer to “what’s for dessert?” when I’m tired, don’t want to bake, and still want something that tastes amazing. My family is happy, my guests are impressed, and I’m happy because I’m not stuck in the kitchen for hours.
Make it yours! Try different add-ins, swap in your favorite spices, or adjust the sweetness to your liking. The best recipes are the ones you adapt to your family’s tastes. If you make this, drop a comment and let me know what you think! I love hearing how recipes turn out in your kitchen. And if something doesn’t work, tell me that too—I’m here to help troubleshoot.
Happy baking… wait, no-baking! Enjoy your autumn vibes.
Frequently Asked Questions
Can I use pumpkin pie filling instead of pure pumpkin?
Absolutely not. Pumpkin pie filling already has sugar, spices, and thickeners added. If you use it, your pie will be way too sweet and might not set properly. Always use 100% pure pumpkin puree.
Why is my crust crumbly?
Usually, this means you didn’t use enough butter or didn’t press it down firmly enough. Make sure the crumbs look like wet sand and pack them tightly into the pan. Chilling the crust in the freezer for 10 minutes also helps it bind.
Can I make this ahead of time?
Yes! This pie actually tastes better the next day. You can make it up to 2 days in advance. Just keep it covered in the fridge. It’s perfect for meal-prepping your desserts.
How do I store leftovers?
Keep it in the springform pan, covered with plastic wrap or in an airtight container, in the fridge for up to 5 days. It’s best eaten within 3 days for the optimal texture.
Can I freeze this pie?
Yes, you can. Wrap it tightly in plastic wrap and then foil. Freeze for up to 2 months. Thaw in the fridge overnight. The texture might be slightly softer, but it’s still delicious.
What if I don’t have a springform pan?
You can use a regular 9-inch pie plate. Just grease it well with butter or cooking spray. Slicing might be messier, but it works fine. You can also use a loaf pan for a bar-style version.
Can I use whipped topping (like Cool Whip) instead of whipping cream?
You can, but the texture won’t be as light and fresh. Homemade whipped cream is superior. If you’re short on time, Cool Whip works, but just fold it in gently so it doesn’t get too airy.
Pin This Recipe!
No-Bake Pumpkin Pie: Easy Gingersnap Cookie Crust
- Total Time: 4 hours 20 minutes
- Yield: 12 servings 1x
Description
A stress-free, no-bake pumpkin pie featuring a crunchy gingersnap cookie crust and a rich, cheesecake-like pumpkin filling. Perfect for holidays and make-ahead entertaining.
Ingredients
- 3 cups (240g) gingersnap cookies, crushed
- 6 tablespoons (85g) unsalted butter, melted
- 2 tablespoons (25g) granulated sugar
- 1/4 teaspoon salt
- 8 ounces (225g) full-fat cream cheese, softened
- 1/2 cup (60g) powdered sugar
- 15 ounces (425g) canned 100% pure pumpkin puree
- 1 tablespoon pumpkin pie spice
- 1 teaspoon vanilla extract
- 1 cup (240ml) heavy cream, chilled
- Whipped cream, for topping (optional)
- Extra gingersnap crumbs, for garnish (optional)
Instructions
- Crush the gingersnap cookies into fine crumbs using a food processor or a Ziploc bag with a rolling pin.
- In a medium bowl, mix the cookie crumbs with melted butter, granulated sugar, and salt until the texture resembles wet sand.
- Press the crust mixture firmly into the bottom and slightly up the sides of a 9-inch springform pan. Freeze for 10 minutes to set.
- In a large bowl, beat the softened cream cheese and powdered sugar together until completely smooth and pale.
- Add the pumpkin puree, pumpkin pie spice, and vanilla extract to the cream cheese mixture. Beat on low speed until just combined.
- In a separate cold bowl, whip the heavy cream until stiff peaks form.
- Gently fold the whipped cream into the pumpkin mixture in two additions until no white streaks remain.
- Pour the filling into the chilled crust and smooth the top.
- Cover loosely with plastic wrap and refrigerate for at least 4 hours, preferably overnight.
- To serve, release the springform pan sides, top with whipped cream and extra crumbs, slice, and enjoy.
Notes
Ensure cream cheese is at room temperature to avoid lumps. Chill the crust in the freezer to help it bind. Do not use pumpkin pie filling; use 100% pure pumpkin puree. For gluten-free, use GF gingersnap cookies. For dairy-free, substitute with vegan cream cheese and coconut oil.
- Prep Time: 20 minutes
- Cook Time: 0 minutes
- Category: Dessert
- Cuisine: American
Nutrition
- Serving Size: 1 slice
- Calories: 320
- Sugar: 22
- Sodium: 180
- Fat: 18
- Saturated Fat: 11
- Carbohydrates: 35
- Fiber: 1
- Protein: 4
Keywords: no-bake pumpkin pie, gingersnap crust, fall dessert, holiday dessert, make-ahead dessert, easy pumpkin pie



