
Last Tuesday, I was standing in my kitchen at 5:45 PM, staring into the fridge with that specific kind of desperation only a parent with three hungry kids and zero energy can understand. The freezer had one sad, frozen chicken breast left. The pantry had a can of white beans, a bag of frozen corn, and half a jar of salsa. No rice. No fancy spices. No time to thaw meat properly.
I could have ordered takeout. But after counting the cost of delivery fees and realizing I’d be spending $25 on food that would be gone in twenty minutes, I said, “Absolutely not.” So I threw everything into the Instant Pot. I didn’t measure anything. I just dumped it in, hit “Soup,” and went to help my son with his math homework.
Twenty minutes later, the kitchen smelled like comfort food heaven. I ladled out a bowl, expecting something thin and watery. Instead, I got a creamy, hearty, restaurant-quality white chicken chili that my picky eater actually asked for seconds of. That was the moment I realized: this isn’t just a quick dinner. It’s my new secret weapon for busy weeknights.
This Instant Pot white chicken chili is perfect for busy weeknights because it does the heavy lifting while you do everything else. It’s budget-friendly, uses ingredients you probably already have, and tastes like you spent hours simmering it on the stove. I’ve made this recipe at least a dozen times since that Tuesday, and it has completely replaced my takeout habit. Seriously, if you can boil water, you can make this.
Why You’ll Love This Instant Pot White Chicken Chili
I know, I know. Another chili recipe? But hear me out. This one is different. It’s creamy without needing heavy cream, it’s ready in under 30 minutes, and it costs less than a pizza delivery. Here’s why this has become a permanent fixture in our weekly rotation:
- Stupid Simple Cleanup — Seriously, if you can press a button, you can make this. It’s one pot. One pot means one dish to wash. I’ve walked my teenage son through it over FaceTime, and he nailed it.
- Lightning Fast — 30 minutes from start to finish. The Instant Pot does the work. I get home at 6 PM, chop chicken, dump it in, and eat by 6:30 PM. It’s a miracle.
- Pantry-Friendly — You probably have 80% of these ingredients already. I keep white beans, frozen corn, and chicken stock stocked just so I can make this on a whim when I’m tired.
- Crowd-Pleaser — I’ve served this to my vegetarian sister (with slight tweaks), my gluten-free neighbor, and my I-only-eat-chicken dad. Everyone loved it. The creaminess comes from the beans, not dairy, so it’s naturally rich.
- Makes Amazing Leftovers — Actually tastes better the next day. The flavors meld together overnight. I deliberately make extra for lunch throughout the week because it reheats perfectly.
- Budget-Smart — Feeds 4-6 people for under $15. That’s less than one meal at a fast-food place. And it’s way healthier than anything from a drive-thru.
This is my go-to when I need dinner to just work. No complicated techniques, no weird ingredients, just reliable, delicious food that makes everyone happy.
Ingredients You’ll Need
Here’s the best part: you probably have most of this already. This isn’t a recipe that requires a special trip to an expensive specialty store. I’m particular about three ingredients here, and I’ll tell you exactly why.
For the Base
Chicken breasts (1.5 lbs / 680g) — Boneless, skinless. I buy the family pack when they’re on sale and freeze them in portions. You can use thighs, but breasts cook faster and stay tender in the pressure cooker. Don’t skip the sear if you have time—it adds flavor.
White beans (2 cans, 15 oz each / about 850g total) — Cannellini or Great Northern beans work best. They’re creamy and mild. Drain and rinse them well. This removes the metallic taste some people dislike. If you can’t find canned, dried beans soaked overnight work too, but add 15 minutes to the cook time.
Chicken broth (32 oz / 950ml) — Use low-sodium so you can control the salt level. I keep a carton in the fridge at all times. Vegetable broth works for a vegetarian version, but chicken is traditional and delicious.
Onion (1 large yellow onion, diced / about 300g) — Yellow onions are sweet and savory. White onions are too sharp for this. Red onions work but change the color. I dice mine finely so it melts into the sauce.
For the Flavor
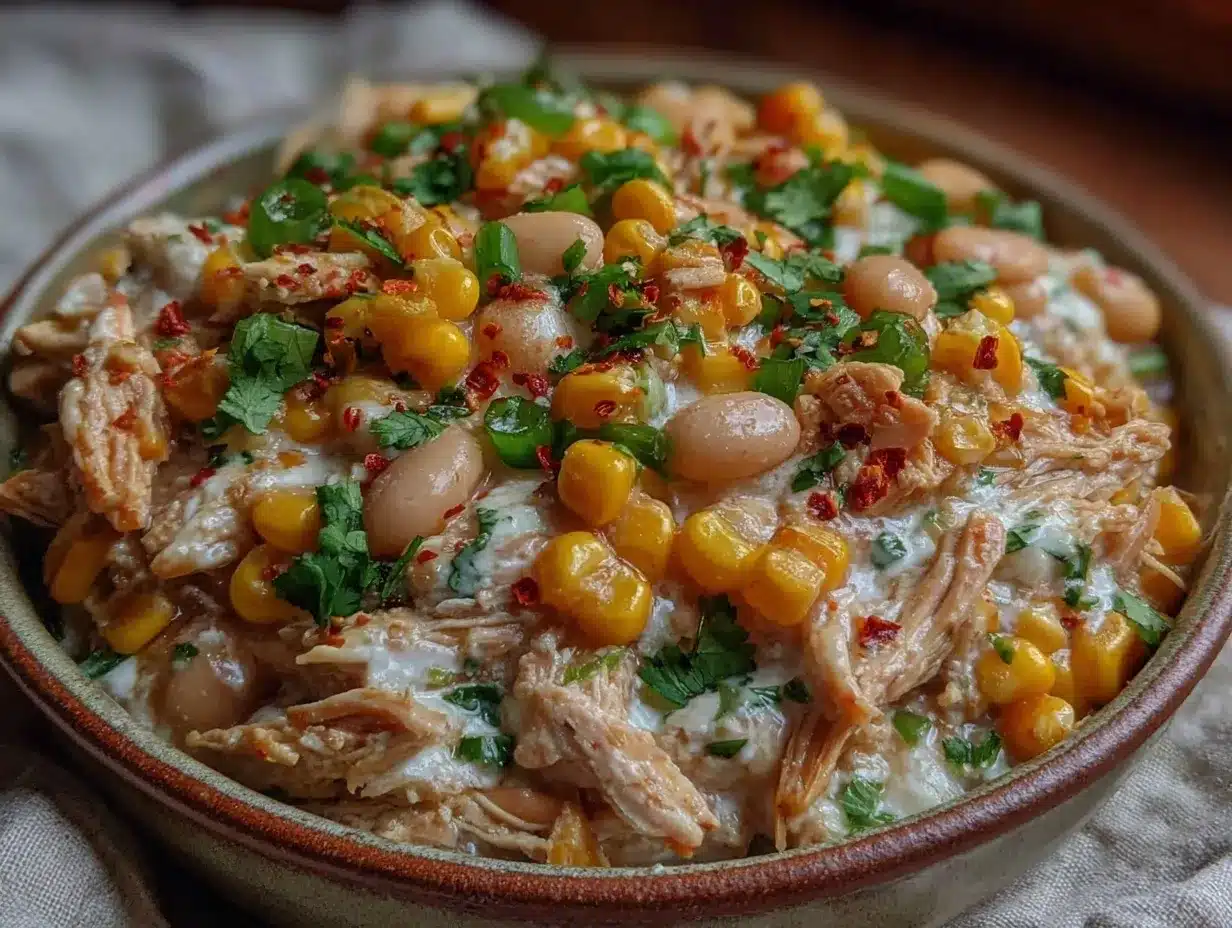
Green chiles (1 can, 4 oz / 113g) — Mild green chiles. I use Ro*Tel or a generic brand. This is what gives the chili its signature kick. If you hate spice, drain the liquid. If you like heat, keep some of the juice. I never drain it.
Cumin (1 tablespoon / 6g) — Ground cumin is the backbone of chili flavor. Don’t skip it. It smells earthy and warm. If you don’t have it, buy a new bottle—it’s cheap and lasts forever.
Garlic (4 cloves, minced / about 2 tablespoons) — Fresh only. No jarred garlic in this recipe. It tastes too metallic in pressure cooking. Minced by hand or a press works fine.
Olive oil (1 tablespoon / 15ml) — For sautéing the onions and chicken. Use whatever you have. Avocado oil works too if you’re worried about smoke point, but we’re not searing hard.
For the Creaminess
Cream cheese (8 oz / 225g) — Full-fat brick cream cheese. This is the secret to the creamy texture without using heavy cream. Let it come to room temperature for 10 minutes before adding—it melts easier. I buy the generic brand; it’s the same stuff as the name brand.
Frozen corn (1 cup / 150g) — Adds sweetness and texture. Frozen is fine. Fresh off the cob is great but expensive. Canned corn works but can be mushy. Frozen is the sweet spot.
Salsa (1 cup / 240g) — Mild or medium, depending on your heat preference. I use a chunky salsa for texture. If you only have smooth salsa, add some diced peppers for crunch.
Taco seasoning (1 packet / 28g) — Or make your own (see below). I use the store brand. It’s consistent and cheap. If you make your own, it’s better, but I don’t always have time.
Equipment Needed
You don’t need fancy equipment for this. Here’s what I actually use.
6-Quart Instant Pot — I use a Duo. Any brand works. Just make sure it’s at least 6 quarts so you have room for the ingredients. A 3-quart will be too small.
Sharp knife — For chopping chicken and onion. Dull knives make you cry more—learned this the hard way.
Cutting board — Any size works. I use plastic for easier cleanup.
Wooden spoon or silicone spatula — For stirring. Don’t use metal on the non-stick inner pot.
Measuring cups and spoons — Pretty standard stuff. Dollar store versions work fine.
Colander — For rinsing beans. Or just use the sink if you’re in a rush.
Optional but nice:
- Garlic press — Saves time but not necessary. Mincing works fine.
- Immersion blender — If you want a smoother chili, blend half of it. I usually leave it chunky for my kids.
How to Make It: Step-by-Step
Alright, let’s make this! I’m walking you through exactly how I do it, including the little tricks I’ve picked up.
Step 1: Prep Your Ingredients (5 minutes)
Before you start cooking, dice your onion, mince your garlic, and cut your chicken into 1-inch cubes. I know it seems fussy, but it makes the actual cooking way less stressful. Drain and rinse your beans. Measure out your spices. Once you start cooking, things move fast.
Step 2: Sauté Aromatics (3 minutes)
Set your Instant Pot to “Sauté” mode. Add the olive oil. Once hot, add the diced onion. Cook for 2-3 minutes until it starts to soften and smell sweet. Add the minced garlic and cook for 1 minute, stirring constantly. The garlic should smell amazing but not brown—browned garlic tastes bitter.
Step 3: Add Chicken and Seasonings (2 minutes)
Add the chicken cubes, cumin, garlic powder (if using), and half of the taco seasoning. Stir to coat the chicken. This step helps build flavor. You don’t need to brown it deeply, just sear it for a minute.
Step 4: Build the Pot (2 minutes)
Pour in the chicken broth, salsa, green chiles, and drained beans. Stir everything together. Make sure nothing is stuck to the bottom of the pot. If you have browned bits stuck on the bottom, scrape them up now. This prevents the “burn” error later.
Step 5: Pressure Cook (10 minutes)
Lock the lid. Set the valve to “Sealing.” Select “Manual” or “Pressure Cook” on High for 10 minutes. The pot will take about 10-15 minutes to come to pressure. Don’t worry about the time—it’s hands-off. Go watch a show. Do laundry. Breathe.
Step 6: Quick Release and Add Cream (5 minutes)
Once the timer beeps, do a “Quick Release.” Carefully turn the valve to “Venting” to release the steam. Wait until the float valve drops. Open the lid. Stir in the cream cheese, frozen corn, and remaining taco seasoning. The residual heat will melt the cream cheese. If it’s not fully melted, hit “Sauté” for 2 more minutes and stir.
Step 7: Serve
Taste and add salt if needed. Serve hot with toppings. I usually serve this straight from the pot at the dinner table—it looks rustic and stays warm.
Total Time: About 30 minutes (5 minutes active, 25 minutes mostly hands-off)
Expert Tips & Tricks
Here’s everything I’ve learned from making this dozens of times. These tips will save you from my mistakes.
Don’t Skip the Sauté
Cooking the onions and garlic first adds a depth of flavor that you miss if you just dump everything in raw. It’s an extra minute, but it’s worth it.
Room Temp Cream Cheese
Cold cream cheese clumps. Let it sit on the counter for 10 minutes before you start. If you forget, cut it into small cubes. It melts faster.
Save That Broth
Use low-sodium broth. Canned beans and salsa are already salty. If you use full-sodium broth, you’ll end up with a salt bomb. You can always add salt, but you can’t take it out.
Thicken It Up
If your chili is too thin, mash some of the beans against the side of the pot with your spoon. This releases starch and thickens the sauce naturally. Or, use an immersion blender to blend half the chili for a creamy, thick texture.
Customize the Heat
Green chiles vary in heat. Taste your salsa before adding. If you want more kick, add a diced jalapeño or a dash of cayenne. If you’re cooking for kids, stick to mild salsa and no extra heat.
Variations & Substitutions
Once you’ve nailed the basic version, here’s how you can mix it up. I’ve tried all of these.
Spicy Chipotle Version
Swap green chiles for one minced chipotle pepper in adobo sauce. Add a teaspoon of the adobo sauce. Smoky and spicy. This pairs well with spicy chipotle corn on the cob for a full Mexican-inspired meal.
Turkey White Chili
Use ground turkey instead of chicken. It’s leaner and still delicious. Cook it until browned before adding the liquids.
Veggie-Loaded
Toss in 2 cups of fresh spinach or kale in the last 5 minutes. It wilts right in. This is how I get my kids to eat vegetables.
Black Bean Version
Swap white beans for black beans. Adds a heartier texture and earthier flavor.
Gluten-Free
This recipe is naturally gluten-free. Just check your taco seasoning label to ensure it doesn’t contain wheat flour. Most brands are GF.
Dairy-Free
Skip the cream cheese. Use ½ cup of coconut cream or cashew cream for richness. It’s different but still tasty.
Serving & Storage
How to Serve:
I usually serve this with toppings on the side so everyone can customize. My family loves:
- Shredded cheddar or Mexican blend cheese
- Sour cream or Greek yogurt
- Fresh cilantro, chopped
- Diced avocado
- Crushed tortilla chips for crunch
- Lime wedges
Side Dishes:
– Loaded baked potato salad is a great non-traditional side.
– Cornbread or tortilla chips.
– A simple green salad with lime vinaigrette.
Storage Instructions:
Refrigerator:
Store in an airtight container for up to 4 days. The sauce will thicken in the fridge—totally normal.
Reheating:
Best method: Add to a pot with a splash of broth or water over low heat. Stir until heated through.
Microwave method: Heat in 1-minute intervals, stirring between. Add a splash of liquid if it’s too thick.
Freezing:
This freezes well! But skip the cream cheese if you plan to freeze it. The cream cheese can separate when thawed. Freeze in portions for easy lunches. Thaw in the fridge overnight and reheat gently.
Pro tip:
Double the batch. It freezes so well, and having extra chili for lunch is a game-changer for busy days.
Nutrition Information
I’m not a nutritionist, but here’s the breakdown if you’re tracking.
Per Serving (based on 6 servings):
- Calories: 380
- Protein: 32g
- Carbs: 35g
- Fiber: 8g
- Sugar: 6g
- Fat: 12g
- Saturated Fat: 6g
- Cholesterol: 70mg
- Sodium: 650mg
What’s Good:
– High protein from chicken and beans.
– Good fiber from beans and corn.
– Lower in fat than traditional red chili because we skip the fatty ground beef.
What to Know:
– Sodium can be high if you use full-sodium broth. Use low-sodium to control this.
– Contains dairy (cream cheese).
My Take:
“Look, this is comfort food. It’s not a diet recipe. But it’s way better than takeout, costs less, and I know exactly what’s in it. When I want to make it lighter, I skip the cream cheese and use Greek yogurt as a topping. But usually? I just eat a reasonable portion and enjoy it.”
Final Thoughts
So that’s my go-to Instant Pot white chicken chili! I’ve probably talked your ear off at this point, but when you make a recipe this often, you have a lot to say about it.
This has saved weeknight dinners more times than I can count. It’s my answer to “what’s for dinner” when I’m tired, don’t want takeout, and still want something that tastes really good. My kids are happy, my husband’s happy, and I’m happy because I’m not stressed about cooking.
Make it yours! Try different add-ins, swap in your favorite vegetables, adjust the heat. The best recipes are the ones you adapt to your family’s tastes.
If you make this, drop a comment and let me know what you think! I love hearing how recipes turn out in your kitchen. And if something doesn’t work, tell me that too—I’m here to help troubleshoot.
Happy cooking! And I hope your kitchen smells half as good as mine does right now.
Frequently Asked Questions
Can I use rotisserie chicken?
Absolutely! This is actually my favorite way to make it. Skip the sauté step for the chicken. Just shred the rotisserie chicken and add it in the last 5 minutes of cooking (after pressure cooking) to warm it through. It saves even more time. I use this method when I’m really rushed.
Why did my chili turn out watery?
This usually happens if you don’t let it simmer after adding the cream cheese, or if you used too much broth. After pressure cooking, let it sit on “Sauté” for 5-10 minutes to thicken. Also, mashing some beans against the side of the pot helps. If it’s still too thin, a cornstarch slurry (1 tsp cornstarch + 1 tsp water) stirred in and cooked for 2 minutes works wonders.
Can I make this in a slow cooker?
Yes! Sauté the onions and garlic first. Add everything except cream cheese and corn. Cook on Low for 6-8 hours or High for 3-4 hours. Add cream cheese and corn in the last 30 minutes. It works great, but the Instant Pot is faster.
Is this recipe spicy?
It’s mild by default. The green chiles add a little kick, but it’s not hot. If you want it spicy, add jalapeños or cayenne. If you want it mild, use mild salsa and drain the liquid from the chiles. It’s very customizable.
Can I freeze this?
Yes, but skip the cream cheese if you plan to freeze it. Dairy can separate when thawed. Freeze in portions for easy lunches. Thaw in the fridge overnight and reheat gently, adding fresh cream cheese if needed.
What’s the best topping?
It’s subjective, but I love fresh cilantro, lime juice, and crushed tortilla chips. The crunch and acidity cut through the creaminess perfectly. Sour cream is a classic too.
Can I double this recipe?
Yes! Double everything and use your largest Instant Pot (8-quart is ideal). The cooking time stays the same. I do this when I’m meal-prepping or feeding a crowd. Just make sure you don’t fill the pot past the max line.
Pin This Recipe!


Instant Pot White Chicken Chili: 3-Ingredient Budget Family Meal
- Total Time: 30 minutes
- Yield: 6 servings 1x
Description
A creamy, hearty, and budget-friendly white chicken chili made in the Instant Pot. Ready in under 30 minutes with simple pantry ingredients like chicken, white beans, and salsa.
Ingredients
- 1.5 lbs boneless, skinless chicken breasts, cut into 1-inch cubes
- 2 cans (15 oz each) white beans (Cannellini or Great Northern), drained and rinsed
- 32 oz low-sodium chicken broth
- 1 large yellow onion, diced
- 1 can (4 oz) mild green chiles
- 1 tablespoon ground cumin
- 4 cloves garlic, minced
- 1 tablespoon olive oil
- 8 oz full-fat brick cream cheese, cubed and room temperature
- 1 cup frozen corn
- 1 cup mild or medium chunky salsa
- 1 packet taco seasoning (or homemade blend)
Instructions
- Prep ingredients: Dice onion, mince garlic, and cut chicken into 1-inch cubes. Drain and rinse beans.
- Set Instant Pot to ‘Sauté’ mode. Add olive oil. Once hot, add diced onion and cook for 2-3 minutes until softened.
- Add minced garlic and cook for 1 minute, stirring constantly until fragrant but not browned.
- Add chicken cubes, cumin, and half of the taco seasoning. Stir to coat the chicken.
- Pour in chicken broth, salsa, green chiles, and drained beans. Stir to combine, scraping any browned bits from the bottom of the pot.
- Lock the lid, set valve to ‘Sealing’, and select ‘Pressure Cook’ on High for 10 minutes.
- Once the timer beeps, perform a Quick Release by turning the valve to ‘Venting’. Wait for the float valve to drop.
- Open the lid. Stir in cream cheese, frozen corn, and remaining taco seasoning. Use residual heat or ‘Sauté’ mode for 2 minutes to melt the cream cheese.
- Taste and add salt if needed. Serve hot with desired toppings.
Notes
Use low-sodium broth to control salt levels. Let cream cheese come to room temperature for easier melting. If chili is too thin, mash some beans against the pot or use an immersion blender. For freezing, omit the cream cheese as it may separate upon thawing.
- Prep Time: 5 minutes
- Cook Time: 25 minutes
- Category: Main Course
- Cuisine: Mexican
Nutrition
- Serving Size: 1 bowl
- Calories: 380
- Sugar: 6
- Sodium: 650
- Fat: 12
- Saturated Fat: 6
- Carbohydrates: 35
- Fiber: 8
- Protein: 32
Keywords: instant pot, white chicken chili, budget meal, family dinner, quick recipes, pressure cooker, creamy chili, weeknight dinner



