There is a specific kind of panic that sets in when you realize it’s October and you haven’t bought a single pumpkin yet. Last week, I was standing in the grocery store aisle, staring at a stack of pie pumpkins, feeling that familiar dread of a parent who forgot to plan breakfast for the next three days. My kids were already arguing over whose turn it was to get the orange juice, and the house smelled like wet wool because of the rain. I needed something warm, something cheap, and something that would make them actually get out of bed without a negotiation.
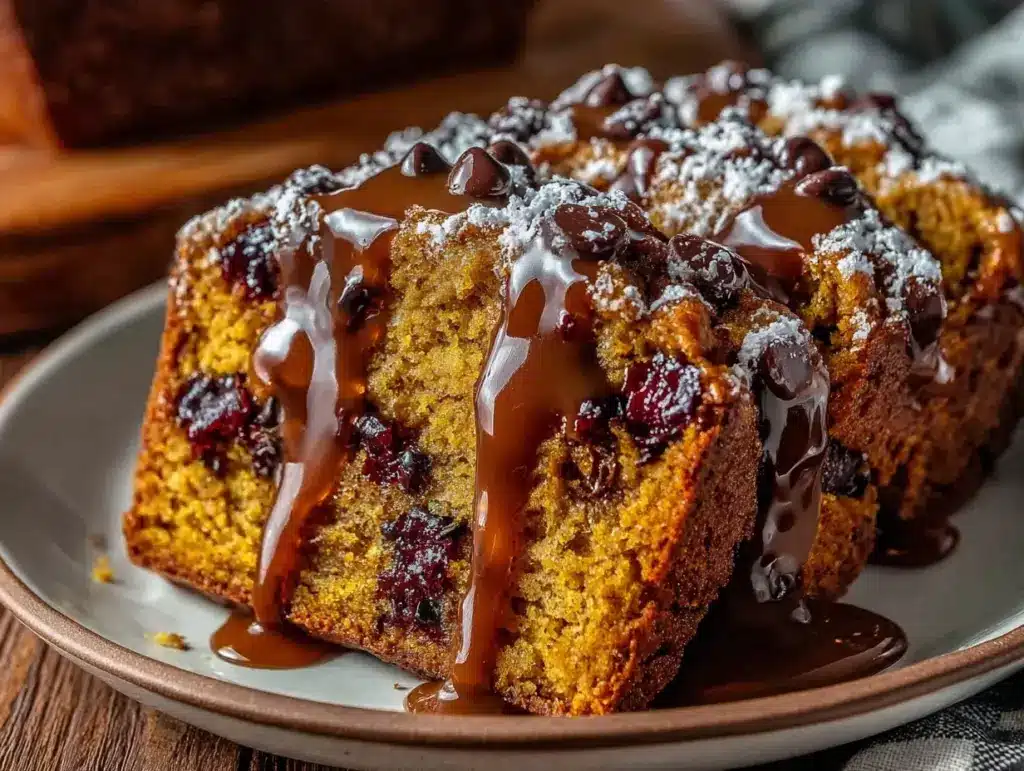
That’s when I decided to make my fall pumpkin chocolate chip bread with brown butter glaze. I know what you’re thinking—bread sounds like work. But this isn’t that complicated sourdough project that requires a starter and a degree in chemistry. This is the kind of bread you make when you have a can of pumpkin puree, a bag of flour, and a craving for something sweet but not too heavy. I’ve made this loaf at least a dozen times since September started, and it has become my secret weapon for weekday mornings.
The best part? The brown butter glaze. It sounds fancy, like something you’d pay $6 for at a coffee shop, but it takes two minutes and uses ingredients you already have. I first tried this recipe because I wanted to use up some leftover pumpkin puree before it went bad. I ended up making two loaves. One for us, and one for my neighbor who had just moved in and looked like she hadn’t slept in a week. She sent me a text three days later saying it was the best thing she’d eaten all month. That’s the kind of comfort food this is. It’s affordable, it’s easy, and it smells like autumn the second it hits the oven.
Why You’ll Love This Recipe
If you’ve been searching for a reliable fall breakfast that doesn’t involve waking up at 5 AM or spending a fortune at the bakery, you’ve found it. This pumpkin bread has saved me more times than I can count. Here’s why it’s become a staple in our house:
- Stupid Simple — Seriously, if you can mix a bowl, you can make this. I’ve walked my teenage son through it over FaceTime while I was on a work call. He didn’t burn it. That’s saying something.
- Budget-Friendly — This feeds a family of four (or six, if you’re generous with the slices) for under $5. You’re probably already halfway to making it because you have flour, sugar, and eggs. The pumpkin is cheap in the fall, and chocolate chips are pantry staples for us.
- Smells Like Heaven — I know that’s cliché, but it’s true. The moment that brown butter hits the pan, the whole house transforms. My kids think it smells like a bakery. It actually helps with the “five more minutes” morning struggle.
- Meal-Prep Friendly — This bread keeps for four days in an airtight container, and it freezes beautifully. I usually make two loaves on Sunday. By Wednesday, we’re slicing and toasting pieces for a quick breakfast or snack. It’s way cheaper than buying those expensive pre-sliced loaves at the store.
- Kid-Approved — My picky eater, who usually turns his nose up at anything orange, loves this. The chocolate chips help, obviously, but the texture is soft and moist, not dry or cake-like. It’s the kind of bread that disappears without a trace.
Real talk: this is my go-to when I need dinner—or breakfast—to just work. No complicated techniques, no weird ingredients you have to order online, just reliable, delicious food that makes everyone happy and leaves money in your pocket.
Ingredients You’ll Need
Here’s the best part: you probably have most of this already in your pantry. I’m particular about a few things here, but mostly, this is about keeping it simple and affordable.
For the Bread
All-purpose flour (2 ½ cups / 315g) — The base of everything. Don’t try to swap this for almond flour unless you want to go broke. AP flour is cheap and works perfectly here. Sift it if you’re feeling fancy, but spooning it into the cup is fine.
Baking soda (1 teaspoon) — This is what makes it rise. Make sure it’s not old. If it’s been in your cabinet since 2019, toss it and buy new. It makes a huge difference in the texture.
Baking powder (½ teaspoon) — Just a little extra lift. Standard stuff.
Cinnamon (1 ½ teaspoons) — Don’t skimp. This is the heart of the flavor. Use good quality cinnamon; the cheap stuff tastes dusty. I usually buy the big container because I use it for everything from chai latte to cookies.
Nutmeg (½ teaspoon) — Freshly grated is best, but ground works fine. Just a pinch adds that warm, cozy depth.
Salt (½ teaspoon) — Essential for balancing the sweet. Never skip the salt.
Pumpkin puree (1 cup / 245g) — NOT pumpkin pie filling. Check the label. It should say 100% pumpkin. Canned is fine, and it’s cheap. If you have fresh pumpkin, roast and puree it, but honestly? The can is easier and tastes just as good.
Vegetable oil (½ cup / 120ml) — Oil keeps the bread moist longer than butter does. I use vegetable or canola. Olive oil works but gives it a savory taste I don’t want here.
Granulated sugar (¾ cup / 150g) — You can reduce this to ½ cup if you’re watching sugar, but I don’t recommend it. The kids will notice, and honestly, a little sugar is part of the fun.
Large eggs (2) — Room temperature is best, so they emulsify better with the oil. If you forget, just drop them in warm water for 5 minutes.
Vanilla extract (1 teaspoon) — Pure vanilla, not imitation. It makes a noticeable difference in flavor.
Chocolate chips (1 cup / 170g) — Semi-sweet or milk chocolate. I use the bag from the grocery store, not the fancy artisanal chips. It’s about budget and volume here.
For the Brown Butter Glaze
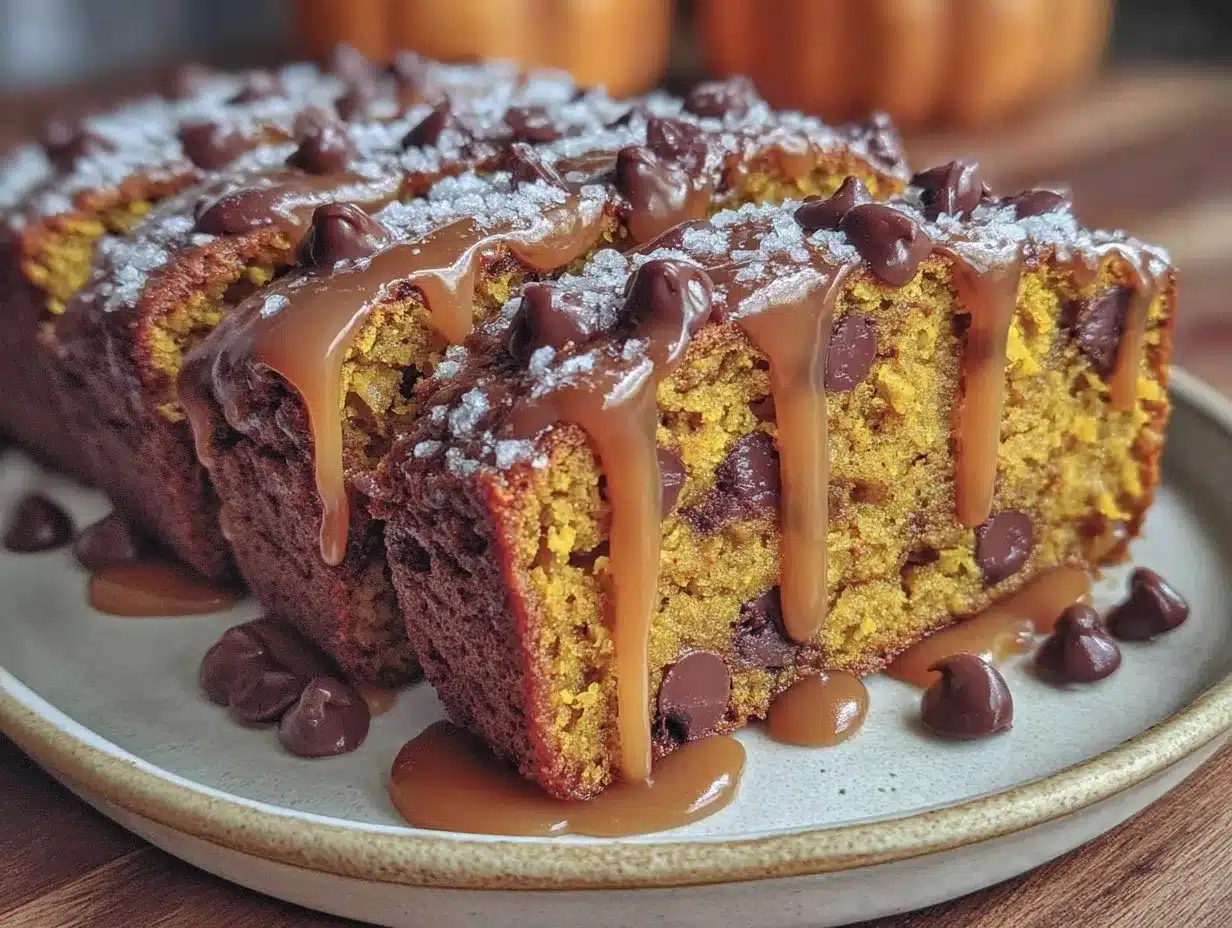
Unsalted butter (¼ cup / 57g) — This is where the magic happens. You’re browning it specifically for the nutty flavor.
Powdered sugar (1 ½ cups / 180g) — Standard confectioners’ sugar. Sift it if it’s clumpy.
Milk (2-3 tablespoons) — Any kind works. I usually use what’s left in the carton.
Salt (a pinch) — Cuts the sweetness of the glaze.
Equipment Needed
You don’t need fancy equipment for this. Here’s what I actually use.
Two 9×5 inch loaf pans — I make two loaves because I always eat the first one before it’s done cooling. Grease them well with butter or non-stick spray. Lining with parchment paper makes cleanup a breeze.
Mixing bowls — One large, one medium. I use plastic ones because they’re lighter and easier to wash.
Whisk — For the dry ingredients. A fork works in a pinch, but a whisk is faster.
Rubber spatula — For folding in the chocolate chips. You need to be gentle so you don’t overmix the batter.
Small saucepan — For browning the butter. Stainless steel is best because you can see the color change clearly. Non-stick makes it harder to tell if it’s browning.
Whisk or small fork — For mixing the glaze.
Cooling rack — Essential. Don’t skip this. If you leave the bread in the hot pan, it’ll steam and get soggy on the bottom.
How to Make It: Step-by-Step
Alright, let’s make this! I’m walking you through exactly how I do it, including the little tricks I’ve picked up.
Step 1: Prep Your Oven and Pans (5 minutes)
Preheat your oven to 350°F (175°C). Grease your two loaf pans thoroughly. I like to spray them with non-stick cooking spray and then dust them with a little flour, tapping out the excess. This ensures the bread doesn’t stick. While the oven heats, get your bowls ready.
Step 2: Mix the Dry Ingredients (2 minutes)
In your large bowl, whisk together the flour, baking soda, baking powder, cinnamon, nutmeg, and salt. Make sure there are no lumps of baking soda. This distributes the leavening evenly so you don’t get bitter spots in the bread. Set this aside.
Step 3: Mix the Wet Ingredients (3 minutes)
In the medium bowl, whisk the vegetable oil, sugar, eggs, vanilla, and pumpkin puree until smooth. The mixture might look a bit curdled at first—that’s normal. Keep whisking until it’s uniform. The pumpkin adds moisture, so don’t worry if it looks wet.
Step 4: Combine Wet and Dry (2 minutes)
Pour the wet ingredients into the dry ingredients. Use your rubber spatula to gently fold them together. Stop as soon as the flour disappears. Overmixing makes the bread tough. It’s okay if there are a few small streaks of flour left.
Step 5: Fold in Chocolate Chips (1 minute)
Stir in the chocolate chips. You can do this by hand or with the spatula. I usually do a few folds to get them distributed, then a few more to finish. Be gentle.
Step 6: Bake (45-50 minutes)
Distribute the batter evenly between the two loaf pans. They should be about ¾ full. Bake for 45-50 minutes. Check at 45 minutes. Insert a toothpick into the center of the loaf. If it comes out clean or with just a few moist crumbs, it’s done. If it has wet batter, give it 5 more minutes. The top should be golden brown and spring back when you touch it lightly.
Step 7: Cool Completely (30 minutes)
Let the loaves sit in the pans for 10 minutes, then turn them out onto a cooling rack. Let them cool completely before glazing. If you glaze warm bread, the glaze will melt right off and soak in. Patience is key here.
Step 8: Make the Brown Butter Glaze (5 minutes)
While the bread cools, melt the butter in a small saucepan over medium heat. Swirl it occasionally. You’re looking for the butter to turn golden brown and smell nutty. This takes about 3-4 minutes. Watch it closely—it goes from brown to burnt very fast. Once it’s brown, remove from heat and let it cool for 2 minutes.
Whisk the powdered sugar, salt, and 2 tablespoons of milk into the brown butter. Add more milk, a teaspoon at a time, until you reach a drizzling consistency. It should be thick but pourable.
Step 9: Glaze and Serve
Drizzle the glaze over the completely cooled bread. Let it set for 10 minutes before slicing. Slice thickly—it’s a breakfast bread, so you want substantial pieces.
Expert Tips & Tricks
Here’s everything I’ve learned from making this dozens of times. These tips will save you from my mistakes.
Don’t Rush the Brown Butter
This is the most critical step. If you walk away to check your phone, your butter will burn. The smell changes from milky to nutty to slightly acrid. When it smells like toasted hazelnuts, it’s done. Take it off the heat immediately.
Room Temperature Eggs
I know it’s annoying, but cold eggs can cause the batter to seize slightly. Leave them on the counter while you prep. It helps the emulsion and makes a smoother batter.
Don’t Overbake
Pumpkin bread is dense. It continues to cook a bit after you take it out of the oven. If the toothpick comes out with wet batter, it needs more time. If it comes out clean, it might be slightly dry if you wait. Aim for moist crumbs.
Storage Hack
Wrap the cooled loaves tightly in plastic wrap, then put them in a freezer bag. They freeze for up to 3 months. Thaw at room temperature or warm in the microwave for 30 seconds. It tastes fresh.
Double the Batch
This recipe scales easily. I usually make two loaves because one disappears in two days. If you’re meal-prepping for the week, make four loaves. Just ensure your oven has space and rotate the pans halfway through baking.
Variations & Substitutions
Once you’ve nailed the basic version, here’s how you can mix it up. I’ve tried all of these.
Gluten-Free
Use a 1-to-1 gluten-free flour blend. I’ve used Bob’s Red Mill and King Arthur, and both work well. Add a teaspoon of xanthan gum if your blend doesn’t have it.
Dairy-Free
Swap the butter in the glaze for coconut oil or a dairy-free butter alternative. The milk can be replaced with oat milk or almond milk. The bread itself is naturally dairy-free if you use oil.
Nut-Free
The original recipe is nut-free, but if you want to add crunch, use toasted sunflower seeds or pepitas instead of walnuts. Avoid pecans if you’re strict about nut-free.
Less Sweet
Reduce the sugar in the bread to ½ cup and skip the glaze. The pumpkin is naturally sweet, so it’s still delicious. Great for a lighter breakfast.
Add-Ins
Chopped walnuts or pecans work great with chocolate chips. You can also add a swirl of cream cheese in the batter before baking for a marble effect. Or swap the chocolate chips for white chocolate and dried cranberries for a festive twist.
Serving & Storage
How to Serve:
I usually serve this straight from the slicing board at the breakfast table. It’s rustic and stays warm. Pair it with a hot coffee or a glass of cold milk. My kids love it with a pat of butter on top, even though it’s already sweet.
Side Dishes:
This bread stands well on its own, but if you want a full meal, add some bacon or sausage links. A simple fruit salad with berries and yogurt balances the richness. Or serve it alongside a salted caramel hot chocolate for a cozy weekend treat.
Storage Instructions:
Refrigerator: Store in an airtight container for up to 4 days. The glaze might soften in the fridge, but the flavor stays great.
Freezer: Wrap tightly in plastic wrap and foil. Freeze for up to 3 months. Thaw overnight in the fridge or at room temperature.
Reheating: Warm slices in the microwave for 20-30 seconds. This restores the soft texture and melts the glaze slightly. Don’t skip this step if it’s been a few days.
Nutrition Information
I’m not a nutritionist, but here’s the breakdown if you’re tracking. This is per slice (assuming 10 slices per loaf, 2 loaves).
- Calories: 280
- Protein: 4g
- Carbs: 42g
- Fiber: 2g
- Sugar: 24g
- Fat: 12g
- Saturated Fat: 4g
- Cholesterol: 35mg
- Sodium: 220mg
Look, this is comfort food with sugar and chocolate chips. It’s not a diet recipe. But it’s way better than the processed stuff from the store, costs less, and I know exactly what’s in it. When I want to make it lighter, I reduce the sugar and skip the glaze. But usually? I just eat a reasonable slice and enjoy it.
Final Thoughts
So that’s my go-to fall pumpkin chocolate chip bread with brown butter glaze! I’ve probably talked your ear off at this point, but when you make a recipe this often, you have a lot to say about it. This has saved weekday mornings more times than I can count. It’s my answer to “what’s for breakfast” when I’m tired, don’t want to cook a big meal, and still want something that tastes really good. My kids are happy, my husband’s happy, and I’m happy because I’m not stressed about cooking.
Make it yours! Try different add-ins, swap in your favorite spices, or adjust the glaze thickness. The best recipes are the ones you adapt to your family’s tastes. If you make this, drop a comment and let me know what you think! I love hearing how recipes turn out in your kitchen. And if something doesn’t work, tell me that too—I’m here to help troubleshoot.
Happy cooking! And I hope your kitchen smells half as good as mine does right now.
Frequently Asked Questions
Can I use fresh pumpkin instead of canned?
Yes, but you need to roast it first. Cut the pumpkin, remove seeds, roast until tender, and puree it. Make sure you drain the puree well—fresh pumpkin has more water, which can make the bread soggy. Canned is easier and more consistent, but fresh tastes great if you have the time.
Why did my bread turn out dense?
Usually, this means you overmixed the batter. Once you add the dry ingredients, mix just until combined. Also, check your baking soda. If it’s old, it won’t rise properly. And don’t pack the flour into the measuring cup—spoon it in and level it off.
Can I make this ahead for a party?
Absolutely. Bake the loaves a day ahead, let them cool completely, and wrap them tightly. They actually taste better the next day as the flavors meld. Bring them to room temperature before serving. The glaze can be made ahead too, just reheat it slightly if it thickens.
Why did my glaze separate?
If the brown butter was too hot when you added the powdered sugar, it might have seized or separated. Let the brown butter cool for a few minutes before whisking in the sugar and milk. If it does separate, whisk in a little more milk until it smooths out.
Can I freeze the glaze separately?
It’s better to make the glaze fresh, but you can store it in the fridge for a few days. Reheat it gently in the microwave and whisk until smooth. The texture might change slightly, but it’s still delicious.
Is this bread too sweet for breakfast?
It’s moderately sweet. If you find it too sweet, reduce the sugar in the batter to ½ cup and skip the glaze. The pumpkin and cinnamon provide plenty of flavor. It’s still moist and delicious without the extra sugar.
Can I use applesauce instead of oil?
You can, but the bread will be less moist and more cake-like. If you want to reduce fat, use half applesauce and half oil. This is a good compromise for a lighter texture without sacrificing too much moisture.
Pin This Recipe!
Fall Pumpkin Chocolate Chip Bread with Brown Butter Glaze
- Total Time: 1 hour 5 minutes
- Yield: 2 loaves (20 slices) 1x
Description
An easy, budget-friendly fall breakfast bread made with pumpkin puree and chocolate chips, topped with a rich brown butter glaze. Perfect for weekday mornings and meal prepping.
Ingredients
- 2 ½ cups all-purpose flour
- 1 teaspoon baking soda
- ½ teaspoon baking powder
- 1 ½ teaspoons cinnamon
- ½ teaspoon nutmeg
- ½ teaspoon salt
- 1 cup pumpkin puree (not pie filling)
- ½ cup vegetable oil
- ¾ cup granulated sugar
- 2 large eggs
- 1 teaspoon vanilla extract
- 1 cup chocolate chips
- ¼ cup unsalted butter (for glaze)
- 1 ½ cups powdered sugar (for glaze)
- 2–3 tablespoons milk (for glaze)
- Pinch of salt (for glaze)
Instructions
- Preheat oven to 350°F (175°C). Grease two 9×5 inch loaf pans thoroughly with butter or non-stick spray.
- In a large bowl, whisk together flour, baking soda, baking powder, cinnamon, nutmeg, and salt until combined.
- In a medium bowl, whisk vegetable oil, sugar, eggs, vanilla, and pumpkin puree until smooth.
- Pour wet ingredients into dry ingredients and gently fold together with a rubber spatula until just combined. Do not overmix.
- Fold in chocolate chips.
- Divide batter evenly between the two prepared loaf pans (filling about ¾ full).
- Bake for 45-50 minutes, or until a toothpick inserted into the center comes out clean or with moist crumbs.
- Let loaves cool in pans for 10 minutes, then transfer to a cooling rack to cool completely.
- While bread cools, melt butter in a small saucepan over medium heat until golden brown and nutty (3-4 minutes). Remove from heat and cool for 2 minutes.
- Whisk powdered sugar, pinch of salt, and 2 tablespoons milk into the brown butter. Add more milk as needed to reach a drizzling consistency.
- Drizzle glaze over completely cooled bread and let set for 10 minutes before slicing.
Notes
Ensure baking soda is fresh for proper rise. Room temperature eggs help emulsify the batter better. Do not overmix the batter to avoid tough bread. Brown butter can burn quickly, so watch it closely. The bread keeps for 4 days in an airtight container or freezes for up to 3 months.
- Prep Time: 15 minutes
- Cook Time: 45-50 minutes
- Category: Breakfast
- Cuisine: American
Nutrition
- Serving Size: 1 slice
- Calories: 280
- Sugar: 24
- Sodium: 220
- Fat: 12
- Saturated Fat: 4
- Carbohydrates: 42
- Fiber: 2
- Protein: 4
Keywords: pumpkin bread, chocolate chip bread, fall breakfast, brown butter glaze, easy baking, budget friendly, meal prep, pumpkin puree recipe



