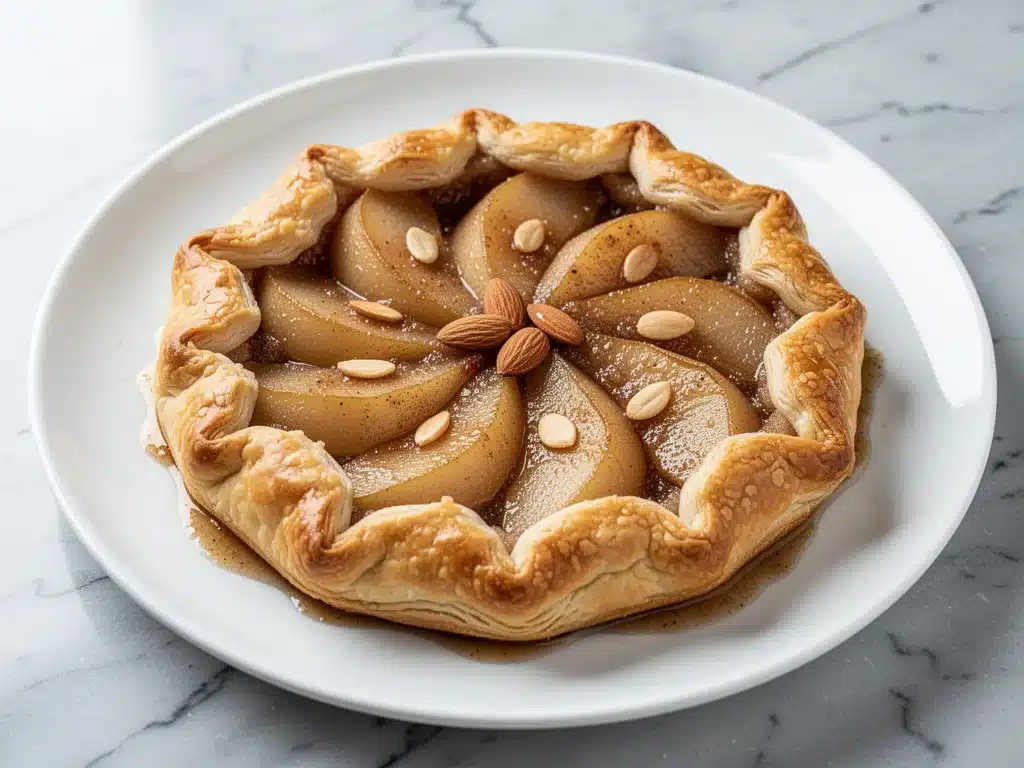
There is a specific kind of panic that hits me every October. It starts with a crisp morning, the leaves turning that perfect shade of amber, and a sudden, overwhelming urge to make something that feels like autumn in a bowl. But here’s the thing: I am not a professional pastry chef. I don’t have a marble countertop or a stand mixer that costs more than my first car. What I have is a well-loved rolling pin, a trusty baking sheet, and a deep desire to look like I know what I’m doing when guests come over.
That’s how I fell in love with the fall brown sugar pear galette. I’d tried making traditional pies before—ones with those fancy lattice tops that always collapsed or crusts that turned out more like rock than flaky pastry. I’d spent hours peeling, slicing, and sweating over a stove, only to serve a dense, soggy mess that my family politely ate while avoiding eye contact. I was ready to give up. I was ready to just buy the pre-made crusts from the grocery store (don’t judge me; we’ve all been there).
Then, last year, I stumbled on the idea of a galette. It’s basically a rustic, free-form tart. No pie pan. No fancy crimping. You just roll out the dough, pile on the fruit, fold the edges over, and bake it. It’s forgiving. It’s beautiful. And it tastes like heaven. I made this fall brown sugar pear galette for a small dinner party, and my friend Sarah actually asked for the recipe before I could finish pouring her wine. That’s the power of a good fruit galette.
Since then, I’ve made this pear dessert at least a dozen times. I’ve tweaked the sugar, played with different types of pears, and even tried using store-bought dough for comparison (spoiler: homemade butter crust is always worth the extra 20 minutes). This recipe has become my go-to when I want to impress without the stress. It’s simple, it’s seasonal, and it smells like a bakery from three blocks away. If you’ve ever been intimidated by pie, this is your entry point. Trust me.
Why You’ll Love This Recipe
There are a lot of dessert recipes out there, but this fall brown sugar pear galette holds a special place in my heart—and my recipe box. It’s not just because it tastes incredible (though it does), but because it fits so perfectly into the rhythm of fall cooking. Here’s why this recipe has earned a permanent spot on my weeknight rotation, even though it’s technically dessert.
Zero Pie Pan Stress — Seriously, if you have a baking sheet, you have everything you need. No specialized pans to buy, no worrying about whether your pie crust will fit in the dish. It’s free-form, which means it’s forgiving. If the edges look a little wonky? That’s not a mistake; that’s “rustic charm.” I’ve made this for people who claim they can’t bake, and they’ve made it themselves within an hour.
Flaky Butter Crust Magic — I am particular about my crust. I’ve tried recipes that use shortening (too mealy) and recipes that use oil (too tough). This one uses cold butter, cut into the flour just right. It creates layers that shatter when you cut into it. I’ve made this crust so many times that I can probably do it blindfolded. It’s the kind of crust that makes you stop mid-bite to appreciate the texture.
Uses Seasonal Pears — This isn’t just a generic fruit tart. It’s specifically designed for fall. Bosc or Anjou pears hold their shape beautifully when baked, staying tender but not turning into applesauce. Plus, using seasonal fruit supports local farms and usually costs less than out-of-season berries. It’s smart cooking.
5-Step Simplicity — I counted. There are really only five main steps: make the dough, roll it out, fill it, fold it, and bake it. That’s it. I’ve walked my teenager through this recipe over FaceTime while I was at work. She called me halfway through to ask if she was supposed to crimp the edges, and I told her no, just fold them. She nailed it. It’s that easy.
Makes Amazing Leftovers — Unlike some delicate tarts, galettes actually taste better the next day. The flavors meld, the crust gets slightly crispier, and it’s perfect for a quick breakfast or a snack with coffee. I deliberately make a double batch sometimes because I know I’ll want this for lunch the next day. It’s that good.
This recipe has saved me more times than I can count. It’s my answer to “I want to bake something fancy but I’m tired.” It’s reliable, it’s delicious, and it makes your kitchen smell like autumn. You’ll love it.
Ingredients You’ll Need
Here’s the best part: you probably have most of these ingredients already. This isn’t a recipe that requires a trip to three different specialty stores. It’s pantry-friendly, with just a few key items that make all the difference. I’m particular about three things here, and I’ll tell you exactly why.
For the Flaky Butter Crust
All-purpose flour (2 ½ cups / 315g) — This is your base. I use Gold Medal or King Arthur, but any standard all-purpose flour works. Don’t try to substitute with cake flour; it won’t have the right structure.
Unsalted butter (1 cup / 225g, cold and cubed) — This is non-negotiable. Cold butter creates steam pockets in the dough, which equals flakiness. I keep my butter in the fridge until the second I need it. If it’s soft, your crust will be tough. I’ve ruined batches this way before, so don’t make my mistake.
Ice water (6-8 tablespoons) — Use ice water. Literally. Have a glass of water with ice in it, and scoop the water out as you need it. The cold temperature keeps the butter from melting into the flour. This is the secret to a tender crust.
Salt (1 teaspoon) — Enhances the flavor of the butter and dough. Don’t skip it.
Granulated sugar (1 tablespoon) — Just a pinch to help browning and balance the salt. It’s subtle.
For the Pear Filling
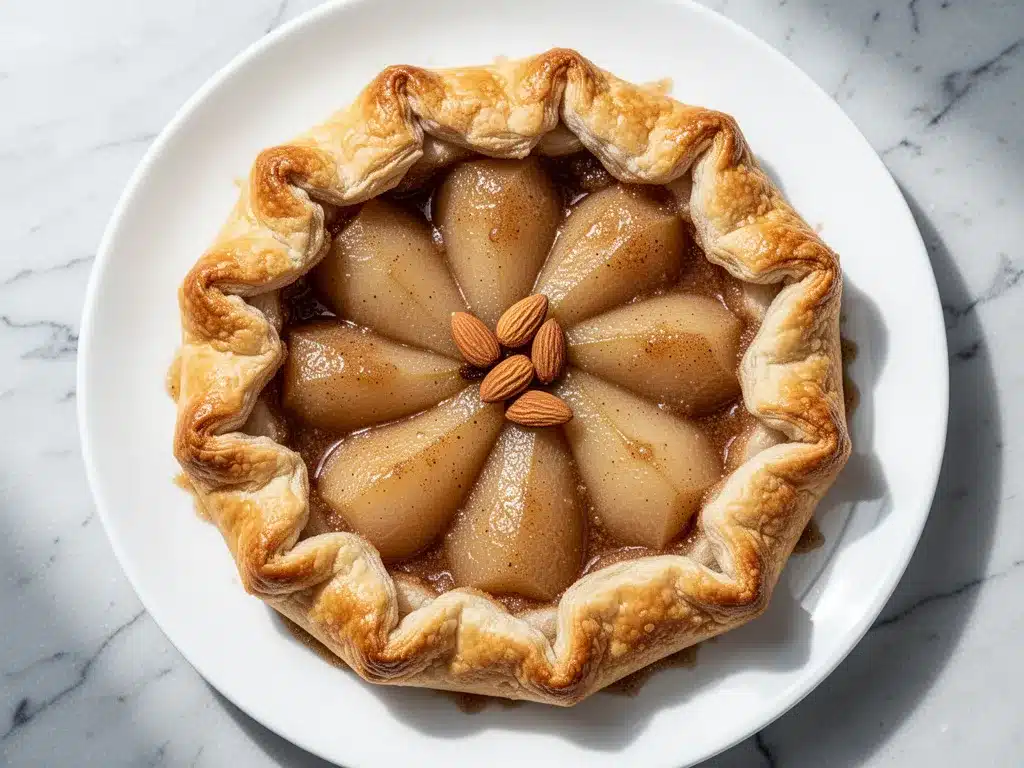
Pears (4-5 medium, about 2 lbs / 900g) — I recommend Bosc pears. They’re firm, hold their shape when baked, and have a nice spicy-sweet flavor. Anjou pears work too, but avoid ripe Bartlett pears as they can get too mushy. You want slices, not applesauce.
Brown sugar (½ cup / 100g) — This is where the “fall” flavor comes from. The molasses in the brown sugar caramelizes in the oven, creating those deep, rich flavors. Dark brown sugar is even better if you want a more intense taste.
Granulated sugar (2 tablespoons) — Balances the brown sugar and helps draw out the pear juices.
Cinnamon (1 teaspoon) — The classic fall spice. It’s warm and comforting.
Nutmeg (¼ teaspoon) — Just a hint. It adds depth without overpowering the pear flavor.
Vanilla extract (1 teaspoon) — Enhances the sweetness and adds a nice aromatic note.
Cornstarch (1 tablespoon) — This thickens the pear juices so you don’t end up with a soggy bottom. It’s crucial.
Lemon juice (1 tablespoon) — Prevents the pears from browning and adds a little brightness to cut through the sweetness.
For the Egg Wash & Topping
Egg (1 large, beaten with 1 tablespoon water) — This gives the crust a beautiful golden-brown shine. It’s optional, but I always do it because it looks so professional.
Sugar for sprinkling (1 tablespoon) — Sprinkle this on top before baking for a crunchy, sweet crust. It’s a small detail that makes a big difference.
Equipment Needed
You don’t need fancy equipment for this. Here’s what I actually use.
Large mixing bowl — For combining the flour and butter. A wide bowl makes it easier to cut in the butter.
Pastry cutter or fork — I use a pastry cutter because it’s faster, but a fork works fine if you’re patient. You’re looking for pea-sized crumbs.
Rolling pin — Any standard rolling pin works. I use a wooden one because it has a nice grip.
Baking sheet — A standard 18×13 inch sheet. Line it with parchment paper for easy cleanup. I’ve burned cookies on bare sheets before; don’t be like me.
Parchment paper — Essential for rolling and baking. It prevents sticking and makes cleanup a breeze.
Sharp knife — For slicing the pears evenly. A dull knife will crush the pears.
Measuring cups and spoons — Standard stuff. Accuracy matters in baking, so don’t eyeball it too much.
Small bowl — For mixing the egg wash.
Cooling rack — Let the galette cool on a rack so the bottom doesn’t get soggy. I know it’s tempting to cut into it hot, but wait.
How to Make It: Step-by-Step
Alright, let’s make this! I’m walking you through exactly how I do it, including the little tricks I’ve picked up over the years.
Step 1: Make the Dough (10 minutes)
In a large bowl, whisk together the flour, salt, and 1 tablespoon of sugar. Add the cold, cubed butter. Using a pastry cutter or fork, cut the butter into the flour until the mixture looks like coarse crumbs with some pea-sized pieces of butter remaining. These butter chunks are what create the flaky layers.
Gradually add the ice water, one tablespoon at a time, mixing gently with a spatula or your hands. Stop when the dough just starts to come together. Don’t overwork it! If you keep mixing, the gluten will develop, and the crust will be tough. It’s okay if it looks a bit shaggy.
Turn the dough out onto a clean surface and gently press it into two disks. Wrap them in plastic wrap and refrigerate for at least 30 minutes. This rest time is crucial—it relaxes the gluten and re-chills the butter.
Step 2: Prepare the Pears (15 minutes)
While the dough chills, peel, core, and slice the pears. Aim for slices about ¼ inch thick. Too thin, and they’ll disappear; too thick, and they’ll be raw in the center.
In a large bowl, toss the pear slices with the brown sugar, granulated sugar, cinnamon, nutmeg, vanilla, cornstarch, and lemon juice. Make sure every slice is coated. Let this sit for 10 minutes while you roll out the dough. The sugar will draw out some juices, which is perfect.
Step 3: Roll Out the Dough (5 minutes)
Take one disk of dough out of the fridge. On a floured surface, roll it out into a large circle, about 12 inches in diameter. Don’t worry about it being perfect. Galettes are rustic, remember?
Transfer the dough to a parchment-lined baking sheet. This makes it easy to move the filling later. Keep the dough on the parchment paper—it’s your best friend.
Step 4: Fill and Fold (10 minutes)
Arrange the pear slices in the center of the dough, leaving a 2-inch border around the edge. Don’t pile them too high in the middle, or the filling will spill out. You want an even layer.
Starting from one side, fold the edge of the dough over the pears, pleating as you go. It’s like folding a blanket. You don’t need to cover all the fruit; leaving some exposed is part of the rustic look. Fold the other side over too, creating a loose, open shape.
Step 5: Bake (40-45 minutes)
Preheat your oven to 400°F (200°C). Brush the folded crust with the egg wash and sprinkle with the extra sugar. This gives it that bakery-shop shine and crunch.
Bake for 40-45 minutes, until the crust is golden brown and the pears are tender and bubbling. If the edges start browning too quickly, cover them with a strip of foil. Let the galette cool on a rack for at least 20 minutes before slicing. This allows the filling to set.
Enjoy warm, with a scoop of vanilla ice cream or a dollop of whipped cream. It’s pure comfort.
Expert Tips & Tricks
Here’s everything I’ve learned from making this dozens of times. These tips will save you from my mistakes.
Keep Everything Cold
This is the #1 rule for pie crust. If your butter melts before it hits the oven, you lose the flakiness. I even chill my flour in the freezer for 15 minutes before starting. If your dough gets warm while you’re rolling, pop it back in the fridge for 10 minutes. It’s worth the patience.
Don’t Skip the Cornstarch
Pears release a lot of juice. Without cornstarch, you’ll end up with a puddle of syrup on your baking sheet. The cornstarch thickens the juices, keeping the bottom crust crisp. I’ve made this without it once, and the bottom was soggy. Don’t make that mistake.
Use Firm Pears
Bosc or Anjou pears are best. If you use very ripe pears, they’ll turn to mush. Look for pears that yield slightly to pressure but aren’t soft. You want them to hold their shape during baking.
Chill Before Baking
After you fold the crust and add the egg wash, put the whole galette in the fridge for 10 minutes before baking. This re-chills the butter, ensuring it puffs up in the oven rather than melting out immediately.
Let It Cool
I know it’s hard, but don’t cut into the galette right out of the oven. The filling needs time to set. If you cut it hot, it’ll be runny. Let it cool for at least 20 minutes. The flavor actually improves as it cools.
Freeze the Dough
If you’re short on time, you can freeze the dough disks for up to 3 months. Just thaw them in the fridge overnight before using. I often make a double batch of dough and freeze half for later. It’s a lifesaver.
Variations & Substitutions
Once you’ve nailed the basic version, here’s how you can mix it up. I’ve tried all of these.
Apple Galette
Swap the pears for thinly sliced apples (Granny Smith or Honeycrisp work well). Use the same filling ingredients. Apples have a similar texture to pears and work beautifully in this format. It’s like a deconstructed apple pie.
Berry Galette
Use mixed berries (blueberries, raspberries, blackberries). Add an extra tablespoon of cornstarch because berries release more juice. A little lemon zest in the filling brightens it up. This is great for summer.
Stone Fruit Galette
In late summer, use sliced peaches, nectarines, or plums. They’re sweeter than pears, so you might want to reduce the brown sugar slightly. The result is juicy and fragrant.
Gluten-Free Crust
Use a 1:1 gluten-free flour blend. The texture might be slightly more crumbly, but it still works. I’ve used Bob’s Red Mill and it’s been successful. Add an extra tablespoon of ice water if the dough is dry.
Vegan Option
Replace the butter with cold vegan butter (like Earth Balance). Use coconut cream or oat milk instead of the egg wash. The flavor is slightly different, but still delicious. My vegan friend loves this version.
Spice It Up
Add a pinch of cardamom or ginger to the filling for a more complex flavor. It pairs wonderfully with the pears and brown sugar.
Serving & Storage
How to Serve:
I usually serve this straight from the baking sheet at the dinner table—it looks rustic and stays warm. But here are other ways I’ve enjoyed it:
Side Dishes:
- Vanilla bean ice cream (classic)
- Whipped cream with a drizzle of caramel
- Cream cheese frosting (if you’re feeling indulgent)
- A cup of hot tea or coffee
Toppings Bar:
When I have guests, I put out: extra cinnamon sugar, crushed walnuts, and a small bowl of whipped cream. Everyone customizes their slice.
Storage Instructions:
Refrigerator: Store in an airtight container for up to 3 days. The crust will soften slightly, but it’s still good. Bring to room temperature before serving.
Reheating: Best method: Warm in a 350°F oven for 10 minutes to crisp up the crust. Microwave works in a pinch but makes the crust chewy. I prefer the oven.
Freezing: You can freeze the unbaked galette. Wrap it tightly in plastic and foil. Bake from frozen, adding 10-15 minutes to the baking time. Or, freeze the baked galette and reheat before serving.
Pro tip: If leftovers are drying out, add a splash of water to the baking sheet before reheating. It creates steam and keeps the crust tender.
Nutrition Information
I’m not a nutritionist, but here’s the breakdown if you’re tracking.
Per Serving (based on 8 servings):
| Nutrient | Amount |
|---|---|
| Calories | 320 |
| Protein | 4g |
| Carbs | 45g |
| Fiber | 3g |
| Sugar | 28g |
| Fat | 14g |
| Saturated Fat | 8g |
| Cholesterol | 35mg |
| Sodium | 220mg |
What’s Good:
- Decent fiber from the pears and whole wheat flour (if used)
- Real fruit in every bite
- More filling than it looks
What to Know:
- Higher in calories from butter and sugar
- Contains gluten and dairy
- Moderate sodium
My Take:
Look, this is dessert. It has butter and sugar. It’s not a diet recipe. But it’s way better than store-bought pie, costs less, and I know exactly what’s in it. When I want to make it lighter, I use less sugar and add more pears. But usually? I just enjoy a slice and savor the moment.
Final Thoughts
So that’s my go-to fall brown sugar pear galette! I’ve probably talked your ear off at this point, but when you make a recipe this often, you have a lot to say about it. This has saved me more times than I can count. It’s my answer to “I want to bake something fancy but I’m tired.” It’s reliable, it’s delicious, and it makes your kitchen smell like autumn.
This recipe has become a staple in my home. I make it for family dinners, holiday gatherings, and sometimes just because I need a hug in food form. My kids are happy, my husband’s happy, and I’m happy because I’m not stressed about cooking. It’s that simple.
Make it yours! Try different fruits, swap in your favorite spices, or adjust the sweetness to your taste. The best recipes are the ones you adapt to your family’s tastes. If you make this, drop a comment and let me know what you think! I love hearing how recipes turn out in your kitchen. And if something doesn’t work, tell me that too—I’m here to help troubleshoot.
Happy baking! And I hope your kitchen smells half as good as mine does right now.
Frequently Asked Questions
Can I use store-bought pie crust?
Absolutely. If you’re short on time, store-bought crust works fine. Just roll it out and follow the filling steps. The flavor won’t be quite as rich as homemade butter crust, but it’s still delicious. I use store-bought when I’m in a rush, but homemade is always worth the effort.
Why did my galette leak?
Usually means you didn’t use enough cornstarch, or you piled the filling too high. Make sure to toss the pears with cornstarch evenly. Also, leave enough border around the edge so the crust can fold over properly. If it leaks, it’s still edible—just scoop out the filling and serve it with ice cream.
Can I freeze the galette?
Yes! You can freeze the unbaked galette. Wrap it tightly in plastic and foil. Bake from frozen, adding 10-15 minutes to the baking time. Or, freeze the baked galette and reheat before serving. It freezes well for up to 3 months.
What kind of pears are best?
Bosc or Anjou pears are best because they hold their shape when baked. Avoid Bartlett pears as they can get too mushy. Look for pears that are firm but yield slightly to pressure.
Can I make this gluten-free?
Yes, use a 1:1 gluten-free flour blend for the crust. The texture might be slightly more crumbly, but it still works. Add an extra tablespoon of ice water if the dough is dry.
How do I prevent a soggy bottom?
Use cornstarch in the filling to thicken the juices. Also, make sure your baking sheet is hot before you put the galette on it. You can preheat the baking sheet in the oven for 10 minutes before adding the galette. This helps crisp the bottom crust.
Pin This Recipe!
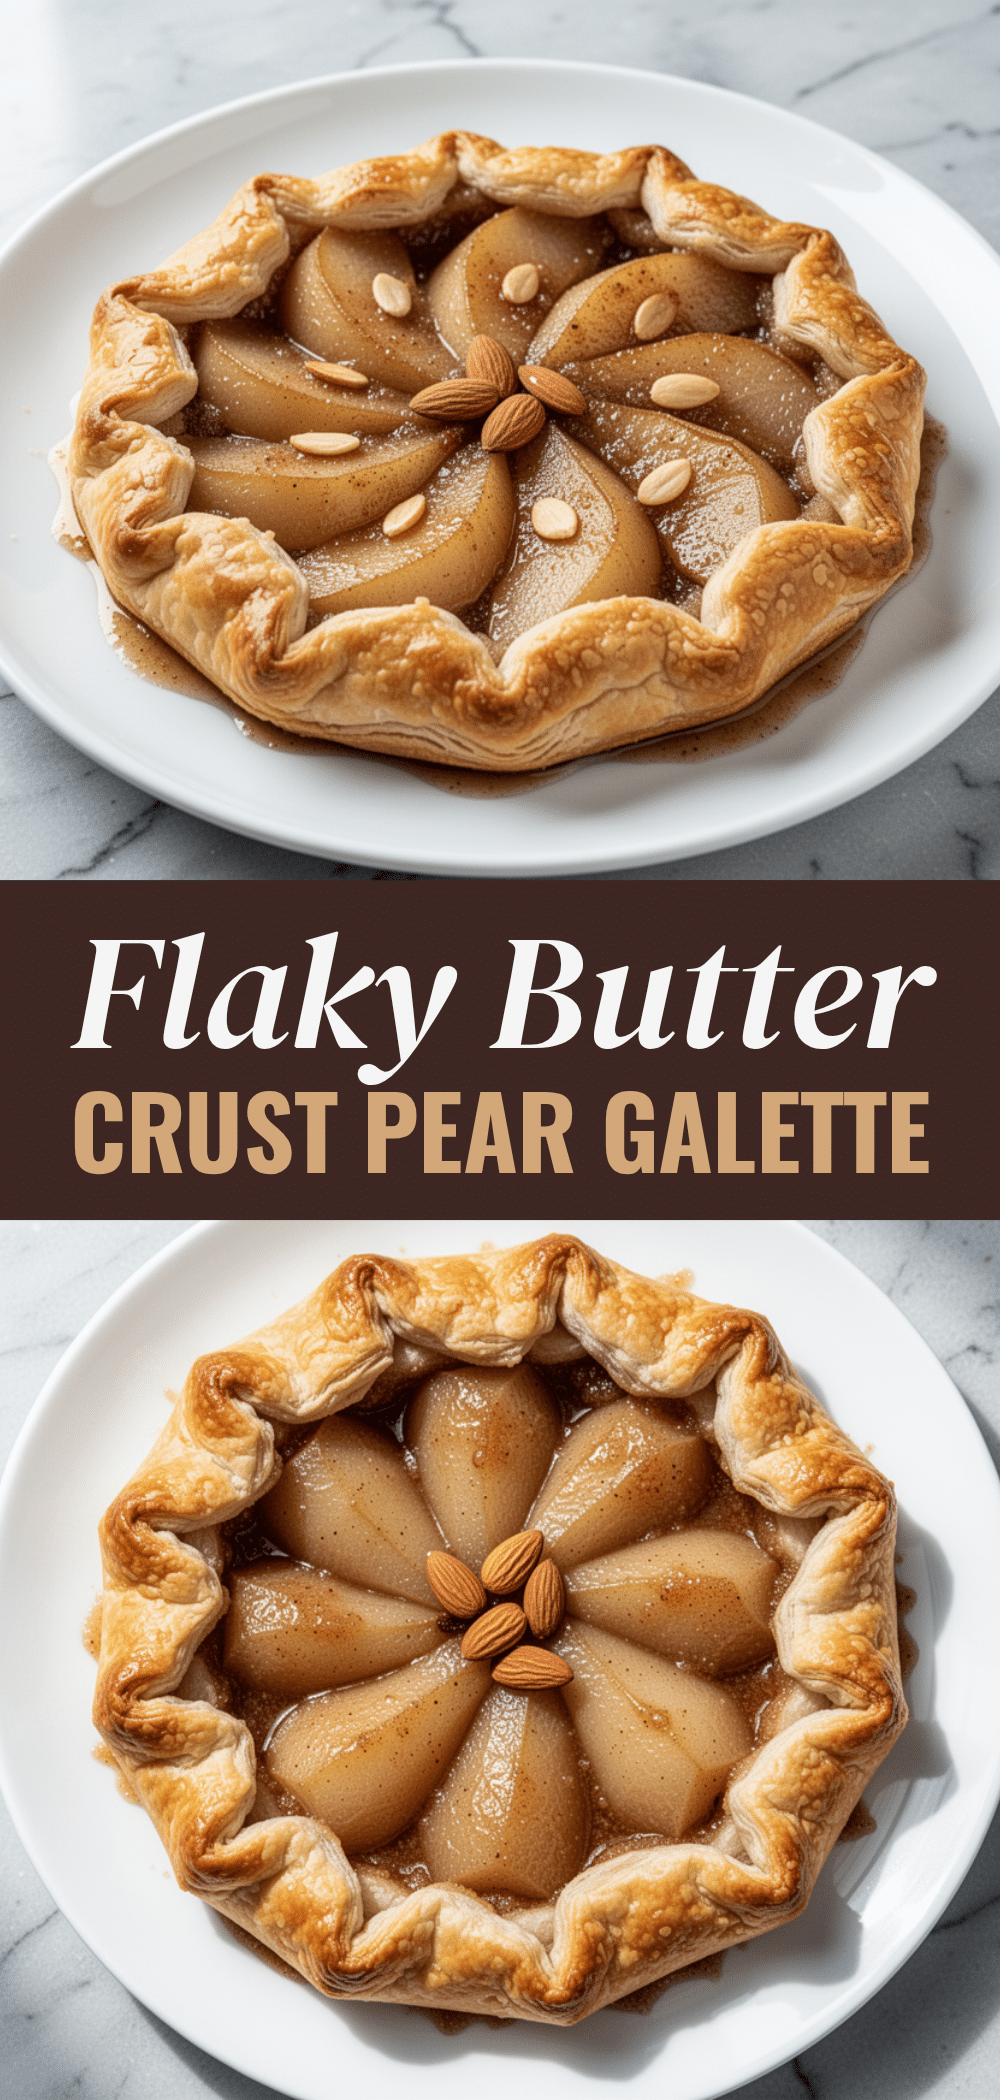
Fall Brown Sugar Pear Galette: 5-Step Easy Pie
- Total Time: 85 minutes
- Yield: 8 servings 1x
Description
A rustic, free-form tart featuring tender fall pears and a flaky butter crust. This forgiving recipe requires no pie pan and delivers bakery-quality flavor with simple, seasonal ingredients.
Ingredients
- 2 ½ cups all-purpose flour
- 1 cup unsalted butter, cold and cubed
- 6–8 tablespoons ice water
- 1 teaspoon salt
- 1 tablespoon granulated sugar
- 4–5 medium pears (Bosc or Anjou), peeled, cored, and sliced
- ½ cup brown sugar
- 2 tablespoons granulated sugar
- 1 teaspoon cinnamon
- ¼ teaspoon nutmeg
- 1 teaspoon vanilla extract
- 1 tablespoon cornstarch
- 1 tablespoon lemon juice
- 1 large egg, beaten with 1 tablespoon water
- 1 tablespoon sugar for sprinkling
Instructions
- In a large bowl, whisk together flour, salt, and 1 tablespoon of sugar. Cut in the cold butter using a pastry cutter or fork until the mixture resembles coarse crumbs with pea-sized butter pieces.
- Gradually add ice water, one tablespoon at a time, mixing gently until the dough just comes together. Do not overwork. Form into two disks, wrap in plastic, and refrigerate for at least 30 minutes.
- While dough chills, toss sliced pears with brown sugar, 2 tablespoons granulated sugar, cinnamon, nutmeg, vanilla, cornstarch, and lemon juice. Let sit for 10 minutes.
- Preheat oven to 400°F (200°C). Roll one dough disk into a 12-inch circle on a floured surface and transfer to a parchment-lined baking sheet.
- Arrange pears in the center, leaving a 2-inch border. Fold the edges of the dough over the fruit, pleating as you go.
- Brush the crust with egg wash and sprinkle with 1 tablespoon sugar.
- Bake for 40-45 minutes until crust is golden brown and pears are tender. Cover edges with foil if browning too quickly.
- Cool on a rack for at least 20 minutes before slicing.
Notes
Keep all ingredients cold for a flaky crust. Use firm pears like Bosc or Anjou to prevent mushiness. Let the galette cool completely to allow filling to set. Can be frozen unbaked or baked for up to 3 months.
- Prep Time: 40 minutes
- Cook Time: 45 minutes
- Category: Dessert
- Cuisine: American
Nutrition
- Serving Size: 1 slice
- Calories: 320
- Sugar: 28
- Sodium: 220
- Fat: 14
- Saturated Fat: 8
- Carbohydrates: 45
- Fiber: 3
- Protein: 4
Keywords: fall dessert, pear galette, rustic tart, easy pie recipe, autumn baking, homemade crust, seasonal fruit



