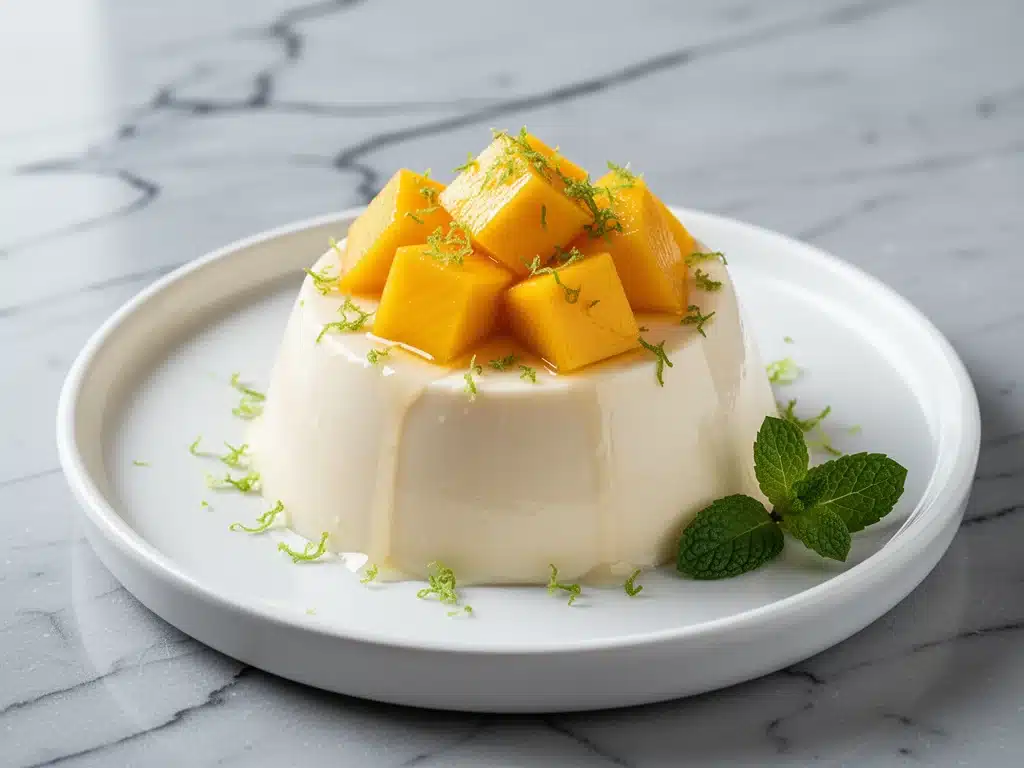
Let’s be honest for a second. I used to think panna cotta was one of those desserts you only saw in fancy restaurant photos or on Pinterest boards, completely out of reach for a normal weeknight. You know the ones—perfectly set, elegant, requiring gelatin sheets you can’t find at the corner store and hours of chilling time I didn’t have after a long day of work.
Then I made a mistake. Well, not really a mistake, more of a happy accident. I was trying to make a traditional Italian dessert for a dinner party, but I ran out of cream and was feeling lazy. I grabbed a can of coconut milk instead, added some mango puree I had lying around, and threw it in the fridge. I expected a weird, runny mess. Instead, I got this silky, dreamy, dairy-free coconut mango panna cotta that was so good my guests asked for the recipe before they even finished their plates.
That was three years ago. Since then, I’ve made this dairy-free coconut mango panna cotta probably fifty times. It’s become my secret weapon for last-minute guests, my go-to treat when I want something sweet but light, and honestly, the only dessert I make on busy weeknights anymore. It’s stupid simple. It comes together in about 15 minutes of active time. And the best part? It tastes like a vacation in a bowl.
If you’ve ever been intimidated by the idea of making panna cotta at home, or if you’re looking for a dessert that happens to be naturally gluten-free and dairy-free, this is the one. I’ve tested it with different brands of coconut milk, different types of mango, and even tried making it with agar-agar for my vegan friends. It always works. Always.
Why You’ll Love This Recipe
There are a million reasons to keep this dairy-free coconut mango panna cotta in your rotation, but let’s get to the real ones—the ones that actually matter when you’re tired and hungry.
It’s Actually Dairy-Free and Creamy — This is the big one. Most people assume “dairy-free dessert” means ice cubes and disappointment. Not here. Full-fat coconut milk gives you that rich, velvety mouthfeel you get from heavy cream, but without the dairy. It’s lush, it’s smooth, and you’ll never miss the cow’s milk.
15 Minutes or Less — I’m not kidding. The prep time is basically just opening a can of coconut milk, blending some mango, and mixing them together. There’s no cooking, no stove-top fuss, no tempering eggs. You whisk, you pour, you chill. That’s it. It’s the easiest dessert I make, right up there with my vegan double-chocolate avocado brownies for sheer laziness.
Make-Ahead Friendly — This is the ultimate stress-reliever. You make it the night before (or even two days before), and it just sits there getting better. You don’t have to stand over it. You don’t have to watch it. When your guests arrive or when you’re ready to eat, it’s already done. It’s the opposite of a last-minute panic.
Gluten-Free by Nature — No flour, no wheat, no cross-contamination worries. This is naturally gluten-free, which makes it a safe bet for everyone at the table. Whether you’re feeding a gluten-free friend or just want a lighter treat, this fits perfectly.
Bright and Refreshing — Unlike heavy chocolate cakes or rich cheesecakes, this is light. The mango adds a bright, tropical acidity that cuts through the richness of the coconut. It’s not cloyingly sweet. It’s balanced. It’s the kind of dessert that leaves you feeling satisfied but not stuffed.
I love this because it respects my time and my ingredients. It’s elegant enough for a dinner party but simple enough for a Tuesday night. And honestly? It’s cheaper than buying it at a fancy dessert shop.
Ingredients You’ll Need
Here’s the thing about this recipe: the ingredient list is short. Like, really short. That’s why it works. But because there are only a few ingredients, each one matters. You can’t skimp on quality here.
Full-Fat Coconut Milk (2 cans, 13.5 oz each / 380g each) — This is the base. Do not use light coconut milk. Do not use coconut water. You need the thick, creamy stuff from the can. Shake the can before you open it, but don’t stir it too much because the cream separates from the water. I like to chill the cans overnight so the cream solidifies at the top, making it easier to scoop out just the thick part, but you can use the whole can if you’re in a hurry. Look for brands with no added gums if you can find them, but most standard brands work fine.
Fresh or Frozen Mango (2 cups / about 300g peeled) — Fresh mango is best for flavor, but frozen works too. If you use frozen, thaw it first. I use a ripe Alphonso or Ataulvo mango when I can find them—they’re sweeter and less fibrous. If you’re using canned mango, drain it well. You want a smooth puree, so blend it until it’s completely silky.
Agar-Agar Powder (1.5 teaspoons / about 6g) — This is the gelling agent. Since we’re not using dairy, we’re skipping gelatin. Agar-agar is derived from seaweed and is the secret to getting that set texture. It’s vegan, gluten-free, and works beautifully. Do not confuse this with agar flakes—they have different gelling strengths. You need the powder. If you can’t find it at your grocery store, order it online; it keeps forever in your pantry.
Simple Syrup or Honey (2-3 tablespoons / 30-45ml) — Depending on how sweet your mango is, you might need a little extra sweetener. Simple syrup blends easiest, but honey or maple syrup works too. Taste your mango puree first! If it’s super sweet, you might not need any. I usually start with 2 tablespoons and add more if needed.
Lime Juice (1 teaspoon / 5ml) — This is the secret weapon. A tiny splash of lime juice brightens up the coconut and mango flavors. It doesn’t make it taste like lime; it just makes the fruit taste more like fruit. Don’t skip it.
Vanilla Extract (1 teaspoon / 5ml) — Pure vanilla adds warmth and depth. I use Madagascar bourbon vanilla. If you don’t have any, you can skip it, but it really rounds out the flavor profile.
Pinch of Salt — Just a tiny pinch to balance the sweetness. It sounds basic, but it makes a difference.
Optional: Toasted Coconut Flakes — For garnish. I love the crunch it adds against the smooth panna cotta. I usually toast it in a dry pan for 2-3 minutes until golden. It’s optional, but highly recommended if you want that restaurant presentation.
I keep all of these in my pantry except the fresh mango, which I buy when it’s in season. If mango is out of season, I use high-quality frozen mango chunks. They’re picked at peak ripeness and frozen immediately, so they’re actually better than the hard, flavorless ones in the produce section in winter.
Equipment Needed
You don’t need any fancy gadgets for this. I’m not going to lie to you and say you need a precision thermometer or a vacuum sealer. Here’s what you actually need:
Blender or Food Processor — You need a smooth mango puree. A hand blender works, but a standard blender gives the best results. I use my Vitamix, but any blender will do. Just make sure it’s clean and dry.
Small Saucepan — You’ll heat the coconut milk and agar-agar mixture slightly to activate the gelling agent. A small 2-quart saucepan is perfect. You don’t need a big pot.
Mixing Bowl — Just a medium bowl to combine everything before pouring into molds. Any bowl works.
Molds or Glasses — This is where you get creative. I use ramekins for individual servings, but I’ve also made this in fancy coupe glasses, small mason jars, or even a large mold to slice later. The shape doesn’t matter as long as it’s heat-safe and has a lid or plastic wrap for chilling.
Measuring Spoons — Precision matters a little here because of the agar-agar. Too little, and it won’t set. Too much, and it gets rubbery. I use standard measuring spoons.
Whisk — For mixing the agar-agar into the coconut milk to prevent clumps. A small whisk works best.
Spatula — To scrape the mixture into the molds. I like silicone spatulas because they’re flexible and get every bit of the mixture out.
That’s it. No weird tools. No special equipment. Just basic kitchen stuff you probably already have. If you don’t have a blender, you can use a fork and mash the mango really well, but it won’t be as smooth. And if you don’t have ramekins, just use regular drinking glasses. It’s not a crime to serve it in a mug if that’s what you’ve got.
How to Make It: Step-by-Step
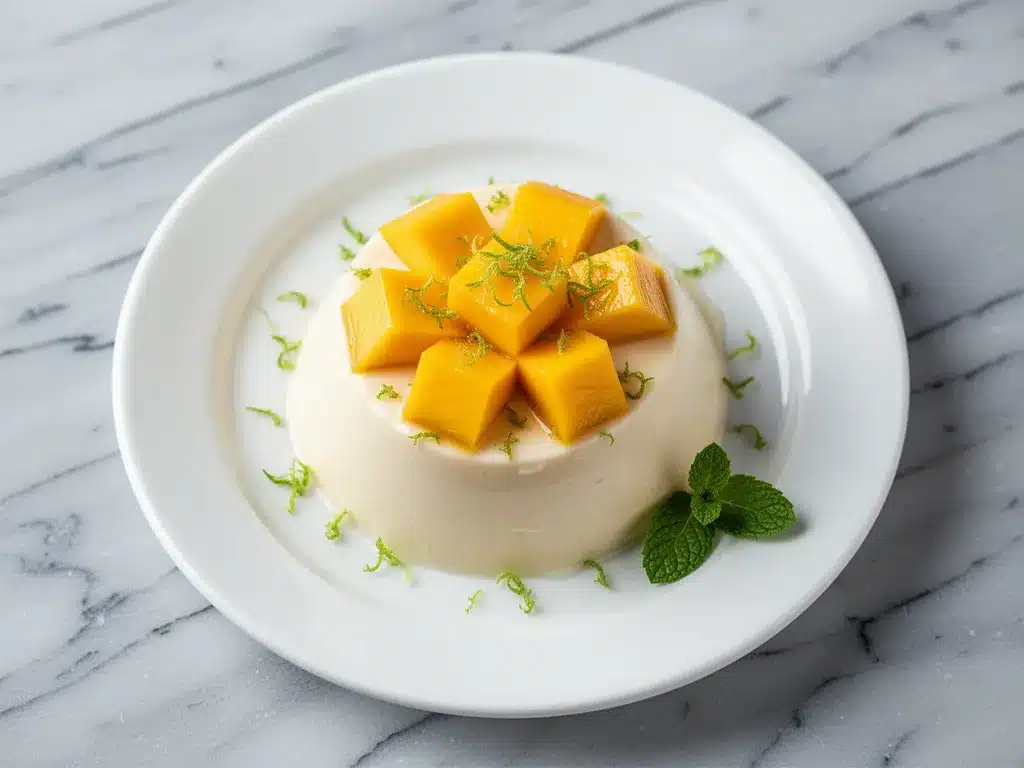
Alright, let’s make this! I’m going to walk you through exactly how I do it, including the little tricks I’ve picked up along the way. It’s simple, but there are a few details that make the difference between good and great.
Step 1: Prepare the Mango Puree (2 minutes)
If you’re using fresh mango, peel it, remove the pit, and chop the flesh into chunks. If you’re using frozen mango, let it thaw slightly. Put the mango chunks into your blender. Add the lime juice, vanilla extract, and half of your sweetener. Blend on high until completely smooth. If it’s too thick to blend, add a splash of water or coconut milk. Taste it. Is it sweet enough? If not, add the rest of the sweetener and blend again. Set the puree aside.
Step 2: Mix the Coconut Base (1 minute)
In your small saucepan, combine the coconut milk and the agar-agar powder. Whisk vigorously to dissolve the agar-agar. This is crucial. If you don’t whisk well, you’ll get little white clumps of agar in your final dessert. I usually whisk for about 30 seconds to make sure it’s completely dissolved.
Step 3: Heat the Mixture (3-4 minutes)
Place the saucepan over medium heat. Warm the mixture, stirring constantly, until it just starts to simmer. You don’t need to boil it hard. Just get it hot enough to activate the agar-agar. This usually takes about 3-4 minutes. Once you see small bubbles around the edges, remove it from the heat. Do not overcook it, or the texture might get weird. Just heat it through.
Step 4: Combine Everything (1 minute)
Remove the saucepan from the heat. Whisk in the mango puree. The mixture will turn a beautiful pale yellow-orange color. Taste it again. Adjust sweetness if needed. Now, let it cool for about 5-10 minutes. You don’t want to pour it boiling hot into your molds, or the agar might set too fast or create air bubbles. Just let it cool slightly so it’s warm, not hot.
Step 5: Pour into Molds (2 minutes)
Divide the mixture evenly among your ramekins or glasses. I like to pour it slowly to avoid air bubbles. If you see any bubbles on top, you can skim them off with a spoon or just let them be—they don’t really matter. Cover the molds with plastic wrap or lids. If you’re using a large mold, cover it tightly.
Step 6: Chill (4-6 hours)
Place the molds in the refrigerator. They need to chill for at least 4 hours, but overnight is best. The agar-agar sets at room temperature, but it sets much firmer and cleaner in the fridge. Don’t rush this step. If you try to unmold it too soon, it’ll be wobbly and messy. Patience is key.
Step 7: Serve (2 minutes)
When you’re ready to serve, take them out of the fridge. If you’re using ramekins, you can run a warm knife around the edge and invert them onto plates. Or, just eat them right out of the ramekins with a spoon. I like to top them with toasted coconut flakes, a few fresh mango cubes, and a mint leaf for color. Serve immediately.
Total time: About 15 minutes of active work, plus 4-6 hours of chilling. That’s it. No stress. No mess. Just delicious dessert.
Expert Tips & Tricks
I’ve made this dozens of times, and I’ve learned a few things that will save you from common mistakes. These tips are the difference between a runny mess and a perfect set.
Don’t Skimp on the Agar-Agar
This is the most important part. Agar-agar is a strong gelling agent. If you use too little, the panna cotta won’t set at all. If you use too much, it gets rubbery and chewy. Stick to the measurements I give you. 1.5 teaspoons for two cans of coconut milk is the sweet spot. I’ve tested it, and it’s reliable.
Activate the Agar Properly
Agar-agar needs heat to activate. If you just mix it in cold and put it in the fridge, it won’t set. You must heat the mixture to a simmer. But don’t boil it for more than a minute. Over-boiling can weaken the gel strength. Just get it hot, then remove from heat.
Use Full-Fat Coconut Milk
I can’t stress this enough. Light coconut milk or coconut water will not give you the creamy texture you want. You need the fat. The fat carries the flavor and gives you that rich mouthfeel. If you use light milk, the dessert will be thin and watery. Buy the good stuff.
Cool Before Pouring
If you pour the mixture into molds while it’s still boiling hot, you might get air bubbles or uneven setting. Let it cool for 5-10 minutes. It should be warm to the touch, not hot. This also helps prevent condensation on the lids, which can drip water onto the surface.
Toast Your Coconut
If you’re using toasted coconut flakes for garnish, do it right before serving. Toasted coconut goes from perfect to burnt in seconds. I usually toast it in a dry skillet over medium heat, stirring constantly, for 2-3 minutes. Watch it closely. It’s done when it’s golden brown. It adds a incredible crunch and nutty flavor.
Don’t Use Lime Juice as Sweetener
Some recipes call for lime juice to replace sugar, but in this recipe, the lime juice is just for brightness. You still need the sweetener to balance the tartness of the mango and the richness of the coconut. Don’t skip the sugar/honey.
Storage is Simple
Leftovers? Store them in the fridge in an airtight container for up to 3 days. They’ll keep their shape. Don’t freeze it, though. The texture changes when frozen and thawed. It gets grainy. Make it fresh or keep it in the fridge.
Variations & Substitutions
Once you’ve mastered the basic version, here are some fun ways to mix it up. I’ve tried all of these, and they all work.
Piña Colada Version
Swap the mango for pineapple puree. Add a splash of rum extract if you want it adult. Top with toasted coconut. It’s basically a tropical piña colada in a bowl. My kids love this version.
Chocolate Coconut
Add 2 tablespoons of cocoa powder to the coconut milk mixture. It turns it into a chocolate-coconut panna cotta. It’s rich and indulgent. I like to top it with berries to cut the sweetness.
Mango Sticky Rice Inspired
Add a pinch of salted coconut milk to the base. Top with cooked sticky rice and fresh mango. It’s like eating dessert sushi. It’s a fun twist that honors the traditional Thai flavors.
Berry Swirl
Make the base as usual, but swirl in a berry compote (raspberry or strawberry) before chilling. It creates a beautiful marbled effect. I make a quick compote by simmering berries with sugar for 10 minutes, then cooling it.
Avocado Mango (Healthy Version)
Add half a ripe avocado to the blender with the mango. It makes the texture even creamier and adds healthy fats. You won’t taste the avocado, I promise. It just makes it lush. I’ve made this for my health-conscious friends, and they couldn’t tell.
Gluten-Free & Vegan
This recipe is already gluten-free and vegan (as long as you use agar-agar, not gelatin). No changes needed. It’s naturally free from common allergens.
Dairy-Free Alternatives
If you can’t have coconut, you can try this with cashew cream. Soak cashews, blend with water, and use that instead of coconut milk. It’s less tropical but still creamy. I haven’t tested it as much, but it should work.
Serving & Storage
This dessert is versatile. You can serve it in fancy glasses for guests or in simple ramekins for a quick treat. Here’s how I usually do it.
How to Serve
I like to serve it straight out of the fridge. The cold temperature makes it feel extra refreshing. I top it with toasted coconut flakes, a few fresh mango cubes, and a sprig of mint. It looks beautiful and adds texture. If you’re serving it to kids, skip the garnish and just let them eat it with a spoon. They’ll love it.
Side Dishes
This is a dessert, so it doesn’t need sides. But if you’re making a full meal, it pairs well with light dinners. I often serve it after a spicy meal, like my authentic chicken tikka masala, because the cool, sweet dessert balances the heat. It’s also great after a heavy meal like beef and cheese enchiladas because it’s light and doesn’t weigh you down.
Storage Instructions
Store in the refrigerator in an airtight container for up to 3 days. The agar-agar keeps it firm, so it won’t get runny. Just make sure the lid is tight to prevent it from absorbing fridge smells. Don’t freeze it. The texture will change, and it’ll become grainy. Make it fresh or keep it in the fridge.
Meal Prep
This is perfect for meal prep. Make it on Sunday, and you have desserts ready for the week. Just keep them in the fridge and grab one when you need it. It’s a great way to avoid the “what’s for dessert?” panic.
Pro Tip
If you’re serving it in glasses, layer the mango puree at the bottom, then pour the coconut mixture over it. It creates a nice visual effect. Or, swirl it in before chilling for a marble look. Either way, it looks fancy.
Nutrition Information
I’m not a nutritionist, but here’s the breakdown if you’re tracking. Keep in mind that this is a dessert, so it’s not a health food, but it’s lighter than most cakes.
Per Serving (based on 6 servings):
- Calories: 280
- Protein: 3g
- Carbs: 35g
- Fiber: 2g
- Sugar: 28g
- Fat: 16g
- Saturated Fat: 14g
- Cholesterol: 0mg
- Sodium: 15mg
What’s Good:
- No dairy or cholesterol
- Naturally gluten-free
- Contains healthy fats from coconut
- Vitamin C from mango
What to Know:
- High in sugar from mango and added sweetener
- High in saturated fat from coconut milk
- Low in protein
My Take:
Look, this is a dessert. It’s sweet, it’s rich, and it’s meant to be enjoyed. It’s not a diet food, but it’s cleaner than most store-bought desserts. I know exactly what’s in it. If you want to make it lighter, reduce the sweetener or use less coconut milk, but you’ll lose some creaminess. I usually just enjoy a small portion and savor it.
Final Thoughts
So that’s my dairy-free coconut mango panna cotta! I know I’ve talked a lot about it, but when you find a recipe that works this well, you want to share it. This has saved me more times than I can count. It’s my answer to “what’s for dessert” when I’m tired, don’t want to bake, and still want something that tastes amazing.
It’s elegant, it’s simple, and it’s naturally free from dairy and gluten. My friends who are lactose intolerant love it. My kids love the mango flavor. And I love that it takes 15 minutes to make. It’s the perfect balance of effort and reward.
Make it yours! Try different fruits, different garnishes, different molds. The best recipes are the ones you adapt to your tastes. If you make this, drop a comment and let me know what you think! I love hearing how recipes turn out in your kitchen. And if something doesn’t work, tell me that too—I’m here to help troubleshoot.
Happy cooking! And I hope your kitchen smells as good as mine does right now (it doesn’t, because I’m just eating dessert, but imagine it).
Frequently Asked Questions
Q: Can I use gelatin instead of agar-agar?
A: You can, but it changes the recipe. Gelatin needs to be bloomed in cold water first, then dissolved in hot liquid. It also sets at a higher temperature, so it might melt if the room is hot. Agar-agar is better for this recipe because it sets firmly at room temperature and is vegan. If you must use gelatin, use 2 teaspoons of powdered gelatin. Bloom it in 2 tablespoons of cold water, then dissolve it in the warm coconut milk.
Q: Why didn’t my panna cotta set?
A: This usually happens for two reasons: either you didn’t use enough agar-agar, or you didn’t heat it enough. Agar-agar needs to be heated to a simmer to activate. If you just mixed it in cold, it won’t set. Also, make sure you’re using full-fat coconut milk. Low-fat milk doesn’t have enough fat to support the gel structure.
Q: Can I make this ahead of time?
A: Yes! This is actually better when made ahead. It needs at least 4 hours to set, but overnight is best. You can make it 2-3 days in advance. Just keep it covered in the fridge.
Q: Can I use frozen mango?
A: Yes, frozen mango works great. Just thaw it first, then blend it. If it’s too watery, drain some of the liquid before blending. Fresh mango is best for flavor, but frozen is convenient and still delicious.
Q: How do I unmold the panna cotta?
A: Run a warm knife around the edge of the ramekin. Then, dip the bottom of the ramekin in hot water for 5-10 seconds. Invert it onto a plate. It should slide out easily. If it doesn’t, chill it longer. It needs to be fully set.
Q: Can I add alcohol to this?
A: Yes! Add a splash of rum, vodka, or coconut liqueur to the mixture. It adds a nice kick. Just reduce the sweetener slightly if the alcohol is sweet.
Q: Is this recipe gluten-free?
A: Yes, it’s naturally gluten-free. Just make sure your agar-agar is certified gluten-free, as some brands might be processed in facilities with wheat. Most agar-agar is safe, but check the label.
Pin This Recipe!
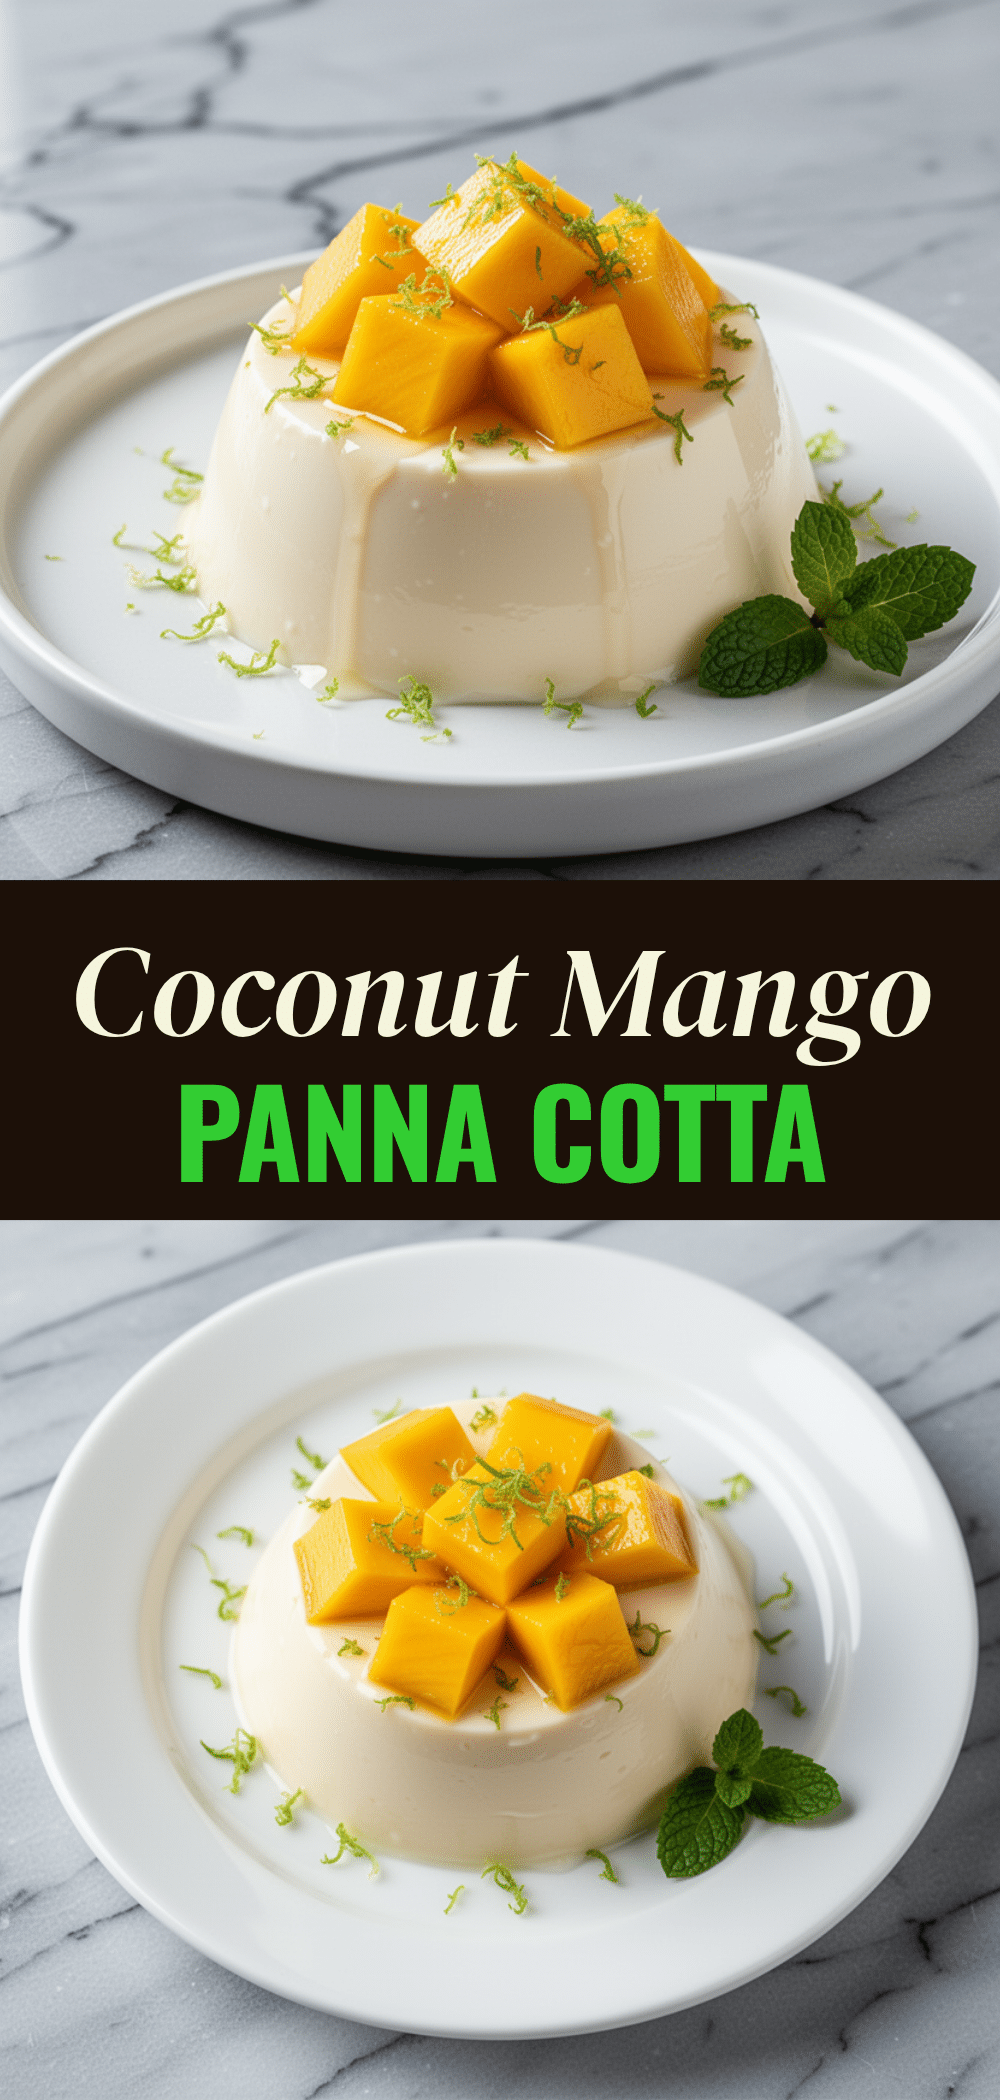
Dairy-Free Coconut Mango Panna Cotta
- Total Time: 4 hours 20 minutes
- Yield: 6 servings 1x
Description
A silky, dreamy, and naturally dairy-free dessert that comes together in just 15 minutes of active time. Using full-fat coconut milk and agar-agar, this gluten-free panna cotta offers a rich, creamy texture without any gelatin or heavy cream.
Ingredients
- 2 cans (13.5 oz each) full-fat coconut milk
- 2 cups fresh or frozen mango puree (about 300g peeled)
- 1.5 teaspoons agar-agar powder
- 2–3 tablespoons simple syrup, honey, or maple syrup
- 1 teaspoon lime juice
- 1 teaspoon vanilla extract
- Pinch of salt
- Optional: Toasted coconut flakes for garnish
Instructions
- Prepare the mango puree by blending fresh or thawed frozen mango chunks with lime juice, vanilla extract, and half of the sweetener until completely smooth. Taste and adjust sweetness if needed, then set aside.
- In a small saucepan, combine the coconut milk and agar-agar powder. Whisk vigorously for about 30 seconds to ensure the agar-agar is fully dissolved and no clumps remain.
- Place the saucepan over medium heat and warm the mixture, stirring constantly, until it just starts to simmer (small bubbles around the edges). This takes about 3-4 minutes. Remove from heat immediately; do not boil vigorously.
- Whisk the mango puree into the warm coconut milk mixture. Taste and adjust sweetness if necessary. Let the mixture cool for 5-10 minutes until it is warm, not hot.
- Pour the mixture evenly into ramekins, glasses, or molds. Cover with plastic wrap or lids.
- Refrigerate for at least 4 hours, or preferably overnight, until fully set.
- Serve chilled. Optionally, run a warm knife around the edge to unmold onto plates, or serve directly in the glasses. Garnish with toasted coconut flakes, fresh mango cubes, and mint.
Notes
Use full-fat coconut milk for the best creamy texture; light milk will result in a watery dessert. Agar-agar must be heated to a simmer to activate properly. Do not freeze this dessert as the texture will become grainy. If using frozen mango, ensure it is thawed and drained if too watery before blending.
- Prep Time: 15 minutes
- Cook Time: 5 minutes
- Category: Dessert
- Cuisine: Italian-inspired
Nutrition
- Serving Size: 1 ramekin or glass
- Calories: 280
- Sugar: 28
- Sodium: 15
- Fat: 16
- Saturated Fat: 14
- Carbohydrates: 35
- Fiber: 2
- Protein: 3
Keywords: dairy-free, vegan, gluten-free, coconut mango, panna cotta, agar-agar, easy dessert, make-ahead, tropical



