It was 6:30 PM on a Tuesday, and I was standing in front of my open pantry with that specific dread that only a parent of three can understand. My son had just announced he was “only eating white foods” again. My daughter was complaining that dinner took too long. And I was staring at a package of chicken thighs that had been thawing in the fridge since Thursday.
I was about to resign myself to grilled cheese and hope for the best when I remembered a recipe I’d bookmarked months ago but never actually tried: crispy air fryer honey garlic chicken thighs. I figured, what’s the worst that could happen? We’d have another mediocre dinner.
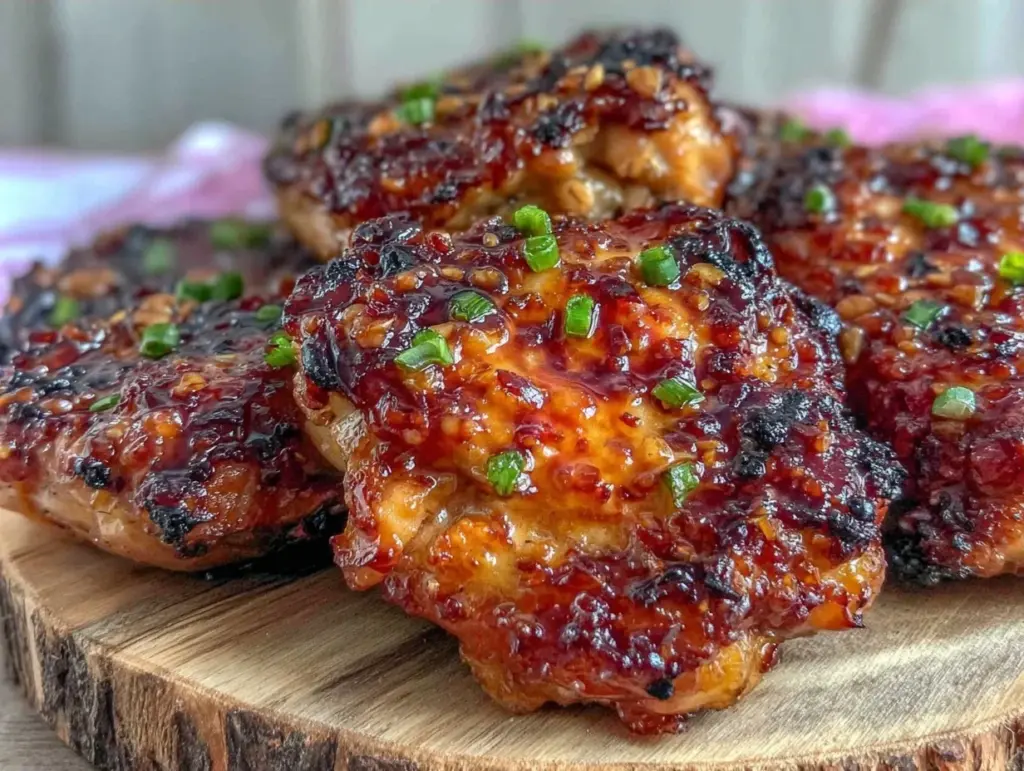
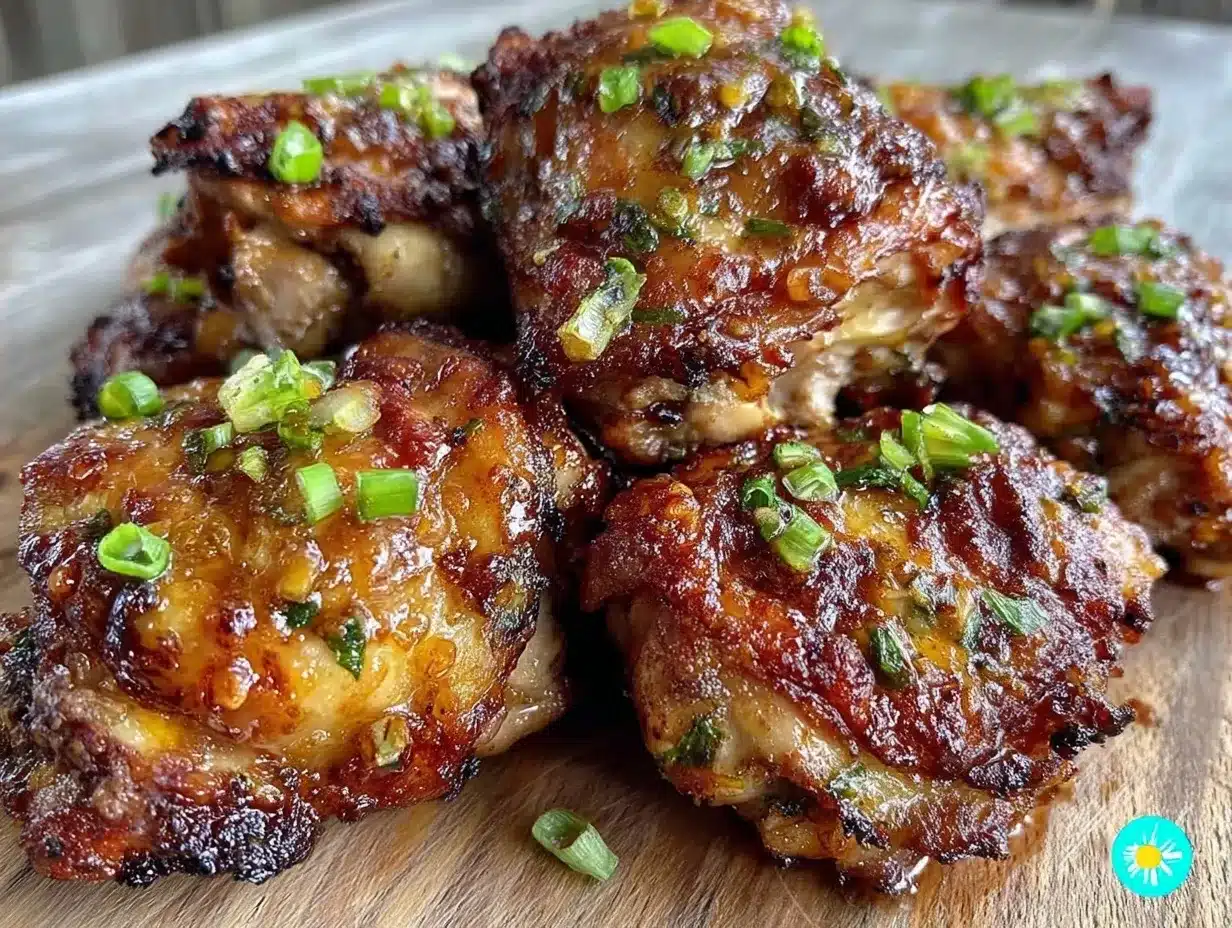
But here’s the thing—this wasn’t mediocre. This was incredible. The skin got shockingly crispy in the air fryer (I know, I know, thighs aren’t supposed to be crispy like breast meat, but trust me on this). The sauce was sticky, sweet, and garlicky in the best possible way. My son, the self-proclaimed “white food only” guy, ate three pieces. My daughter asked for seconds before I’d even finished plating. And the best part? It cost less than $15 and took 30 minutes from start to finish.
Since that Tuesday, I’ve made these honey garlic chicken thighs at least eight times. I’ve tweaked the sauce slightly, adjusted the cooking time for different air fryer models, and even figured out how to meal-prep them for busy workdays. This has officially replaced my usual weeknight rotation, beating out everything from my one-pot creamy Cajun sausage pasta to my go-to stir-fries. If you’re looking for a dinner that delivers restaurant-quality flavor without the restaurant price tag or the 45 minutes of active cooking time, this is it. It’s the kind of recipe that makes you feel like a kitchen wizard, even when you’re exhausted.
Why You’ll Love This Honey Garlic Chicken
There are a million reasons to keep this recipe in your regular rotation, but I’ll keep it real with you. These are the ones that actually matter when you’re trying to feed a family on a budget and a tight schedule.
It’s Budget-Friendly — Chicken thighs are significantly cheaper than breasts, especially when you buy them in bulk or on sale. I usually grab a family pack, cook half immediately, and freeze the other half for later. You’re feeding four to six people for under $15, which is practically a steal compared to ordering takeout.
Zero Stress Cooking — The air fryer does the heavy lifting. You don’t need to stand over a hot stove, flipping pieces of chicken and worrying about burning the garlic. You toss everything in, set the timer, and walk away. It’s perfect for those nights when you’re also trying to help with homework or deal with a meltdown.
Sauce That Actually Sticks — I’ve tried so many “honey garlic” recipes where the sauce just slides right off the meat and pools at the bottom of the plate. This one? It clings. The balance of sweet, salty, and tangy creates a glaze that coats every bite. It’s sticky enough to be fun but not so thick that it’s cloying.
Kid-Approved Flavor — If you have picky eaters, you know the struggle. Sweet and savory is usually the winning combo. This sauce hits that note perfectly without being overly spicy or weird. It tastes like comfort food. My kids think it’s fancy because it looks glossy and sticky, but it’s basically just pantry staples.
Fast Cleanup — Because you’re using the air fryer basket (which I line with parchment paper or foil), cleanup is a breeze. Wipe it down, throw it in the dishwasher, and you’re done. No scrubbing pots or dealing with splattered oil on the stovetop.
This recipe has saved me more times than I can count. It’s my go-to when I need dinner to just work, when I don’t want to order out, and when I want my family to feel like they’re getting something special. It’s reliable, delicious, and incredibly easy.
Ingredients You’ll Need
Here’s the best part: you probably already have most of these ingredients in your kitchen. This isn’t a recipe that requires a trip to three different specialty stores. It’s built on pantry staples and affordable basics.
For the Chicken
Chicken thighs (2 pounds / 900g) — Boneless, skinless is easiest for air frying, but bone-in skin-on works too if you remove the bones before saucing. I always buy skinless thighs because they cook faster and are less messy. Look for ones that are roughly the same size so they cook evenly.
Oil (1 tablespoon / 15ml) — I use olive oil or avocado oil. Just enough to help the chicken crisp up. You don’t need much.
Seasoning — Salt, black pepper, and a pinch of garlic powder. Keep it simple. The sauce provides most of the flavor, so you just need a good base.
For the Honey Garlic Sauce
Honey (½ cup / 170g) — Don’t skimp on quality here, but you don’t need the fancy stuff. Any standard honey works. I use whatever is on sale.
Soy sauce (¼ cup / 60ml) — This provides the salty, umami depth. I use low-sodium soy sauce so I can control the saltiness. Regular soy sauce works fine if you reduce the added salt in the chicken.
Rice vinegar (2 tablespoons / 30ml) — This cuts through the sweetness of the honey and adds brightness. If you don’t have rice vinegar, apple cider vinegar works in a pinch, but the flavor will be slightly different.
Minced garlic (4 cloves / about 2 tablespoons) — Fresh garlic is non-negotiable. Jarred garlic has a metallic taste that really shows up in this sauce. Mince it yourself. It takes two minutes and makes a huge difference.
Ginger (1 teaspoon / 5g, freshly grated) — Fresh ginger adds a warm, zesty note. Grate it on a microplane. If you don’t have fresh ginger, ½ teaspoon of ground ginger works, but fresh is better.
Cornstarch (1 tablespoon / 8g) — This is the secret weapon. It thickens the sauce so it coats the chicken instead of running off. Mix it with a little water to make a slurry before adding it to the pan.
Red pepper flakes (½ teaspoon, optional) — Just a pinch to add a tiny bit of heat. Not spicy, just a warm background note. Skip it if you have very young kids.
Sesame seeds (1 tablespoon, for garnish) — Adds a nice nutty crunch and makes it look restaurant-quality. Toasted sesame seeds are best.
Optional Add-Ins
Green onions — Chopped and sprinkled on top for color and freshness.
Broccoli or carrots — You can toss these in the air fryer with the chicken for a one-pan meal. Just add them halfway through cooking so they don’t burn.
Equipment Needed
You don’t need fancy equipment for this. Here’s what I actually use.
Air fryer — Obviously. I use a 5.8-quart basket style. If you have a smaller one, you might need to cook in two batches. Don’t overcrowd the basket, or the chicken will steam instead of crisp.
Small saucepan — For making the sauce. I use a small 1-quart saucepan. It’s easier to whisk and control the heat than trying to do it in a skillet.
Whisk — For mixing the sauce slurry and whisking everything together.
Tongs — For flipping the chicken in the air fryer and tossing it in the sauce.
Parchment paper or foil — To line the air fryer basket. Makes cleanup instant. I prefer parchment because it sticks better and doesn’t block airflow as much.
Microplane or grater — For the garlic and ginger. A sharp knife works too, but a grater makes it easier to get fine minces.
Measuring cups and spoons — Standard stuff. I keep a set on my counter for easy access.
Optional: Instant-read thermometer — I don’t always use one, but if you’re paranoid about undercooked chicken, check that the internal temperature reaches 165°F (74°C).
How to Make It: Step-by-Step
Alright, let’s make this! I’m walking you through exactly how I do it, including the little tricks I’ve picked up over the last few months.
Step 1: Prep the Chicken (5 minutes)
Pat your chicken thighs dry with paper towels. This is crucial. Moisture is the enemy of crispiness. If they’re wet, they’ll steam. Season them generously with salt, pepper, and a little garlic powder. Toss them in a bowl with the tablespoon of oil until they’re lightly coated.
Step 2: Air Fry the Chicken (15-18 minutes)
Preheat your air fryer to 400°F (200°C). Place the chicken thighs in the basket in a single layer. Don’t stack them! Leave a little space between each piece for air circulation. Cook for 15-18 minutes, flipping halfway through. The chicken is done when it’s golden brown and crispy, and the internal temperature reaches 165°F. If your pieces are very large, you might need an extra 2-3 minutes.
Step 3: Make the Sauce (5 minutes)
While the chicken cooks, make the sauce. In a small saucepan over medium heat, combine the honey, soy sauce, rice vinegar, minced garlic, and grated ginger. Whisk until the honey is dissolved. Let it simmer for 2-3 minutes until it starts to bubble and smell amazing.
Step 4: Thicken the Sauce (2 minutes)
In a small bowl, mix the cornstarch with 2 tablespoons of cold water to create a smooth slurry. Pour the slurry into the simmering sauce while whisking constantly. The sauce will thicken almost immediately. Let it cook for another 1-2 minutes until it’s glossy and coats the back of a spoon. Remove from heat.
Step 5: Combine and Glaze (2 minutes)
Transfer the cooked chicken thighs to a large bowl. Pour the hot honey garlic sauce over the chicken. Toss gently but thoroughly, making sure every piece is coated. If you want extra sticky, you can return the sauced chicken to the air fryer basket and cook for 1-2 more minutes to set the glaze. I usually skip this step because the chicken is already hot, but it’s a nice touch if you have time.
Step 6: Serve
Serve immediately, garnished with sesame seeds and chopped green onions. This pairs beautifully with loaded baked potato salad or steamed rice. My family loves it with rice because the sauce is perfect for soaking up.
Total Time: About 30 minutes (5 minutes prep, 18 minutes cook, 7 minutes sauce).
Expert Tips & Tricks
Here’s everything I’ve learned from making this dozens of times. These tips will save you from my mistakes.
Don’t Skip the Drying Step — I know it’s annoying, but patting the chicken dry is the single most important step for getting crispy skin. If you’re in a rush, at least let them sit on paper towels for 10 minutes.
Flipping is Key — Flip the chicken halfway through cooking. This ensures even browning on both sides. If you don’t flip, one side will be pale and soft while the other is dark and crispy.
Watch the Sauce — Honey burns easily. Keep the heat on medium, not high, when making the sauce. If it starts to darken too quickly, turn the heat down. You want it sweet and golden, not bitter and charred.
Slurry First — Always mix the cornstarch with cold water first. If you add dry cornstarch to hot sauce, it will clump up instantly. Smooth slurry = smooth sauce.
Double the Batch — This recipe doubles easily. I often make two batches on Sundays for meal prep. Just store the chicken and sauce separately in the fridge. Reheat the chicken in the air fryer for 3-4 minutes to crisp it back up, then toss with the reheated sauce.
Adjust the Sweetness — Taste the sauce before adding it to the chicken. If it’s too sweet, add a splash more rice vinegar or soy sauce. If it’s too salty, add a little more honey. Everyone’s palate is different, so make it yours.
Variations & Substitutions
Once you’ve nailed the basic version, here’s how you can mix it up. I’ve tried all of these.
Spicy Honey Garlic — Add 1 teaspoon of chili flakes or a drizzle of sriracha to the sauce. It adds a nice kick that balances the sweetness. My teenager loves this version.
Teriyaki Style — Swap the rice vinegar for mirin (or more soy sauce) and add a tablespoon of brown sugar. It’s closer to a classic teriyaki flavor.
Veggie-Packed — Toss broccoli florets or bell pepper strips in the air fryer with the chicken. Add them at the same time as the chicken. They’ll cook perfectly alongside the meat.
Gluten-Free — Use tamari instead of soy sauce, and ensure your honey and other ingredients are certified gluten-free. The rest of the recipe is naturally GF.
Dairy-Free — This recipe is already dairy-free! Just double-check your soy sauce and honey labels if you’re strict.
Protein Swap — You can use chicken breasts, but they cook faster and can dry out. Reduce air fry time to 10-12 minutes and watch them closely. I prefer thighs for their juiciness.
Serving & Storage
How to Serve: I usually serve this straight from the bowl at the dinner table. It looks rustic and stays warm. But here are other ways I’ve enjoyed it:
- Over Rice: Steamed jasmine or brown rice soaks up the sauce perfectly.
- In Wraps: Serve with lettuce leaves or warm tortillas for a hands-on meal.
- With Veggies: Roasted broccoli or green beans complement the sweetness.
- Salad Topper: Slice the chicken and toss it over a crisp Asian slaw.
Storage Instructions:
Refrigerator: Store in an airtight container for up to 4 days. The sauce will thicken in the fridge—totally normal.
Reheating: Best method: Add to a skillet with a splash of water or broth over low heat. Stir until heated through and creamy again. Air fryer works too! Reheat at 350°F for 3-4 minutes to crisp the chicken back up. Microwave works but can make the chicken rubbery if you’re not careful.
Freezing: Yes, you can freeze this! Freeze the chicken and sauce separately for up to 3 months. Thaw in the fridge overnight. Reheat in the air fryer or skillet. The texture might be slightly softer, but it’s still delicious.
Meal Prep Tip: I often cook the chicken on Sunday, store it plain, and make a fresh batch of sauce mid-week. The sauce keeps well in the fridge for 5 days, so you can just whisk it up and toss it with reheated chicken for a quick weeknight dinner.
Nutrition Information
I’m not a nutritionist, but here’s the breakdown if you’re tracking. These are estimates per serving (based on 4 servings).
Per Serving:
- Calories: 380
- Protein: 32g
- Carbs: 28g
- Fiber: 1g
- Sugar: 24g
- Fat: 16g
- Saturated Fat: 4g
- Cholesterol: 110mg
- Sodium: 680mg
What’s Good: High protein, relatively low carb (if you skip the rice), and uses healthy fats from the chicken. It’s a solid main dish for a balanced meal.
What to Know: Higher in sugar from the honey, which is natural. Sodium is moderate, so use low-sodium soy sauce if you’re watching salt. It’s not a diet food, but it’s not junk food either. It’s real, honest, home-cooked food.
Final Thoughts
So that’s my go-to crispy air fryer honey garlic chicken thighs! I’ve probably talked your ear off at this point, but when you make a recipe this often, you have a lot to say about it.
This has saved weeknight dinners more times than I can count. It’s my answer to “what’s for dinner” when I’m tired, don’t want takeout, and still want something that tastes really good. My kids are happy, my husband’s happy, and I’m happy because I’m not stressed about cooking.
Make it yours! Try different add-ins, swap in your favorite vegetables, adjust the garlic (though more is always better in my opinion). The best recipes are the ones you adapt to your family’s tastes.
If you make this, drop a comment and let me know what you think! I love hearing how recipes turn out in your kitchen. And if something doesn’t work, tell me that too—I’m here to help troubleshoot.
Happy cooking! And I hope your kitchen smells half as good as mine does right now.
Frequently Asked Questions
Can I use chicken breasts instead of thighs?
You can, but thighs are juicier and more forgiving. If you use breasts, reduce the air fry time to 10-12 minutes and check the temperature frequently. Breasts dry out easily, so be careful not to overcook them.
Why is my sauce too thin?
Usually means you didn’t cook it long enough after adding the cornstarch slurry. Let it simmer for another 2-3 minutes. If it’s still too thin, add a little more slurry. Remember, it will thicken more as it cools.
Can I make this ahead for a dinner party?
Sort of. Cook the chicken and make the sauce up to 2 days ahead and store in the fridge. Reheat the sauce gently and toss with freshly reheated chicken. It won’t be quite as crispy as fresh, but it’s close and saves you stress during the party.
Why did my chicken come out soggy?
This usually happens if the basket was overcrowded or the chicken wasn’t patted dry. Air needs to circulate around each piece. Cook in batches if necessary, and always dry the chicken thoroughly before seasoning.
Can I use jarred garlic?
You can, but fresh tastes so much better in this recipe. Jarred garlic has a weird metallic taste that really shows up in honey sauces. If you must use it, use half the amount because it’s stronger. But honestly, mincing 4 cloves takes like 2 minutes.
How do I reheat leftovers without it getting dry?
Add a splash of water or broth to a skillet, add your leftover chicken, and heat gently over low heat, stirring frequently. The extra liquid brings back the sauciness. Air fryer also works well—reheat at 350°F for 3-4 minutes to crisp it back up.
Can I double this recipe?
Absolutely! Double everything and use your biggest air fryer basket. The cooking times stay the same. I do this when I’m meal-prepping or feeding a crowd. Just make sure you don’t overcrowd the basket—you might need to cook in two batches.
Pin This Recipe!
Crispy Air Fryer Honey Garlic Chicken Thighs
- Total Time: 30 minutes
- Yield: 4 servings 1x
Description
A quick and easy 30-minute family dinner featuring juicy chicken thighs with a sticky, sweet, and garlicky honey garlic sauce, cooked to crispy perfection in an air fryer.
Ingredients
- 2 pounds (900g) boneless, skinless chicken thighs
- 1 tablespoon olive oil or avocado oil
- Salt and black pepper to taste
- 1/2 teaspoon garlic powder
- 1/2 cup honey
- 1/4 cup soy sauce (low-sodium recommended)
- 2 tablespoons rice vinegar
- 4 cloves garlic, minced
- 1 teaspoon fresh ginger, grated
- 1 tablespoon cornstarch mixed with 2 tablespoons cold water
- 1/2 teaspoon red pepper flakes (optional)
- 1 tablespoon toasted sesame seeds (for garnish)
- Chopped green onions (optional garnish)
Instructions
- Pat chicken thighs dry with paper towels and season generously with salt, pepper, and garlic powder. Toss with oil until lightly coated.
- Preheat air fryer to 400°F (200°C). Place chicken in the basket in a single layer, ensuring space between pieces for air circulation.
- Air fry for 15-18 minutes, flipping halfway through, until golden brown, crispy, and internal temperature reaches 165°F.
- While chicken cooks, combine honey, soy sauce, rice vinegar, minced garlic, and ginger in a small saucepan over medium heat. Simmer for 2-3 minutes until bubbly.
- Whisk the cornstarch slurry into the simmering sauce and cook for 1-2 minutes until thickened and glossy.
- Transfer cooked chicken to a large bowl, pour sauce over, and toss to coat. Optionally return to air fryer for 1-2 minutes to set glaze.
- Serve immediately garnished with sesame seeds and green onions.
Notes
Patting the chicken dry is crucial for crispiness. Do not overcrowd the air fryer basket. Use fresh garlic and ginger for best flavor. The sauce thickens as it cools.
- Prep Time: 5 minutes
- Cook Time: 18 minutes
- Category: Main Course
- Cuisine: Asian Fusion
Nutrition
- Serving Size: 1 chicken thigh with
- Calories: 380
- Sugar: 24
- Sodium: 680
- Fat: 16
- Saturated Fat: 4
- Carbohydrates: 28
- Fiber: 1
- Protein: 32
Keywords: air fryer chicken, honey garlic chicken, easy dinner, family meals, weeknight dinner, crispy chicken thighs, gluten-free options



