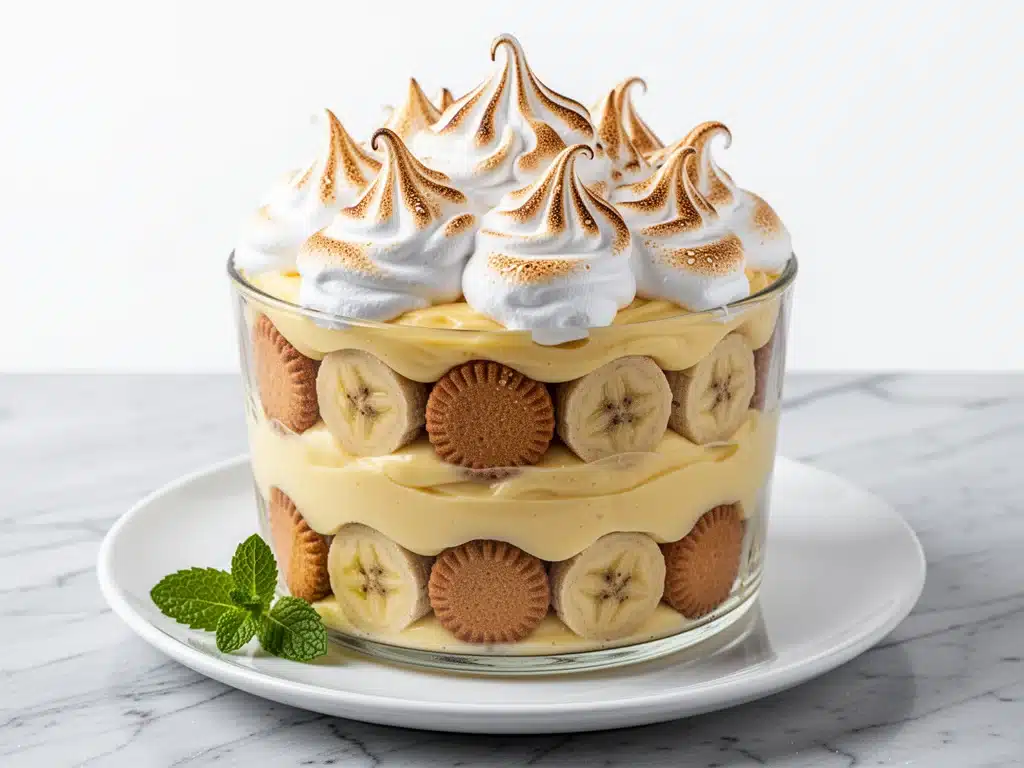
I still remember the specific smell of my grandmother’s kitchen on Sunday afternoons. It wasn’t just the smell of the roast chicken slowly cooking in the oven or the dust motes dancing in the sunlight filtering through the lace curtains. It was the sweet, creamy, slightly boozy scent of banana pudding. She didn’t make it often—only on Sundays, and only when someone was sick, or celebrating, or when the weather turned just right. But when she did, the whole house stopped.
My job, usually, was to break the vanilla wafers. I’d sit at the kitchen table, carefully snapping the round cookies into quarters, trying not to eat too many before they even went into the dish. I’d watch her fold the whipped cream into the custard with a wooden spoon, her movements slow and rhythmic, like a dance. She never rushed. She never measured with a cup. She tasted, she adjusted, and she waited. And when we finally got our first spoonful, it was always the best thing I’d ever eaten. Creamy, cool, with that perfect crunch of the cookie that had softened just enough but not turned to mush.
For years, I tried to replicate that. I bought the instant pudding mix. I used canned whipped topping. I rushed it. And it was… fine. It was good, sure. But it wasn’t that. It didn’t have the soul of my grandmother’s version. It was just dessert. It wasn’t memory.
Then, last summer, I decided to stop taking shortcuts. I went back to the old index card she left me, the one stained with vanilla and time, and I started from scratch. I learned that the secret isn’t in the ingredients—it’s in the patience. It’s in making a real custard from eggs and milk. It’s in letting the pudding sit in the fridge long enough for the flavors to marry. It’s in using fresh bananas that are just ripe enough, not brown and mushy, and letting the vanilla wafers do their magic.
Now, this classic Southern banana pudding with vanilla wafers is my go-to for any gathering. It’s elegant enough for a potluck, comforting enough for a weeknight treat, and nostalgic enough to make anyone remember their own grandmother. I’ve made it dozens of times, tweaking the ratio of custard to cream, adjusting the sweetness, and perfecting the layering technique. And I can tell you, with absolute certainty, that this is the real deal. It’s rich, it’s creamy, it’s got that signature crunch, and it tastes like home. If you’ve ever been disappointed by instant pudding mixes, or if you just want to make something truly special, this is the recipe you need. It’s worth the extra time. I promise.
Why You’ll Love This Recipe
There are about ten reasons I keep making this banana pudding, but here are the big ones. This isn’t just dessert; it’s an experience. It’s the kind of dish that disappears before you even finish serving it, leaving everyone asking for the recipe.
- It’s Pure Comfort — Seriously, there’s nothing like a spoonful of cold, creamy banana pudding on a hot day. It’s soothing. I make this when I need a hug in a bowl. It’s sweet without being cloying, rich without being heavy.
- It’s Impressively Simple — Once you’ve made the custard, assembling this is almost meditative. You just layer, layer, layer. No baking, no complicated techniques. If you can spread something, you can make this. I’ve walked my teenage son through it over FaceTime, and he nailed it.
- It Tastes Better the Next Day — This is the big one. Banana pudding is a make-ahead dessert. The flavors meld overnight. The vanilla wafers soften into a cake-like layer, and the custard sets up. I deliberately make extra for lunch the next day. It’s even better than fresh.
- It’s a Crowd-Pleaser — I’ve served this to picky eaters, food snobs, and everyone in between. Even the people who say they “don’t like banana pudding” usually love this version. It’s rich and complex, not just sweet and mushy.
- It’s Budget-Friendly — You probably have most of these ingredients already. Bananas, milk, eggs, sugar, vanilla, wafers. It’s cheap to make, but it tastes like something from a high-end Southern bakery. Feeds a crowd for under $10.
This is my go-to when I need dessert to just work. No stress, no last-minute panic, just reliable, delicious food that makes everyone happy. It’s the kind of recipe that brings people together.
Ingredients You’ll Need
Here’s the best part: you probably have most of this already in your kitchen. This classic Southern banana pudding with vanilla wafers relies on simple, high-quality ingredients. There are no weird additives, no instant mixes. Just real food.
For the Custard Base
Whole milk (3 cups / 720ml) — Use full-fat milk. Low-fat or skim will make the custard thin and watery. You want richness. I keep 2% on hand, but for this, I always go full-fat. It’s worth it.
Granulated sugar (3/4 cup / 150g) — This balances the tartness of the bananas and the richness of the cream. Don’t reduce the sugar too much, or it’ll taste flat. I use regular white sugar, but raw sugar works too if you want a slight caramel note.
All-purpose flour (1/3 cup / 40g) — This thickens the custard. Some recipes use cornstarch, but flour gives it that traditional, slightly denser texture that holds up better in layers. Whisk it well to avoid lumps.
Salt (1/2 teaspoon) — Crucial. It enhances the vanilla and balances the sweetness. Don’t skip it.
Unsalted butter (2 tablespoons / 30g) — Adds a silky mouthfeel. I use Kerrygold or European butter when I have it, but regular unsalted works fine. Add it at the end for gloss.
Large egg yolks (4 yolks) — These give the custard its rich, yellow color and creamy texture. Save the whites for meringue or omelets. Don’t use whole eggs, or it’ll be too thin.
Vanilla extract (2 teaspoons) — Use real vanilla, not imitation. I use Nielsen-Massey or McCormick Pure. The flavor of this pudding is 80% vanilla, so quality matters.
For the Assembly
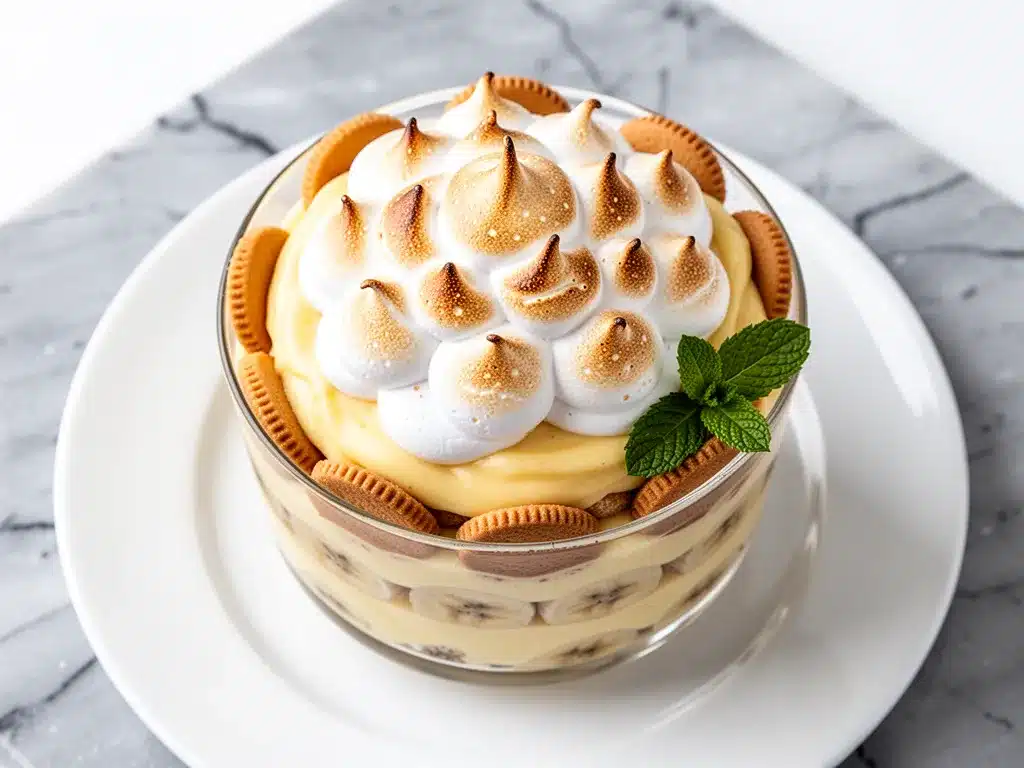
Heavy cream (2 cups / 480ml) — Chilled. This is folded into the custard to make it light and fluffy. Don’t use whipping cream that’s already sweetened; you want to control the sugar.
Bananas (5-6 medium) — Look for bananas that are yellow with a few brown speckles. They’re sweet and flavorful but still firm. Overripe bananas turn mushy too fast. Underripe bananas are starchy and bland.
Vanilla wafers (1 package / about 30-40 cookies) — Nilla Wafers are the gold standard. Don’t substitute with vanilla ice cream wafers or shortbread; they’re too rich and won’t soften correctly. You want the crisp, buttery snap of a true vanilla wafer.
Optional: Sherry or Rum (1-2 tablespoons) — My grandmother added a splash of sherry. It’s not traditional in all Southern kitchens, but it adds a deep, complex flavor that cuts through the sweetness. I use it sometimes. If you don’t drink alcohol, skip it or use vanilla extract.
For the Topping (Optional)
Meringue — Some people top this with toasted meringue. I prefer plain, but if you want to go fancy, whip 3 egg whites with 1/4 cup sugar and toast it under the broiler. It’s pretty, but it melts quickly.
Whipped Cream — Just a dollop on top adds extra richness. I usually skip it because the pudding is already rich, but it’s nice for guests.
Equipment Needed
You don’t need fancy equipment for this. Here’s what I actually use. Most of this is basic kitchen stuff you already own.
Medium saucepan — I use a 3-quart stainless steel pot. It needs to be heavy-bottomed so the custard doesn’t scorch. My old aluminum pot works too, but stainless is easier to clean.
Whisk — A good balloon whisk is essential. You need to whisk constantly to prevent lumps. I have a cheap one from the dollar store and a fancy one from Williams Sonoma. The fancy one is better, but any whisk works.
Large mixing bowl — For the custard and for whipping the cream. Glass or stainless steel is best because it conducts heat well if you need to cool the custard quickly.
Electric mixer or hand whisk — To whip the heavy cream. I use a hand mixer because it’s faster, but a hand whisk works if you have strong arms. It takes about 5 minutes.
9×13 inch glass baking dish — Pyrex is ideal because you can see the layers. It also goes nicely on the table for serving. Ceramic works too, but glass is traditional.
Measuring cups and spoons — Pretty standard. I use both liquid and dry measures. Accuracy matters more here than in baking, but it’s still good to be precise.
Spatula — For folding the cream into the custard. Silicone is best. You want to be gentle to keep the air in the cream.
Knife and cutting board — For slicing the bananas. A serrated knife works well for bananas because it doesn’t crush them.
How to Make It: Step-by-Step
Alright, let’s make this! I’m walking you through exactly how I do it, including the little tricks I’ve picked up over the years. This isn’t hard, but it does require attention. Don’t walk away from the stove while making the custard.
Step 1: Make the Custard Base (15 minutes)
In your medium saucepan, whisk together the sugar, flour, and salt. This dry mix helps prevent lumps. Slowly whisk in the milk, a little at a time, until it’s smooth. Turn the heat to medium. Now, the important part: whisk constantly. You can’t stop. If you stop, you’ll get lumps. The custard will start to thicken after about 5 minutes. Keep whisking until it’s thick enough to coat the back of a spoon and leaves a clear path when you run your finger through it. This takes about 10-12 minutes total. Don’t rush it.
Once it’s thick, remove it from the heat. In a small bowl, temper the egg yolks. Whisk a little bit of the hot custard into the yolks to warm them up slowly, then pour the yolk mixture back into the pot. Whisk vigorously for 1 minute. This cooks the yolks gently without scrambling them. Stir in the butter and vanilla extract. The mixture will be thick and glossy.
Step 2: Cool the Custard (20 minutes)
Pour the custard into a large mixing bowl. Place a piece of plastic wrap directly on the surface of the custard. This prevents a skin from forming. Let it cool to room temperature. You can speed this up by setting the bowl in an ice bath, stirring occasionally. Once it’s cool, refrigerate it for at least 30 minutes. It needs to be cold before you fold in the whipped cream, or the cream will melt.
Step 3: Whip the Cream (5 minutes)
In a separate large bowl, whip the heavy cream until you have stiff peaks. This means when you lift the whisk, the cream stands up straight. Don’t over-whip it, or it’ll turn into butter. Keep it cold. If your kitchen is warm, chill the bowl and whisk first.
Step 4: Fold the Cream into Custard (2 minutes)
Once the custard is cool, gently fold the whipped cream into it. Use a spatula. Cut down through the middle, scrape the bottom, and fold over. Rotate the bowl. Do this until there are no more white streaks. Be gentle. You want to keep the air in the cream. This is what makes the pudding light and fluffy, not dense.
Step 5: Assemble the Layers (10 minutes)
Now for the fun part. Take your 9×13 dish. Start with a layer of vanilla wafers at the bottom. Break them to fit if needed. Don’t overlap them too much; you want a single layer. Slice the bananas into quarters lengthwise (not rounds, because rounds look better and don’t break as easily). Arrange the banana slices over the wafers. Drizzle with a little sherry if you’re using it.
Spoon a generous layer of the custard-cream mixture over the bananas. Spread it evenly. Repeat the layers: wafers, bananas, custard. Finish with a top layer of custard. You should have about 3-4 layers total. Smooth the top with a spatula.
Step 6: Chill and Set (4+ hours)
This is the hardest part. You have to wait. Cover the dish with plastic wrap or foil. Refrigerate for at least 4 hours, but overnight is best. The wafers need time to soften into the custard, and the flavors need to meld. If you eat it too soon, it’ll be just cold custard and hard cookies. Patience is key.
Step 7: Serve
When you’re ready to serve, spoon it out from the center to get all the layers. Garnish with a dollop of whipped cream or a few banana slices if you want. Enjoy. It’s best at room temperature, so take it out of the fridge 15 minutes before serving if you can.
Expert Tips & Tricks
Here’s everything I’ve learned from making this dozens of times. These tips will save you from my mistakes.
- Don’t Skip the Temper — When adding the egg yolks to the hot custard, temper them first. Pour a little hot custard into the yolks while whisking. This prevents scrambled eggs in your pudding. It’s a small step that makes a huge difference.
- Cool the Custard Completely — If you fold warm custard into whipped cream, the cream will melt. You’ll end up with a dense, soupy mess. Chill the custard in the fridge or ice bath until it’s cold. It’s worth the wait.
- Slice Bananas Lengthwise — Quartering bananas lengthwise gives you beautiful, uniform slices that look great and hold their shape better than rounds. It’s a visual trick, but it matters for presentation.
- Use Ripe Bananas — Yellow with brown spots. Not green, not black. Green bananas are starchy and bland. Black bananas are mushy and ferment. The sweet spot is yellow with speckles. Taste one. If it’s not sweet, it’s not ready.
- Layer Generously — Don’t skimp on the custard. You want every bite to have custard, banana, and wafer. If you run out of custard, make more. Better to have extra than to have dry wafers.
- Let It Set — I know you want to eat it now. But wait. The longer it sits, the better it gets. Overnight is ideal. If you can’t wait 4 hours, at least wait 2. The wafers need time to soften.
Common Mistakes (and how to avoid them)
Mistake: Custard is lumpy. Fix: You didn’t whisk enough or you added the milk too fast. Whisk the dry ingredients first, then add milk slowly. Keep whisking over medium heat. If you get lumps, strain the custard through a sieve before cooling.
Mistake: Pudding is watery. Fix: You didn’t cook the custard long enough, or you used low-fat milk. Cook until it coats the spoon. Use whole milk. Also, don’t add too many bananas; they release water. Pat them dry if they’re very juicy.
Mistake: Wafers are hard. Fix: You didn’t let it chill long enough. Or you used the wrong wafers. Make sure you use Nilla Wafers and chill for at least 4 hours.
Mistake: Bananas turned brown. Fix: Bananas oxidize. To prevent this, you can toss them in a little lemon juice, but it changes the flavor. Better to assemble the pudding right before chilling and eat it within 24 hours. The custard protects them somewhat.
Variations & Substitutions
Once you’ve nailed the basic version, here’s how you can mix it up. I’ve tried all of these, and they all work.
Chocolate Banana Pudding
Add 1/4 cup cocoa powder to the dry ingredients when making the custard. It turns it into a chocolate pudding. It’s rich and decadent. My kids love this version. It’s like a banana pudding Oreo.
Coffee Banana Pudding
Add 1 tablespoon of instant espresso powder to the custard. It enhances the vanilla and adds a subtle coffee flavor. It’s sophisticated and great for adult gatherings. Pairs well with a dark rum splash.
Coconut Banana Pudding
Replace half the milk with coconut milk. Use coconut extract instead of vanilla. Top with toasted coconut flakes. It’s tropical and refreshing. Great for summer.
Shortbread Layer
Some people use shortbread cookies instead of wafers. It’s richer and butterier, but it doesn’t soften as much. You get a crunchier texture. I prefer wafers, but shortbread is nice if you like a bite.
Dairy-Free Version
Use coconut milk for the custard (full-fat canned). Use dairy-free vanilla wafers (check labels, some have milk). Use coconut cream instead of heavy cream. It’s different but still creamy. My lactose-intolerant friend loves this version.
Gluten-Free Version
Use gluten-free vanilla wafers. There are good brands now. The custard is naturally gluten-free. Just make sure your wafers are certified GF. It works surprisingly well.
Serving & Storage
How to Serve: I usually serve this straight from the dish at the dinner table. It looks rustic and homemade. But here are other ways I’ve enjoyed it:
- Individual Cups — Spoon it into glass cups for a fancy presentation. Great for parties.
- Parfaits — Layer it in parfait glasses with extra banana slices on top.
- With Coffee — It’s amazing with a hot cup of coffee. The contrast of hot and cold is perfect.
Storage Instructions:
Refrigerator: Store in an airtight container or covered with plastic wrap for up to 3 days. The flavor gets better each day, but the bananas will start to brown after day 2. Eat it within 3 days for best quality.
Reheating: Do not reheat this. Banana pudding is a cold dessert. Reheating will melt the custard and make the wafers mushy. Eat it cold or at room temperature.
Freezing: I don’t recommend freezing this. The custard separates when thawed, and the bananas turn mushy. It’s best made fresh. If you must, freeze the custard separately, but the texture will change.
Meal Prep: This is a make-ahead dessert. Make it the night before. It saves time and tastes better. Assemble it, cover, and refrigerate. It’s ready to go when you are.
Nutrition Information
I’m not a nutritionist, but here’s the breakdown if you’re tracking. This is a rich dessert, so enjoy in moderation.
Per Serving (based on 12 servings):
- Calories: 320
- Protein: 5g
- Carbs: 42g
- Fiber: 2g
- Sugar: 28g
- Fat: 15g
- Saturated Fat: 8g
- Cholesterol: 65mg
- Sodium: 180mg
What’s Good: It has some protein from the milk and eggs. Bananas add potassium. It’s a natural dessert, not full of artificial flavors.
What to Know: It’s high in sugar and fat from the cream and wafers. Use low-fat milk if you want to reduce calories, but it won’t be as rich. The bananas add natural sugar, so it’s not just refined sugar.
My Take: Look, this is comfort food. It’s sweet and rich. It’s not a diet recipe. But it’s way better than store-bought pudding, and it’s made with real ingredients. When I want to make it lighter, I use less cream and more custard. But usually? I just eat a small bowl and enjoy it.
Final Thoughts
So that’s my classic Southern banana pudding with vanilla wafers! I’ve probably talked your ear off at this point, but when you make a recipe this often, you have a lot to say about it. This has saved my dessert table more times than I can count. It’s my answer to “what’s for dessert” when I want something that feels special but doesn’t require a lot of effort.
My family loves it. My friends ask for the recipe. And I love making it because it reminds me of my grandmother. It’s a recipe with history, with soul. It’s not just food; it’s a connection to the past.
Make it yours! Try different wafers, add different fruits, adjust the sweetness. The best recipes are the ones you adapt to your family’s tastes. But start with this base. It’s a classic for a reason.
If you make this, drop a comment and let me know what you think! I love hearing how recipes turn out in your kitchen. And if something doesn’t work, tell me that too—I’m here to help troubleshoot. Happy cooking! And I hope your kitchen smells half as good as mine does right now.
Frequently Asked Questions
Can I use instant pudding mix instead of making custard?
You can, but it’s not the same. Instant pudding is thinner and doesn’t have the richness of a custard made from eggs and milk. If you’re in a huge rush, you can use it, but I recommend making the custard. It’s only 15 minutes of active time, and the difference is huge. The custard sets better and tastes more authentic.
Why did my bananas turn brown?
Bananas oxidize when exposed to air. To prevent this, slice them right before layering. You can also toss them in a little lemon juice, but it changes the flavor. The best way is to assemble the pudding and chill it immediately. The custard protects the bananas somewhat. If you’re serving it the next day, it’s fine. If you’re serving it hours later, the bananas might brown a bit. It’s still safe to eat, just not pretty.
Can I make this ahead of time?
Yes! This is actually better made ahead. Assemble it the night before and chill it overnight. The flavors meld, and the wafers soften perfectly. It’s ready to serve the next day. Just cover it tightly to prevent it from absorbing fridge smells.
What kind of bananas should I use?
Use ripe bananas that are yellow with a few brown spots. They’re sweet and flavorful. Avoid green bananas (too starchy) and very brown/black bananas (too mushy). If your bananas are too ripe, use them in the custard or freeze them for smoothies. For this recipe, you want firm but sweet bananas.
Can I freeze banana pudding?
I don’t recommend it. The custard separates when thawed, and the texture becomes grainy. The bananas also turn mushy. It’s best made fresh. If you must, freeze the custard separately, but the final texture won’t be the same. Make it within 3 days of serving for best quality.
Can I use whipped topping instead of whipped cream?
You can, but it’s not traditional. Cool Whip or similar toppings are sweeter and have a different texture. They don’t fold as well into custard. If you use them, the pudding will be sweeter and less rich. I prefer real whipped cream for the authentic Southern taste. But if you’re short on time, it works.
How long does banana pudding last in the fridge?
It lasts up to 3 days in the fridge. After that, the bananas will start to break down and turn brown. The custard will also start to separate slightly. For best quality, eat it within 2-3 days. Store it in an airtight container to keep it fresh.
Pin This Recipe!
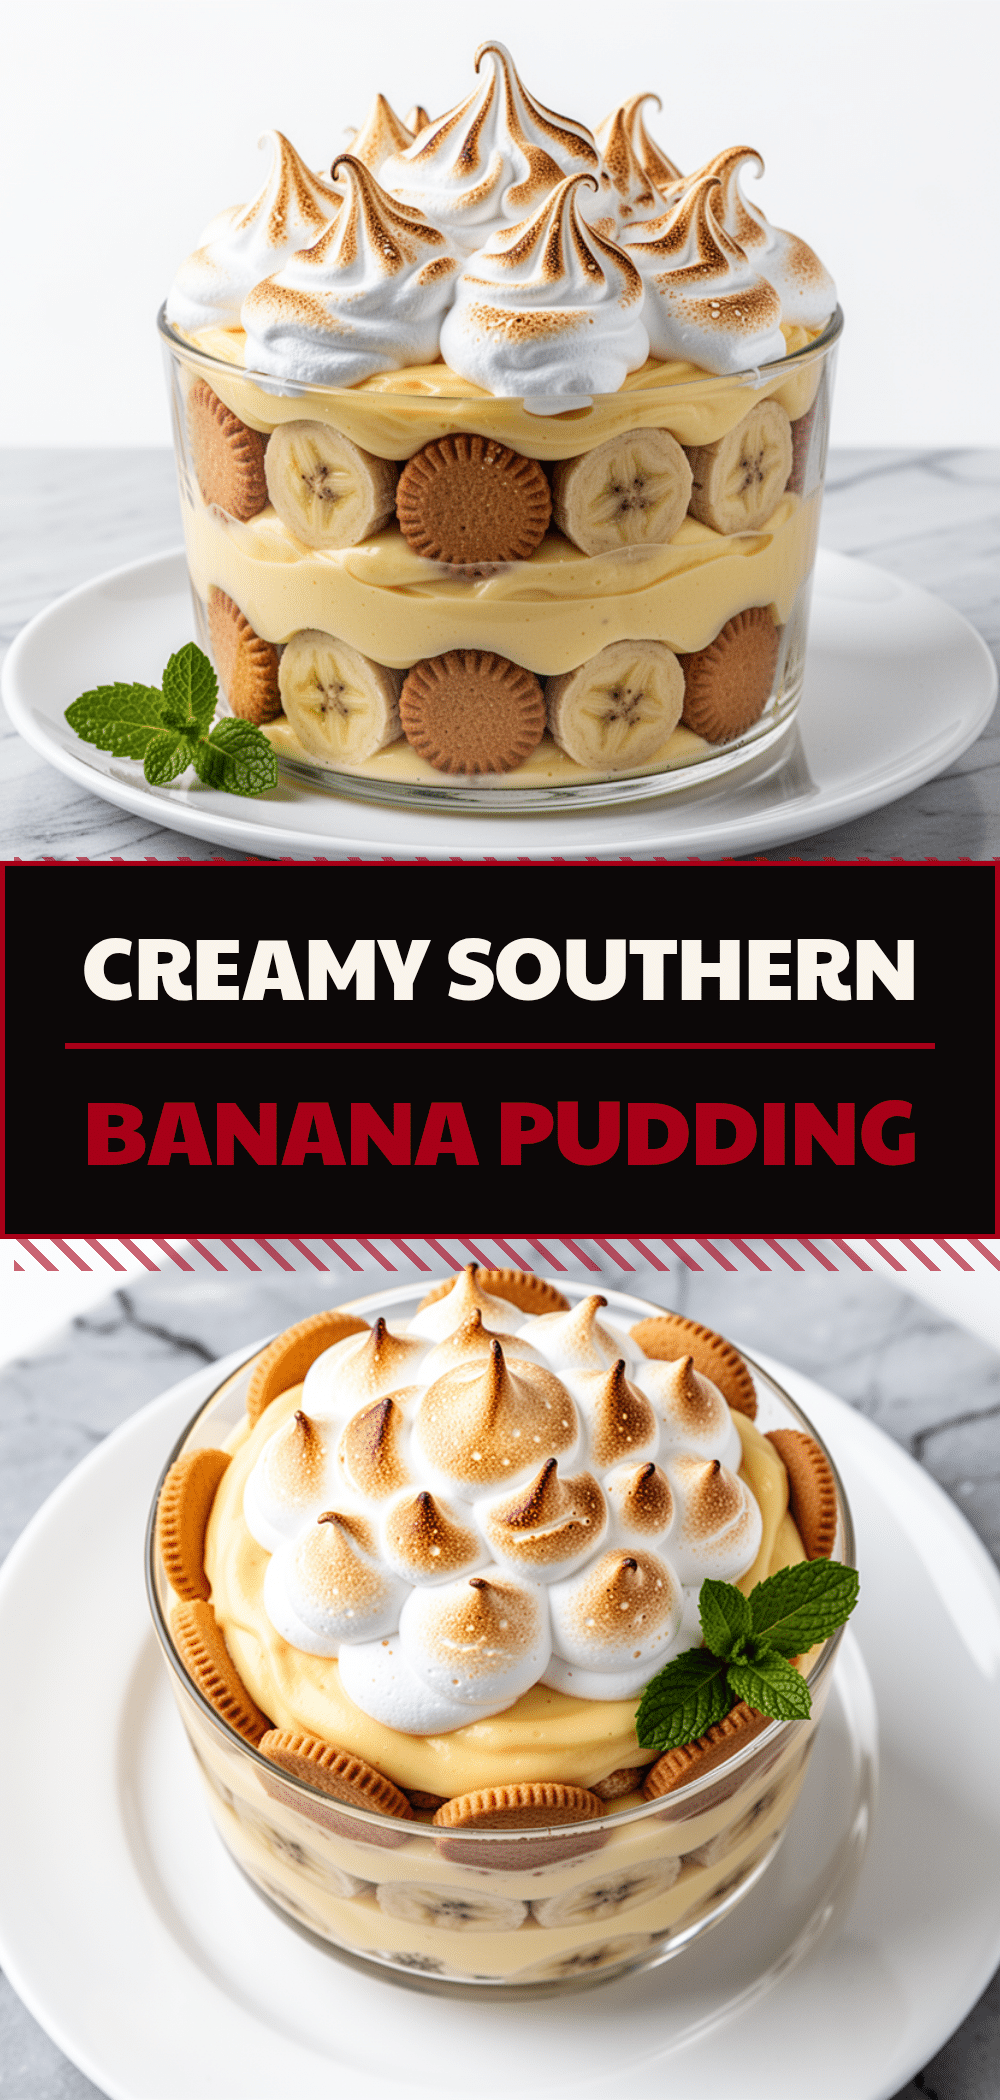
Classic Southern Banana Pudding with Vanilla Wafers
- Total Time: 4 hours 45 minutes
- Yield: 12 servings 1x
Description
A rich, creamy, and nostalgic Southern dessert made from scratch with a homemade custard base, fresh bananas, and vanilla wafers. This make-ahead treat offers the perfect balance of soft cookies and cool custard.
Ingredients
- 3 cups whole milk
- 3/4 cup granulated sugar
- 1/3 cup all-purpose flour
- 1/2 teaspoon salt
- 2 tablespoons unsalted butter
- 4 large egg yolks
- 2 teaspoons vanilla extract
- 2 cups heavy cream, chilled
- 5–6 medium bananas, sliced lengthwise
- 1 package vanilla wafers (about 30–40 cookies)
- 1–2 tablespoons Sherry or Rum (optional)
Instructions
- In a medium saucepan, whisk together sugar, flour, and salt. Slowly whisk in milk until smooth.
- Cook over medium heat, whisking constantly, until the mixture thickens enough to coat the back of a spoon (about 10-12 minutes).
- Remove from heat. Temper the egg yolks by whisking in a small amount of hot custard, then pour the yolk mixture back into the pot. Whisk vigorously for 1 minute.
- Stir in butter and vanilla extract until glossy.
- Pour custard into a large bowl, cover surface directly with plastic wrap, and cool to room temperature. Refrigerate for at least 30 minutes until cold.
- In a separate bowl, whip heavy cream until stiff peaks form.
- Gently fold the whipped cream into the cooled custard until no white streaks remain.
- In a 9×13 inch dish, create layers: vanilla wafers, sliced bananas, and custard mixture. Repeat for 3-4 layers, finishing with custard.
- Cover and refrigerate for at least 4 hours, preferably overnight, to allow flavors to meld and wafers to soften.
- Serve chilled or at room temperature.
Notes
For best results, use ripe bananas that are yellow with brown speckles but still firm. Slice bananas lengthwise for better presentation. Ensure the custard is completely cold before folding in the whipped cream to prevent melting. This pudding tastes better the next day as the flavors meld and the wafers soften into a cake-like layer. Do not freeze, as the texture will suffer.
- Prep Time: 30 minutes
- Cook Time: 15 minutes
- Category: Dessert
- Cuisine: Southern
Nutrition
- Serving Size: 1 slice
- Calories: 320
- Sugar: 28
- Sodium: 180
- Fat: 15
- Saturated Fat: 8
- Carbohydrates: 42
- Fiber: 2
- Protein: 5
Keywords: banana pudding, southern dessert, vanilla wafers, custard, make-ahead dessert, comfort food, homemade pudding



