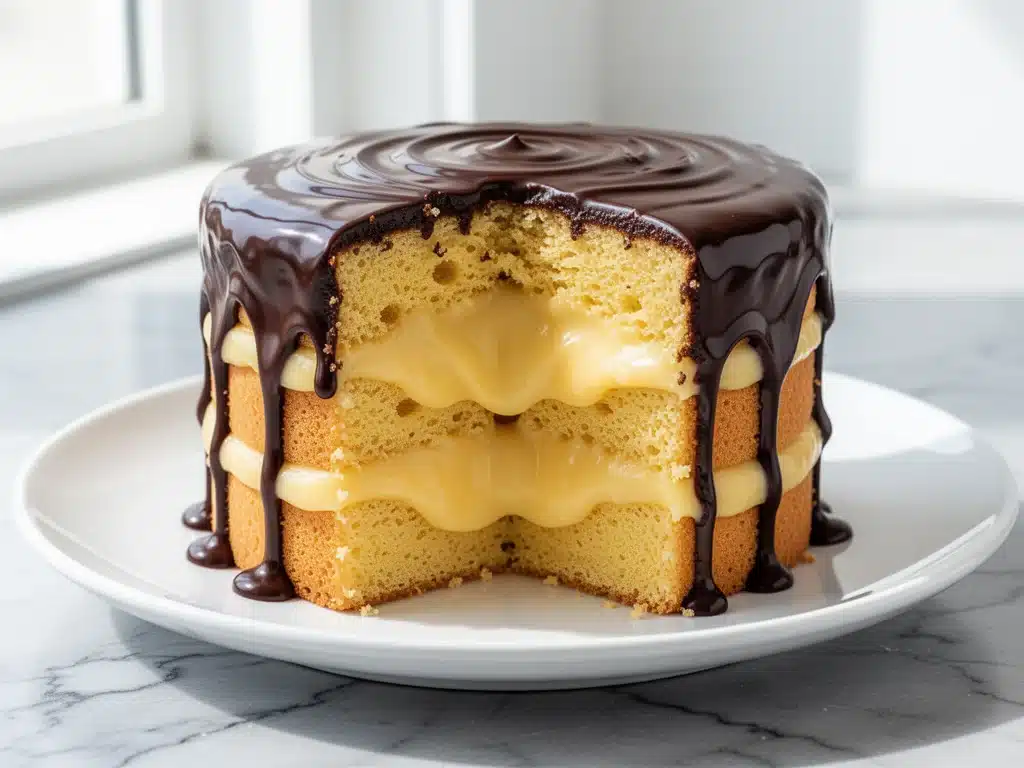
My husband has a thing about Boston cream donuts. You know the type—the ones from the gas station bakery that are somehow moist, sweet, and perfectly glazed despite being made in a factory. He loves them. I used to make them for him, but let’s be honest: my homemade versions were usually dry, the custard was too runny, and the glaze cracked if you looked at it wrong.
Then came the birthday party last October. I decided to step up my game. I didn’t want to make a dozen individual donuts because, let’s face it, that’s a lot of frying and mess for a Tuesday. I wanted something that felt fancy, served family-style, and would actually impress his colleagues who were coming over. So, I tried a Boston cream poke cake.
I’ll admit, I was skeptical. A poke cake? Isn’t that just a box mix with holes poked in it? That sounded like something you’d serve at a church fundraiser, not a dinner party. But I gave it one shot. I used a yellow cake base, made a rich vanilla custard from scratch (no pudding mix shortcuts), and poured a glossy chocolate glaze over the top. The result? Absolute magic. The cake absorbed the custard like a sponge, becoming impossibly moist, while the chocolate layer added that deep, bitter-sweet contrast we love in the classic donut.
My husband took one bite, closed his eyes, and said, “You finally did it.” His friends asked for the recipe before the plates were even cleared. That’s when I knew I had something special. This Boston cream poke cake isn’t just a dessert; it’s a crowd-pleaser that looks like you spent hours in the kitchen but actually comes together in about 45 minutes of active time. If you’ve ever struggled with keeping a cake moist or making custard that doesn’t curdle, this is the recipe for you.
Why You’ll Love This Boston Cream Poke Cake
There are a dozen reasons I keep making this cake, but here are the big ones that keep it in my regular rotation:
It’s Moisture City — Seriously, this cake stays fresh for days. I’ve made it on Sunday and eaten leftovers on Wednesday, and it’s still soft and custardy. Unlike regular cakes that dry out in the fridge, the poke method locks in moisture. It’s like the ultra-moist carrot cake but in dessert form.
Restaurant-Quality Custard — Most poke cakes use instant pudding. I refuse. This recipe uses a real vanilla bean custard made with milk, egg yolks, sugar, and cornstarch. It’s rich, silky, and tastes like you bought it from a patisserie. Yes, it takes a few extra minutes on the stove, but the flavor difference is night and day.
Zero-Fry Convenience — Making actual Boston cream donuts requires frying dough, waiting for it to cool, filling each one individually, and dipping it in glaze. This cake does all that work in one pan. You bake it, poke it, pour it, and chill it. It’s the lazy person’s way of getting gourmet results.
Make-Ahead Friendly — This cake actually gets better overnight. The flavors meld together, the custard sets, and the chocolate glaze firms up to that perfect snap. I often make it the day before a party so I don’t have to stress on the day of.
Looks Impressive — The glossy chocolate glaze dripping down the sides looks stunning on a platter. It’s elegant enough for a dinner party but casual enough for a potluck. Plus, it feeds a crowd easily—this 9×13 pan serves 12 to 16 people.
Ingredients You’ll Need
Here’s the best part: you probably have most of this already. I’m particular about three ingredients here, and I’ll tell you exactly why.
For the Cake Base:
Yellow cake mix (1 box / 15.25 oz) — I use a standard box mix because it’s reliable and tender. Don’t swap for white cake; yellow has that buttery richness that mimics the donut dough better. I prefer brands like Duncan Hines or Betty Crocker.
Vanilla pudding mix (1 box / 3.4 oz) — Wait, I said no pudding for the custard, right? Yes, but we use a tiny bit of dry pudding mix in the cake batter to help it stay moist and add vanilla flavor. It’s a baker’s secret.
Vegetable oil (½ cup / 120ml) — Oil keeps cakes moister than butter. Don’t substitute with melted butter unless you want a denser crumb.
Eggs (3 large) — Room temperature eggs blend better into the batter. If you’re rushing, just drop them in warm water for 5 minutes.
Water (1 cup / 240ml) — Hot water helps bloom the vanilla flavor in the pudding mix. Cold water works too, but hot is better.
For the Vanilla Custard:
Whole milk (2 cups / 480ml) — Full-fat is non-negotiable. Skim milk will make a watery custard. I buy the gallon jug because I use it for everything.
Egg yolks (4 large yolks) — We use just the yolks for richness and color. Save the whites for an easy batch of snickerdoodles or meringues.
Granulated sugar (½ cup / 100g) — Standard white sugar. No need for fancy varieties here.
Cornstarch (3 tablespoons / 24g) — This is what thickens the custard. Don’t use flour; it gives a raw taste and doesn’t get as glossy.
Unsalted butter (2 tablespoons / 30g) — Added at the end for shine and richness.
Vanilla extract (1 teaspoon / 5ml) — Or scrape one vanilla bean. I use extract for convenience, but a real bean is worth it for special occasions.
For the Chocolate Glaze:
Semi-sweet chocolate chips (1 cup / 170g) — I use Ghirardelli or Nestlé Toll House. Don’t use baking bars unless you melt them properly; chips hold their structure better for a glaze.
Heavy cream (½ cup / 120ml) — Full-fat cream ensures a smooth, glossy glaze. Half-and-half will be too thin.
Salt (a pinch) — Enhances the chocolate flavor. Never skip this.
Equipment Needed
You don’t need fancy equipment for this. Here’s what I actually use:
9×13 inch baking pan — Standard glass or metal pan works. Glass takes longer to bake but gives a crispier edge.
Mixing bowls — One large for the cake, one medium for the custard.
Whisk — Essential for the custard to prevent lumps. A fork works in a pinch, but a whisk is better.
Medium saucepan — For cooking the custard. Non-stick is easiest for cleanup.
Small saucepan or microwave-safe bowl — For melting the chocolate glaze.
Wooden spoon — For stirring the custard. You’ll be stirring constantly.
Measuring cups and spoons — Standard stuff.
Toothpicks or chopsticks — For poking holes in the cake. I use chopsticks because they make wider holes that absorb more custard.
How to Make It: Step-by-Step
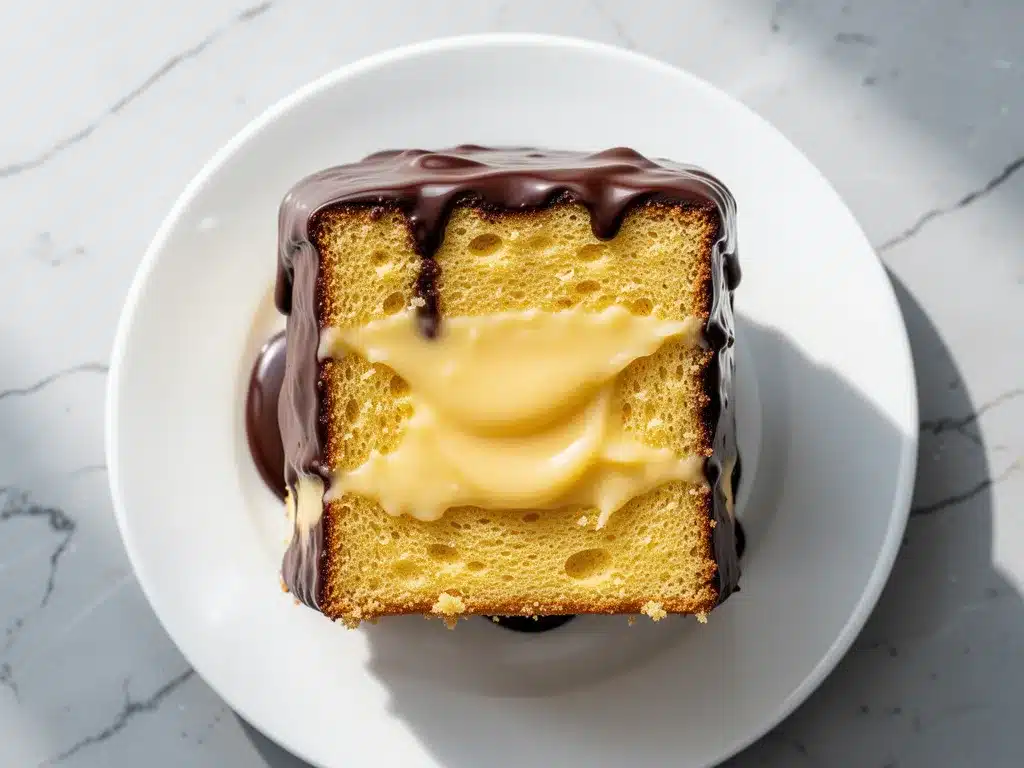
Alright, let’s make this! I’m walking you through exactly how I do it, including the little tricks I’ve picked up.
Step 1: Bake the Cake (30-35 minutes)
Preheat your oven to 350°F (175°C). Grease a 9×13 inch baking pan with cooking spray or butter. In a large bowl, combine the yellow cake mix, dry pudding mix, eggs, oil, and water. Mix on medium speed for 2 minutes until smooth. Pour the batter into the prepared pan and spread it evenly. Bake for 25-30 minutes, or until a toothpick inserted in the center comes out clean. Let the cake cool in the pan for 10 minutes. It doesn’t need to be completely cool, but it shouldn’t be hot to the touch.
Step 2: Poke the Holes (5 minutes)
This is the fun part. Take a wooden spoon handle, chopsticks, or a skewer and poke holes all over the cake. Go for about ½-inch spacing. Don’t be afraid to go deep—poke until you reach the bottom of the pan. The more holes, the more custard the cake will absorb. I usually do a grid pattern, going row by row across the pan.
Step 3: Make the Vanilla Custard (15 minutes)
In a medium saucepan, whisk together the sugar and cornstarch. Slowly whisk in the milk and egg yolks until smooth. Place the saucepan over medium heat and cook, stirring constantly with a wooden spoon or whisk. The mixture will start to thicken after about 3-4 minutes. Keep stirring! It will bubble and thicken quickly. Once it reaches a boil and looks like thick pudding (about 5-7 minutes total), remove from heat. Stir in the butter and vanilla extract until melted and combined. Let it cool for 5-10 minutes so it’s warm but not scalding.
Step 4: Pour the Custard (2 minutes)
Pour the warm custard evenly over the poked cake. It will soak in immediately. If some areas look dry, gently tilt the pan to spread the custard. You want every part of the cake to get a drink. If you have leftover custard, don’t worry—it’s delicious on its own. Cover the pan with plastic wrap and refrigerate for at least 2 hours, or overnight.
Step 5: Make the Chocolate Glaze (5 minutes)
While the cake chills, make the glaze. In a small saucepan, heat the heavy cream over low heat until it just starts to simmer (small bubbles around the edges). Pour the hot cream over the chocolate chips in a heat-proof bowl. Let it sit for 2 minutes, then stir gently until smooth and glossy. If there are still lumps, microwave in 10-second bursts, stirring in between. Stir in a pinch of salt.
Step 6: Glaze and Serve (5 minutes)
Remove the cake from the fridge. Pour the warm chocolate glaze over the chilled cake. Use a spatula to spread it to the edges, letting it drip down the sides. The heat from the glaze will melt the top layer of custard slightly, creating that signature oozy Boston cream texture. Slice and serve cold.
Total Time: About 45 minutes active, plus 2 hours chilling.
Expert Tips & Tricks
Here’s everything I’ve learned from making this dozens of times. These tips will save you from my mistakes.
Don’t Skip the Poking
I know it feels like a lot of holes, but this is the whole point of a poke cake. If you don’t poke enough, the custard just sits on top and makes a soggy mess. Go deep and go wide. I use chopsticks because they create bigger channels.
Custard Consistency
The custard should be thick enough to hold its shape on a spoon but still pourable. If it’s too thick, add a splash of milk. If it’s too thin, cook it a minute longer. Remember, it will thicken more as it cools.
Glaze Temperature
The glaze needs to be warm to pour, but not hot. If it’s boiling, it will melt the cake too much and make it fall apart. If it’s cold, it will seize up and become chunky. Aim for “warm to the touch.”
Chill Time Matters
You can eat this immediately, but it’s much better after chilling. The custard sets, the cake firms up, and the glaze becomes glossy. I recommend at least 2 hours, but overnight is best.
Storage
Keep this cake covered in the fridge for up to 3 days. The glaze will soften, but the cake will stay moist. Bring to room temperature for 15 minutes before serving for the best texture.
Variations & Substitutions
Once you’ve nailed the basic version, here’s how you can mix it up. I’ve tried all of these.
Coffee Cake Version
Add 1 tablespoon of instant espresso powder to the custard. It adds a deep, mocha flavor that pairs beautifully with the chocolate. It’s like a Boston cream mocha cake.
Strawberry Shortcake Poke
Swap the chocolate glaze for a raspberry coulis or strawberry puree. Use a white cake mix instead of yellow. It’s fresh and summery.
Chocolate Cake Base
Use a chocolate cake mix instead of yellow. It makes it a double-chocolate experience. Add chocolate chips to the custard for extra richness.
Gluten-Free
Use a gluten-free yellow cake mix. Everything else is naturally gluten-free. I’ve used King Arthur Gluten-Free and it works great. Just follow the package instructions for mixing.
Dairy-Free
Replace milk with oat milk or coconut milk. Use dairy-free butter and chocolate chips. The custard will be slightly less rich but still delicious.
Serving & Storage
How to Serve:
I usually serve this straight from the pan with a nice serrated knife. It looks rustic and stays moist. But here are other ways I’ve enjoyed it:
Side Dishes:
– Fresh berries (strawberries, raspberries) to cut the sweetness
– Whipped cream on the side for those who want extra richness
– A scoop of vanilla ice cream for a “Boston Cream Sundae” vibe
Wine Pairing:
Not a wine expert, but my wine-snob friend says a late-harvest Riesling or a sweet Moscato works great with this. It balances the chocolate and custard.
Storage Instructions:
Refrigerator:
Store in an airtight container or covered with plastic wrap for up to 4 days. The glaze will soften, but the cake will stay moist. Bring to room temperature for 15 minutes before serving.
Freezing:
Honestly, this doesn’t freeze well because of the custard. The texture changes when thawed. Make it fresh or store in the fridge for up to 4 days.
Meal Prep:
Make the cake and custard on Sunday, chill overnight. Make the glaze on the day of serving. It saves you time and ensures the best texture.
Nutrition Information
I’m not a nutritionist, but here’s the breakdown if you’re tracking.
Per Serving (based on 12 servings):
| Nutrient | Amount |
|---|---|
| Calories | 380 |
| Protein | 6g |
| Carbs | 52g |
| Fiber | 1g |
| Sugar | 38g |
| Fat | 18g |
| Saturated Fat | 10g |
| Cholesterol | 65mg |
| Sodium | 220mg |
What’s Good:
– Decent protein from the eggs and milk
– Calcium from the custard
– Feeds a crowd, so each slice is a manageable portion
What to Know:
– Higher in sugar and calories from the cake, custard, and glaze
– Contains dairy and gluten
– Moderate sodium (use low-sodium cake mix if concerned)
My Take:
Look, this is comfort food with custard and chocolate. It’s not a diet recipe. But it’s way better than takeout, costs less, and I know exactly what’s in it. When I want to make it lighter, I use the half-and-half version and load up on vegetables. But usually? I just eat a reasonable portion and enjoy it.
Final Thoughts
So that’s my go-to Boston cream poke cake! I’ve probably talked your ear off at this point, but when you make a recipe this often, you have a lot to say about it.
This has saved dinner parties more times than I can count. It’s my answer to “what’s for dessert” when I’m tired, don’t want to bake from scratch, and still want something that tastes really good. My husband is happy, his friends are happy, and I’m happy because I’m not stressed about cooking.
Make it yours! Try different add-ins, swap in your favorite cake mix, adjust the glaze thickness. The best recipes are the ones you adapt to your family’s tastes.
If you make this, drop a comment and let me know what you think! I love hearing how recipes turn out in your kitchen. And if something doesn’t work, tell me that too—I’m here to help troubleshoot.
Happy cooking! And I hope your kitchen smells half as good as mine does right now.
Frequently Asked Questions
Can I use instant pudding instead of making custard?
You can, but the custard tastes so much better. Instant pudding is fine if you’re in a huge rush, but the homemade custard is rich, silky, and has a real vanilla flavor. I’ve used pudding when I was desperate, and it’s okay, but the custard is worth the extra 10 minutes.
Why did my glaze turn grainy?
Usually means the cream was too hot when you poured it over the chips, or you didn’t let it sit long enough before stirring. Always pour hot cream over chips, let it sit for 2 minutes, then stir gently. If it’s already grainy, try whisking in a splash of warm cream—it sometimes saves it.
Can I make this ahead for a party?
Absolutely! This cake actually gets better overnight. Make it the day before, chill it, and glaze it the day of the party. It saves you stress and ensures the best texture. I do this all the time.
Why did my custard curdle?
The heat was too high when you cooked the custard. Egg yolks curdle if they get too hot too fast. Always cook over medium-low heat and stir constantly. If it starts to look lumpy, remove from heat immediately and whisk vigorously.
Can I use a different cake mix?
Yes! Yellow is classic, but chocolate or white cake work too. Just adjust the liquid in the mix according to the package directions. I’ve tried lemon cake too, and it’s refreshing with the chocolate glaze.
How long does this cake last?
It lasts up to 4 days in the fridge, covered. The glaze will soften, but the cake will stay moist. Bring to room temperature for 15 minutes before serving for the best texture.
Can I freeze this cake?
Honestly, this doesn’t freeze well because of the custard. The texture changes when thawed. Make it fresh or store in the fridge for up to 4 days.
Pin This Recipe!
Boston Cream Poke Cake: 3-Step Easy Dessert
- Total Time: 45 minutes active time plus 2 hours chilling
- Yield: 12 servings 1x
Description
A moist, family-style dessert that mimics the flavors of a Boston cream donut without the frying. This poke cake features a yellow cake base soaked in rich vanilla custard and topped with a glossy chocolate glaze.
Ingredients
- 1 box (15.25 oz) yellow cake mix
- 1 box (3.4 oz) vanilla pudding mix (dry)
- 3 large eggs, room temperature
- 1/2 cup (120ml) vegetable oil
- 1 cup (240ml) water, hot
- 2 cups (480ml) whole milk
- 4 large egg yolks
- 1/2 cup (100g) granulated sugar
- 3 tablespoons (24g) cornstarch
- 2 tablespoons (30g) unsalted butter
- 1 teaspoon vanilla extract
- 1 cup (170g) semi-sweet chocolate chips
- 1/2 cup (120ml) heavy cream
- Pinch of salt
Instructions
- Preheat oven to 350°F (175°C). Grease a 9×13 inch baking pan.
- In a large bowl, combine yellow cake mix, dry pudding mix, eggs, oil, and water. Mix on medium speed for 2 minutes until smooth.
- Pour batter into the prepared pan and spread evenly. Bake for 25-30 minutes or until a toothpick inserted in the center comes out clean.
- Let the cake cool in the pan for 10 minutes.
- Using chopsticks or a skewer, poke holes all over the cake, spacing them about 1/2 inch apart and going deep to the bottom of the pan.
- In a medium saucepan, whisk together sugar and cornstarch. Slowly whisk in milk and egg yolks until smooth.
- Cook over medium heat, stirring constantly, until the mixture thickens and bubbles (about 5-7 minutes).
- Remove from heat and stir in butter and vanilla extract until combined. Let cool for 5-10 minutes.
- Pour the warm custard evenly over the poked cake. Cover and refrigerate for at least 2 hours or overnight.
- While the cake chills, heat heavy cream in a small saucepan until it just starts to simmer.
- Pour hot cream over chocolate chips in a heat-proof bowl. Let sit for 2 minutes, then stir until smooth and glossy. Stir in a pinch of salt.
- Remove cake from fridge and pour the warm chocolate glaze over the top, spreading to the edges to let it drip down the sides.
- Slice and serve cold.
Notes
The cake stays fresh for days due to the poke method. It is best made ahead and chilled overnight to allow flavors to meld. Do not freeze this cake as the custard texture changes upon thawing. For a gluten-free version, use a gluten-free yellow cake mix. For a dairy-free version, substitute milk with oat or coconut milk and use dairy-free butter and chocolate chips.
- Prep Time: 15 minutes
- Cook Time: 30 minutes
- Category: Dessert
- Cuisine: American
Nutrition
- Serving Size: 1 slice
- Calories: 380
- Sugar: 38
- Sodium: 220
- Fat: 18
- Saturated Fat: 10
- Carbohydrates: 52
- Fiber: 1
- Protein: 6
Keywords: Boston cream poke cake, poke cake recipe, vanilla custard, chocolate glaze, easy dessert, make ahead dessert, family friendly dessert



