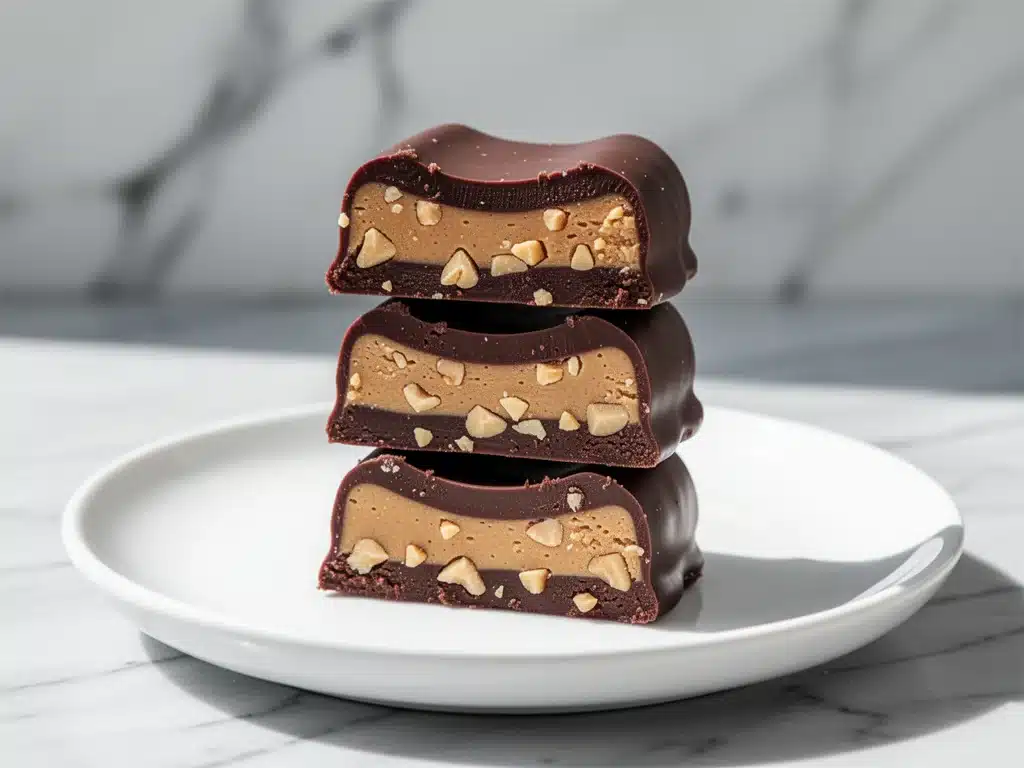
There is a specific kind of chaos that happens at a football tailgate. It’s 10 degrees below zero, the wind is cutting right through your jacket, and someone is already arguing about a call from three plays ago. But amidst the shivering, the propane grill smoke, and the smell of charcoal, there is one thing that keeps people warm and happy: the dessert table. And specifically, the dessert table that has chocolate peanut butter buckeye bars.
I learned this the hard way five years ago. I showed up to a friend’s tailgate with a batch of store-bought brownies. They were fine. But then Dave from accounting pulled out a Tupperware container of homemade buckeye bars—crunchy chocolate on the outside, creamy peanut butter on the inside—and suddenly, the brownies felt like an afterthought. Everyone crowded around Dave. I stood there in the cold, holding my plate, realizing I needed to step up my game.
That was the moment I decided to master the art of the Football Tailgate Chocolate Peanut Butter Buckeye Bars. I wanted something that could survive the car ride in the trunk, stay good in a cooler for six hours, and taste like it came from a fancy bakery (but actually costs pennies to make). I’ve tested this recipe through blizzards, sunny stadium lots, and even a tailgate that got rained out (plastic wrap is your friend). These bars are now a non-negotiable part of my game day routine. They’re rich, they’re indulgent, and they disappear faster than any other dessert I bring.
If you’ve ever tried to make traditional buckeyes as cookies, you know they can be tricky. The peanut butter filling can be too soft, or the chocolate coating cracks when you bite into it. These bars solve all those problems. By pressing the filling into a pan and topping it with a poured chocolate layer, you get that perfect crunch without the hassle. It’s the ultimate crowd-pleaser, and honestly, it’s become my new favorite way to use up that jar of peanut butter sitting in the back of the pantry.
Why You’ll Love This Recipe
There are a lot of dessert options out there, but few hit the sweet spot between “easy to transport” and “absolutely addictive” quite like these buckeye bars. Here’s why they’ve earned a permanent spot in my tailgate rotation:
- Zero Melting Worry — Unlike custards or cream pies, these bars are stable. The chocolate shell protects the peanut butter center, meaning they won’t turn into a soup if the cooler lid pops open. I’ve driven them 45 minutes in the summer heat, and they came out perfect.
- Make-Ahead Friendly — You can make these three days before the game. In fact, I recommend it. They taste better after the flavors have had time to meld in the fridge. This means less stress on game day morning.
- Supermarket Ingredients — You don’t need specialty stores for this. All you need is peanut butter, chocolate chips, and basic pantry staples. It’s cheaper than buying a dozen cupcakes at the gas station.
- Big Flavor, Small Effort — The ratio of chocolate to peanut butter is exactly right. It’s not too sweet, not too salty, just balanced. It tastes like a high-end confection but takes about 20 minutes of active work.
- Kid-Approved — My nephew, who usually turns his nose up at anything “fancy,” asks for these specifically. They’re familiar flavors in a fun bar format. Plus, no messy dipping required.
These bars are my secret weapon for tailgate popularity. They’re sturdy enough to handle being picked up by sticky hands and rich enough to make people close their eyes when they take a bite. If you’ve ever struggled with no-bake peanut butter chocolate pie, you’ll appreciate how much easier these bars are to portion and serve.
Ingredients You’ll Need
The beauty of this Football Tailgate Chocolate Peanut Butter Buckeye Bars recipe is that the ingredient list is short. You don’t need a dozen different flours or exotic spices. You just need good quality basics. Here’s what you’ll need for a standard 9×13 pan:
For the Peanut Butter Filling
Creamy Peanut Butter (1 cup / 250g) — This is the star. Use a standard brand like Jif or Skippy. Natural peanut butter can be too oily and won’t set as firmly. You want that smooth, processed texture for the best consistency.
Unsalted Butter (½ cup / 113g, softened) — This adds richness and helps bind the filling. Make sure it’s softened to room temperature so it mixes smoothly without lumps.
Powdered Sugar (2 cups / 240g) — Also known as confectioners’ sugar. This sweetens the filling and helps it hold its shape. Sift it if it’s clumpy—nobody wants a gritty bar.
Vanilla Extract (1 teaspoon) — Just a splash to round out the peanut flavor. Pure vanilla is best here since the flavor is prominent.
Salt (¼ teaspoon) — Crucial. Peanut butter and chocolate are sweet; salt makes them sing. Don’t skip this.
For the Chocolate Topping
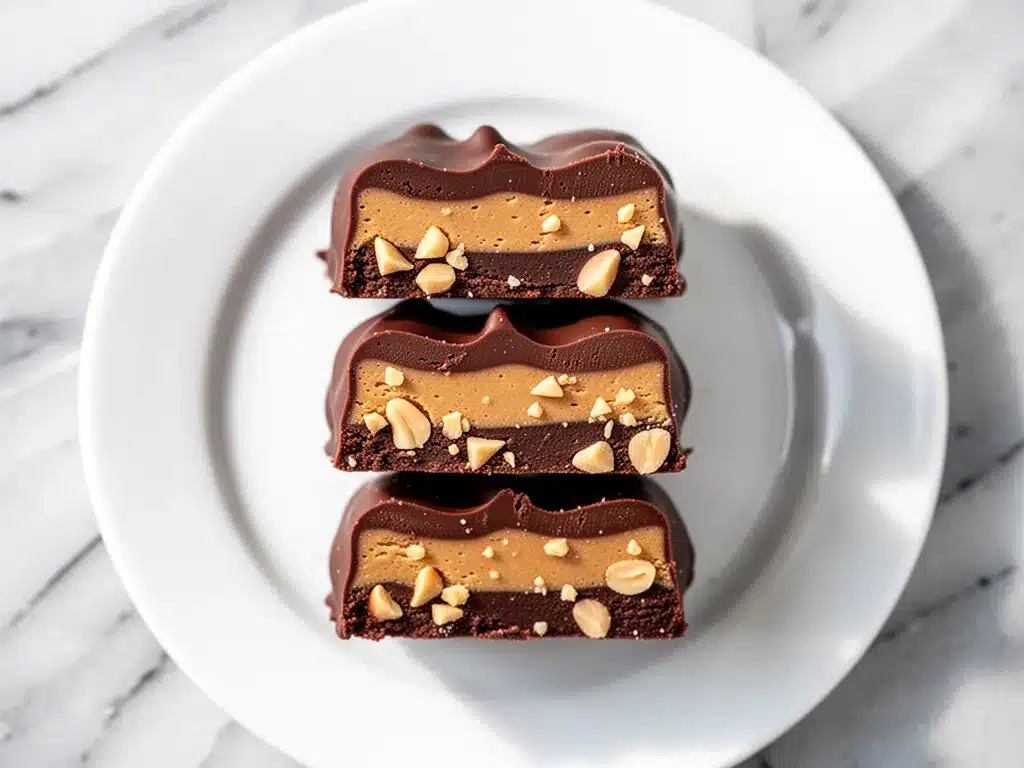
Chocolate Chips (12 ounces / 340g) — I prefer semi-sweet chocolate chips for a balanced taste. Milk chocolate works if you like it sweeter, but dark chocolate chips (60% cacao) add a nice sophistication. Avoid baking bars unless you know how to temper them—chips are easier.
Heavy Cream (⅓ cup / 80ml) — This creates a ganache. It makes the chocolate shiny and gives it that snap when it sets. Whole milk works in a pinch, but heavy cream is best for stability.
Butter (1 tablespoon) — Adding a little butter to the ganache makes it extra glossy and rich.
Optional: Crushed Peanuts — For that classic buckeye crunch on top. Not strictly necessary, but it adds texture.
Pro Tip: I always buy the block of cheddar cheese for my tailgate snacks and grate it myself, but for these bars, pre-shredded chocolate chips are a lifesaver. Just give them a quick check for clumps.
Equipment Needed
You don’t need fancy gadgets for this. Here’s what I actually use:
- 9×13 Inch Baking Pan — Line it with parchment paper. This is non-negotiable for easy removal. I use “overhang” strips so you can lift the whole block out later.
- Microwave-Safe Bowl — Large enough to hold the chocolate chips and cream. Glass or ceramic works best.
- Mixer — A hand mixer or stand mixer makes creaming the peanut butter and butter super easy. You can do it by hand with a wooden spoon, but your arm will thank you if you use a machine.
- Spatula — Silicone is best for scraping the bowl and spreading the ganache.
- Knife — For cutting the bars. A sharp chef’s knife or a pizza cutter works well.
Quick Note: If you don’t have parchment paper, you can grease the pan heavily with butter, but parchment makes cleanup a breeze and ensures the bars don’t stick.
How to Make It: Step-by-Step
Alright, let’s make these Football Tailgate Chocolate Peanut Butter Buckeye Bars. It’s straightforward, but there are a few tricks to get that perfect texture.
Step 1: Prep the Pan and Chill
Line your 9×13 pan with parchment paper, leaving an overhang on the long sides. This acts as a sling. Put the empty pan in the fridge while you make the filling. Why? Because cold peanut butter is easier to spread if it gets too soft, and it helps the final bars set faster.
Step 2: Make the Peanut Butter Filling
In a large mixing bowl, combine the softened butter, creamy peanut butter, powdered sugar, vanilla, and salt. Beat on medium speed until smooth and creamy. This should take about 2-3 minutes. If it looks too dry, add a teaspoon of milk. If it’s too wet, add a little more powdered sugar. The mixture should be thick but spreadable—like stiff frosting.
Spread this mixture evenly into the chilled pan. Use a spatula or the back of a spoon to smooth it out. Get it to the corners. Place the pan back in the fridge for at least 30 minutes, or until the filling is firm to the touch. This step is critical; if the filling is soft, the chocolate topping will mix into it and you’ll get a muddy mess.
Step 3: Make the Chocolate Ganache
Once the filling is set, it’s time for the chocolate. Place the chocolate chips in a microwave-safe bowl. Heat the heavy cream in the microwave for 30-45 seconds until it’s hot but not boiling. Pour the hot cream over the chocolate chips. Let it sit for 2 minutes without stirring. This allows the chocolate to melt gently.
After 2 minutes, add the tablespoon of butter. Stir slowly with a spatula, starting from the center and working outward. The mixture will look lumpy at first, but keep stirring gently. Within a minute, it will become smooth, glossy, and shiny. This is your ganache.
Step 4: Top and Set
Pour the warm ganache over the chilled peanut butter filling. Use a spatula to spread it evenly to the edges. If you want that classic buckeye look, sprinkle crushed peanuts over the top now while the chocolate is still wet. Tap the pan gently on the counter to release any air bubbles.
Place the pan in the refrigerator for at least 2 hours, or overnight. The chocolate needs to fully harden. If you rush this step, you’ll get squishy bars instead of clean cuts.
Step 5: Cut and Serve
Lift the entire block out of the pan using the parchment sling. Place it on a cutting board. For clean cuts, use a sharp knife. Wipe the knife clean between cuts if the chocolate smears. Cut into 12 or 16 squares. Serve immediately, or store in an airtight container.
Troubleshooting: If your ganache seizes and becomes grainy, it’s usually because water got into the chocolate. Make sure your bowl and cream are completely dry. If it happens, add a tiny bit more hot cream and stir vigorously to save it.
Expert Tips & Tricks
Here’s everything I’ve learned from making these dozens of times. These tips will save you from my mistakes.
The Peanut Butter Choice Matters
I cannot stress this enough: do not use natural peanut butter with oil separation for the filling. The oil makes the bars greasy and they won’t set. Use the standard processed kind. If you’re worried about additives, look for a brand with just peanuts and salt.
Chill the Filling Thoroughly
I’ve been guilty of skipping the chill time before. Bad move. The filling needs to be rock hard before you pour the chocolate. If it’s even slightly soft, the chocolate will sink in. I usually make the filling in the morning and let it chill all day.
Don’t Overheat the Cream
When making the ganache, you don’t need to boil the cream. Just hot is enough. Boiling cream can sometimes scorch the chocolate or make the ganache too thin. 30-45 seconds in the microwave is usually perfect.
For a Snap, Use Dark Chocolate
If you want that professional bakery snap, use semi-sweet or dark chocolate chips. Milk chocolate tends to stay softer. I like a 60% cacao bar for a nice balance of bitterness against the sweet peanut butter.
Storage is Key
These bars must be stored in the fridge. The peanut butter filling is perishable, and the chocolate needs the cold to stay firm. They’ll last up to a week in the fridge, but I’ve never seen them last that long.
Variations & Substitutions
Once you’ve nailed the basic version, here’s how you can mix it up. I’ve tried all of these.
Salted Caramel Buckeyes
Drizzle store-bought or homemade salted caramel over the peanut butter layer before adding the chocolate. This adds a chewy, sweet-salty dimension that is incredible. It’s similar to the vibe in brown butter salted caramel blondies, but in bar form.
Chocolate Chip Buckeyes
Stir a handful of mini chocolate chips into the peanut butter filling before spreading it in the pan. This adds little bursts of chocolate throughout the bar.
Cookie Crust Base
For a more substantial bar, press a layer of crushed Oreo cookies or graham crackers into the bottom of the pan before adding the peanut butter. This adds a crunch that mimics a cheesecake crust.
Gluten-Free Option
This recipe is naturally gluten-free if you use certified GF chocolate chips and ensure your peanut butter doesn’t have cross-contamination warnings. Most standard brands are safe.
Vegan Version
Use vegan butter and vegan chocolate chips. For the peanut butter filling, you might need to add a little more powdered sugar or a teaspoon of cornstarch to help it set, as vegan butter can have different water content.
Serving & Storage
How to Serve:
I usually serve these straight from the fridge. The cold temperature makes the chocolate snap and the peanut butter feel almost like ice cream. I like to pair them with a cold soda or coffee. They’re rich, so people usually only eat one or two.
Side Dishes:
These are dessert, so they pair well with savory tailgate food like buffalo chicken meatballs or beef and vegetable chili. The contrast of spicy/savory and sweet/chocolate is perfect for a game day spread.
Storage Instructions:
Store in an airtight container in the refrigerator for up to 5 days. Layer them between parchment paper to prevent sticking. They can also be frozen for up to 2 months. Thaw in the fridge overnight before serving. I don’t recommend leaving them out at room temperature for more than 2 hours, especially in warm weather.
Pro Tip: If you’re transporting them, keep them in the cooler until the last minute. A cold bar is a clean cut bar.
Nutrition Information
I’m not a nutritionist, but here’s the breakdown if you’re tracking. Keep in mind, these are rich, so portion control is key.
Per Serving (based on 12 bars):
- Calories: 320
- Protein: 6g
- Carbs: 32g
- Fiber: 2g
- Sugar: 28g
- Fat: 20g
- Saturated Fat: 8g
- Sodium: 120mg
What’s Good:
It provides some protein from the peanut butter, which helps with satiety. It’s also relatively simple in ingredients.
What to Know:
It’s high in sugar and fat due to the chocolate and peanut butter. It’s a treat, not a health food. Enjoy it as part of your game day celebration.
Final Thoughts
So that’s my go-to Football Tailgate Chocolate Peanut Butter Buckeye Bars! I’ve probably talked your ear off at this point, but when you make a recipe this often, you have a lot to say about it.
This has saved my tailgate reputation more times than I can count. It’s my answer to “what dessert should I bring?” when I want something impressive but easy. My friends are happy, the kids are happy, and I’m happy because I’m not stressed about cooking or transporting delicate desserts.
Make it yours! Try different chocolate chips, add crushed pretzels for a salty kick, or drizzle caramel. The best recipes are the ones you adapt to your family’s tastes.
If you make this, drop a comment and let me know what you think! I love hearing how recipes turn out in your kitchen. And if something doesn’t work, tell me that too—I’m here to help troubleshoot.
Happy cooking! And I hope your kitchen smells half as good as mine does right now.
Frequently Asked Questions
Can I use natural peanut butter?
I don’t recommend it for the filling. Natural peanut butter has separated oils that can make the bars greasy and prevent them from setting firmly. If you must use it, make sure the oil is fully incorporated and add a little extra powdered sugar to absorb the moisture. But for best results, stick to standard creamy peanut butter.
Why did my chocolate topping crack?
This usually happens if the chocolate cools too quickly or if the ganache was too thick. Make sure you’re using heavy cream to create a smooth ganache. Also, don’t pour the chocolate over a filling that’s freezing cold; let the pan sit at room temperature for 5 minutes before pouring the ganache to prevent thermal shock.
Can I make these ahead of time?
Yes! In fact, they taste better after sitting in the fridge for 24 hours. You can make them up to 3 days before your tailgate. Just keep them covered in the fridge until you’re ready to transport them.
How do I cut them cleanly?
Use a sharp knife. For extra clean cuts, dip the knife in hot water and wipe it dry between each cut. This melts the chocolate slightly, allowing for a smooth slice without dragging the peanut butter layer.
Can I freeze these bars?
Yes, they freeze well for up to 2 months. Wrap them tightly in plastic wrap and then foil. Thaw them in the refrigerator overnight. Do not thaw at room temperature, as condensation can make the chocolate sticky.
What if I don’t have a microwave?
You can melt the chocolate and cream in a double boiler. Place a heatproof bowl over a pot of simmering water (make sure the bottom of the bowl doesn’t touch the water). Stir until smooth. This method gives you more control and prevents burning.
Are these bars too sweet?
They are sweet, but the salt in the peanut butter and the slight bitterness of semi-sweet chocolate balance it out. If you find them too sweet, switch to dark chocolate chips (70% cacao) or add a pinch of sea salt on top after pouring the ganache.
Pin This Recipe!
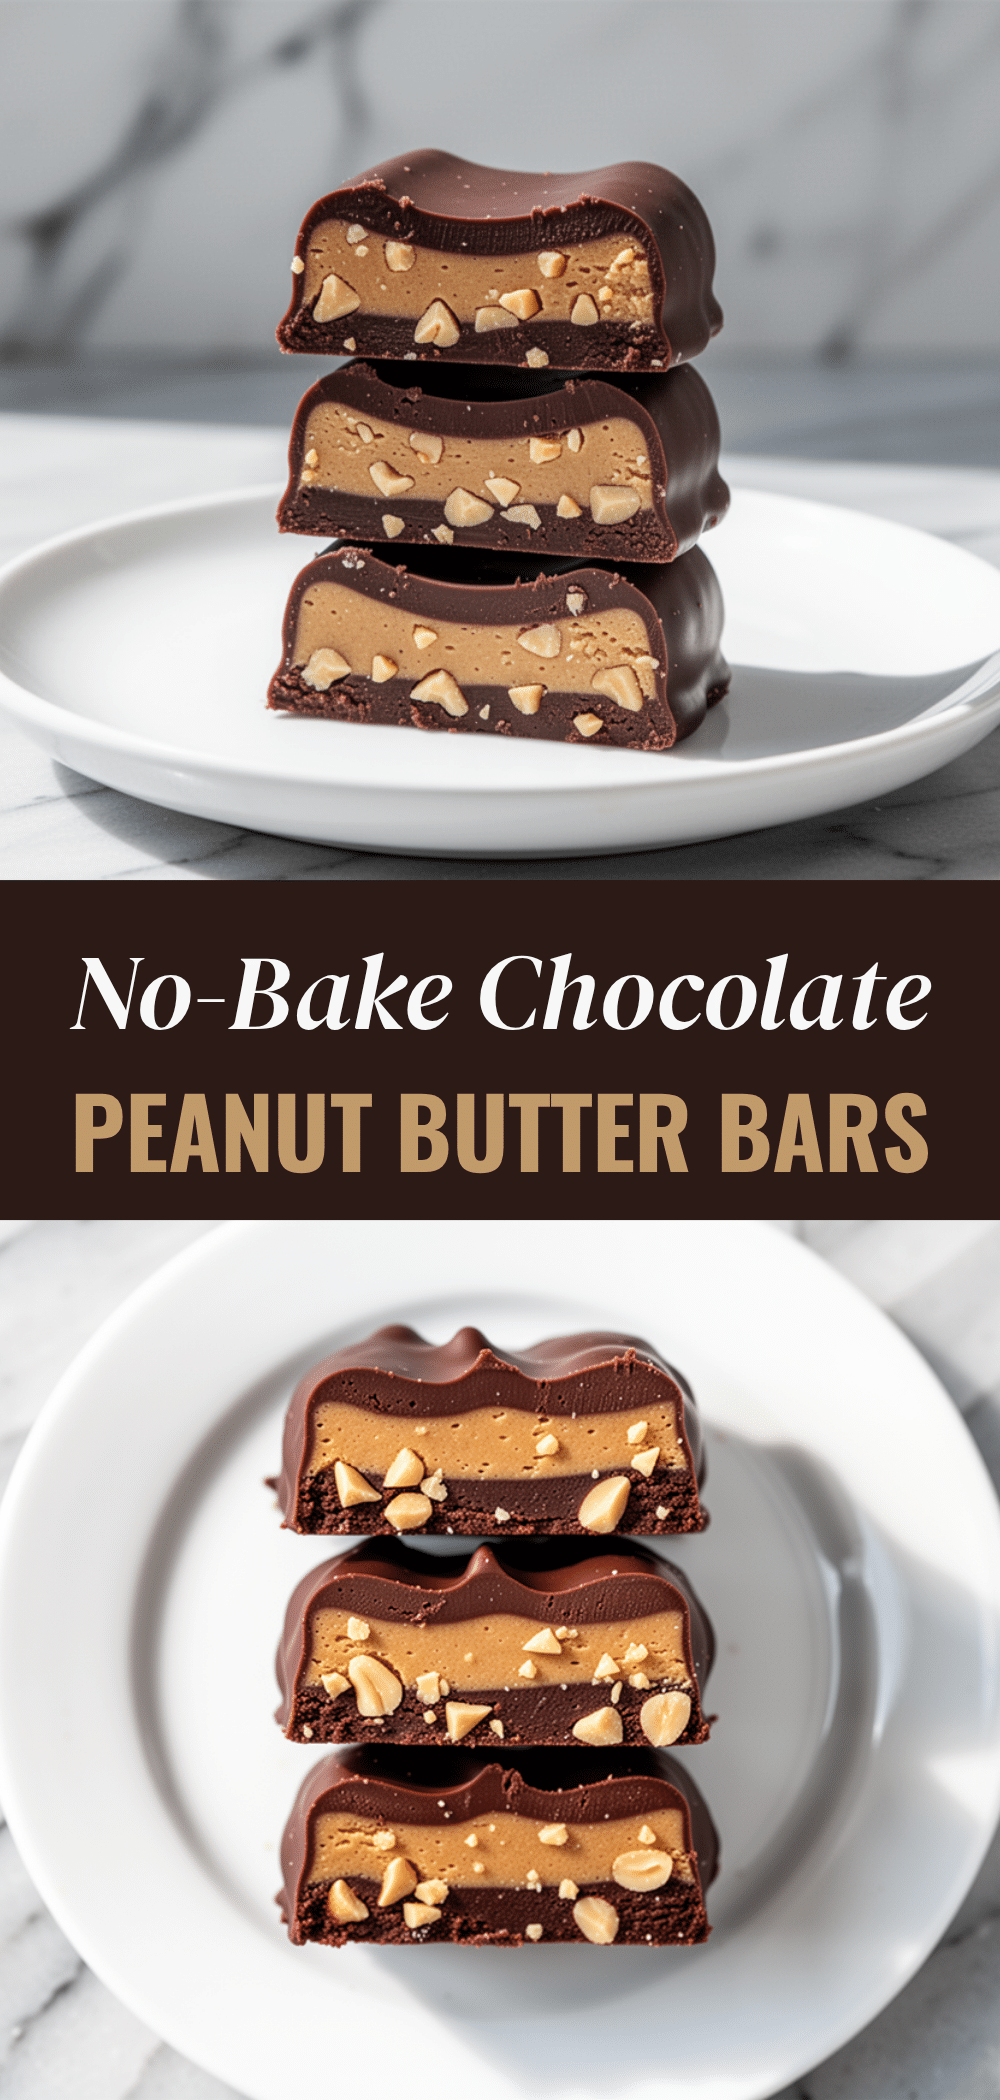
Football Tailgate Chocolate Peanut Butter Buckeye Bars
- Total Time: 2 hours 20 minutes
- Yield: 12 servings 1x
Description
Rich, no-bake chocolate peanut butter bars that are stable for transport, easy to make, and perfect for tailgating or game day parties.
Ingredients
- 1 cup creamy peanut butter
- 1/2 cup unsalted butter, softened
- 2 cups powdered sugar
- 1 teaspoon vanilla extract
- 1/4 teaspoon salt
- 12 ounces semi-sweet chocolate chips
- 1/3 cup heavy cream
- 1 tablespoon butter
- Crushed peanuts (optional)
Instructions
- Line a 9×13 inch baking pan with parchment paper, leaving an overhang on the long sides, and place in the fridge.
- In a large mixing bowl, combine softened butter, creamy peanut butter, powdered sugar, vanilla, and salt. Beat on medium speed until smooth and creamy (2-3 minutes).
- Spread the peanut butter mixture evenly into the chilled pan. Return to the fridge for at least 30 minutes until firm.
- Place chocolate chips in a microwave-safe bowl. Heat heavy cream for 30-45 seconds until hot but not boiling. Pour hot cream over chocolate chips and let sit for 2 minutes.
- Add 1 tablespoon of butter to the chocolate mixture. Stir slowly with a spatula until smooth, glossy, and shiny.
- Pour the warm ganache over the chilled peanut butter filling. Spread evenly to the edges and sprinkle with crushed peanuts if desired.
- Refrigerate for at least 2 hours or overnight until the chocolate is fully hardened.
- Lift the block out of the pan using the parchment sling. Cut into 12 or 16 squares using a sharp knife.
Notes
Do not use natural peanut butter as the oil separation prevents the bars from setting. Ensure the filling is rock hard before pouring the chocolate to prevent mixing. Store in the refrigerator for up to 5 days or freeze for up to 2 months.
- Prep Time: 20 minutes
- Cook Time: 0 minutes
- Category: Dessert
- Cuisine: American
Nutrition
- Serving Size: 1 bar
- Calories: 320
- Sugar: 28
- Sodium: 120
- Fat: 20
- Saturated Fat: 8
- Carbohydrates: 32
- Fiber: 2
- Protein: 6
Keywords: football tailgate, chocolate peanut butter bars, buckeye bars, no-bake dessert, game day snacks, easy dessert, make-ahead dessert