It was 6:45 AM on a Tuesday, and the house was already in chaos. My youngest had spilled orange juice on the rug, my oldest was hunting for his other sneaker, and I was staring into the fridge like it owed me money. There was no yogurt, no oatmeal, and definitely no time to cook eggs. The only thing left was a bunch of brown-spotted bananas and a jar of peanut butter that had been sitting in the back of the pantry since last Christmas.
I knew I had to make something. Something fast. Something that wouldn’t make us late for the school bus. And something that wouldn’t cost $6 for a box of granola bars at the gas station.
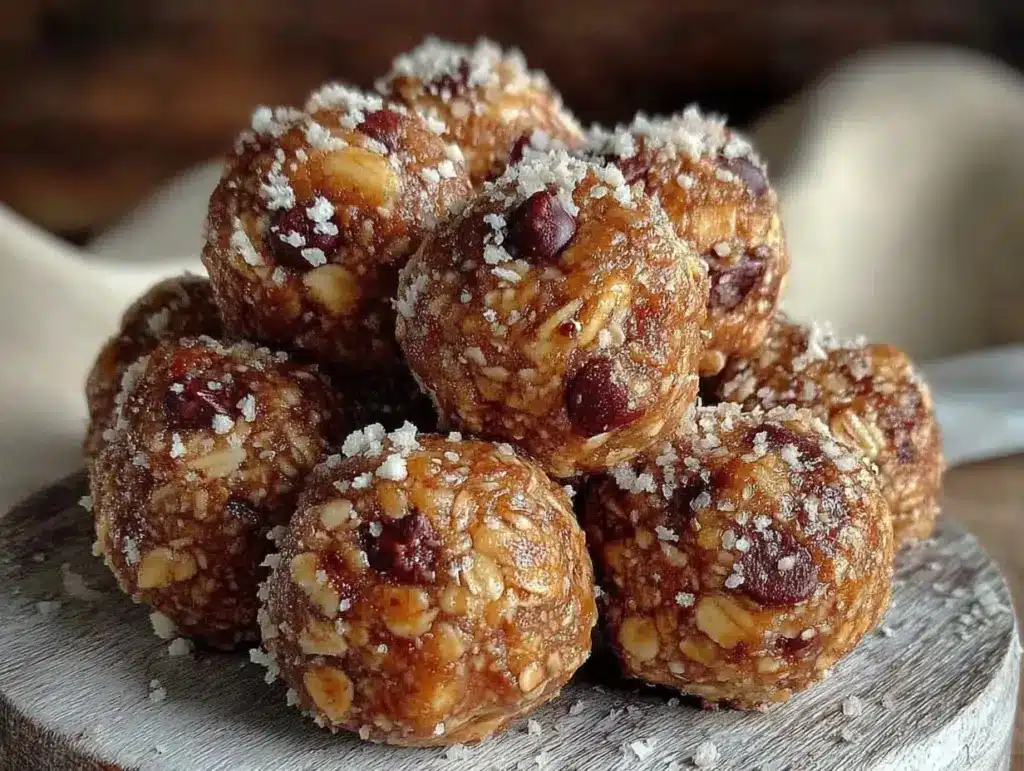
So I threw those bananas and peanut butter into a bowl with a handful of oats and a splash of honey. I mixed it, rolled it into balls, and threw them in the freezer for ten minutes while I wrestled my kids into coats. Ten minutes later, we had breakfast in hand. No stove, no oven, no mess. Just four sticky, delicious bites that kept us full until lunch.
That was three months ago. I’ve made these no bake peanut butter banana energy bites at least twenty times since then. They’ve become my secret weapon for busy mornings, my go-to snack for after-school hunger, and my emergency backup when the grocery budget gets tight. And the best part? You can make a huge batch on Sunday, stash them in the freezer, and have breakfast ready to grab for the entire week.
I’ve tested this recipe more times than I can count, tweaking the ratios until it was perfect. Too much banana and they’re mushy. Too little peanut butter and they fall apart. But once you get the balance right, you’ll wonder how you ever lived without them. They’re cheap, they’re healthy, and they’re ridiculously easy. Let’s get into it.
Why You’ll Love This 5-Ingredient Breakfast
Look, I’m not going to pretend these are gourmet. They’re not going to win a cooking competition. But they are the ultimate practical food hack for parents who need fuel without the fuss. Here’s why these bites have replaced every other snack in our house:
- Five Ingredients, Max — Seriously. Peanuts, bananas, oats, honey, and maybe a pinch of salt. That’s it. You probably have all of these right now. No exotic superfoods from a specialty store, no weird supplements. Just real food.
- Ready in 10 Minutes (Plus Chill Time) — The actual mixing and rolling takes about 10 minutes. The rest is just waiting for them to firm up. I usually do this while I’m brewing coffee or helping with homework. It’s the most hands-off cooking you’ll ever do.
- Budget-Friendly — A jar of peanut butter and a bunch of bananas cost less than a single slice of pizza. These bites cost pennies each to make. If you’re feeding a family or just trying to save money, this is your new best friend. It’s way cheaper than buying those expensive protein bars at the store.
- Meal-Prep Magic — I make a double batch every Sunday. They keep in the fridge for a week or the freezer for a month. I keep a container in the freezer and one in the fridge. When I’m rushing out the door, I just grab two. It’s like having a personal breakfast assistant.
- Kid-Approved (Even the Picky Ones) — My son thinks these are “cookie balls.” He doesn’t realize he’s eating breakfast. They’re sweet, chewy, and satisfying. I’ve also made these for my daughter’s classroom, and they were the first snack to disappear. If kids will eat it, it’s a win.
- Gluten-Free Option — If you use certified gluten-free oats, these are naturally gluten-free. Great for anyone with sensitivities or just trying to cut back on processed grains.
This recipe is my answer to “What’s for breakfast?” when I’m tired. It’s simple, it’s affordable, and it just works. No stress, no dishes, just good food.
Ingredients You’ll Need
Here’s the thing: this recipe is forgiving. You don’t need fancy ingredients. You don’t need to go to a specialty store. Just grab what you have in your pantry and fridge.
The Base
Ripe Bananas (2 large) — This is non-negotiable. They need to be spotty brown. I know they look ugly, but that’s where the sweetness is. Green bananas won’t mash well and will taste starchy. Overripe bananas make these bites naturally sweet, so you can use less honey.
Peanut Butter (½ cup / 120g) — Use creamy or crunchy, your choice. I prefer creamy for a smoother texture, but crunchy adds nice bites. Just make sure it’s natural peanut butter without added sugar or hydrogenated oils. If your natural PB separates, just stir it well before measuring. Pro tip: Don’t use “peanut butter spread” with high sugar content—it changes the texture and makes them too sticky.
The Binder
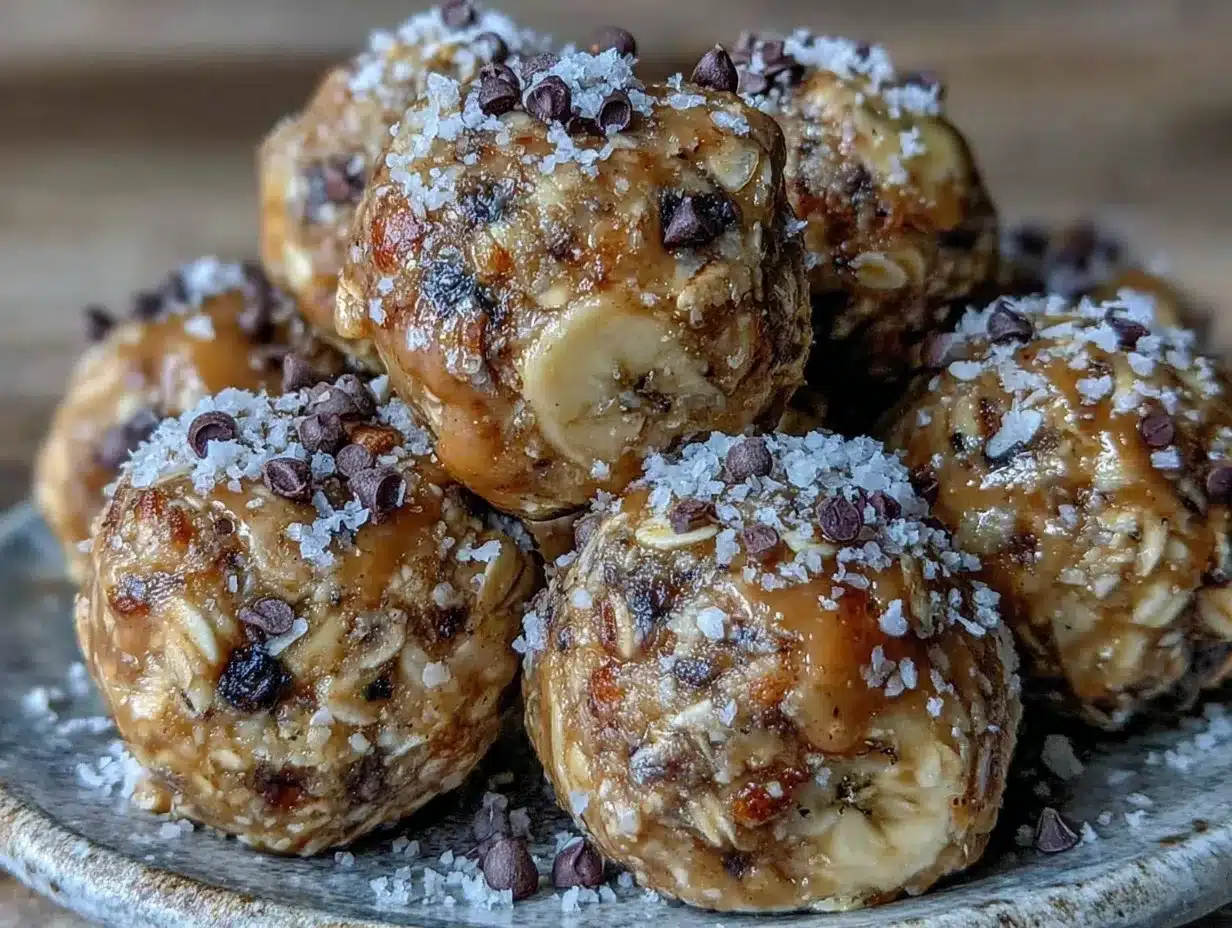
Old-Fashioned Rolled Oats (1 ½ cups / 150g) — These give the bites structure and chew. Quick oats will make them too dense and pasty. Steel-cut oats won’t work at all—they’re too hard. If you need gluten-free, just swap for certified GF rolled oats. I buy the big canisters; they last forever and are super cheap.
Honey (2 tablespoons / 30ml) — This adds extra sweetness and helps bind everything together. Maple syrup works too if you want vegan, but honey has a better flavor with peanut butter. Agave nectar is another option, but it’s thinner, so you might need a bit less.
The Flavor Boosters (Optional but Recommended)
Salt (½ teaspoon) — Seriously, don’t skip this. Salt brings out the peanut butter flavor and balances the sweetness. It’s the difference between “bland” and “delicious.”
Vanilla Extract (1 teaspoon) — Adds a nice depth of flavor. Makes them taste more like dessert, which is nice for breakfast.
Mini Chocolate Chips (¼ cup / 40g) — For the kids (and honestly, for me). They melt slightly and make these taste like cookie dough. Optional, but highly recommended if you want to treat yourself.
Chia Seeds or Flaxseed (1 tablespoon) — I toss these in for extra fiber and omega-3s. They’re tiny, so you won’t notice the texture, but they add nutrition. Great for boosting the health factor without changing the taste.
Equipment Needed
You don’t need any fancy gadgets for this. Here’s what I actually use:
- Mixing Bowl — Any medium-sized bowl works. I use a 3-quart glass bowl because I can see what’s going on.
- Fork or Potato Masher — To mash the bananas. A fork is fine, but a masher is faster if you have ripe ones.
- Spatula — For mixing everything together. A sturdy silicone spatula works best.
- Baking Sheet — To line with parchment paper. I use a standard half-sheet pan.
- Parchment Paper — Or a silicone baking mat. Prevents sticking and makes cleanup a breeze.
- Measuring Cups and Spoons — Standard stuff. I keep a basic set in my drawer.
Note: You don’t need a food processor, blender, or mixer. This is all done by hand. If you’re making these for a party or batch cooking, you might want a large bowl, but for a family of four, a regular bowl is perfect.
How to Make It: Step-by-Step
Alright, let’s make these! It’s super simple, but there are a few tricks to get the texture right. I’m walking you through exactly how I do it.
Step 1: Mash the Bananas
Peel your bananas and put them in a large mixing bowl. Use a fork or potato masher to mash them until they’re completely smooth. No big chunks left. If they’re really ripe, they’ll mash easily. If they’re a bit firm, you might need to press harder. The smoother the mash, the better the texture of the final bites.
Step 2: Add the Wet Ingredients
Add the peanut butter and honey to the mashed bananas. Stir well until everything is combined. The mixture should look like a thick, chunky paste. If it’s too dry, add a teaspoon more honey. If it’s too wet, add a tablespoon more oats. You’re looking for a consistency that holds together when you press it.
Step 3: Mix in the Oats and Add-Ins
Add the rolled oats, salt, and vanilla extract (if using). Stir until the oats are fully coated and the mixture is uniform. If you’re adding chocolate chips or chia seeds, fold them in now. At this point, the mixture will look like cookie dough. It should be thick and slightly sticky, but manageable.
Step 4: Chill the Mixture (Optional but Helpful)
If the mixture feels too sticky to roll, pop the bowl in the fridge for 15-20 minutes. Cold oats absorb moisture and become less sticky. This step is optional, but it makes rolling much easier, especially if you have a warm kitchen.
Step 5: Roll Into Bites
Line a baking sheet with parchment paper. Scoop out about 1 tablespoon of mixture (I use a small cookie scoop for consistency) and roll it into a ball between your palms. If the mixture sticks to your hands, wet them slightly with water. Place the ball on the baking sheet. Repeat with the rest of the mixture. You should get about 15-20 bites, depending on size.
Step 6: Set in the Freezer
Place the baking sheet in the freezer for at least 30 minutes. This firms them up so they hold their shape. You can eat them soft right away, but chilled bites are much better for packing in lunchboxes or grabbing on the go.
Total Time: About 10 minutes active, plus 30 minutes chilling.
Expert Tips & Tricks
Here’s everything I’ve learned from making these dozens of times. These tips will save you from my mistakes.
Use Very Ripe Bananas
This is the most important tip. The riper the banana, the sweeter the bites. If your bananas are green or just yellow, you’ll need to add more honey. But if they’re brown and spotty, you can skip the honey entirely. I keep a bag of bananas in the fridge until they’re ready—they stay ripe longer and are perfect for baking.
Don’t Overmix
Once you add the oats, mix just until combined. Overmixing can make the oats soggy and the bites dense. You want them to have a bit of chew, not be like a brick.
Wet Your Hands
If the mixture is sticky (and it might be), wet your hands with a little water before rolling. This prevents the mixture from sticking to your palms. Alternatively, you can use a cookie scoop and just press it onto the parchment paper—no rolling required.
Double the Batch
These freeze incredibly well. I always make a double batch because they disappear fast. Store them in an airtight container in the freezer for up to 3 months. They thaw in about 5 minutes at room temperature, so they’re perfect for grab-and-go breakfasts.
Adjust for Stickiness
If your mixture is too wet, add more oats, one tablespoon at a time. If it’s too dry and crumbly, add a teaspoon of milk or more honey. The texture should be like playdough—firm but pliable.
Variations & Substitutions
Once you’ve mastered the basic version, here’s how you can mix it up. I’ve tried all of these, and they all work.
Chocolate Peanut Butter
Add 2 tablespoons of cocoa powder to the dry ingredients. This makes them taste like a peanut butter cup. Great for dessert-like breakfasts.
Almond Butter Swap
Use almond butter instead of peanut butter. It’s slightly sweeter and has a different flavor profile. Works great, but it’s more expensive.
Seed Butter Version
Use sunflower seed butter or soy nut butter for a nut-free version. Perfect for school-friendly snacks. Sunflower seed butter can be a bit drier, so you might need a splash more honey.
Protein Boost
Add a scoop of vanilla protein powder. This makes them more filling and great for post-workout snacks. You might need to add a tablespoon of milk if the powder absorbs too much moisture.
Coconut Twist
Add ¼ cup of shredded coconut. It adds chewiness and a tropical flavor. Great with the chocolate variation.
Dietary Modifications
Vegan: Use maple syrup instead of honey. Everything else is naturally vegan.
Gluten-Free: Use certified gluten-free rolled oats. All other ingredients are naturally GF.
Nut-Free: Use sunflower seed butter or soy nut butter. Oats are naturally nut-free.
Serving & Storage
How to Serve: I usually serve these straight from the freezer or fridge. They’re best eaten cold or at room temperature. They’re perfect for breakfast, post-workout snacks, or afternoon treats.
Side Dishes: Pair with a glass of milk, a piece of fruit, or a smoothie for a complete meal. I often eat them with a cup of coffee on busy mornings.
Storage Instructions:
- Fridge: Store in an airtight container for up to 1 week. They’ll stay soft and chewy.
- Freezer: Store in an airtight container or freezer bag for up to 3 months. They freeze beautifully. Just thaw for 5 minutes before eating.
Pro tip: Don’t store them in the fridge if you live in a humid climate—they might get too soft. Freezer is always safer for long-term storage.
Nutrition Information
I’m not a nutritionist, but here’s the breakdown if you’re tracking. This is per bite (based on 20 bites).
| Nutrient | Per Bite |
|---|---|
| Calories | 90 |
| Protein | 3g |
| Carbs | 12g |
| Fiber | 2g |
| Sugar | 6g |
| Fat | 4g |
These are relatively low-calorie but filling thanks to the fiber and protein. They’re a great way to start the day without spiking your blood sugar too much.
Final Thoughts
So that’s my go-to no bake peanut butter banana energy bites! They’ve saved me more mornings than I can count. They’re cheap, easy, and delicious. And they taste homemade, which is always better than store-bought.
Make it yours! Try different add-ins, swap in your favorite nut butter, or adjust the sweetness to your liking. The best recipes are the ones you adapt to your family’s tastes.
If you make this, drop a comment and let me know what you think! I love hearing how recipes turn out in your kitchen. And if something doesn’t work, tell me that too—I’m here to help troubleshoot.
Happy cooking! And I hope your kitchen smells half as good as mine does right now.
Frequently Asked Questions
Can I use quick oats instead of rolled oats?
You can, but the texture will be different. Quick oats are thinner and will make the bites denser and less chewy. Rolled oats give them that nice bite. If you only have quick oats, it’ll still work, but it won’t be quite the same.
Why are my bites too sticky?
This usually means you used bananas that weren’t ripe enough, or you didn’t add enough oats. Add more oats, one tablespoon at a time, until the mixture is manageable. Also, wet your hands with water before rolling—it helps a lot.
Can I freeze these?
Yes! They freeze beautifully. Store them in an airtight container or freezer bag for up to 3 months. They thaw quickly at room temperature, so they’re perfect for meal prep.
Are these gluten-free?
If you use certified gluten-free oats, yes. All other ingredients are naturally gluten-free. Just double-check your peanut butter and honey labels to make sure they’re processed in a GF facility if you have celiac disease.
Can I make these ahead for school lunches?
Absolutely. I make a batch every Sunday and pack them in my kids’ lunches. They stay fresh in the fridge for a week. Just make sure to use a nut-free butter if your school has a nut-free policy.
What if I don’t have honey?
Maple syrup or agave nectar works just as well. Use the same amount. The flavor will be slightly different, but it’ll still be delicious.
Pin This Recipe!
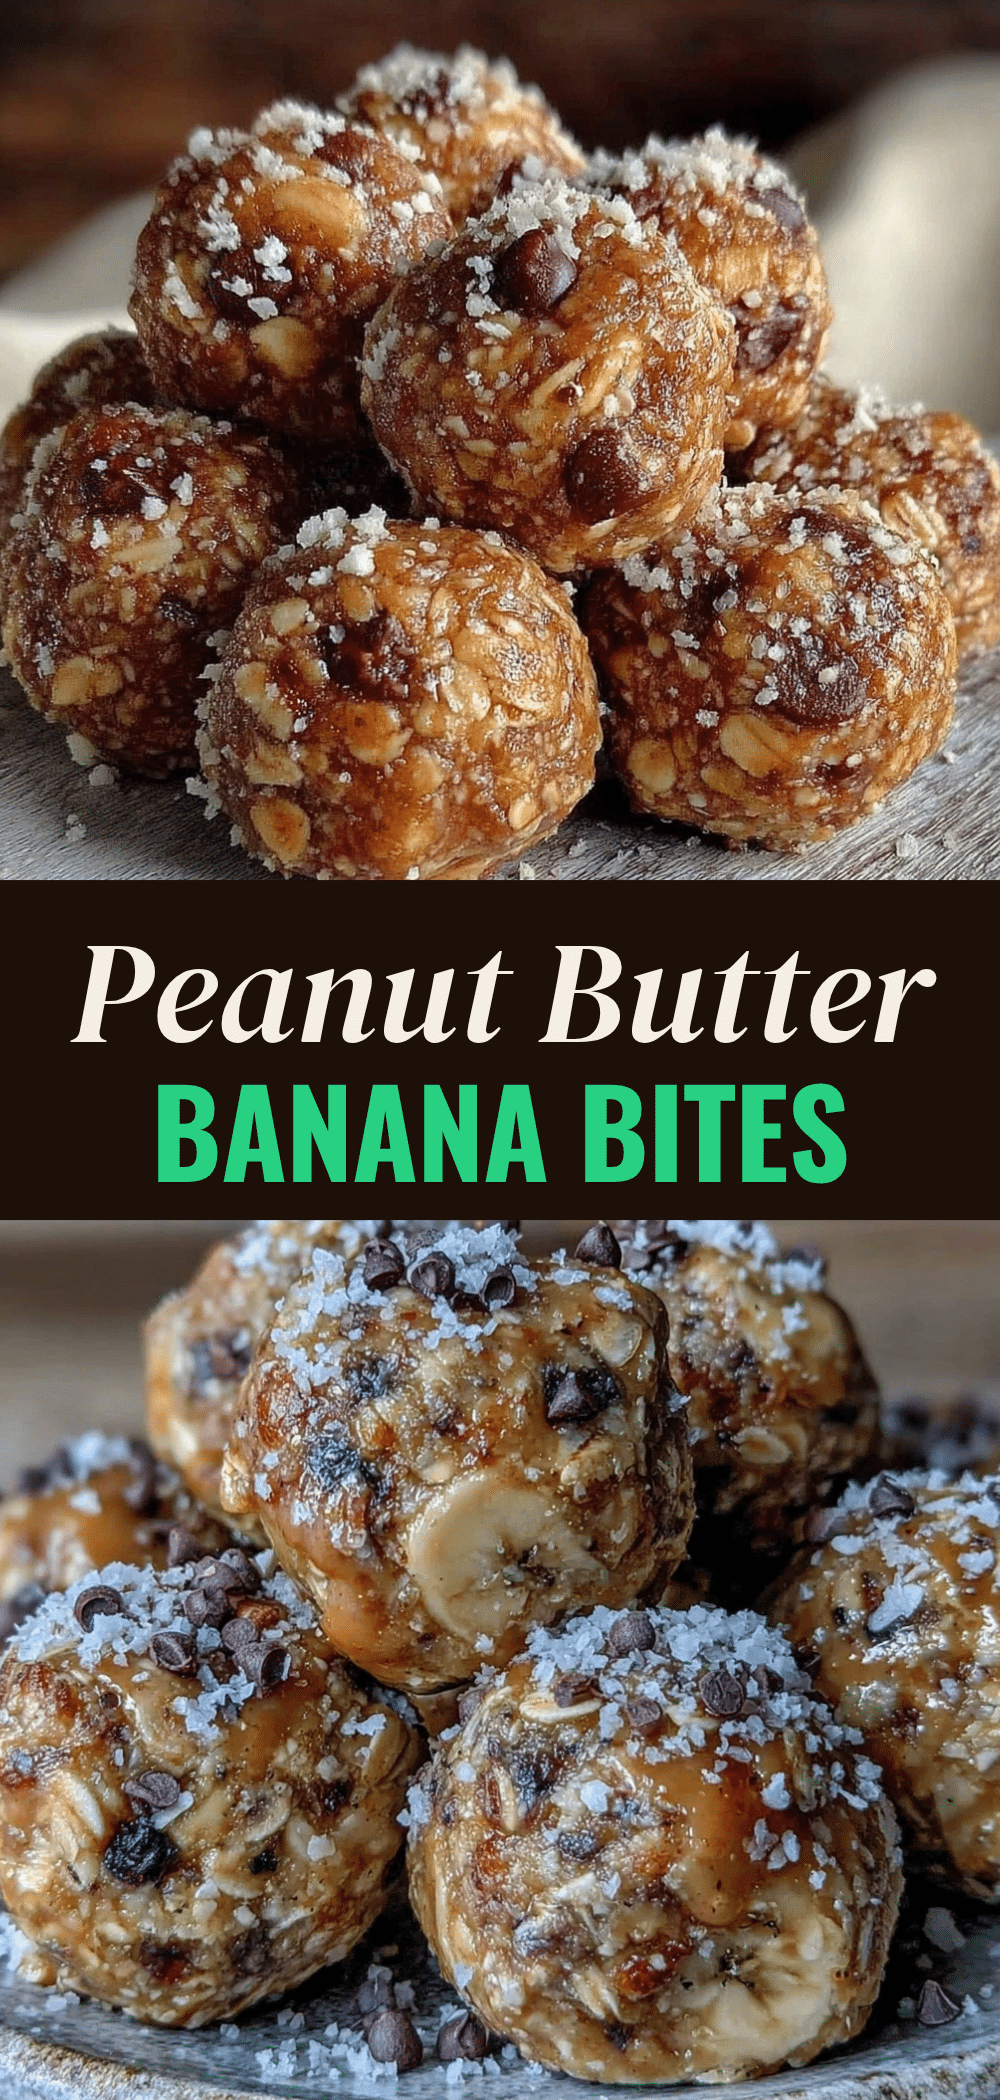
No Bake Peanut Butter Banana Energy Bites
- Total Time: 40 minutes
- Yield: 20 servings 1x
Description
A quick, budget-friendly, and healthy 5-ingredient breakfast or snack made with ripe bananas, peanut butter, and oats. These no-bake energy bites are perfect for busy mornings and can be prepped ahead for the week.
Ingredients
- 2 large ripe bananas
- 1/2 cup (120g) peanut butter (creamy or crunchy)
- 1 1/2 cups (150g) old-fashioned rolled oats
- 2 tablespoons (30ml) honey
- 1/2 teaspoon salt
- 1 teaspoon vanilla extract (optional)
- 1/4 cup (40g) mini chocolate chips (optional)
- 1 tablespoon chia seeds or flaxseed (optional)
Instructions
- Peel the bananas and mash them in a large mixing bowl until completely smooth.
- Add the peanut butter and honey to the mashed bananas and stir well until combined into a thick paste.
- Add the rolled oats, salt, and vanilla extract (if using). Stir until the oats are fully coated and the mixture is uniform.
- If adding chocolate chips or chia seeds, fold them in now.
- If the mixture is too sticky, chill the bowl in the fridge for 15-20 minutes.
- Line a baking sheet with parchment paper.
- Scoop out about 1 tablespoon of mixture and roll it into a ball between your palms. If it sticks, wet your hands slightly with water.
- Place the balls on the prepared baking sheet.
- Freeze the bites for at least 30 minutes to firm them up.
- Store in an airtight container in the fridge for up to 1 week or freezer for up to 3 months.
Notes
Use very ripe, spotty brown bananas for natural sweetness. If the mixture is too wet, add more oats; if too dry, add more honey or a splash of milk. Wet your hands with water if the mixture sticks while rolling. These freeze beautifully and thaw quickly at room temperature.
- Prep Time: 10 minutes
- Cook Time: 0 minutes
- Category: Breakfast
- Cuisine: American
Nutrition
- Serving Size: 1 energy bite
- Calories: 90
- Sugar: 6
- Fat: 4
- Carbohydrates: 12
- Fiber: 2
- Protein: 3
Keywords: no bake, energy bites, peanut butter, banana, breakfast, healthy snack, budget friendly, meal prep, gluten free option, kid friendly



