Last September, I stood in the parking lot of the local high school stadium, shivering in my team colors, holding a plastic cup of lukewarm beer and a paper plate that was already soggy from the “appetizer” I’d paid $12 for. It was basically just a handful of onion rings with ketchup. I looked at my husband, who was trying to balance a bag of chips and a hot dog, and realized we were spending $60 just to stand outside in the cold for two hours.
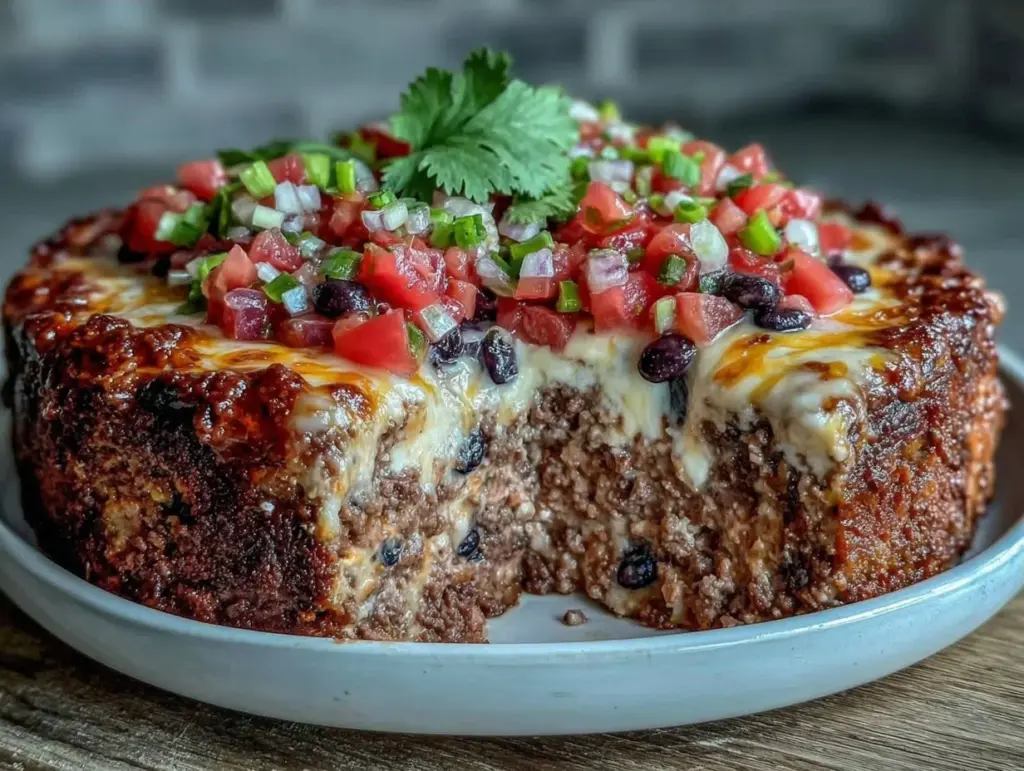
That was the moment I decided to stop being a victim of overpriced stadium food. I went home and whipped up what I now call the Football Tailgate Layered Taco Dip with Ground Beef. It costs about $15 to feed 15 people. It’s hot, it’s cheesy, it’s got all the flavors of your favorite taco night, and it doesn’t require a single oven or a cooler big enough to fit a family of four.
I’ve made this layered taco dip for every Super Bowl since, and honestly? It’s become the star of the show. People don’t even talk about the wings anymore. They ask, “Did you make that dip?” Yes. Yes, I did. And it’s going to save your wallet and your sanity this game day.
If you’re tired of spending a fortune on gas station snacks or sad store-bought platters, this recipe is your answer. It’s budget-friendly, it’s crowd-pleasing, and it’s incredibly easy to make ahead of time. Let’s get into why this is the ultimate game day feed.
Why You’ll Love This Layered Taco Dip
There are about ten reasons I keep making this dip, but here are the big ones that make it a tailgate essential:
Stupid Simple — Seriously, if you can brown ground beef and scoop cream cheese, you can make this. I’ve made this while my kids were running around the kitchen and my partner was packing the cooler. It’s that easy. No fancy techniques, no delicate sauces.
Lightning Fast — From start to finish, this takes about 30 minutes. And half of that is just cooking the meat. The rest is just layering. I start this on game morning, and by kickoff, it’s ready to go. If you’re running late, it still works perfectly.
Pantry-Friendly — You probably have 80% of these ingredients already. You need ground beef, taco seasoning, cream cheese, sour cream, salsa, cheese, and tortilla chips. That’s it. No weird ingredients you have to hunt for at three different stores.
Crowd-Pleaser — I’ve served this to my vegetarian sister (who skips the beef layer), my gluten-free neighbor (who uses corn chips), and my I-only-eat-chicken dad (who actually loved this). Everyone loves it. It’s one of those dishes that bridges all the dietary gaps at a party.
Makes Amazing Leftovers — Actually, the leftovers are the best part. The next day, I scoop the top layers off and eat it over a bed of rice or with crackers for lunch. It tastes even better after the flavors have melded together overnight.
Budget-Smart — Feeds 10-15 people for under $20. That is less than what we spent on those soggy onion rings in the parking lot. This is real talk: feeding a crowd doesn’t have to break the bank.
This is my go-to when I need dinner (or a snack) to just work. No complicated techniques, no weird ingredients, just reliable, delicious food that makes everyone happy and keeps the hunger at bay.
Ingredients You’ll Need
Here’s the best part: this looks like a long list, but most of it is pantry basics or cheap staples. I’m particular about a few things here, and I’ll tell you exactly why.
For the Base and Meat Layer
Ground Beef (1 pound / 450g) — I use 80/20 fat ratio. It’s cheaper and tastes better. Lean beef gets dry, and this dip needs to be juicy. If you want to stretch it, you can mix in a cup of cooked black beans to bulk it up without losing flavor.
Taco Seasoning (1 packet / 1 ounce) — I use the store brand. The big name brands are fine too, but don’t overpay. If you want to control the sodium, mix your own: cumin, chili powder, paprika, garlic powder, onion powder, salt, and pepper. But honestly, the packet is faster.
Water or Beef Broth (½ cup) — Use whatever you have. Broth adds a bit more depth, but water works fine.
For the Creamy Layers
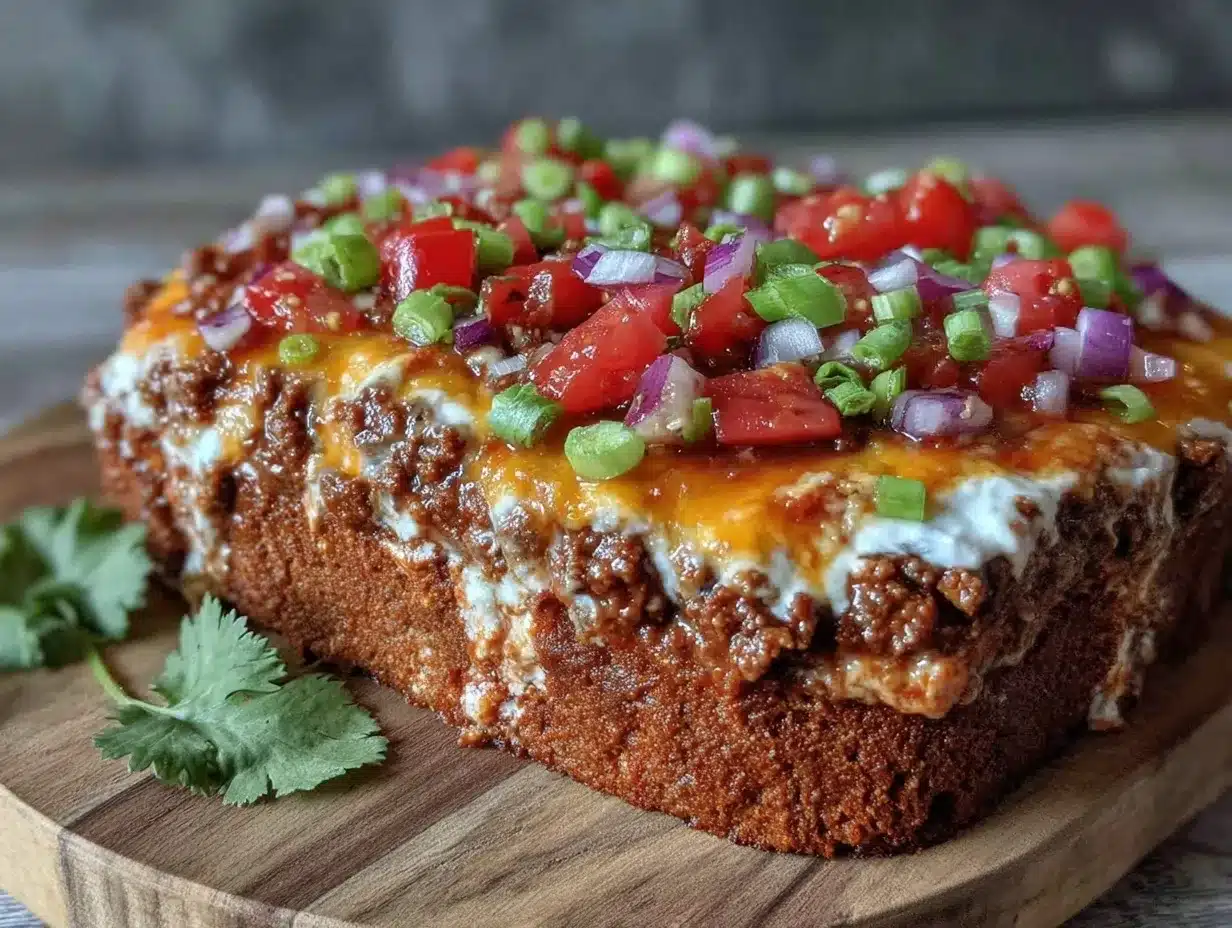
Light Cream Cheese (8 ounces / 225g) — This is key. I use the light version because it’s easier to spread and mix, and it cuts the richness so the dip isn’t too heavy. If you’re doing this for a keto crowd, use full-fat, but for a general party, light works great. Let it sit out for 10 minutes to soften so it’s scoopable.
Sour Cream (1 cup / 240g) — Full fat is best for texture, but low-fat works if you’re trying to be “healthy.” I stick to full fat for that tangy kick that balances the cheese.
Mayonnaise (½ cup / 120g) — Yes, mayo. It sounds weird in a taco dip, but it adds creaminess and helps bind the sour cream and cream cheese together. You won’t taste it directly; it just makes the texture silky.
For the Toppings
Cheddar Cheese (2 cups / 200g, shredded) — Buy the block and shred it yourself. Pre-shredded cheese has cellulose in it that prevents it from melting smoothly. I want that gooey, stretchy cheese experience. Sharp cheddar is best for flavor.
Salsa (1.5 cups / 360g) — I use a medium salsa. If you like it spicy, use a hot salsa. If you’re serving kids, use a mild or “green” salsa. Avoid chunky salsa with big pieces of corn or peppers if you want a smooth layer, but chunky is fine if you don’t mind bits.
Green Onions (4-5 stalks, sliced) — For that fresh, oniony bite on top. Don’t skip this; it cuts through the richness.
Black Olives (½ cup, sliced) — Optional, but my family loves them. If you have olive haters, leave them out.
Diced Tomatoes (1 can, 14.5 oz, drained) — I add these to the sour cream layer sometimes for extra freshness. If you use salsa, you might not need these, but they add a nice texture.
Tortilla Chips (1 large bag) — Use sturdy chips. Thin chips break when you scoop. Look for “restaurant style” or thick-cut chips. They hold up better to the heavy dip.
Pro Tips for Shopping
- Buy in bulk: If you have a Costco or Sam’s Club membership, buy the large tub of sour cream and the big block of cheese. It saves money for future meals like this.
- Check sales: Ground beef often goes on sale. Stock up and freeze it. This dip is freezer-friendly (meat layer only, see storage below).
- Salsa hack: Make your own salsa if you have overripe tomatoes. It’s cheaper and tastes fresher.
Equipment Needed
You don’t need fancy equipment for this. Here’s what I actually use:
Large Skillet — 12-inch works best. I use cast iron because it holds heat well, but any heavy-bottomed pan works. You need enough room to brown the beef easily.
Spatula — For breaking up the ground beef. A wooden spoon works too, but a spatula is better for scraping the bits off the bottom.
Mixing Bowl — Medium size. Just big enough to mix the cream cheese, sour cream, and mayo. A large bowl is fine if you’re using a hand mixer, but I do it by hand.
9×13 Inch Baking Dish — This is the standard size for layered dips. Glass or ceramic works best because it heats evenly. If you don’t have one, a large casserole dish works too.
Measuring Cups and Spoons — Pretty standard stuff. Dollar store versions work fine.
Knife and Cutting Board — For slicing the green onions and olives.
Hand Mixer (Optional) — I usually mix the cream cheese layer by hand with a spatula. It’s faster than cleaning the mixer, and it doesn’t take long. But if you have lumpy cream cheese, a mixer helps smooth it out.
How to Make It: Step-by-Step
Alright, let’s make this! I’m walking you through exactly how I do it, including the little tricks I’ve picked up over the years.
Step 1: Prep Your Meat (10 minutes)
Heat your large skillet over medium-high heat. Add the ground beef. Break it up with your spatula as it cooks. You want small crumbles, not big chunks. Cook until browned and no pink remains. Drain any excess grease if there’s a lot, but leave a little for flavor. Stir in the taco seasoning and water/broth. Let it simmer for 2-3 minutes until the liquid thickens and coats the meat. This step is crucial—if you skip the simmer, the seasoning will taste powdery. Set aside.
Step 2: Make the Creamy Base (5 minutes)
In your mixing bowl, combine the softened cream cheese, sour cream, and mayonnaise. Mix until smooth and creamy. If you’re using a hand mixer, beat it for about 30 seconds. If you’re doing it by hand, just stir vigorously until there are no lumps. Taste it? It should be tangy and creamy. If it’s too thick, add a tablespoon of milk, but usually, it’s perfect as is.
Step 3: Layer the Dip (10 minutes)
This is the fun part. Spread the meat mixture evenly over the bottom of your 9×13 baking dish. It’s your base. Next, spoon the cream cheese mixture over the meat. Use a spatula to spread it evenly. Try to cover all the meat so the layers don’t mix too much before serving. If you want, sprinkle half of the shredded cheddar cheese over the cream cheese layer now. This helps it melt into the layer.
Step 4: Add the Salsa Layer (5 minutes)
Pour the salsa over the cream cheese layer. Use a spoon to spread it gently. Don’t stir it in! You want distinct layers. The salsa will be wet, so go slow. If you’re adding diced tomatoes, scatter them over the salsa now. Sprinkle the remaining cheddar cheese on top.
Step 5: Bake or Serve Cold (5-10 minutes)
You have two options here. For a hot dip, preheat your oven to 350°F (175°C). Bake the dip for 10-15 minutes, just until the cheese is melted and bubbly. Don’t overbake it or the cream cheese might separate. For a cold dip, skip the oven. Just refrigerate for an hour to let the layers set. Both ways are delicious, but the hot version is better for tailgating because it stays warm longer.
Step 6: Garnish and Serve
Once it’s baked (or chilled), take it out. Sprinkle the sliced green onions and black olives on top. This adds color and freshness. Serve immediately with tortilla chips on the side. Or, if you’re tailgating, put the chips in a separate bowl nearby so they don’t get soggy.
Total Time: About 30 minutes (10 minutes active, 20 minutes mostly hands-off or baking)
Expert Tips & Tricks
Here’s everything I’ve learned from making this dozens of times. These tips will save you from my mistakes.
Softening Cream Cheese is Non-Negotiable
I learned this the hard way. If you try to mix cold cream cheese with sour cream, you’ll end up with lumps. Cut the cream cheese into cubes and let it sit on the counter for 15-20 minutes before you start. Or, microwave it for 15-20 seconds just to warm it up. It needs to be spreadable.
Don’t Skip the Drain
If your ground beef is extra greasy, drain it. Too much grease will make the dip oily and slide off the chips. But don’t rinse it! Rinsing washes away the taco seasoning flavor. Just drain the fat.
Layering Order Matters
Always put the meat at the bottom. It’s the heaviest layer. If you put salsa on the bottom, it’ll leak out. Meat, then cream cheese, then salsa. It’s the most stable structure.
Chip Strategy
Don’t put chips in the dip bowl. They’ll get soggy in 10 minutes. Put chips in a separate large bowl. This keeps them crunchy and lets people control how much dip they get.
Make-Ahead Magic
You can assemble this dip the night before. Cover it tightly with plastic wrap and refrigerate. In the morning, just pop it in the oven. It saves so much stress on game day morning when you’re trying to get the kids ready.
Variations & Substitutions
Once you’ve nailed the basic version, here’s how you can mix it up. I’ve tried all of these.
Turkey Version
Use ground turkey instead of beef. It’s leaner and tastes slightly different, but still delicious. I use 93/7 turkey and add a little extra taco seasoning because turkey is milder.
Vegetarian Taco Dip
Skip the meat and use a can of black beans and a can of corn (drained). Sauté the beans with the taco seasoning. It’s hearty and protein-packed. I serve this to my vegetarian sister, and she loves it.
Spicy Kick
Add a can of diced green chiles to the salsa layer. Or use a spicy salsa. If you really like heat, add a chopped jalapeño to the cream cheese layer.
Bean-Loaded
Add a can of drained black beans to the meat layer. It stretches the meat and adds fiber. Great for feeding a crowd on a budget.
Dairy-Free Option
Use dairy-free cream cheese, dairy-free sour cream, and nutritional yeast instead of cheddar. It’s not the same, but it works for those with allergies. I’ve made this for a friend, and she said it was still tasty.
Gluten-Free
Just use gluten-free tortilla chips or corn chips. Everything else is naturally gluten-free. Check your taco seasoning packet to make sure it’s certified gluten-free, as some brands use wheat flour as a thickener.
Serving & Storage
How to Serve:
I usually serve this straight from the baking dish at the tailgate. It looks rustic and stays warm in a cooler (if you put a hot water bottle next to it). But here are other ways I’ve enjoyed it:
Side Dishes:
- Classic loaded baked potato salad for a hearty carb option.
- Real Mexican street tacos if you want to go all out.
- Simple green salad with lime vinaigrette to balance the rich dip.
Toppings Bar:
When I have guests, I put out: extra shredded cheese, sour cream, diced tomatoes, and hot sauce. Everyone customizes their scoop.
Wine Pairing:
Not a wine expert, but my wine-snob friend says a crisp Sauvignon Blanc or a light-bodied Pinot Noir works great. Or just stick to beer—it’s a tailgate, after all.
Storage Instructions:
Refrigerator:
Store in an airtight container for up to 4 days. The flavors actually get better on day two. The layers might blend a bit, but it’s still delicious.
Reheating:
Best method: Add to a skillet with a splash of milk or cream over low heat. Stir until heated through and creamy again. Microwave method: Heat in 30-second intervals, stirring between. Add a splash of milk if it’s too thick.
Freezing:
Honestly, the dairy layers don’t freeze well. They separate and get grainy. But you can freeze the cooked meat mixture. Make the meat, cool it, and freeze it in bags. Thaw it on game day and assemble with fresh dairy layers. This is my meal prep hack for busy weeks.
Pro tip: If leftovers are drying out, stir in a tablespoon of sour cream when reheating. Brings back that creamy texture.
Nutrition Information
I’m not a nutritionist, but here’s the breakdown if you’re tracking. This is per serving based on 12 servings (approx. ½ cup dip + chips).
| Nutrient | Amount |
|---|---|
| Calories | 320 |
| Protein | 18g |
| Carbs | 22g |
| Fiber | 2g |
| Fat | 18g |
| Sodium | 580mg |
What’s Good:
- Decent protein from the beef and cheese.
- Calcium from the dairy.
- Can add beans to boost fiber and protein.
What to Know:
- Higher in calories from cream cheese and chips.
- Contains dairy and gluten (unless modified).
- Moderate sodium (use low-sodium taco seasoning and salsa to reduce).
My Take:
Look, this is comfort food with cream cheese and chips. It’s not a diet recipe. It’s game day food. But it’s way better than takeout, costs less, and I know exactly what’s in it. When I want to make it lighter, I use light cream cheese, turkey, and more beans. But usually? I just eat a reasonable portion and enjoy it.
Final Thoughts
So that’s my Football Tailgate Layered Taco Dip with Ground Beef! I’ve probably talked your ear off at this point, but when you make a recipe this often, you have a lot to say about it.
This has saved me from overpriced stadium food and stressed-out game day mornings. It’s my answer to “what’s for the tailgate?” when I’m tired, don’t want to spend a fortune, and still want something that tastes amazing. My kids are happy, my husband’s happy, and I’m happy because I’m not stressed about cooking.
Make it yours! Try different add-ins, swap in your favorite vegetables, adjust the spice level. The best recipes are the ones you adapt to your family’s tastes. And if you’re looking for more easy party food, check out my hearty slow cooker beef chili for a wetter option, or my juicy stovetop smash burgers for a main course.
If you make this, drop a comment and let me know what you think! I love hearing how recipes turn out in your kitchen. And if something doesn’t work, tell me that too—I’m here to help troubleshoot.
Happy tailgating! And I hope your kitchen smells half as good as mine does right now.
Frequently Asked Questions
Can I make this ahead of time?
Absolutely. In fact, it’s better if you do. Assemble the dip the night before, cover it tightly, and refrigerate. In the morning, just pop it in the oven. It saves so much stress on game day morning. You can also freeze the meat layer separately and assemble fresh on the day of.
Why did my dip turn out watery?
Usually, this happens if you didn’t drain the ground beef well enough, or if you used a very wet salsa. Make sure to drain the meat thoroughly. If your salsa is chunky, drain the liquid from the can before adding it. Also, don’t bake it too long; overbaking can cause the dairy to separate.
Can I use ground turkey instead of beef?
Yes! Ground turkey works great. It’s leaner, so the dip will be slightly less rich, but still delicious. I recommend using 93/7 turkey and adding a little extra taco seasoning since turkey is milder than beef.
How long does this dip last?
It lasts up to 4 days in the refrigerator. The flavors actually meld and get better on day two. Just make sure to store it in an airtight container. It’s not recommended to freeze the dairy layers, but you can freeze the meat component.
Can I make this in a slow cooker?
Yes! Assemble the dip in the slow cooker insert. Cook on low for 2-3 hours, stirring occasionally to combine the layers. It’s perfect for keeping warm during a long tailgate party. Just add the chips on the side.
What kind of chips work best?
Sturdy tortilla chips are best. Look for “restaurant style” or thick-cut chips. Thin chips will break when you scoop the heavy dip. Corn chips (like Fritos) also work well if you want a sweeter crunch.
Is this dip gluten-free?
The dip itself is naturally gluten-free, but you need to check your taco seasoning packet and tortilla chips. Some taco seasonings use wheat flour as a thickener, and some chips contain wheat. Use certified gluten-free products to be safe.
Pin This Recipe!
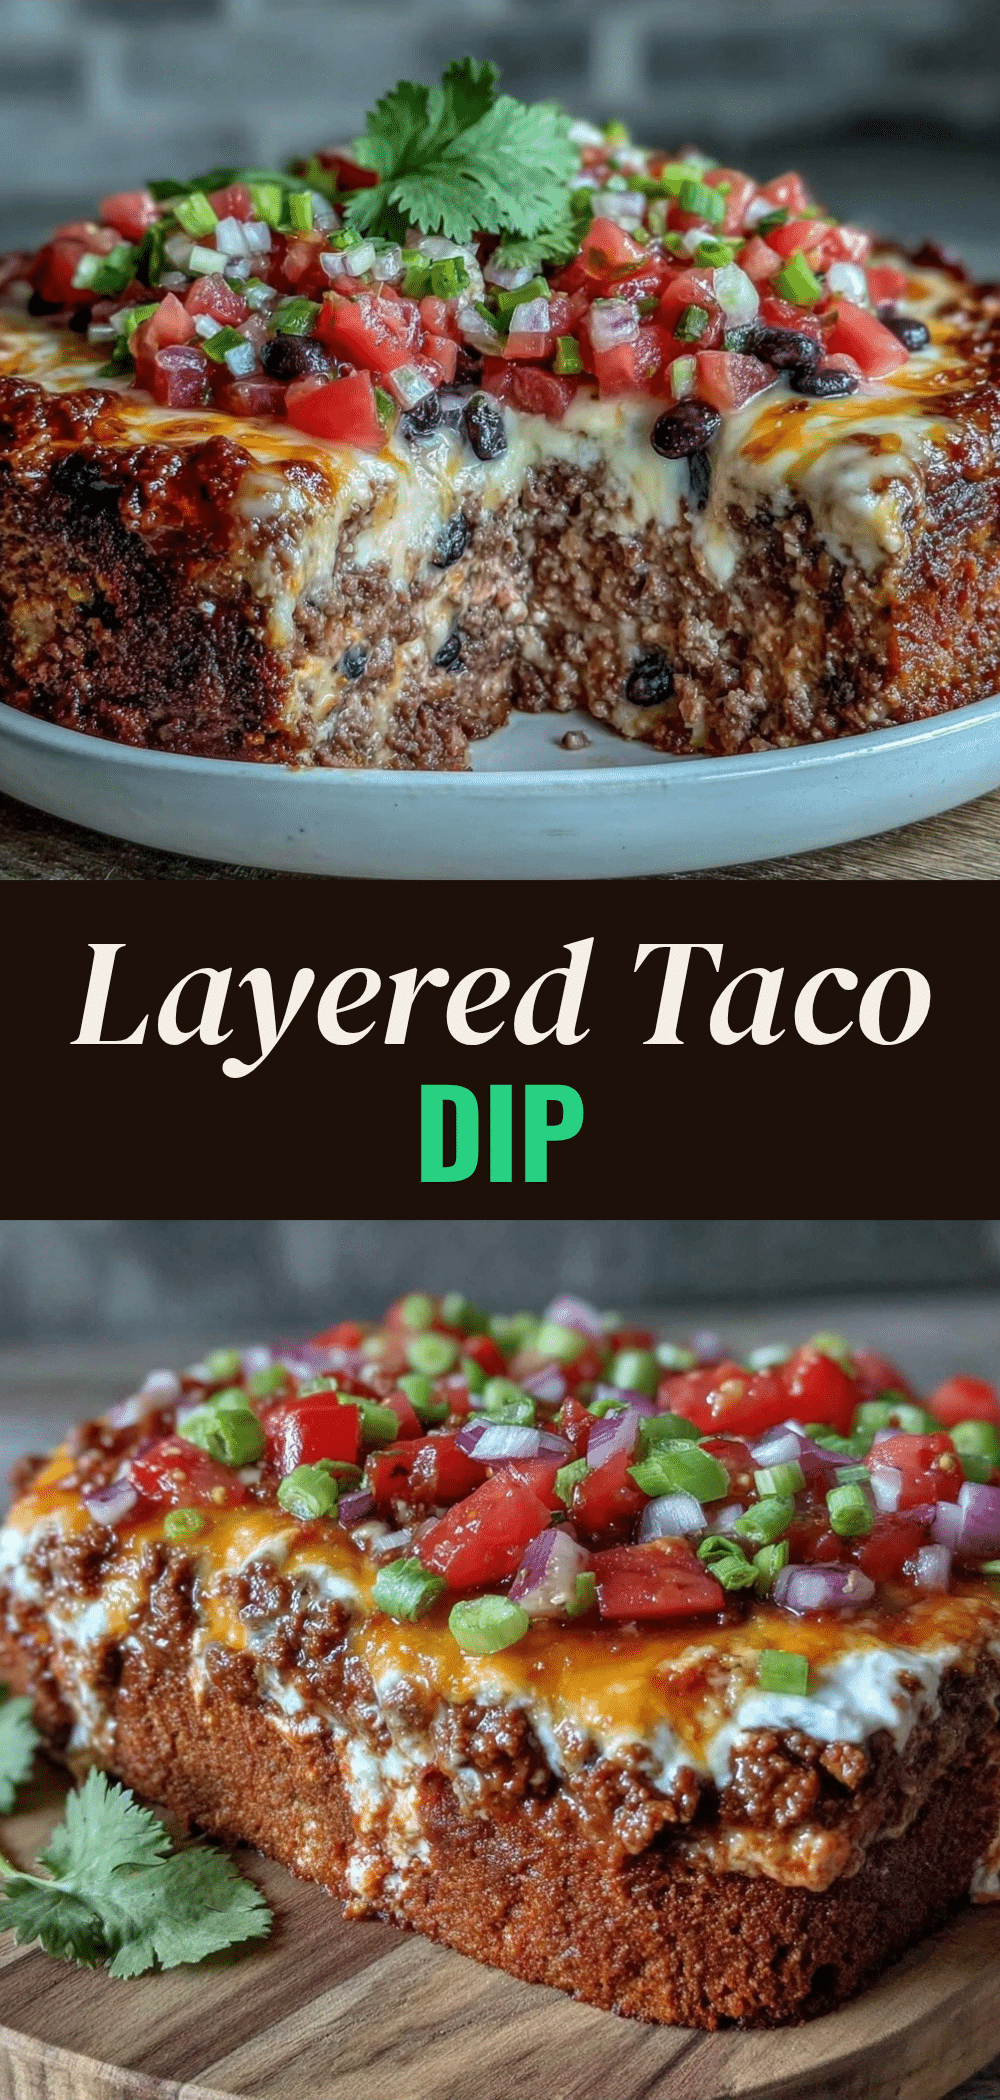

Football Tailgate Layered Taco Dip with Ground Beef
- Total Time: 30 minutes
- Yield: 12 servings 1x
Description
A budget-friendly, crowd-pleasing layered taco dip that feeds 10-15 people for under $20. It features a savory ground beef base, creamy cheese layers, and fresh toppings, ready in just 30 minutes.
Ingredients
- 1 pound ground beef (80/20 fat ratio)
- 1 packet taco seasoning (1 ounce)
- 1/2 cup water or beef broth
- 8 ounces light cream cheese, softened
- 1 cup sour cream (full fat)
- 1/2 cup mayonnaise
- 2 cups shredded sharp cheddar cheese
- 1.5 cups medium salsa
- 4–5 stalks green onions, sliced
- 1/2 cup black olives, sliced (optional)
- 1 can (14.5 oz) diced tomatoes, drained (optional)
- 1 large bag sturdy tortilla chips
Instructions
- Heat a large skillet over medium-high heat. Add ground beef and break it into small crumbles. Cook until browned and no pink remains.
- Drain excess grease if necessary, leaving a little for flavor. Stir in taco seasoning and water/broth. Simmer for 2-3 minutes until liquid thickens. Set aside.
- In a mixing bowl, combine softened cream cheese, sour cream, and mayonnaise. Mix until smooth and creamy.
- Spread the meat mixture evenly over the bottom of a 9×13 inch baking dish.
- Spoon the cream cheese mixture over the meat layer and spread evenly. Sprinkle half of the shredded cheddar cheese over this layer.
- Pour salsa over the cream cheese layer and spread gently. If using, scatter diced tomatoes over the salsa. Sprinkle remaining cheddar cheese on top.
- For hot dip: Preheat oven to 350°F (175°C). Bake for 10-15 minutes until cheese is melted and bubbly. For cold dip: Refrigerate for 1 hour to set.
- Garnish with sliced green onions and black olives. Serve immediately with tortilla chips on the side.
Notes
Ensure cream cheese is softened to avoid lumps. Drain ground beef well to prevent oily dip. Layering order is important: meat at bottom, then cream cheese, then salsa. For make-ahead, assemble the night before and refrigerate. The meat layer can be frozen separately; dairy layers do not freeze well.
- Prep Time: 10 minutes
- Cook Time: 20 minutes
- Category: Appetizer
- Cuisine: Mexican
Nutrition
- Serving Size: 1/2 cup dip with chi
- Calories: 320
- Sugar: 4
- Sodium: 580
- Fat: 18
- Saturated Fat: 8
- Carbohydrates: 22
- Fiber: 2
- Protein: 18
Keywords: taco dip, tailgate food, game day snacks, layered dip, ground beef recipe, budget friendly party food, easy appetizer, crowd pleaser



