
I still remember the first time I tried to make pretzel bites at home. It was Super Bowl Sunday, three years ago, and I had promised my kids that we’d have “restaurant quality” snacks without spending a fortune on stadium prices. I stood in my kitchen at 2 PM, surrounded by a cloud of flour, trying to wrestle dough that refused to stay soft. It was sticky, it was cold, and frankly, it was a disaster. By the time the game started, I was ordering pizza because I couldn’t be bothered with the mess anymore.
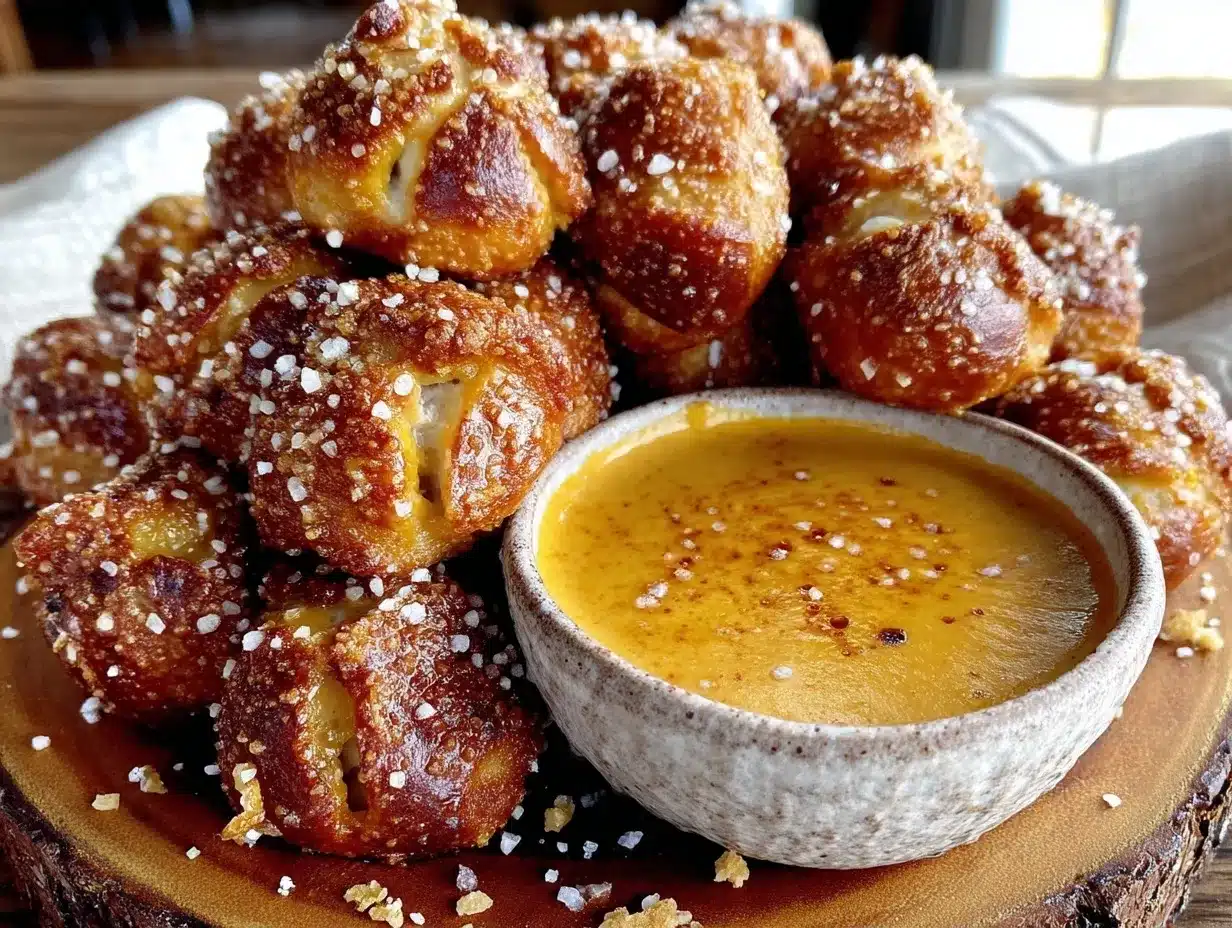
But here’s the thing: I refused to let a little sticky dough beat me. I went back the next weekend, tweaked the yeast proofing, adjusted the baking soda bath, and finally, I nailed it. Those little golden-brown bites, drenched in a sharp, creamy beer cheese dip, are now the hero of every game day. They’re cheaper than buying a bag of pretzels at the store, they freeze beautifully, and my kids actually prefer them to the greasy nachos from the concession stand.
If you’re looking for a snack that brings the big flavor without breaking the bank, these beer cheese pretzel bites are your answer. They’re soft, chewy, salty, and tangy all at once. I’ve made this batch for tailgates, for Sunday dinners when we want to feel fancy but don’t want to cook a full meal, and even for last-minute dinner guests. Once you get the hang of the dough, you’ll wonder why you ever bought the pre-made kind.
Why You’ll Love This Recipe
There are a hundred reasons to keep this recipe in your rotation, but let’s be real—most of them come down to taste and convenience. Here’s why this snack has earned a permanent spot in my weekly meal plan:
- Stupidly Affordable — Seriously, the cost per bite is pennies. A bag of pretzels at the store runs $4-5 for a small box. This recipe makes enough to feed a crowd for under $8. That’s less than the cost of one drink at a tailgate.
- Perfectly Portable — These bites hold up well on a plate. They don’t get soggy immediately like chips do, and they’re easy to pick up with one hand while holding a drink with the other. Ideal for tailgates or watching the game on the couch.
- The Dip Factor — The beer cheese sauce isn’t just an afterthought. It’s sharp, creamy, and has that perfect kick of mustard and beer that cuts through the richness of the dough. It’s the kind of dip people fight over.
- Make-Ahead Friendly — This is my secret weapon. I make the dough and freeze the unbaked bites on a tray. When guests arrive, I just pull them out and bake. They come out looking fresh and taste just as good as if I made them an hour ago.
- Kid-Approved — My picky eater, who usually only eats chicken nuggets, loves these. They’re soft, not too spicy, and the dipping sauce makes everything better. I’ve even used them to sneak in a little extra comfort food before a heavy meal like hearty slow cooker beef chili.
This is my go-to when I need to feed a group of hungry people without spending hours in the kitchen. No complicated techniques, no weird ingredients, just reliable, delicious food that makes everyone happy.
Ingredients You’ll Need
Here’s the best part: you probably have most of this already in your pantry or fridge. I’m particular about three ingredients here, and I’ll tell you exactly why they matter.
For the Pretzel Dough
Active dry yeast (2 packets / 4 1/2 teaspoons) — Don’t skimp here. Old yeast makes flat, dense bites. I keep packets in my fridge, but if you’re using a jar, make sure it’s fresh. If it doesn’t foam up in warm water, toss it.
Warm water (1 1/2 cups / 360ml) — Not boiling! Think bathwater temperature. Too hot kills the yeast; too cold won’t wake it up. I use a thermometer, but if you don’t have one, just dip your finger in. It should feel warm, not hot.
All-purpose flour (4 to 4 1/2 cups / 500-560g) — I use Gold Medal or King Arthur. You want about 4 cups to start, but the dough might need a little more depending on humidity. Don’t dump it all in at once. Add it gradually until the dough pulls away from the sides of the bowl.
Sugar (2 tablespoons / 25g) — Feeds the yeast and helps with browning. White sugar works fine; brown sugar adds a tiny bit of depth but isn’t necessary.
Salt (1 tablespoon / 15g) — Vital for flavor. Pretzels are bland without enough salt. Use kosher salt if you have it, as it’s easier to measure.
Unsalted butter (3 tablespoons / 42g) — Adds richness and softness to the crumb. Melted, not hot.
For the Baking Soda Bath
Baking soda (1/2 cup / 60g) — This is the secret to that authentic pretzel flavor and dark brown crust. It’s not a leavening agent here; it’s a chemical reaction that creates the signature pretzel taste.
Water (4 cups / 960ml) — For boiling the bites. You’ll need a large pot for this.
For the Beer Cheese Dip
Sharp cheddar cheese (2 cups / 200g, freshly grated) — Buy the block and grate it yourself. Pre-shredded cheese has anti-caking agents that prevent it from melting smoothly. I use a mix of sharp white cheddar and a little Monterey Jack for meltability.
Beer (1/2 cup / 120ml) — Use a lager or pilsner. Budweiser, Coors, or a local lager works great. Don’t use IPA or stout; the flavors are too bitter or dark. The alcohol cooks off, leaving just the malt flavor.
Heavy cream (1 cup / 240ml) — Full-fat only. Half-and-half makes it too thin. Trust me on this.
Dijon mustard (1 tablespoon) — Adds tang and helps emulsify the cheese. It doesn’t make it taste like mustard; it just deepens the flavor.
Garlic powder & Cayenne pepper (1/2 teaspoon each) — Garlic powder for savory depth, cayenne for a tiny kick. Adjust cayenne to your spice tolerance.
Optional Add-ins:
Chopped jalapeños (1/4 cup) — If you like heat, throw these in the dip.
Fresh chives (2 tablespoons, chopped) — For garnish. Adds a nice fresh color contrast.
Equipment Needed
You don’t need fancy equipment for this. Here’s what I actually use.
Large mixing bowl — Or a stand mixer with a dough hook. I use a stand mixer because kneading by hand for 10 minutes is a workout I don’t always want to do after a long day.
Baking sheets — 2 large sheets. Line them with parchment paper. This saves so much cleanup. I don’t bother greasing the pan if I use parchment.
Large pot — For boiling the baking soda water. A stockpot works best because you need space for the bites to move around.
Slotted spoon or spider strainer — To lift the bites out of the boiling water. A regular spoon works if you’re careful, but a slotted spoon is much faster.
Saucepan — Small to medium, for making the cheese sauce. Non-stick is nice here so the cheese doesn’t stick to the bottom.
Box grater — For the cheese. Or a food processor if you’re grating lots of cheese quickly.
How to Make It: Step-by-Step
Alright, let’s make this! I’m walking you through exactly how I do it, including the little tricks I’ve picked up.
Step 1: Proof the Yeast (5 minutes)
In the bowl of your stand mixer (or a large bowl), combine the warm water, sugar, and yeast. Stir gently and let it sit for 5-10 minutes. You’ll see a foamy layer form on top. If it doesn’t foam, your yeast is dead or the water was too hot. Start over. This step is non-negotiable for fluffy bites.
Step 2: Make the Dough (10 minutes)
Add the melted butter and salt to the yeast mixture. Gradually add the flour, one cup at a time, mixing with the dough hook on low speed. Once all the flour is incorporated, increase speed to medium and knead for 5-7 minutes. The dough should be smooth, slightly tacky, and pull away from the sides of the bowl. If it’s too sticky, add a little more flour. If it’s too dry, add a splash of water. It should feel like an earlobe—soft but not sticky.
Step 3: First Rise (1 hour)
Lightly grease a clean bowl, place the dough inside, and cover with a damp towel or plastic wrap. Let it rise in a warm spot for about 1 hour, or until doubled in size. I usually put it in a turned-off oven with just the light on—it creates the perfect warm environment.
Step 4: Shape the Bites (15 minutes)
Punch down the dough gently to release air bubbles. Turn it out onto a lightly floured surface. Divide the dough into 4 equal parts. Take one part and roll it into a rope about 12 inches long. Cut the rope into 1-inch pieces. Repeat with the remaining dough. You should have about 40-50 bites. Place them on parchment-lined baking sheets, leaving a little space between them.
Step 5: Second Rise (15 minutes)
Cover the shaped bites loosely with a towel and let them rise again for 15 minutes. They should look puffy and soft. While they rise, preheat your oven to 400°F (200°C).
Step 6: The Baking Soda Bath (10 minutes)
Bring the 4 cups of water to a boil in your large pot. Carefully stir in the baking soda. It will foam up aggressively—be careful not to spill. Using the slotted spoon, drop 5-6 bites into the boiling water at a time. Boil for 30 seconds on one side, flip, and boil for 30 seconds on the other. Remove and place back on the baking sheet. Don’t crowd the pot; do this in batches.
Step 7: Bake (12-15 minutes)
Bake the pretzel bites at 400°F for 12-15 minutes, or until they are deep golden brown. They should sound hollow when tapped on the bottom. If they’re pale, they need more time. If they’re burnt, your oven is too hot or you boiled them too long. Let them cool for 5 minutes.
Step 8: Make the Beer Cheese Dip (10 minutes)
While the bites bake, make the dip. In a saucepan over medium-low heat, melt a tablespoon of butter (optional, for extra richness). Add the garlic powder and cayenne. Pour in the beer and let it simmer for 2 minutes to cook off the alcohol. Reduce heat to low. Gradually whisk in the shredded cheese, a handful at a time, until melted and smooth. Stir in the mustard. Keep warm on the lowest setting.
Total Time: About 1.5 hours (mostly rising time, very little active work).
Expert Tips & Tricks
Here’s everything I’ve learned from making this dozens of times. These tips will save you from my mistakes.
Don’t Skip the Baking Soda Bath
This is the #1 secret. Without it, you’re just making soft bread rolls. The bath gives them that distinct pretzel flavor and chewy texture. I learned this the hard way when I tried to skip it once and my kids asked, “Why are these just buns?”
Grate Your Own Cheese
Pre-shredded cheese contains cellulose to prevent clumping, which means it won’t melt smoothly. Your dip will be grainy. Grate a block of cheddar—it takes 3 minutes and makes a huge difference. My husband can tell when I’ve been lazy.
Low Heat for Cheese
Always keep the cheese sauce on low heat. High heat makes cheese separate and look oily. If your sauce breaks, add a splash of milk or cream and whisk vigorously. It usually comes back together.
Freezing Raw Bites
After the second rise, place the baking sheet in the freezer for 1 hour. Once the bites are frozen solid, transfer them to a zip-top bag. They’ll keep for up to 3 months. When you want them, just bake them straight from frozen, adding 2-3 minutes to the bake time. No need to thaw.
Common Mistakes (and how to avoid them):**
Mistake: Dough is too sticky
Fix: Add flour gradually. Humidity affects dough, so don’t measure by the cup alone. Touch it. It should be tacky but not stick to your hands.
Mistake: Bites are dense
Fix: You probably over-proofed or under-kneaded. Make sure the dough doubles in size during the first rise, but not more. Knead until smooth.
Mistake: Dip is too thick
Fix: Add a splash of milk or beer to thin it out. It should be dip-able, not spreadable.
Variations & Substitutions
Once you’ve nailed the basic version, here’s how you can mix it up. I’ve tried all of these.
Jalapeño Cheddar Pretzel Bites
Add 1/4 cup finely chopped jalapeños to the dough before the first rise. Adds a nice spicy kick that pairs well with the cool dip.
Garlic Herb Pretzel Bites
Brush the baked bites with melted butter mixed with minced garlic and dried parsley. These go great with garlic butter shrimp or just on their own.
Whole Wheat Version
Substitute half the all-purpose flour with whole wheat flour. It adds nuttiness and fiber, though the texture will be slightly denser.
Gluten-Free Option
Use a 1:1 gluten-free flour blend with xanthan gum. The dough will be stickier, so you may need more flour. The baking soda bath still works, but the texture won’t be quite as chewy.
Vegan Beer Cheese
Use plant-based milk and vegan cheddar shreds. Not all vegan cheeses melt well, so look for brands specifically designed for melting. Nutritional yeast adds that cheesy flavor.
Serving & Storage
How to Serve:
I usually serve these straight from the baking sheet with the warm beer cheese dip in the center. It’s rustic and easy. But here are other ways I’ve enjoyed them:
Side Dishes:
– Juicy stovetop smash burgers (pretzel buns or bites on the side)
– Roasted vegetables with a balsamic glaze
– A simple green salad to balance the richness
Toppings Bar:
When I have guests, I put out: extra shredded cheese, chopped pickles, jalapeño slices, and hot sauce. Everyone customizes their dip.
Storage Instructions:
Refrigerator:
Store baked bites in an airtight container for up to 3 days. The dip can be stored separately for up to 4 days. The sauce will thicken in the fridge—totally normal.
Reheating:
Best method: Reheat bites in a 350°F oven for 5-7 minutes to restore crispiness. Reheat dip in a saucepan over low heat, adding a splash of milk to loosen it.
Microwave method: Works for the dip, but the bites will get chewy and tough. Avoid microwaving the pretzels if you can.
Freezing:
As mentioned, freeze unbaked bites on a tray, then bag them. Baked bites also freeze well for up to 2 months. Reheat in the oven, not the microwave.
Nutrition Information
I’m not a nutritionist, but here’s the breakdown if you’re tracking. This is per serving (based on 8 servings of 5 bites + 2 tbsp dip).
| Nutrient | Amount |
|---|---|
| Calories | 380 |
| Protein | 12g |
| Carbs | 45g |
| Fiber | 2g |
| Fat | 16g |
| Sodium | 650mg |
What’s Good:
– Decent protein from the cheese and dough
– Satisfying carbs for energy
– Can add vegetables to boost nutrition
What to Know:
– Higher in calories from cheese and butter
– Contains dairy and gluten
– Moderate sodium (use low-sodium broth if making the chili pairing)
My Take:
Look, this is comfort food with cheese and beer. It’s not a diet recipe. But it’s way better than store-bought snacks, costs less, and I know exactly what’s in it. When I want to make it lighter, I use less cheese in the dip and load up on veggies. But usually? I just eat a reasonable portion and enjoy it.
Final Thoughts
So that’s my go-to beer cheese pretzel bites! I’ve probably talked your ear off at this point, but when you make a recipe this often, you have a lot to say about it. This has saved game days more times than I can count. It’s my answer to “what’s for snacks” when I’m tired, don’t want takeout, and still want something that tastes really good. My kids are happy, my husband’s happy, and I’m happy because I’m not stressed about cooking.
Make it yours! Try different add-ins, swap in your favorite vegetables, adjust the garlic (though more is always better in my opinion). The best recipes are the ones you adapt to your family’s tastes.
If you make this, drop a comment and let me know what you think! I love hearing how recipes turn out in your kitchen. And if something doesn’t work, tell me that too—I’m here to help troubleshoot.
Happy cooking! And I hope your kitchen smells half as good as mine does right now.
Frequently Asked Questions
Can I use a different type of beer?
You can, but stick to lagers or pilsners. IPAs are too bitter and will make the dip taste harsh. Stouts are too dark and heavy. A mild lager is perfect because it adds malt flavor without overpowering the cheese. If you don’t drink beer, you can substitute with chicken broth, but you’ll miss that distinct tangy flavor.
Why did my pretzel bites turn out pale?
Usually means you didn’t boil them long enough in the baking soda bath, or your oven wasn’t hot enough. Make sure the water is at a rolling boil and you’re boiling each side for a full 30 seconds. Also, check your oven temperature with an oven thermometer—many ovens run cooler than they say.
Can I make the dough ahead of time?
Yes! After the first rise, punch down the dough, wrap it tightly in plastic, and refrigerate for up to 24 hours. When you’re ready, take it out, let it come to room temperature, then proceed with shaping and the second rise. This is great for meal prep.
Why did my cheese sauce break?
The heat was too high. Cheese proteins tighten up and squeeze out fat when overheated. Always melt cheese on low heat, gradually, and whisk constantly. If it breaks, add a splash of cold milk or cream and whisk vigorously—it often emulsifies back together.
Can I freeze the baked pretzel bites?
Absolutely. Let them cool completely, then freeze in a single layer on a baking sheet. Once frozen, transfer to a bag. Reheat in a 350°F oven for 5-7 minutes to crisp them up. They won’t be quite as chewy as fresh, but they’re still delicious.
How do I store the beer cheese dip?
Store in an airtight container in the fridge for up to 4 days. The sauce will thicken significantly. To reheat, add a splash of milk or cream and warm gently over low heat, stirring often. Do not boil the dip.
Pin This Recipe!


Beer Cheese Pretzel Bites: Best Budget Football Tailgate Snack
- Total Time: 1.5 hours
- Yield: 8 servings 1x
Description
Soft, chewy pretzel bites served with a sharp, creamy beer cheese dip. This budget-friendly recipe is perfect for tailgating, game days, or family snacks, offering restaurant-quality flavor at home.
Ingredients
- 2 packets (4 1/2 teaspoons) active dry yeast
- 1 1/2 cups (360ml) warm water
- 2 tablespoons (25g) sugar
- 1 tablespoon (15g) salt
- 3 tablespoons (42g) unsalted butter, melted
- 4 to 4 1/2 cups (500-560g) all-purpose flour
- 1/2 cup (60g) baking soda
- 4 cups (960ml) water (for boiling)
- 2 cups (200g) sharp cheddar cheese, freshly grated
- 1/2 cup (120ml) lager or pilsner beer
- 1 cup (240ml) heavy cream
- 1 tablespoon Dijon mustard
- 1/2 teaspoon garlic powder
- 1/2 teaspoon cayenne pepper
- 1 tablespoon butter (optional, for dip)
- 1/4 cup chopped jalapeños (optional)
- 2 tablespoons fresh chives, chopped (optional)
Instructions
- Proof the yeast: In a large bowl or stand mixer, combine warm water, sugar, and yeast. Let sit for 5-10 minutes until foamy.
- Make the dough: Add melted butter and salt to the yeast mixture. Gradually add flour, mixing on low. Increase speed to medium and knead for 5-7 minutes until smooth and slightly tacky.
- First rise: Place dough in a greased bowl, cover, and let rise in a warm spot for 1 hour or until doubled in size.
- Shape the bites: Punch down dough and divide into 4 parts. Roll each part into a 12-inch rope and cut into 1-inch pieces. Place on parchment-lined baking sheets.
- Second rise: Cover bites and let rise for 15 minutes. Preheat oven to 400°F (200°C).
- Baking soda bath: Bring 4 cups of water to a boil in a large pot. Stir in baking soda. Boil bites for 30 seconds per side in batches. Remove and return to baking sheet.
- Bake: Bake at 400°F for 12-15 minutes until deep golden brown. Cool for 5 minutes.
- Make the dip: In a saucepan, melt optional butter. Add garlic powder and cayenne. Simmer beer for 2 minutes. Reduce heat to low and whisk in cheese gradually until smooth. Stir in mustard. Keep warm.
Notes
Do not skip the baking soda bath; it is essential for the authentic pretzel flavor and chewy texture. Grate your own cheese to ensure smooth melting. Keep the cheese sauce on low heat to prevent separation. Unbaked bites can be frozen after the second rise for up to 3 months.
- Prep Time: 45 minutes
- Cook Time: 30 minutes
- Category: Snack
- Cuisine: American
Nutrition
- Serving Size: 5 bites with 2 tbsp
- Calories: 380
- Sugar: 4
- Sodium: 650
- Fat: 16
- Saturated Fat: 10
- Carbohydrates: 45
- Fiber: 2
- Protein: 12
Keywords: beer cheese, pretzel bites, tailgate snacks, football food, budget recipes, game day appetizers, homemade pretzels, cheese dip



