It was 4:30 PM on a Sunday, and I was staring at the last slice of cold pizza like it was the only thing standing between me and a complete emotional breakdown. My toddler had just finished a nap that lasted exactly twelve minutes. My partner was in a meeting that was running late. And I was hungry. Not “snack on a handful of almonds” hungry. I was “need something sweet, salty, and deeply comforting” hungry.
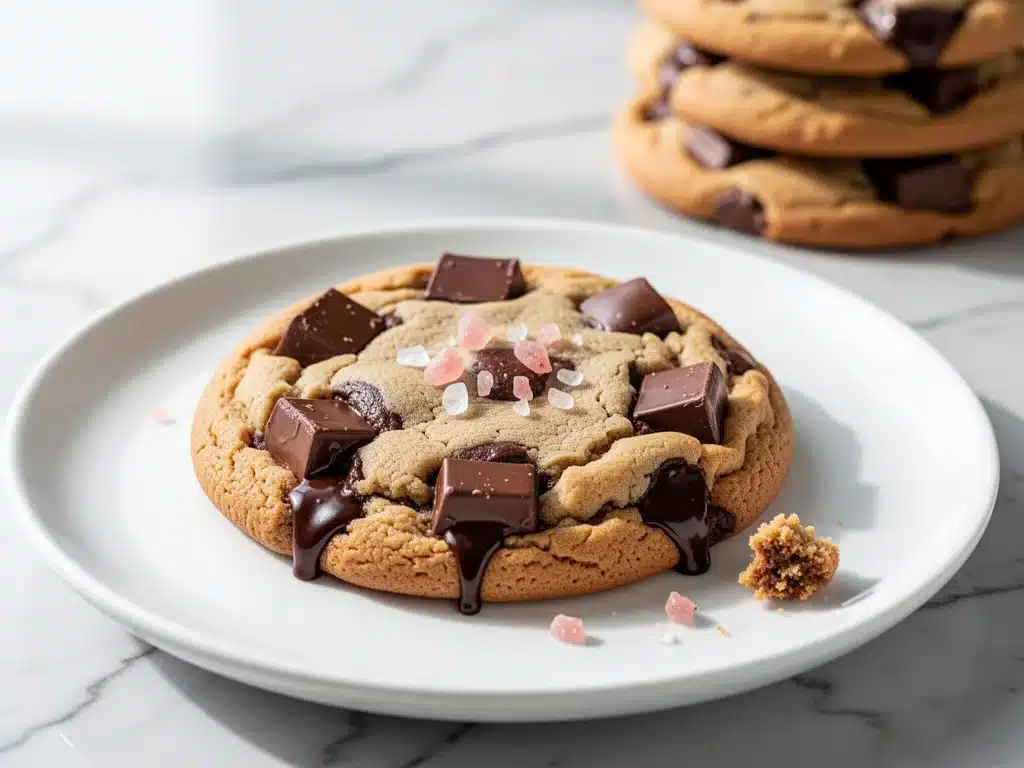
I didn’t want to order takeout. I didn’t want to make a full dinner. I just wanted cookies. But not those sad, flat, cakey cookies that taste like they were made by someone who’s never actually eaten a cookie. I wanted the kind that have crisp edges, a chewy center that pulls apart in strands, and chunks of chocolate that melt into little pools of joy. The kind that make you close your eyes for a second when you take the first bite.
So I dug out my oldest, most battered baking sheet and went to work on what has now become my absolute favorite recipe: Double Chocolate Chunk Cookies with Flaky Sea Salt. I’ve made these at least fifteen times in the last three months. I’ve made them for my book club, for my neighbor’s kid’s birthday, for random Tuesday nights when I just need a hug in edible form. And every single time, they turn out exactly right.
Here’s the thing about these cookies: they’re not complicated. But they’re not basic either. There’s a specific balance of sugars, a specific type of chocolate, and a specific trick with the butter that makes the difference between “okay” and “oh my god, I need another one.” I figured it out by burning a batch (twice) and learning what not to do. Now? I make these on repeat. Seriously. I keep the ingredients stocked just so I can pull them out when I need a win.
If you’re looking for a cookie recipe that’s rich, fudgy, and has that perfect salty-sweet crunch from flaky sea salt, stop scrolling. This is the one. It’s the kind of recipe you’ll save to your favorites, print out, and make every time you have guests over—or just when you’re having a Sunday afternoon slump like I did.
Why You’ll Love This Double Chocolate Chunk Cookie Recipe
Look, I’m not going to sit here and tell you these are the healthiest cookies in the world. They’re not. They’re also not the quickest thing you’ll ever whip up in five minutes. But here’s why I keep making them, and why I think you will too:
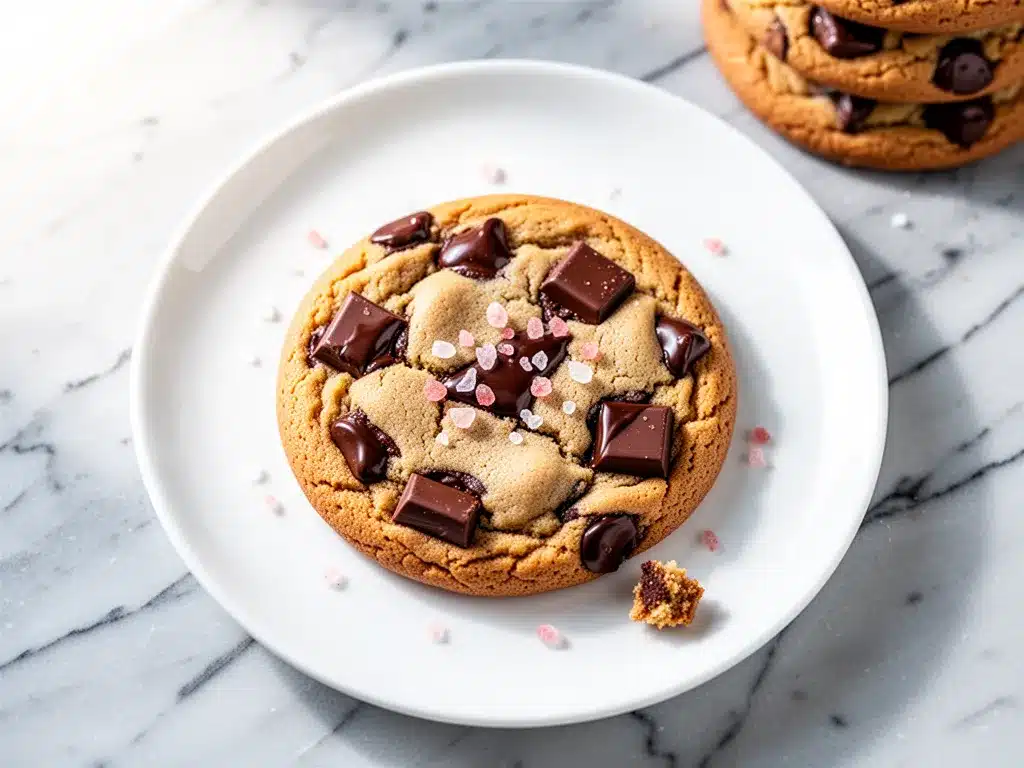
Fudgy, Not Cakey — This is the biggest selling point. I’ve tried so many chocolate cookie recipes that end up tasting like brownies or dense cakes. These are different. The center is soft, chewy, and slightly underdone when you pull them out (which is crucial). They set up as they cool, giving you that perfect texture contrast. I tested this with my sister who hates cakey cookies, and she asked for the recipe before she even finished the second one.
Real Chocolate, Not Chips — Most recipes call for chocolate chips. I’m calling for chocolate chunks. And not the cheap, waxy chips that melt into plastic. I use high-quality baking chocolate (like Ghirardelli or Lindt) chopped by hand. Why? Because you get these irregular, melty pockets of intense chocolate flavor. It’s not uniform. It’s messy. It’s perfect. My kids love picking out the big chunks, and I love watching them do it.
The Flaky Sea Salt Finish — This isn’t just garnish. It’s essential. The flakes of sea salt (Maldon is my go-to, but any flaky salt works) on top of the warm cookie cut through the richness of the chocolate and butter. It makes the chocolate taste more like chocolate. I learned this from a pastry chef friend, and I’ve never looked back. If you skip the salt, you’re missing half the experience.
Make-Ahead Friendly — I know, I know. Cookies are best fresh. But these dough balls keep in the fridge for up to 5 days, or in the freezer for up to 3 months. I often make a batch of dough on Sunday, freeze it, and then bake fresh cookies whenever I need a pick-me-up. It’s like having homemade cookies on demand. I’ve saved dinner parties with this trick more times than I can count.
Simple Ingredients — You don’t need anything fancy. Flour, sugar, brown sugar, butter, eggs, chocolate, salt. That’s it. No weird extracts, no exotic flours, no trips to three different specialty stores. I keep all of this in my pantry and fridge at all times. If you have these basics, you can make these cookies. Period.
They Freeze Like a Dream — I’ve mentioned the freezer thing, but I can’t stress it enough. These cookies freeze beautifully, both as dough and as baked cookies. I bake a double batch, freeze half, and then I have fresh cookies ready to go for unexpected guests or those 4:30 PM Sunday slumps. It’s my secret weapon for looking like a baking genius without the effort.
Ingredients You’ll Need
Here’s the best part: you probably have most of this already. I’m being serious. The beauty of this recipe is that it uses pantry staples. But I am particular about a few things, and I’ll tell you exactly why.
Unsalted Butter (1 cup / 226g) — I use unsalted so I can control the saltiness. You need to soften it properly. Not melted, not cold. Room temperature. If you microwave it, it’ll melt, and that changes the texture. I take it out of the fridge 45 minutes before I start. If you’re in a rush, you can cut it into cubes and let it sit for 15 minutes. It should leave a fingerprint when you press it.
Granulated Sugar (1 cup / 200g) — This gives the cookies their crisp edges. I use regular white granulated sugar. Don’t try to substitute with coconut sugar or something weird unless you want a totally different flavor profile. This is classic for a reason.
Dark Brown Sugar (1 cup / 220g, packed) — This is where the chewiness comes from. The molasses in the brown sugar keeps the centers soft. I always buy dark brown sugar because it’s moister and has a deeper flavor. If your brown sugar is hard as a rock, microwave it for 10 seconds with a damp paper towel on top. It’ll soften right up.
Large Eggs (2 large) — Room temperature eggs mix better into the butter and sugar. I take them out of the fridge while the butter softens. If you crack one and it’s cold, just toss it in a bowl of warm water for 5 minutes. It’s worth the effort.
Vanilla Extract (2 teaspoons) — Use real vanilla, not imitation. I know it’s more expensive, but in a cookie where chocolate is the star, you don’t want artificial vanilla tasting chemical. I use Nielsen-Massey or McCormick Pure. It makes a noticeable difference.
All-Purpose Flour (2 ¼ cups / 280g) — I don’t use cake flour or bread flour for this. All-purpose gives the right balance of structure and tenderness. I spoon the flour into the measuring cup and level it off. Don’t scoop directly from the bag, or you’ll pack it down and end up with dry cookies. Trust me on this.
Cornstarch (1 teaspoon) — This is the secret ingredient. It tenderizes the cookies and helps them stay soft. I learned this from a baking blog years ago, and it’s been in my rotation ever since. You don’t taste it, but you definitely taste the difference.
Baking Soda (1 teaspoon) — Make sure it’s fresh. If your baking soda is old, it won’t rise properly, and your cookies will be flat and dense. I replace my baking soda every 6 months. It’s cheap insurance.
Salt (1 teaspoon) — This enhances the chocolate flavor. Don’t skip it. Even though we’re using unsalted butter, you need salt in the dough to balance the sweetness.
Dark Chocolate Chunks (8 ounces / 225g) — I use 60-70% dark chocolate bars. I chop them myself. I don’t trust pre-chopped chocolate because the pieces are too small and uniform. I want big, irregular chunks that melt into gooey pockets. Ghirardelli 60% Cacao is my favorite, but Lindt or Guittard work great too. Avoid chocolate chips—they’re designed to hold their shape, and we want melt.
Flaky Sea Salt (for sprinkling) — Maldon is the gold standard, but any flaky sea salt will work. You need this for the top. It’s not optional. The contrast of the salt against the sweet chocolate is what makes these cookies addictive.
Equipment Needed
You don’t need fancy equipment for this. Here’s what I actually use:
Stand Mixer or Hand Mixer — I use a stand mixer with the paddle attachment. It’s faster and more consistent. But a hand mixer works fine. If you’re mixing by hand, you’ll need strong arms and about 5 minutes of elbow grease. It’s doable, just tiring.
Large Mixing Bowl — I use a 6-quart stainless steel bowl. It’s big enough to mix everything without splattering. Any large bowl works.
Measuring Cups and Spoons — Standard stuff. I have a set from OXO that I’ve had for years. Dollar store versions work fine too. Just make sure they’re accurate.
Baking Sheets — I use two half-sheet pans. I prefer aluminum sheets because they conduct heat evenly. Dark sheets can burn the bottoms, so if you use those, lower the oven temp by 25 degrees. I have a set of Nordic Ware pans that I swear by.
Parchment Paper — Line your baking sheets with parchment. It prevents sticking and makes cleanup a breeze. I don’t use silicone mats for these because I like the slight browning that parchment allows.
Cooling Rack — Essential. You need to transfer the cookies to a cooling rack so they don’t steam on the hot pan and get soggy. I have a stackable rack that saves counter space.
Knife — For chopping the chocolate. A chef’s knife works best. I use a rocking motion to chop the chocolate bars into chunks. Be careful—chocolate can slip. I learned that the hard way with a bloody thumb.
How to Make It: Step-by-Step
Alright, let’s make these cookies! I’m walking you through exactly how I do it, including the little tricks I’ve picked up over dozens of batches.
Step 1: Prep Your Oven and Pans (5 minutes)
Preheat your oven to 350°F (175°C). This is crucial. If your oven is too cool, the cookies will spread too much before they set. If it’s too hot, they’ll burn on the outside and be raw in the middle. Line two baking sheets with parchment paper. I don’t grease them—parchment is enough.
Step 2: Cream the Butter and Sugars (3 minutes)
In a large bowl, beat the softened butter, granulated sugar, and brown sugar together on medium-high speed for about 2-3 minutes. You’re looking for a light, fluffy mixture. It should look pale and creamy. This step incorporates air, which helps the cookies rise. Don’t skip it. I’ve made cookies with just mixed butter and sugar, and they’re dense and flat. The creaming step matters.
Step 3: Add Eggs and Vanilla (2 minutes)
Add the eggs one at a time, beating well after each addition. Then add the vanilla extract. Scrape down the sides of the bowl with a spatula to make sure everything is incorporated. The mixture should look smooth and glossy.
Step 4: Mix Dry Ingredients (2 minutes)
In a separate bowl, whisk together the flour, cornstarch, baking soda, and salt. I do this in a medium bowl. Whisking ensures the leavening agents are evenly distributed. If you don’t whisk, you might get pockets of baking soda that taste bitter.
Step 5: Combine Wet and Dry (2 minutes)
Gradually add the dry ingredients to the wet mixture, mixing on low speed. Stop as soon as the flour disappears. Do not overmix. Overmixing develops gluten, which makes cookies tough. I mix for about 30-45 seconds. The dough will look shaggy at first, but it’ll come together. If it’s too dry, add a teaspoon of milk. If it’s too wet, add a tablespoon of flour. But it shouldn’t be.
Step 6: Fold in Chocolate Chunks (2 minutes)
Using a spatula or your hands, fold in the chopped chocolate chunks. I reserve about 20% of the chocolate to press on top of the cookies before baking. This makes them look professional and ensures every cookie has chocolate on top. The rest goes into the dough.
Step 7: Scoop the Dough (5 minutes)
Use a cookie scoop or a tablespoon to portion the dough into balls. I aim for about 2 tablespoons per cookie. This makes about 24 cookies. Place them on the prepared baking sheets, spacing them about 2 inches apart. They’ll spread, so don’t crowd them. If you’re baking two sheets at once, bake one at a time. Rotate the pan halfway through for even browning.
Step 8: Bake and Salt (12-14 minutes)
Bake for 12-14 minutes. The edges should be set and slightly golden, but the centers should still look soft and underdone. This is the key to chewy cookies. They will continue to cook on the hot pan after you take them out. Immediately after baking, sprinkle each cookie with a pinch of flaky sea salt. The salt will stick to the warm surface.
Step 9: Cool Completely (15 minutes)
Let the cookies cool on the baking sheet for 5 minutes, then transfer them to a wire rack to cool completely. I know it’s tempting to eat them hot, but they’re fragile right out of the oven. Letting them set ensures they hold their shape. I usually wait at least 10 minutes before eating the first one. It’s hard, but worth it.
Expert Tips & Tricks
Here’s everything I’ve learned from making these cookies dozens of times. These tips will save you from my mistakes.
Don’t Overbake — This is the #1 mistake. Take them out when they look slightly underdone. The residual heat will finish cooking them. If you wait until they look done in the oven, they’ll be dry and cakey when they cool. I err on the side of underbaking. Always.
Chill the Dough (Optional but Recommended) — If you have time, chill the dough balls in the fridge for 30 minutes to 24 hours before baking. This hydrates the flour and deepens the flavor. It also prevents over-spreading. I often make the dough the night before and bake in the morning. It’s so convenient.
Use High-Quality Chocolate — I can’t stress this enough. Cheap chocolate tastes waxy and artificial. Invest in a good bar of chocolate. It’s worth the extra dollar. I use Ghirardelli 60% Cacao bars, which I chop myself. The irregular chunks melt into beautiful pools.
Measure Flour Correctly — Spoon the flour into the measuring cup and level it off. Don’t scoop directly from the bag. Scooping packs the flour down, and you’ll end up with too much flour, leading to dry cookies. I’ve ruined batches this way. Don’t make my mistake.
Room Temperature Ingredients — Cold butter and eggs won’t mix properly. Take them out of the fridge 45 minutes before you start. If you forget, you can soften butter by microwaving in 5-second bursts, but be careful not to melt it.
Salt on Top — Don’t skip the flaky sea salt. It’s not just for looks. The salt enhances the chocolate flavor and adds a crunch. I sprinkle it immediately after baking so it sticks. If you wait until they’re cool, it won’t adhere.
Bake One Sheet at a Time — If your oven runs hot or has hot spots, bake one sheet at a time and rotate the pan halfway through. This ensures even baking. If you bake two sheets at once, you might get uneven browning.
Variations & Substitutions
Once you’ve nailed the basic version, here’s how you can mix it up. I’ve tried all of these.
White Chocolate Chip Version — Swap half the dark chocolate chunks for white chocolate chips. It’s sweeter and creamier. My kids love this version. I do a 50/50 mix of dark and white chocolate chunks for the best of both worlds.
Pretzel Crumble Version — Add ½ cup of crushed pretzels to the dough. The salt and crunch are amazing with the chocolate. I crush pretzels in a food processor or put them in a bag and smash them with a rolling pin. It’s like a salty-sweet dream.
Nutty Version — Add 1 cup of toasted pecans or walnuts. Toasting the nuts first brings out their flavor. I toast them in a dry skillet for 3-4 minutes until fragrant. Let them cool before adding to the dough. It adds a nice crunch and richness.
Espresso Boost — Add 1 teaspoon of instant espresso powder to the dry ingredients. It enhances the chocolate flavor without making the cookies taste like coffee. I use this when I want a deeper, more intense chocolate taste. It’s subtle but effective.
Gluten-Free — Substitute the all-purpose flour with a 1:1 gluten-free flour blend (like Bob’s Red Mill). The texture might be slightly different, but they’re still delicious. I’ve tested this with my gluten-free friend, and she loved them.
Vegan — Use vegan butter (like Miyoko’s or Earth Balance) and flax eggs (1 tablespoon ground flaxseed mixed with 3 tablespoons water per egg). Use vegan chocolate chunks. The texture will be slightly different, but still tasty. My vegan friend requested this version, and it worked.
Serving & Storage
How to Serve: I usually serve these warm, right out of the oven with a glass of cold milk. It’s classic for a reason. But they’re also great at room temperature for lunchboxes or office treats. I store them in an airtight container with a slice of bread to keep them soft. The bread releases moisture, keeping the cookies chewy.
Refrigerator: Store baked cookies in an airtight container for up to 5 days. If you live in a humid climate, add a silica packet to absorb moisture. They stay fresh and chewy.
Freezing: These cookies freeze beautifully. Store them in a freezer-safe container or bag for up to 3 months. Thaw at room temperature for 30 minutes before eating. Or, freeze the dough balls and bake straight from frozen (add 1-2 minutes to bake time). I do this all the time for emergency cookie cravings.
Reheating: If you want warm cookies, microwave them for 10-15 seconds. They’ll be soft and gooey. Or bake them at 350°F for 5 minutes. Avoid the oven if they’re already baked—they’ll dry out.
Pro Tip: If your cookies are drying out, put a slice of bread in the container with them. The bread will soften the cookies overnight. It’s a trick my grandmother taught me, and it still works.
Nutrition Information
I’m not a nutritionist, but here’s the breakdown if you’re tracking. Keep in mind that this is an estimate based on standard ingredients.
Per Cookie (based on 24 cookies):
- Calories: 180
- Protein: 2g
- Carbs: 24g
- Fiber: 1g
- Sugar: 16g
- Fat: 10g
- Saturated Fat: 6g
- Cholesterol: 20mg
- Sodium: 120mg
What’s Good: Decent protein from the eggs and chocolate. Iron from the dark chocolate. It’s a treat, not a health food.
What to Know: Higher in calories and sugar because it’s a cookie. Contains dairy and gluten. Moderate sodium.
My Take: Look, these are cookies. They’re meant to be indulgent. Enjoy them in moderation. One or two cookies with a cup of coffee or tea is a perfect afternoon treat. Don’t stress the calories—stress the joy.
Final Thoughts
So that’s my go-to Double Chocolate Chunk Cookie with Flaky Sea Salt recipe. I’ve probably talked your ear off at this point, but when you make a recipe this often, you have a lot to say about it.
This has saved my Sunday afternoons more times than I can count. It’s my answer to “what do I need right now?” when I’m stressed, tired, or just craving comfort. My kids are happy, my friends are happy, and I’m happy because I’m not stressed about baking. It’s reliable, delicious, and always a crowd-pleaser.
Make it yours! Try different chocolates, add nuts, or sprinkle pretzels on top. The best recipes are the ones you adapt to your tastes. If you make these cookies, drop a comment and let me know what you think! I love hearing how recipes turn out in your kitchen. And if something doesn’t work, tell me that too—I’m here to help troubleshoot.
Happy baking! And I hope your kitchen smells half as good as mine does right now.
Frequently Asked Questions
Can I use milk chocolate instead of dark chocolate?
You can, but the cookies will be sweeter and less intense. I recommend sticking with dark chocolate (60-70%) for the best balance. If you use milk chocolate, reduce the granulated sugar by 2 tablespoons to compensate for the extra sweetness. I’ve tried it, and it’s good, but not as complex as dark chocolate.
Why did my cookies spread too much?
Usually, this means the butter was too warm or melted. Make sure your butter is softened, not melted. Also, check that your baking soda is fresh. If your oven runs hot, lower the temperature by 25 degrees. Chilling the dough for 30 minutes before baking also helps prevent spreading.
Can I freeze the cookie dough?
Absolutely. Scoop the dough into balls and freeze them on a baking sheet until solid (about 1 hour). Then transfer to a freezer bag. Bake straight from frozen, adding 1-2 minutes to the bake time. This is my favorite way to have cookies on demand. I keep a bag of dough balls in the freezer at all times.
Why are my cookies dry?
Overbaking is the most common cause. Take them out when they look slightly underdone. They’ll continue to cook on the hot pan. Also, check your flour measurement. If you packed the flour, you might have used too much. Spoon and level your flour for accurate measurements.
Can I make these cookies gluten-free?
Yes! Substitute the all-purpose flour with a 1:1 gluten-free flour blend. The texture might be slightly crumblier, but they’ll still be delicious. I’ve tested this with Bob’s Red Mill 1:1 Blend, and it works well. Make sure your chocolate is certified gluten-free if you’re strictly avoiding gluten.
What kind of salt should I use on top?
Flaky sea salt is best. Maldon is the most popular, but any flaky salt works. The flakes provide a nice crunch and burst of saltiness. Avoid fine table salt—it won’t give the same texture or visual appeal. Just a pinch on each cookie after baking is perfect.
How do I store leftovers?
Store in an airtight container at room temperature for up to 5 days. Place a slice of bread in the container to keep them soft. If they start to dry out, the bread will rehydrate them. For longer storage, freeze the cookies in a freezer-safe bag for up to 3 months.
Pin This Recipe!
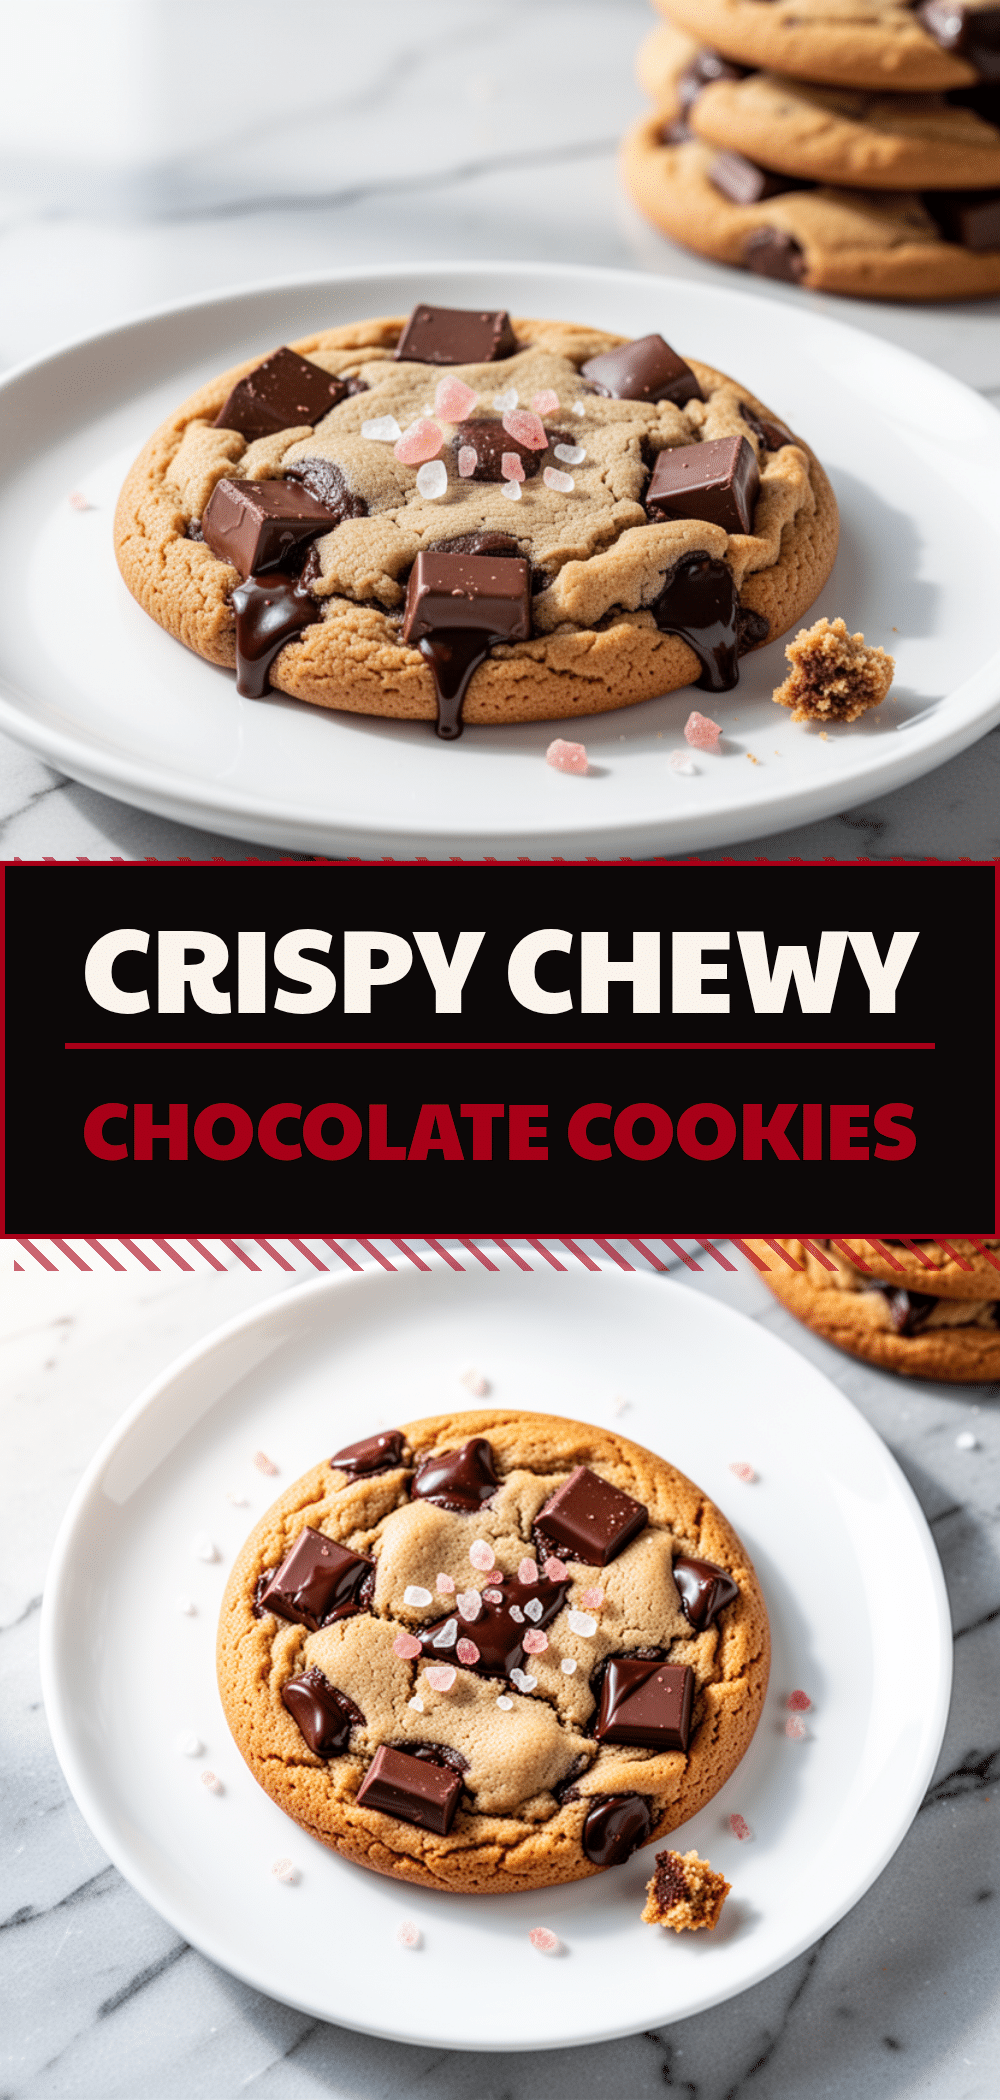
Double Chocolate Chunk Cookies with Flaky Sea Salt
- Total Time: 30 minutes
- Yield: 24 cookies 1x
Description
Rich, fudgy, and chewy double chocolate chunk cookies with crisp edges and a touch of flaky sea salt. These homemade cookies are easy to make, freeze well, and offer the perfect balance of sweet and salty.
Ingredients
- 1 cup (226g) unsalted butter, softened to room temperature
- 1 cup (200g) granulated sugar
- 1 cup (220g) dark brown sugar, packed
- 2 large eggs, room temperature
- 2 teaspoons pure vanilla extract
- 2 ¼ cups (280g) all-purpose flour
- 1 teaspoon cornstarch
- 1 teaspoon baking soda
- 1 teaspoon salt
- 8 ounces (225g) dark chocolate bars (60-70% cacao), chopped into chunks
- Flaky sea salt (such as Maldon), for sprinkling
Instructions
- Preheat oven to 350°F (175°C). Line two half-sheet baking pans with parchment paper.
- In a large bowl, beat the softened butter, granulated sugar, and brown sugar on medium-high speed for 2-3 minutes until light and fluffy.
- Add the eggs one at a time, beating well after each addition. Mix in the vanilla extract and scrape down the sides of the bowl.
- In a separate medium bowl, whisk together the flour, cornstarch, baking soda, and salt.
- Gradually add the dry ingredients to the wet mixture on low speed. Mix just until the flour disappears (about 30-45 seconds). Do not overmix.
- Fold in the chopped chocolate chunks using a spatula. Reserve about 20% of the chocolate to press onto the tops of the cookies later.
- Scoop dough into balls (about 2 tablespoons each) and place on prepared baking sheets, spacing them 2 inches apart.
- Bake for 12-14 minutes. The edges should be set and slightly golden, but the centers should still look soft and underdone.
- Immediately after removing from the oven, sprinkle each cookie with a pinch of flaky sea salt.
- Let cookies cool on the baking sheet for 5 minutes, then transfer to a wire rack to cool completely.
Notes
For best results, ensure butter is softened but not melted. Spoon and level flour for accurate measurements. Cookies can be frozen as dough balls for up to 3 months. Store baked cookies in an airtight container with a slice of bread to maintain softness.
- Prep Time: 15 minutes
- Cook Time: 12-14 minutes
- Category: Dessert
- Cuisine: American
Nutrition
- Serving Size: 1 cookie
- Calories: 180
- Sugar: 16
- Sodium: 120
- Fat: 10
- Saturated Fat: 6
- Carbohydrates: 24
- Fiber: 1
- Protein: 2
Keywords: double chocolate chunk cookies, flaky sea salt cookies, fudgy cookies, homemade cookies, baking recipe, chocolate cookies, easy dessert



