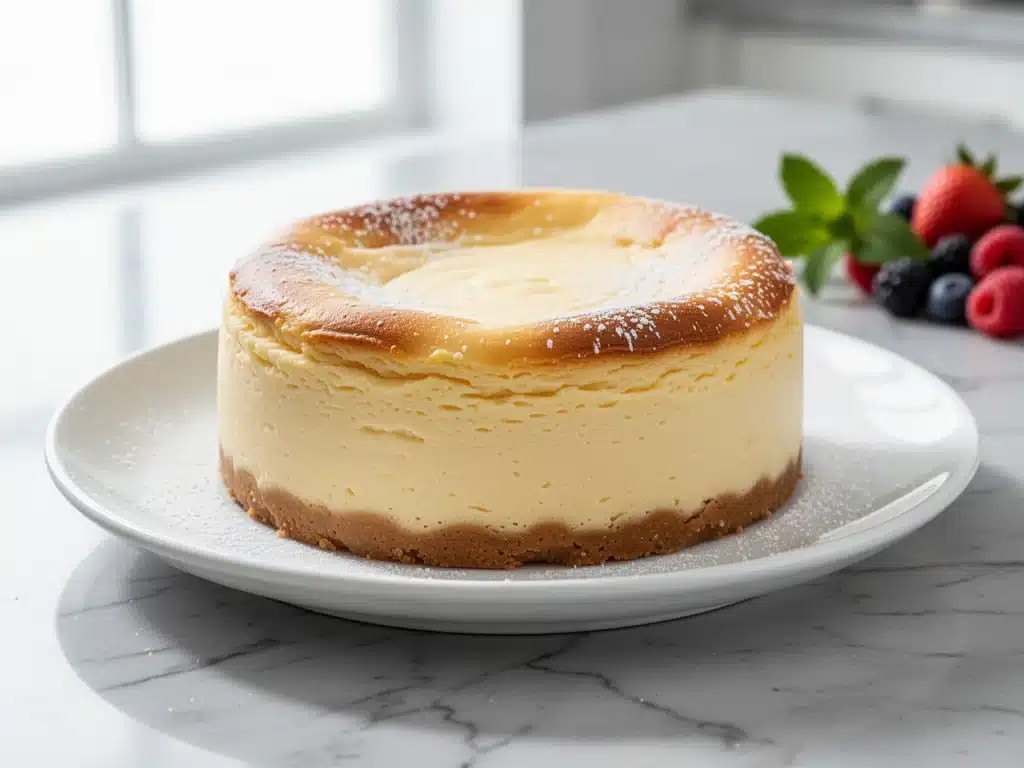
It was a rainy Saturday in November, the kind where the sky is gray by 2 PM and you just want to stay in bed. But instead, I was standing in my kitchen, staring at a 9-inch springform pan filled with what I hoped would be the perfect cheesecake. I had just moved into a new apartment in the city, and I was determined to recreate the slice I’d had three years ago at a tiny bakery in Manhattan. You know the type—the one that’s dense enough to stand up on its own but creamy enough to melt on your tongue. I thought I had it figured out. I didn’t.
I pulled the cake out of the oven, and it was fine. It was good, even. But it wasn’t that cheesecake. It was too light, too airy, lacking that signature heavy, luxurious texture that defines the New York style. I ate a slice anyway, nodded politely, and then spent the next six hours researching why my crust was soggy and why my filling cracked like a desert floor. I’ve since made this Classic New York Style Baked Cheesecake at least twelve times. I’ve burned the bottoms, overmixed the batter, and underbaked the center. But through all those failures, I finally cracked the code. And now? This is the only recipe I use. It’s become my weekend ritual, my go-to dessert for birthdays, and honestly, my answer to “what should I bake when I’m stressed?”
If you’ve ever been intimidated by cheesecake because you think it requires a water bath, a scale, or a degree in pastry science, let me stop you right there. You don’t need any of that. What you need is patience, the right ingredients, and this specific method that guarantees a dense, creamy, crack-free masterpiece every single time. This isn’t just a cheesecake; it’s an experience. It’s the kind of dessert that makes people ask for your recipe before they’ve even finished their second slice. And once you make it, you’ll be making it on repeat, just like I have.
Why This New York Style Cheesecake Is Worth The Effort
Look, I know there are a million cheesecake recipes out there. Some are no-bake, some are fluffy and light, some use sour cream, some use yogurt. But there is a reason the New York style has remained the king of cheesecakes for decades. It’s about texture. It’s about density. It’s about that rich, buttery crumb meeting a filling that’s so smooth it feels like you’re eating a cloud made of cream cheese. Here’s why this specific version has earned a permanent spot in my rotation:
It’s Actually Dense (In A Good Way) — Most home recipes turn out too light, almost like a soufflé. This one is heavy. It’s substantial. When you cut it, it holds its shape perfectly. I love that you can serve a smaller slice and still feel satisfied. It’s rich, yes, but it doesn’t leave you feeling heavy or sick afterward. It’s the perfect balance of indulgence and elegance.
Zero Cracking Guaranteed — I’ve tried so many tricks to prevent cracks: water baths, low-and-slow baking, running a knife around the edge. The truth is, the secret isn’t a fancy technique; it’s in the batter. By beating the cream cheese thoroughly but gently, and adding eggs last, you avoid incorporating too much air. Less air means less rising and falling, which means a smooth, uncracked top. I’ve made this recipe five times in a row without a single crack. That’s not luck; that’s science.
Pantry-Friendly Ingredients — You don’t need exotic ingredients or a trip to a specialty store. You need cream cheese, sugar, eggs, butter, and vanilla. That’s it. The graham cracker crust uses ingredients you probably already have in your cupboard. It’s simple, accessible, and incredibly rewarding to make from scratch.
Make-Ahead Friendly — This is my favorite part. Cheesecake tastes better the next day, and even better the day after that. It needs time to set and for the flavors to meld. I often make this on Sunday, let it chill overnight, and serve it on Monday or Tuesday. It makes entertaining so much easier because everything is done before the guests arrive. Plus, it freezes beautifully if you have leftovers.
It’s Crowd-Pleasing — I’ve served this to my picky eater brother, my vegan friend (who was skeptical but loved the crust), and my foodie neighbors. Everyone loves it. It’s universally appealing. It’s the dessert that gets you invited back to dinner parties. It’s the cake you bring to a potluck and come home to find an empty plate.
This recipe has saved me from takeout desserts more times than I can count. It’s my comfort bake, my celebration cake, and my stress-relief tool. Once you taste it, you’ll understand why I’m so obsessed.
Ingredients You’ll Need For The Perfect Crust And Filling
Here’s the thing about cheesecake: the quality of your ingredients matters more than you think. You can’t use low-fat cream cheese and expect a rich, creamy result. But don’t worry, you don’t need expensive, hard-to-find items. Here’s exactly what you need and why each one is crucial.
For The Graham Cracker Crust
Graham cracker crumbs (1 ½ cups / 150g) — You can buy pre-crushed graham crackers, but I prefer to crush them myself. It takes two minutes and gives you a better texture. Use regular graham crackers, not honey or cinnamon, unless you want a sweeter crust. The crumbs should be fine, like sand, not chunky.
Unsalted butter (5 tablespoons / 70g, melted) — This binds the crust together. Use real butter, not margarine. It adds that rich, savory flavor that balances the sweet filling. Melt it completely before mixing.
Granulated sugar (2 tablespoons / 25g) — Just a touch to sweeten the crust. Don’t skip this, or the crust will taste bland compared to the filling.
Salt (¼ teaspoon) — A pinch of salt enhances the flavor of the butter and graham crackers. It’s the secret ingredient that makes the crust taste professional.
For The Filling
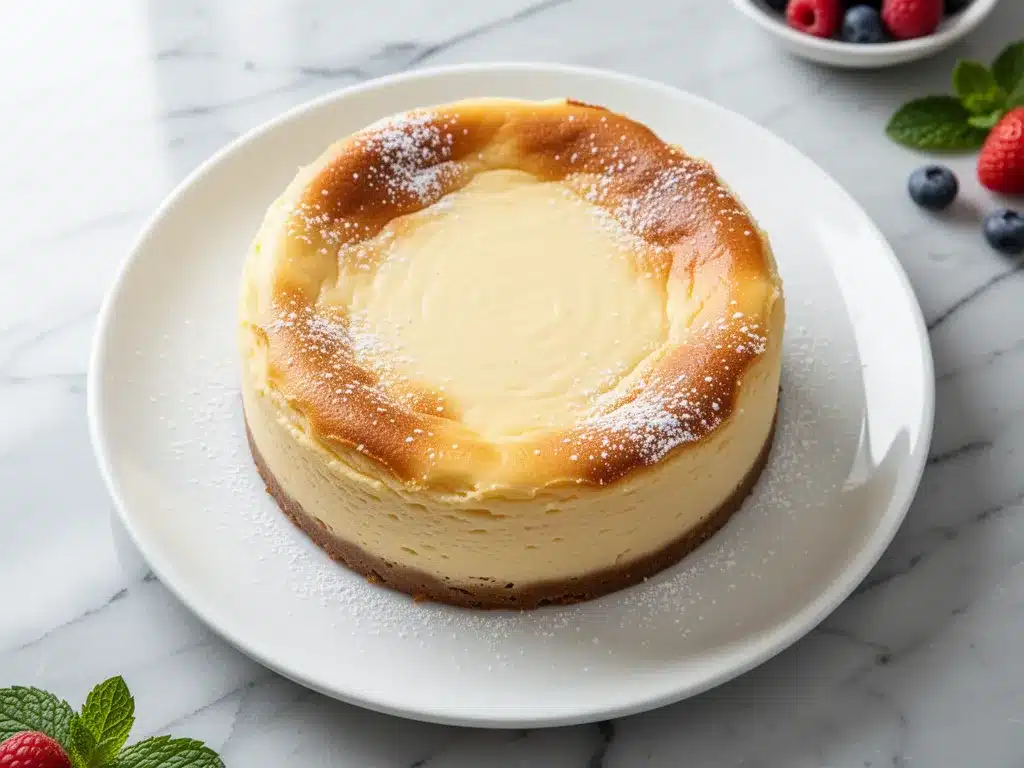
Cream cheese (32 ounces / 900g, full-fat, block style) — This is the star. Do not use tub cream cheese. It has higher water content and won’t set properly. Use blocks like Philadelphia or store brand full-fat. Room temperature is non-negotiable. If your cream cheese is cold, it will be lumpy. Take it out of the fridge at least 2 hours before you start.
Granulated sugar (1 cup / 200g) — Standard white sugar. It dissolves easily and doesn’t add a weird aftertaste. Some recipes use brown sugar, but I prefer the clean sweetness of white.
Sour cream (1 cup / 240g, full-fat) — This adds tang and moisture. It prevents the cheesecake from being too sweet and helps keep the texture creamy. Don’t use low-fat sour cream; it can make the filling watery.
Vanilla extract (2 teaspoons) — Use real vanilla, not imitation. It adds depth and warmth. I always keep a bottle of Nielsen-Massey or Madagascar vanilla on hand.
Eggs (4 large, room temperature) — Eggs provide structure. Room temperature eggs blend more smoothly into the batter. Cold eggs can cause the mixture to separate. Crack them into a separate bowl first to check for shells.
All-purpose flour (2 tablespoons / 15g) — A small amount of flour helps stabilize the cheesecake and prevents cracking. It’s a little-known trick, but it works. Don’t add more, or it will taste like cake.
Optional: Lemon zest (1 teaspoon) — If you like a hint of citrus, add the zest of one lemon. It brightens the flavor and cuts through the richness. I add this when I want a slightly fresher taste.
Equipment You Actually Need
You don’t need a fancy mixer or a special oven. Here’s what I use:
9-inch springform pan — This is essential. The springform allows you to release the sides without damaging the cake. Make sure it’s a good quality one that doesn’t leak. I wrap the bottom in foil to be safe.
Electric mixer — A hand mixer or stand mixer is helpful for beating the cream cheese smoothly. You can do it by hand, but it takes forever and your arms will hurt. I use a hand mixer because it’s easier to control.
Large mixing bowl — Make sure it’s big enough to hold all the ingredients. A 5-quart bowl is perfect.
Rubber spatula — For scraping down the sides of the bowl. You want every bit of cream cheese incorporated.
Measuring cups and spoons — Precision matters in baking. Don’t guess.
Fork or pastry cutter — For mixing the crust. I use a fork because it’s easier to clean.
Knife — For running around the edge of the cake after baking to prevent cracking.
How To Make It: Step-By-Step
Alright, let’s make this! I’m walking you through exactly how I do it, including the little tricks I’ve picked up. It’s simpler than it looks, but there are key steps to get that perfect texture.
Step 1: Prep Your Pan And Oven (5 minutes)
Preheat your oven to 325°F (160°C). This is a low temperature, which helps the cheesecake bake evenly without cracking. Take your 9-inch springform pan and grease the inside lightly with butter. Then, take a strip of parchment paper and line the bottom. This ensures the crust doesn’t stick and makes cleanup easier. Wrap the outside of the pan in two layers of heavy-duty aluminum foil to prevent water from seeping in if you decide to use a water bath (though I usually don’t).
Step 2: Make The Crust (5 minutes)
In a medium bowl, combine the graham cracker crumbs, melted butter, sugar, and salt. Mix until it looks like wet sand. Press this mixture firmly into the bottom of the prepared pan. Use the bottom of a measuring cup to pack it down evenly. Don’t worry about the sides unless you want a crust up the sides. Bake the crust for 8-10 minutes until it’s fragrant and slightly darkened. Let it cool completely while you make the filling. This step is crucial; if the crust is warm, the filling will melt into it and get soggy.
Step 3: Beat The Cream Cheese (3 minutes)
In a large bowl, beat the room-temperature cream cheese on medium-low speed until it’s completely smooth and creamy. This takes about 2-3 minutes. Scrape down the sides and bottom of the bowl with a spatula. You want no lumps. If there are lumps, they will show up in the final cake. This is the most important step for a smooth texture.
Step 4: Add Sugar And Sour Cream (2 minutes)
Add the sugar and sour cream to the beaten cream cheese. Mix on low speed until just combined. Don’t overmix here; you don’t want to incorporate too much air. Scrape the bowl again. The mixture should be thick and creamy.
Step 5: Add Eggs And Flour (3 minutes)
Add the eggs one at a time, mixing on low speed just until blended. Add each egg, wait until it’s mixed in, then add the next. Overmixing at this stage incorporates air, which leads to cracks. Add the flour and vanilla (and lemon zest if using) and mix gently until combined. The batter should be thick, smooth, and glossy.
Step 6: Bake The Cheesecake (1 hour 15 minutes)
Pour the batter over the cooled crust. Smooth the top with a spatula. Bake at 325°F (160°C) for 1 hour and 15 minutes. The edges should be set, but the center should still jiggle slightly like Jell-O when you gently shake the pan. It will continue to cook as it cools. Do not overbake, or it will become dry and cracked.
Step 7: Cool And Chill (4 hours minimum)
Turn off the oven and crack the door open. Let the cheesecake cool in the oven for 1 hour. This gradual cooling prevents cracking. Then, remove it from the oven and let it cool completely on a wire rack. Once cool, cover it with plastic wrap and refrigerate for at least 4 hours, preferably overnight. This chilling time is essential for the flavors to meld and the texture to set. Serve cold with fresh berries or whipped cream.
Expert Tips For A Flawless Cheesecake
Here’s everything I’ve learned from making this dozens of times. These tips will save you from my mistakes.
Room Temperature Is Key — Cold cream cheese and eggs are the enemy of smooth cheesecake. If you forget to take them out, you can warm the cream cheese blocks in the microwave for 15-20 seconds on low power. For eggs, just drop them in a bowl of warm water for 5 minutes. It makes a huge difference.
Don’t Overmix — Once you add the eggs, mix on the lowest speed possible. You’re just trying to blend them in, not whip air into the batter. Air bubbles expand in the oven and then collapse, causing cracks. Less air equals a smoother cake.
The Jiggle Test — Don’t rely on a timer alone. The cheesecake is done when the edges are set but the center 2 inches still jiggle slightly. It should look like a firm gelatin, not a liquid. If it’s completely firm, it’s overbaked.
Patience With Cooling — The gradual cooling in the turned-off oven is what prevents cracks. Don’t rush this step. If you take it out while it’s hot, the temperature change will shock the cake and cause it to crack.
Chill Overnight — I know it’s tempting to eat it right away, but wait. The cheesecake tastes significantly better after 24 hours in the fridge. The flavors deepen, and the texture becomes silkier.
Variations And Substitutions
Once you’ve mastered the basic version, here’s how you can mix it up. I’ve tried all of these.
Berry Swirl — Before baking, dollop ½ cup of raspberry or strawberry jam on top of the batter. Use a knife to swirl it in. It adds a beautiful marbled effect and a burst of fruit flavor.
Chocolate Chip — Fold 1 cup of chocolate chips into the batter before baking. It’s like a cookie cheesecake. My kids love this version.
Oreo Crust — Substitute the graham crackers with crushed Oreo cookies. Remove the filling first, or leave it in for a sweeter crust. It’s decadent and fun.
Gluten-Free — Use gluten-free graham crackers or almond flour for the crust. The filling is naturally gluten-free, so no changes needed there.
Dairy-Free — Use vegan cream cheese and dairy-free sour cream. It’s not quite the same texture, but it’s still delicious. I’ve made this for my lactose-intolerant friend, and she loved it.
Serving And Storage
How To Serve — I usually serve this plain, with fresh berries and a dollop of whipped cream. But you can also serve it with chocolate sauce, caramel, or fruit compote. It’s versatile. Use a sharp, warm knife to cut clean slices. Dip the knife in hot water and wipe it dry between cuts.
Storage — Store in the refrigerator, covered with plastic wrap, for up to 5 days. It actually tastes better after a few days. Don’t leave it out at room temperature for more than 2 hours.
Freezing — Cheesecake freezes well. Wrap the whole cake (or individual slices) tightly in plastic wrap and then in foil. Freeze for up to 3 months. Thaw overnight in the fridge before serving. It’s a great way to meal-prep dessert.
Nutrition Information
I’m not a nutritionist, but here’s the breakdown if you’re tracking. This is a rich dessert, so portion control is key.
Per Serving (1/12th of cake):
- Calories: 380
- Fat: 28g
- Saturated Fat: 16g
- Cholesterol: 120mg
- Sodium: 280mg
- Carbs: 28g
- Fiber: 0.5g
- Sugar: 22g
- Protein: 7g
It’s high in fat and sugar, but also provides some protein and calcium from the cheese. If you want to lighten it up, use reduced-fat cream cheese and sour cream, though the texture will be slightly different. But honestly? This is a treat. Enjoy it as such.
Final Thoughts
So that’s my go-to Classic New York Style Baked Cheesecake! I’ve probably talked your ear off at this point, but when you make a recipe this often, you have a lot to say about it. This has saved me from store-bought desserts more times than I can count. It’s my answer to “what should I bake when I want to impress?” and “what should I eat when I need comfort?” My family is obsessed, my friends ask for it regularly, and I’m obsessed because it’s just that good.
Make it yours! Try different toppings, swap in your favorite fruit, or add a hint of citrus. The best recipes are the ones you adapt to your tastes. If you make this, drop a comment and let me know what you think! I love hearing how recipes turn out in your kitchen. And if something doesn’t work, tell me that too—I’m here to help troubleshoot. Happy baking!
Frequently Asked Questions
Why did my cheesecake crack?
Cracks are usually caused by overmixing (which incorporates air), overbaking (which dries it out), or rapid cooling (which shocks the cake). To prevent cracks, mix gently, bake until the center still jiggles, and cool gradually in the turned-off oven.
Can I use a water bath?
Yes, a water bath can help prevent cracking by providing gentle, moist heat. However, it’s not strictly necessary if you follow the cooling method I described. If you do use one, wrap the pan tightly in foil and place it in a roasting pan filled with hot water. Just be careful not to splash water into the pan.
Can I make this ahead of time?
Absolutely. This cheesecake is best made 1-2 days in advance. It needs time to set and for the flavors to develop. You can make it up to 3 days ahead and store it in the fridge. It also freezes well for up to 3 months.
Why is my cheesecake runny?
If the center is liquidy, it’s underbaked. If it’s runny after chilling, it might be due to undermixed cream cheese or too much liquid ingredient (like sour cream). Make sure your cream cheese is fully smooth and that you bake it until the edges are set but the center jiggles.
Can I use low-fat cream cheese?
I don’t recommend it. Low-fat cream cheese has more water and less fat, which can result in a grainy texture and a less rich flavor. For the best results, use full-fat, block-style cream cheese.
How do I store leftovers?
Store leftovers in an airtight container or covered with plastic wrap in the refrigerator for up to 5 days. For longer storage, freeze slices wrapped tightly in plastic and foil for up to 3 months.
Can I add fruit on top?
Yes! Fresh berries, sliced strawberries, or a fruit compote are perfect toppings. Add them just before serving to keep them fresh. Avoid adding wet fruits directly to the cake before baking, as it can affect the texture.
Pin This Recipe!
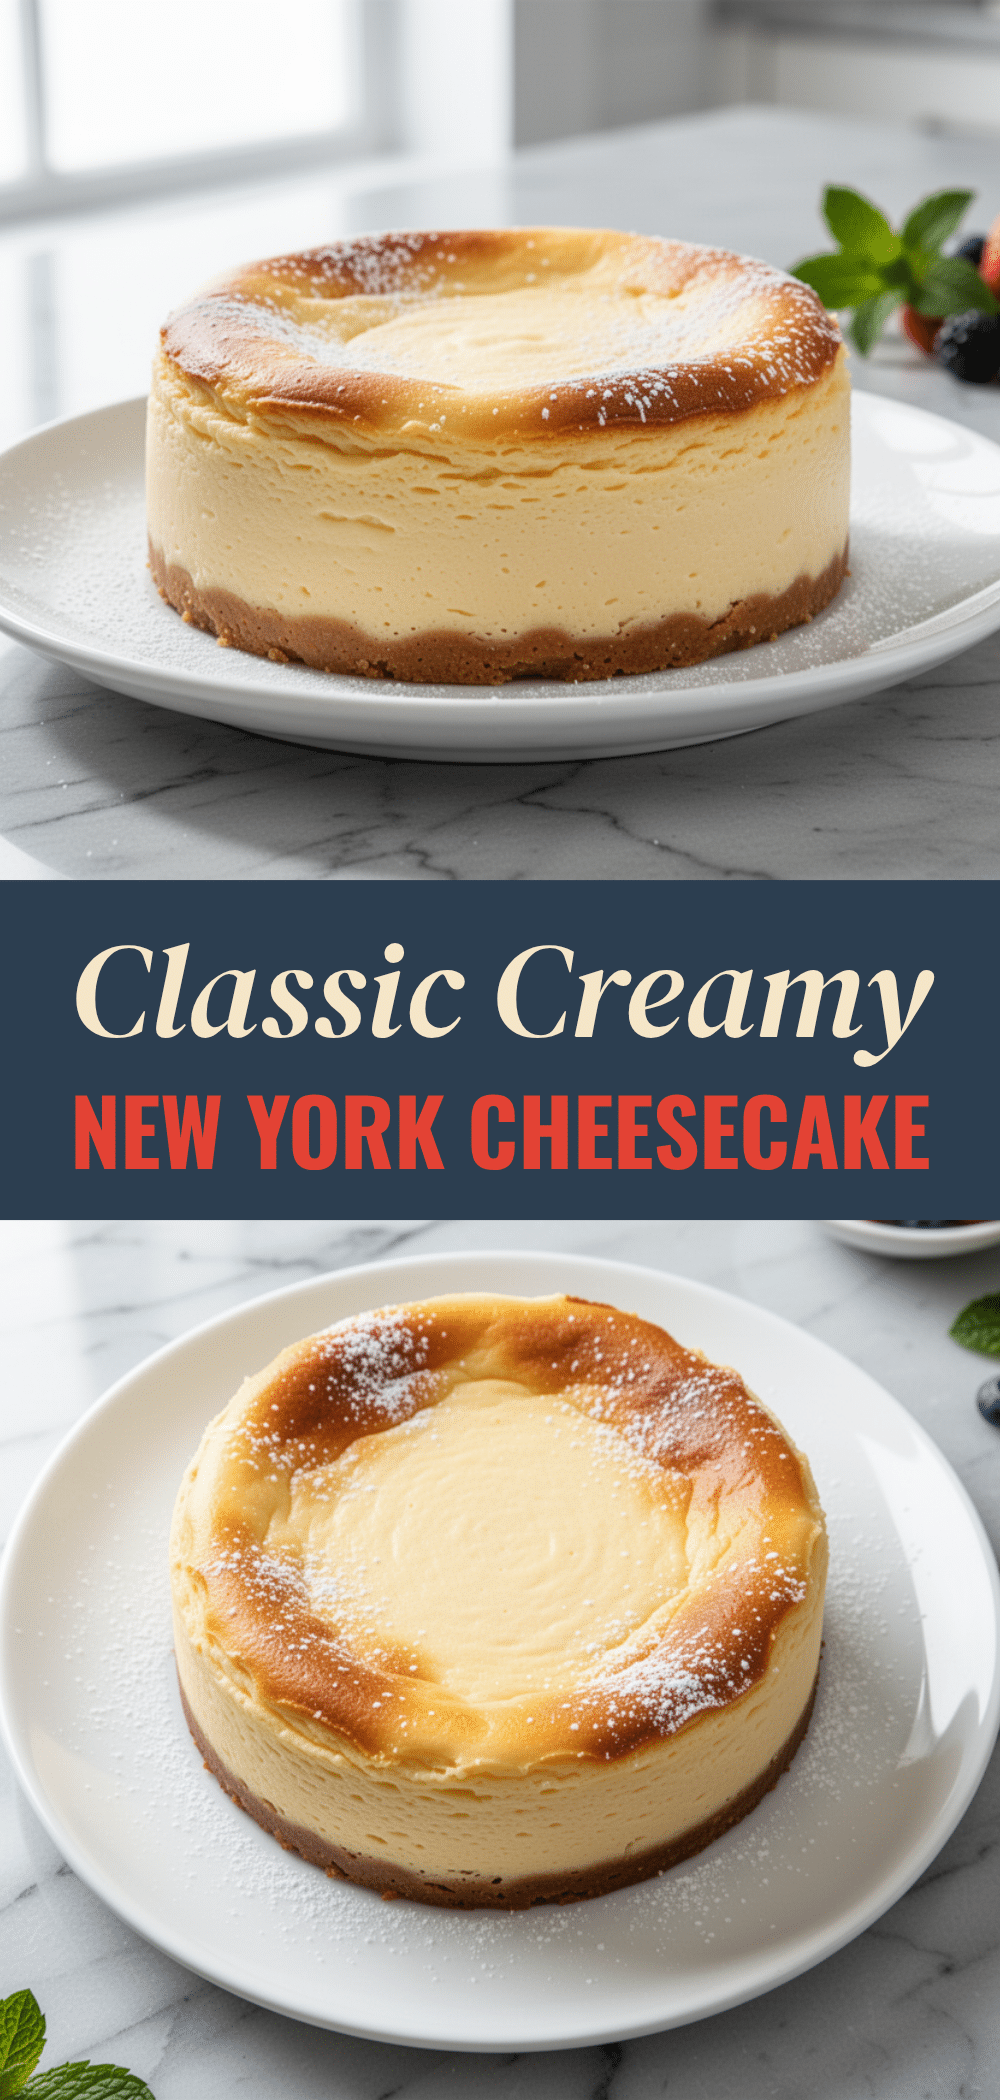
Classic New York Style Baked Cheesecake: Easy Homemade Recipe
- Total Time: 5 hours 45 minutes
- Yield: 12 servings 1x
Description
A dense, creamy, and crack-free New York style cheesecake that requires no water bath or special equipment. This recipe uses pantry-friendly ingredients and a specific mixing method to guarantee a rich, luxurious texture every time.
Ingredients
- 1 ½ cups (150g) graham cracker crumbs
- 5 tablespoons (70g) unsalted butter, melted
- 2 tablespoons (25g) granulated sugar
- ¼ teaspoon salt
- 32 ounces (900g) full-fat block style cream cheese, room temperature
- 1 cup (200g) granulated sugar
- 1 cup (240g) full-fat sour cream
- 2 teaspoons vanilla extract
- 4 large eggs, room temperature
- 2 tablespoons (15g) all-purpose flour
- 1 teaspoon lemon zest (optional)
Instructions
- Preheat oven to 325°F (160°C). Grease a 9-inch springform pan lightly with butter, line the bottom with parchment paper, and wrap the outside in two layers of heavy-duty aluminum foil.
- In a medium bowl, combine graham cracker crumbs, melted butter, sugar, and salt. Mix until it resembles wet sand.
- Press the crust mixture firmly into the bottom of the prepared pan. Bake for 8-10 minutes until fragrant and slightly darkened. Let cool completely.
- In a large bowl, beat the room-temperature cream cheese on medium-low speed until completely smooth and creamy (2-3 minutes). Scrape down the sides and bottom.
- Add the sugar and sour cream to the cream cheese. Mix on low speed until just combined. Scrape the bowl again.
- Add the eggs one at a time, mixing on low speed just until blended after each addition. Do not overmix.
- Add the flour, vanilla extract, and lemon zest (if using). Mix gently until combined. The batter should be thick, smooth, and glossy.
- Pour the batter over the cooled crust and smooth the top.
- Bake at 325°F (160°C) for 1 hour and 15 minutes. The edges should be set, but the center should still jiggle slightly like Jell-O.
- Turn off the oven and crack the door open. Let the cheesecake cool in the oven for 1 hour to prevent cracking.
- Remove from the oven and let cool completely on a wire rack.
- Cover with plastic wrap and refrigerate for at least 4 hours, preferably overnight, before serving.
Notes
Ensure all dairy ingredients (cream cheese, sour cream, eggs) are at room temperature to prevent lumps and ensure a smooth batter. Do not overmix after adding eggs, as incorporating air can cause cracking. The cheesecake tastes best after chilling overnight. It can be stored in the refrigerator for up to 5 days or frozen for up to 3 months.
- Prep Time: 20 minutes
- Cook Time: 1 hour 25 minutes
- Category: Dessert
- Cuisine: American
Nutrition
- Serving Size: 1/12th of cake
- Calories: 380
- Sugar: 22
- Sodium: 280
- Fat: 28
- Saturated Fat: 16
- Carbohydrates: 28
- Fiber: 0.5
- Protein: 7
Keywords: New York cheesecake, baked cheesecake, graham cracker crust, cream cheese dessert, easy cheesecake recipe, crack-free cheesecake



