
Last November, I walked into a health food store feeling vaguely guilty about the three colds I’d caught that season. I wandered into the supplement aisle, stared at a tiny bottle of “Fire Cider” that cost $18 for 8 ounces, and nearly had a cardiac event. Eighteen dollars. For vinegar and roots. I put it back, walked out, and went home to my tiny kitchen with a $40 weekly grocery budget and a head full of skepticism.
I’ve always been the person who checks the unit price on toilet paper. I’m that friend who calculates the cost-per-sipping of every drink I make. And let me tell you, buying pre-made fire cider is a wallet-wrecker. It’s also weirdly unnecessary. The whole point of fire cider is that it’s a folk remedy, something you make in your own kitchen with whatever you can find at the local market or discount grocer.
So I decided to test the theory. Could I make a potent, spicy, immune-boosting fire cider immunity tonic that actually tasted good (or at least tolerable) using ingredients that wouldn’t wreck my grocery budget? The answer was yes. And not only was it cheaper, it was better. Because I could control the heat. Because I could use the good apple cider vinegar from the bulk bin. Because I could stretch a single batch for months.
This isn’t just a recipe; it’s a survival tactic for anyone watching their pennies while trying to stay healthy. I’ve made this batch after batch for the last two winters, and I’m sharing the exact cheap ingredient list that keeps me going. No fancy superfoods required. Just vinegar, roots, and patience.
Why You’ll Love This Budget-Friendly Fire Cider
There are about ten reasons I keep making this, but here are the big ones that matter most to my bank account and my immune system.
Stupid Simple — Seriously, if you can chop an onion and pour vinegar, you can make this. There’s no cooking. No simmering. No fancy techniques. I just toss everything in a jar and wait. It’s the ultimate low-effort, high-reward project.
Pennies Per Serving — This is the real kicker. A store-bought bottle runs you about $2.25 per ounce. My batch makes about 16 ounces and costs me roughly $6 to make total. That’s less than 40 cents per serving. I take a shot a day when I feel a tickle in my throat, and it costs me pennies. Compare that to the $18 bottle and do the math.
Pantry Staples — You probably have 50% of this already. Apple cider vinegar? Check. Garlic? Check. Honey? Check. The rest are dried herbs or cheap roots you can find in the spice aisle or produce section. I don’t need to go to three different specialty stores to make this.
Actually Works — I’m not a doctor, but I’ve been sick less often since I started taking this. The combination of garlic, ginger, and horseradish is a classic immune-boosting trio for a reason. It wakes up your senses. It clears your sinuses. It makes you feel like you’re doing something proactive about your health without spending a fortune.
Makes Amazing Gifts — Okay, this is about one person’s budget, but hear me out. If you make a big batch, you have extras. Bottling it up in cheap mason jars with a handwritten label is the most thoughtful, budget-friendly gift you can give. It’s better than buying generic gifts and saves you money too.
This is my go-to when I need to stay healthy on a dime. No complicated techniques, no weird expensive ingredients, just reliable, spicy, effective liquid gold that makes my wallet happy.
Ingredients You’ll Need (The Cheap List)
Here’s the best part: you probably have most of this already. I’m particular about three ingredients here, but I’ll tell you exactly why so you can save money where it counts.
Apple Cider Vinegar (ACV) (1 cup / 240ml) — This is your base. You want “with the mother”—that cloudy stuff at the bottom. It’s where the beneficial bacteria live. I buy the largest jug I can find at the discount grocer; it’s often cheaper per ounce than the small health-food store bottles. Don’t waste money on “detox” branded vinegars. Plain, unfiltered ACV is all you need.
Organic Garlic (1 head) — Garlic is cheap, but it’s the star of the show. I use a whole head because I like it potent. If you’re on a super tight budget, you can use half, but the potency drops. Fresh cloves only—no jarred garlic. It’s not worth the extra cost for the flavor you lose.
Fresh Ginger Root (1 large knob, about 2 inches) — Ginger can be pricey if you buy the pre-grated stuff. Buy a whole root. It lasts forever in the fridge. Peel it with a spoon (less waste) and chop it up. Fresh ginger has a much sharper, more medicinal kick than dried powder.
Fresh Horseradish Root (1 large knob, about 2 inches) — This is the “fire” in fire cider. Fresh horseradish root is surprisingly cheap at most grocery stores, usually found near the produce or in the ethnic food aisle. If you can’t find it, you can use prepared horseradish from a jar, but it won’t infuse as well. I prefer fresh because it’s cheaper and more potent.
Hot Chili Peppers (2-3 fresh, like jalapeños or serranos) — I use fresh peppers because they’re cheap. If you’re sensitive to heat, use fewer. If you like pain, use more. Slice them up. The capsaicin is what really gets your circulation going.
Dried Oregano (2 tablespoons) — A pantry staple. Cheap, effective, and adds earthy flavor. I always have this. If you don’t, it’s one of the cheapest spices in the store.
Dried Thyme (1 tablespoon) — Another cheap dried herb. Adds a subtle, woody note that balances the heat.
Raw Honey (2-4 tablespoons) — This is for sweetness and to help with the sore throat aspect. You can skip it if you’re avoiding sugar, but it makes the tonic much more drinkable. Buy the big squeeze bottle if you’re on a budget; it’s cheaper per ounce than the fancy jars.
Optional: Lemon Zest (1 lemon) — I like adding the zest of one lemon for brightness. It’s cheap, and the oils are great for flavor. Don’t waste the lemon juice; use it in your sweet potato sausage hash or save it for tea.
Water (Filtered) (Optional, for dilution) — You’ll dilute the final product with water when you drink it, so make sure you have filtered water on hand.
Equipment Needed
You don’t need fancy equipment for this. Here’s what I actually use.
16-ounce Mason Jar — I use a standard wide-mouth mason jar. They’re cheap, reusable, and perfect for this. You can buy a dozen for the price of one store-bought bottle. Just make sure it’s clean and dry.
Knife — A sharp chef’s knife for chopping the garlic, ginger, and peppers. Dull knives make chopping roots harder. Learn to sharpen your knife—it saves time and money.
Peeler or Spoon — For peeling the ginger and horseradish. A spoon is actually better for ginger because you scrape off the skin without wasting the flesh.
Funnel — Optional, but helpful for bottling later. I usually just pour carefully, but a funnel saves messes.
Cheesecloth or Fine Mesh Strainer — For straining the finished cider. I use a fine mesh strainer because I don’t like bits of root in my drink. Cheesecloth works too, but it’s slower.
Small Glass Bottles — For storage after straining. Old sauce jars cleaned out work perfectly. Don’t buy new bottles for this.
How to Make It: Step-by-Step
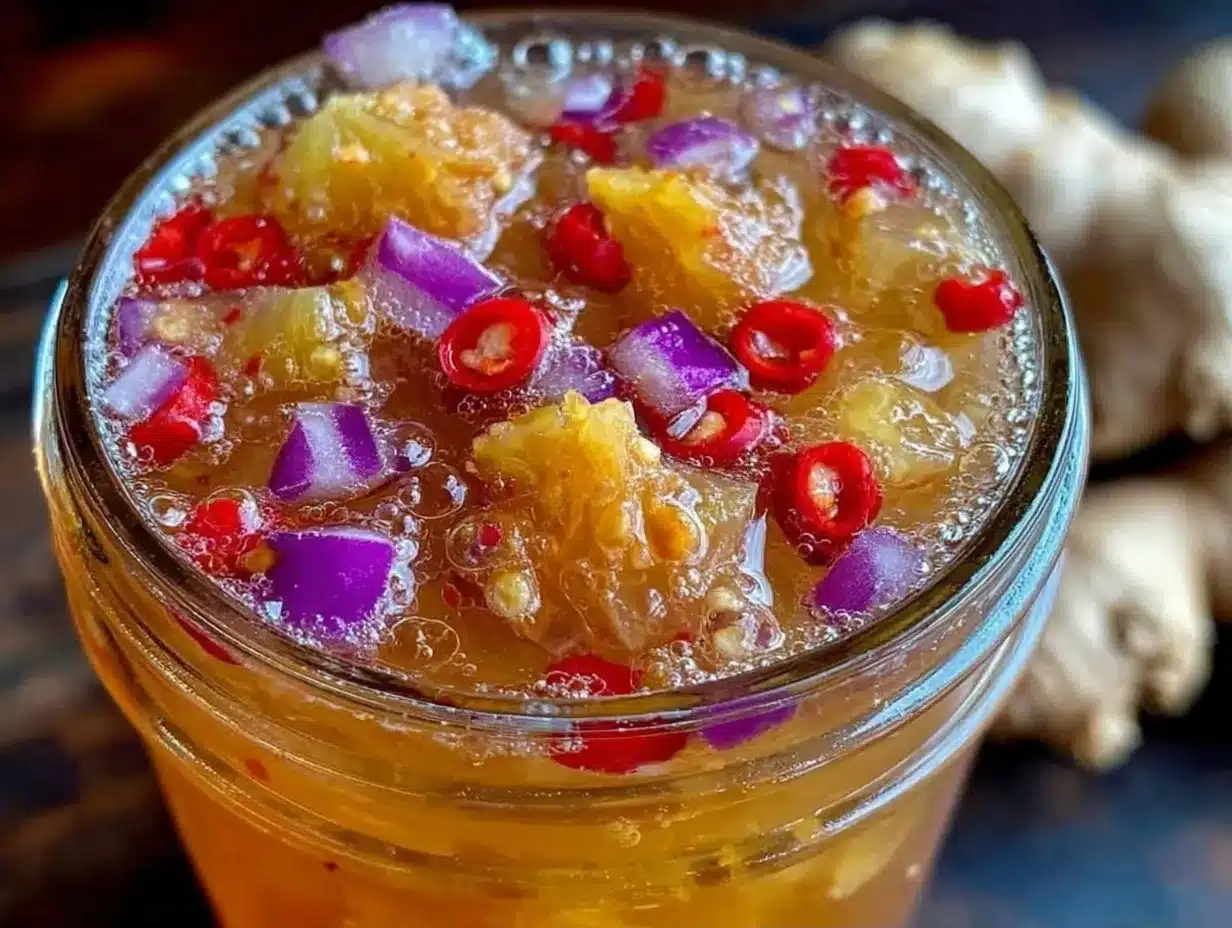
Alright, let’s make this! I’m walking you through exactly how I do it, including the little tricks I’ve picked up.
Step 1: Prep Your Ingredients (10 minutes)
Wash everything thoroughly. Peel the ginger and horseradish. If you’re using fresh horseradish, be careful—it’s potent and can make your eyes water. Mince the garlic. Chop the chili peppers (wear gloves if you have sensitive skin, or just wash your hands immediately after). Chop the ginger and horseradish into small pieces so they infuse better. Smaller pieces = stronger flavor.
Step 2: Pack the Jar (5 minutes)
Put all your chopped roots, garlic, peppers, and dried herbs into the mason jar. Pack them in tightly. You want as much plant matter as possible in there. This is where you get your money’s worth. Don’t skimp on the ingredients.
Step 3: Add the Vinegar (2 minutes)
Pour the apple cider vinegar over the ingredients. Make sure everything is completely submerged. If there’s a piece floating on top, it might mold. Use a chopstick or spoon to push it down. If you need more vinegar, just top it off. The ratio is roughly 1:1 by volume of ingredients to vinegar, but as long as it’s covered, you’re good.
Step 4: The Wait (2-4 Weeks)
Put the lid on tightly and store the jar in a cool, dark place. I keep mine on the back of the pantry shelf. Shake it every few days. This helps the flavors extract. You need to wait at least 2 weeks, but 4 weeks is better. The longer it sits, the stronger and more potent it gets. I usually wait a full month because I’m impatient, but patience pays off.
Step 5: Strain and Sweeten (10 minutes)
After 4 weeks, it’s time to strain. Place your fine mesh strainer over a bowl. Pour the cider through. Squeeze the solids with a spoon to get every drop of liquid out. That liquid is the good stuff. Discard the solids (or compost them). Now, stir in the honey. Start with 2 tablespoons, taste, and add more if you want it sweeter. The honey helps preserve it and makes it easier to drink.
Step 6: Bottle and Store
Pour the finished fire cider into your clean glass bottles. Store them in the fridge. It will last for 6 months or more. The vinegar is a natural preservative, so you’re good.
Expert Tips & Tricks
Here’s everything I’ve learned from making this dozens of times. These tips will save you from my mistakes.
Buy Roots in Bulk — Ginger and horseradish are cheaper when you buy them fresh and peel them yourself. Pre-grated ginger is a waste of money. Do the work once, and you save for months.
Don’t Rush the Infusion — I know you want to drink it now. But 2 weeks is the minimum. 4 weeks is the sweet spot. The vinegar needs time to pull the beneficial compounds out of the roots. If you rush it, you’re just drinking vinegar with a hint of garlic.
Label Your Jar — Write the date you started on the jar. I’ve had jars sitting in the back of my pantry for months because I forgot when I made them. Write it down.
Use a Funnel — When bottling, use a funnel. Messing up vinegar on the counter is annoying and wasteful.
Adjust the Heat — If you’re sensitive to spice, use fewer peppers or remove the seeds. The seeds are where most of the heat lives. If you like it hot, leave the seeds in. This is your tonic, so make it to your taste.
Save the Leftover Vinegar — After you strain the fire cider, you still have vinegar with flavor in it. Don’t throw it away! Use it in salad dressings or marinades. It’s already infused with garlic and herbs. It’s free flavor.
Variations & Substitutions
Once you’ve nailed the basic version, here’s how you can mix it up. I’ve tried all of these.
No-Honey Version — Skip the honey if you’re avoiding sugar. It will still work, but it will be very tart. Add a pinch of stevia or monk fruit if you want sweetness without the calories.
Herb-Heavy Version — Add fresh rosemary or thyme sprigs instead of dried. Fresh herbs infuse faster, so you can strain it after 2 weeks. It adds a piney, aromatic flavor.
Turmeric Boost — Add 1 tablespoon of fresh turmeric root or 1 teaspoon of turmeric powder. Turmeric is anti-inflammatory and cheap. It turns the cider a bright orange color. Add black pepper to help your body absorb it.
Lemon Zest — Add the zest of one lemon before infusing. It adds a bright, citrusy note that cuts through the heat. Don’t add the juice, or it will dilute the vinegar.
Apple Cider Alternative — If you can’t find ACV, use white vinegar. It’s cheaper, but it lacks the fruity notes of ACV. I prefer ACV, but white vinegar works in a pinch.
Serving & Storage
How to Serve:
I take 1-2 teaspoons of fire cider diluted in 4-6 ounces of water. You can drink it straight if you’re brave, but I find it too strong. Mix it with water, or add it to a spiced pear ginger mocktail for a more pleasant drink. I usually take it in the morning on an empty stomach.
Side Dishes:
Fire cider isn’t a food, so it doesn’t have side dishes. But it pairs well with any meal. I often take it before a big dinner to help digestion.
Storage Instructions:
Store in the fridge in an airtight glass bottle. It will last for 6 months or more. The vinegar preserves it. If you see mold, throw it out. But if you keep it submerged and sealed, mold is unlikely.
Reheating:
Don’t heat fire cider. The heat will destroy the beneficial enzymes. Drink it cold or at room temperature.
Nutrition Information
I’m not a nutritionist, but here’s the breakdown if you’re tracking. Note that this is per serving (1 teaspoon diluted in water).
Per Serving:
– Calories: 5
– Protein: 0g
– Carbs: 1g
– Fiber: 0g
– Sugar: 1g (from honey)
– Fat: 0g
– Sodium: 0mg
What’s Good:
– Low calorie
– Contains beneficial enzymes from ACV
– Anti-inflammatory properties from ginger and turmeric
What to Know:
– High acidity (bad for sensitive stomachs)
– Contains garlic (can cause bad breath)
– Spicy (can irritate the throat if taken undiluted)
My Take:
Look, this isn’t a meal replacement. It’s a health tonic. It’s low calorie, low cost, and high impact. When I feel a cold coming on, I double my dose. It’s not magic, but it’s better than doing nothing.
Final Thoughts
So that’s my budget-friendly fire cider immunity tonic! I’ve probably talked your ear off at this point, but when you make a remedy this often, you have a lot to say about it.
This has saved me money and health more times than I can count. It’s my answer to “how do I stay healthy without spending a fortune?” My wallet is happy, my immune system is happy, and I’m happy because I’m not stressed about buying expensive supplements.
Make it yours! Adjust the heat, add herbs, swap out roots. The best remedies are the ones you adapt to your taste. The key is consistency. Take a little every day, and you’ll see the difference.
If you make this, drop a comment and let me know what you think! I love hearing how remedies turn out in your kitchen. And if something doesn’t work, tell me that too—I’m here to help troubleshoot.
Happy sipping! And I hope your immune system feels half as strong as mine does right now.
Frequently Asked Questions
Can I use white vinegar instead of apple cider vinegar?
You can, but the flavor is different. Apple cider vinegar has a fruity, mellow taste that pairs well with the roots. White vinegar is sharper and more acidic. If you’re on a super tight budget, white vinegar works, but I recommend ACV for the taste and health benefits.
Why did my fire cider get moldy?
Mold happens if ingredients aren’t fully submerged in vinegar. Make sure everything is covered. Also, use clean, dry jars. Water introduces bacteria. If you see mold, throw it out. Don’t try to salvage it.
Can I make this ahead for a gift?
Absolutely! Make it 4 weeks before you want to give it. Strain it, bottle it, and add a label. It’s a thoughtful, healthy gift that’s cheap to make. My friends love it.
Why did my fire cider taste too strong?
It’s supposed to be strong! But if it’s unbearable, dilute it more. Try 1 teaspoon in 8 ounces of water. You can also add more honey to balance the heat. It’s a personal preference.
Can I use dried ginger instead of fresh?
You can, but you’ll need more. Use 1 tablespoon of dried ginger for every 2 inches of fresh. Dried ginger is less potent, so you need more volume. Fresh is better for flavor.
How long does homemade fire cider last?
Up to 6 months in the fridge. The vinegar preserves it. If it’s stored in a cool, dark place, it can last even longer. But I usually finish a batch before 6 months.
Can I double this recipe?
Yes! Double everything and use a larger jar. The ratios stay the same. I do this when I want to make a big batch for gifts. Just make sure your jar is big enough.
Pin This Recipe!


Budget-Friendly Fire Cider Immunity Tonic
- Total Time: 2-4 weeks (infusion time)
- Yield: 16 ounces 1x
Description
A potent, spicy, and immune-boosting fire cider made with affordable pantry staples. This DIY tonic is cheaper than store-bought versions and helps support health during cold season.
Ingredients
- 1 cup Apple Cider Vinegar (with the mother)
- 1 head Organic Garlic
- 1 large knob Fresh Ginger Root (about 2 inches)
- 1 large knob Fresh Horseradish Root (about 2 inches)
- 2–3 fresh Hot Chili Peppers (like jalapeños or serranos)
- 2 tablespoons Dried Oregano
- 1 tablespoon Dried Thyme
- 2–4 tablespoons Raw Honey
- 1 lemon (zest only, optional)
Instructions
- Wash all ingredients thoroughly. Peel the ginger and horseradish using a spoon to minimize waste.
- Mince the garlic and chop the chili peppers (wear gloves if sensitive).
- Chop the ginger and horseradish into small pieces to ensure better infusion.
- Pack the chopped roots, garlic, peppers, and dried herbs tightly into a clean 16-ounce mason jar.
- Pour the apple cider vinegar over the ingredients, ensuring everything is completely submerged. Push down any floating pieces.
- Seal the jar tightly and store it in a cool, dark place for 2-4 weeks, shaking it every few days.
- After the infusion period, strain the liquid through a fine mesh strainer or cheesecloth into a bowl, squeezing the solids to extract all liquid.
- Discard the solids and stir in the raw honey to taste.
- Pour the finished fire cider into clean glass bottles for storage.
- Store in the refrigerator for up to 6 months.
Notes
Ensure all ingredients are fully submerged in vinegar to prevent mold. Use clean, dry jars. The tonic can be diluted with water before drinking. If using white vinegar instead of ACV, the flavor will be sharper. Adjust the number of peppers based on heat preference.
- Prep Time: 10 minutes
- Cook Time: 0 minutes
- Category: Beverage
- Cuisine: American
Nutrition
- Serving Size: 1-2 teaspoons dilute
- Calories: 5
- Sugar: 1
- Carbohydrates: 1
Keywords: fire cider, immunity tonic, budget recipe, DIY health remedy, apple cider vinegar, immune boost, cheap ingredients, natural cold remedy



