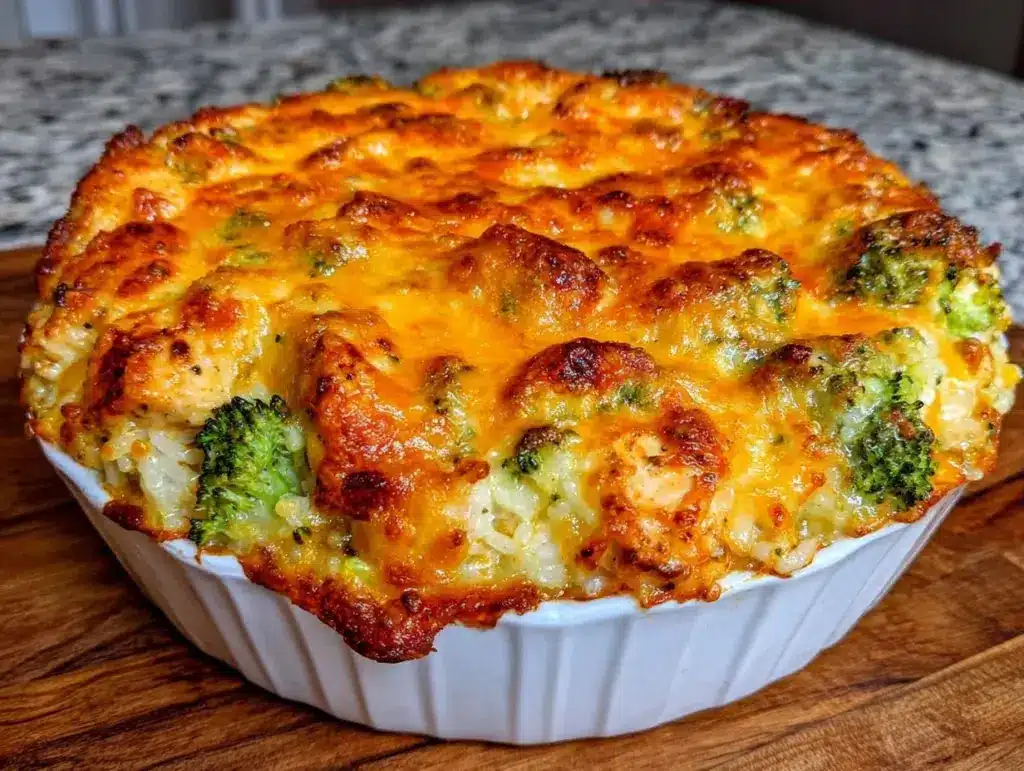
I have a confession to make. For years, I treated casseroles like a trap. You know the kind. You pull a huge, bubbling dish out of the oven, proud of yourself for making a “meal prep” dinner, and then you spend the next four days eating the same thing for lunch, feeling like your life has narrowed down to a single Tupperware container in the back of your fridge.
It’s not cooking. It’s hoarding with cheese.
But last Tuesday, I was hungry, I had leftover rotisserie chicken, and I was desperate for something warm that didn’t involve chopping a dozen vegetables. I threw together a small-batch version of what I now call my cheesy chicken broccoli rice casserole. I made it in my little 8-inch baking dish—the one that actually fits in my fridge. And because I only made enough for two people, I didn’t have to dread the leftovers. I ate it for dinner, had a small portion for lunch the next day, and then I was done. No freezer stash. No guilt. Just delicious, creamy comfort.
This is the recipe I’ve been hunting for. It’s rich, it’s salty, it’s got that perfect crispy top, and it respects your fridge space. I’ve tested this cheesy chicken broccoli rice casserole at least a dozen times, tweaking the cheese ratio and the rice cooking method until it was perfect. It’s the ultimate answer to “what’s for dinner?” when you’re cooking for one or two and don’t want to deal with a mountain of leftovers.
Why You’ll Love This Small-Batch Casserole
There are about ten reasons I keep coming back to this recipe, but here are the big ones that make it a staple in my weekly rotation.
Right-Sized Portions — Seriously, this recipe makes exactly enough for two people. Maybe three if you’re really hungry. I don’t want to be thinking about Tuesday’s lunch on Monday night. This recipe respects the fact that most of us are just cooking for ourselves or our partner.
Uses What You Have — You probably have the base ingredients already. Cooked rice (leftover or quick-cook), rotisserie chicken, frozen broccoli, and cheese. It’s the ultimate pantry-and-fridge cleanout meal. I make this when I’m too tired to go to the store.
Ready in 25 Minutes — If you use pre-cooked rice, this is a 20-minute meal. I’m talking chop, mix, bake, eat. It’s faster than ordering takeout, and it doesn’t leave you feeling heavy and sluggish afterward.
Actually Tastes Good Reheated — Because the portion is small, the “leftover” is manageable. And unlike some big casseroles that turn into a brick in the fridge, this reheats beautifully. The cheese stays creamy, the rice stays tender. I deliberately make a little extra for my next-day lunch.
Budget-Friendly — Using rotisserie chicken and frozen veggies keeps this under $10. That’s less than a sandwich at a cafe. It’s cheap, but it doesn’t taste like it.
This is my go-to when I need dinner to just work. No complicated techniques, no weird ingredients, just reliable, delicious food that makes everyone happy. It’s comfort food without the commitment.
Ingredients You’ll Need
Here’s the best part: you probably have most of this already. I’m particular about three ingredients here, and I’ll tell you exactly why.
For the Base
Cooked Rice (1.5 cups / 200g) — I use long-grain white rice or jasmine. It holds up better than brown rice in a casserole. If you’re starting from scratch, cook it ahead of time. Quick-cook rice works in a pinch, but it can get mushy if you’re not careful. Tip: I often make a big batch of rice on Sunday and use it in things like this creamy white chicken chili too.
Chicken (1.5 cups / 150g, diced) — Rotisserie chicken is your best friend here. Shred it or dice it. If you’re using raw chicken, you’ll need to cook and dice it first, but why do the extra work? I keep a rotisserie chicken in my rotation like clockwork.
Frozen Broccoli (1 cup / 90g, chopped) — Frozen is fine! Honestly, it’s easier. Just thaw it slightly and chop it into bite-sized pieces. Fresh broccoli works too, but you’ll need to blanch it first. I use frozen because it’s already chopped and I don’t have to wash anything.
Cream of Chicken Soup (1 can / 10.5oz) — Or 1 cup of homemade bechamel if you’re fancy. The canned stuff is the traditional route for that classic casserole texture. I use the low-fat version sometimes to cut calories, but full-fat tastes better. If you want a lighter version, check out my take on roasted butternut squash soup for inspiration on creamy textures without the heavy soup.
For the Flavor

Chicken Broth (¼ cup / 60ml) — Low-sodium is best so you can control the salt. Adds moisture and depth without making it soupy.
Garlic Powder (½ teaspoon) — Fresh garlic can burn in the oven. Garlic powder gives that savory backbone without the risk. I use it liberally.
Onion Powder (½ teaspoon) — Again, for that savory note without chopping. If you have fresh onion, sauté it first, but powder is faster.
Dijon Mustard (1 teaspoon) — Don’t skip this. It adds a tangy kick that cuts through the richness of the cheese and cream. It’s the secret ingredient that makes it taste restaurant-quality.
For the Cheese Topping
Shredded Cheddar (1 cup / 100g) — Use a block and shred it yourself. Pre-shredded cheese has anti-caking agents that prevent it from melting smoothly. I buy sharp cheddar for the best flavor.
Parmesan Cheese (¼ cup / 25g, grated) — This adds a salty, nutty crust on top. Mix it with a little panko breadcrumbs if you want extra crunch.
Panko Breadcrumbs (2 tablespoons / 15g) — Optional, but highly recommended. They toast up golden and crispy. Regular breadcrumbs work too, but panko is lighter.
Butter (1 tablespoon, melted) — For tossing the breadcrumbs. Keeps them golden.
Seasoning
Black Pepper (½ teaspoon, freshly cracked) — Always use fresh pepper. It makes a huge difference.
Salt (½ teaspoon, or to taste) — Taste before adding! The soup and cheese are already salty.
Equipment Needed
You don’t need fancy equipment for this. Here’s what I actually use.
8×8 Inch Baking Dish — This is crucial for the small-batch size. A 9×13 will leave you with a thin, dry casserole. An 8×8 keeps it thick and creamy. I use a ceramic one because it retains heat well.
Large Mixing Bowl — Any bowl that can hold 4 cups of ingredients. I use a glass bowl so I can see the ratio easily.
Measuring Cups and Spoons — Standard stuff. Dollar store versions work fine.
Fork — For mixing. A spoon works too, but a fork breaks up the chicken better.
Small Skillet — Optional, for toasting the breadcrumbs. I usually just toss them in the bowl with melted butter.
Knife and Cutting Board — For chopping the broccoli and dicing the chicken if needed.
Grater — For the cheese. A box grater is fine. If you’re lazy, buy pre-shredded, but I promise your taste buds will thank you for grating your own.
How to Make It: Step-by-Step
Alright, let’s make this! I’m walking you through exactly how I do it, including the little tricks I’ve picked up.
Step 1: Prep Your Ingredients (5 minutes)
Before you start cooking, make sure your rice is cooked and cooled slightly. If using frozen broccoli, let it thaw and chop it into small florets. Dice your chicken into bite-sized pieces. Grate your cheddar. Have everything measured out and ready. I know it seems fussy, but it makes the actual assembly way less stressful.
Step 2: Preheat the Oven (2 minutes)
Preheat your oven to 375°F (190°C). Grease your 8×8 inch baking dish with a little butter or cooking spray. This prevents sticking and helps the top crisp up.
Step 3: Mix the Base (3 minutes)
In your large mixing bowl, combine the cooked rice, diced chicken, and chopped broccoli. Stir in the cream of chicken soup, chicken broth, garlic powder, onion powder, Dijon mustard, salt, and pepper. Mix until everything is evenly coated. The mixture should look creamy and cohesive. If it looks too dry, add a splash more broth. If it looks too soupy, add a bit more rice.
Step 4: Transfer to Dish (1 minute)
Pour the mixture into your prepared baking dish. Use a spoon to spread it out evenly. Press down slightly with the back of the spoon to create a flat surface. This helps the cheese melt evenly.
Step 5: Add the Cheese Topping (2 minutes)
Sprinkle the shredded cheddar evenly over the top. If you’re using panko breadcrumbs, mix them with the melted butter and sprinkle over the cheese. This creates a golden, crispy crust. I love the contrast of the crispy top and the creamy inside.
Step 6: Bake (15-20 minutes)
Place the dish in the preheated oven. Bake for 15-20 minutes, or until the cheese is bubbly and golden brown. The edges should be bubbling too. If your oven runs hot, check it at 15 minutes. If you want extra browning, you can broil for the last 1-2 minutes, but watch it closely so it doesn’t burn.
Step 7: Rest and Serve (5 minutes)
Remove from the oven and let it rest for 5 minutes. This allows the sauce to thicken slightly and makes it easier to scoop. Serve immediately. It’s hot, cheesy, and perfect.
Total Time: About 30 minutes (10 minutes active, 20 minutes baking)
Built-in Troubleshooting
- Sauce too thick? Add a splash of milk or broth before baking.
- Sauce too watery? Bake for an extra 5 minutes to evaporate moisture.
- Top not browning? Make sure your oven is fully preheated. Broil for the last minute if needed.
Expert Tips & Tricks
Here’s everything I’ve learned from making this dozens of times. These tips will save you from my mistakes.
Don’t Skip the Resting Time
Casseroles continue to set as they cool. If you dig in immediately, it might look a bit loose. Letting it rest for 5 minutes makes the texture perfect. It’s worth the wait.
Use Sharp Cheddar
Mild cheddar is fine, but sharp or extra-sharp cheddar has more flavor. Since you’re using a small amount, make it count. I buy a block of sharp cheddar and grate it fresh. It melts better and tastes better.
Toast the Breadcrumbs
If you’re using panko, toast them in a dry skillet for 2 minutes before mixing with butter. This adds an extra layer of nutty flavor. It’s a small step that makes a big difference.
Control the Salt
Cream of soup and cheese are salty. Taste your mixture before adding salt. I usually add only half the recommended salt and adjust after baking. You can always add more, but you can’t take it away.
Vary the Cheese
Cheddar is classic, but try mixing in some Monterey Jack for meltiness, or Gruyère for a fancy twist. I occasionally add a little cream cheese to the mixture for extra creaminess. It’s like a baked mac and cheese.
Common Mistakes
- Mistake: Using hot rice. Hot rice can cook the broccoli further and make it mushy. Let the rice cool slightly before mixing.
- Mistake: Overcrowding the dish. If you use a 9×13 dish, the casserole will be thin and dry. Stick to the 8×8 for this recipe size.
- Mistake: Skipping the mustard. The mustard adds acidity that balances the richness. Don’t skip it.
Variations & Substitutions
Once you’ve nailed the basic version, here’s how you can mix it up. I’ve tried all of these.
Turkey Version
Use leftover turkey instead of chicken. Perfect for post-holiday cleanout. Same delicious flavor.
Vegetarian Version
Skip the chicken and add 1 cup of sautéed mushrooms or cauliflower. I use mushrooms for that savory “meaty” bite. It’s just as filling.
Spicy Version
Add ½ teaspoon of cayenne pepper or a diced jalapeño to the mixture. Top with pepper jack cheese. Great if you like a kick.
Rice Substitution
Use quinoa or couscous instead of rice. Quinoa adds protein and a nutty flavor. Couscous cooks faster but can get soft. I prefer rice for texture.
Soup Substitution
Make your own cream sauce. Melt 2 tablespoons butter, whisk in 2 tablespoons flour, and slowly add 1 cup milk. Cook until thickened. It’s healthier and tastes fresher.
Gluten-Free
Use gluten-free cream of chicken soup (or make your own bechamel with GF flour). The rest is naturally GF. I use this method for my vegan mushroom stroganoff too.
Serving & Storage
How to Serve:
I usually serve this straight from the baking dish at the dinner table. It looks rustic and stays warm. Pair it with a simple green salad or roasted asparagus. I also love it with a slice of apple cheddar grilled cheese on the side for extra comfort.
Toppings Bar:
When I have guests, I put out: extra cheddar, crispy bacon bits, chopped chives, and hot sauce. Everyone customizes their bowl.
Refrigerator:
Store in an airtight container for up to 4 days. The sauce will thicken in the fridge—totally normal.
Reheating:
Best method: Add to a microwave-safe dish, add a splash of milk, and heat in 30-second intervals, stirring between. The milk brings back the creaminess.
Oven method: Cover with foil and bake at 350°F for 15 minutes. Uncover for the last 5 minutes to crisp the top.
Freezing:
This doesn’t freeze well because of the dairy. The sauce separates when thawed. Make it fresh or store in the fridge for up to 4 days.
Pro tip: If leftovers are drying out, stir in a tablespoon of butter and a splash of milk when reheating. Brings back that creamy texture.
Nutrition Information
I’m not a nutritionist, but here’s the breakdown if you’re tracking.
Per Serving (based on 2 servings):
– Calories: 480
– Protein: 28g
– Carbs: 42g
– Fiber: 3g
– Sugar: 4g
– Fat: 22g
– Saturated Fat: 12g
– Cholesterol: 85mg
– Sodium: 650mg
– Calcium: 300mg
What’s Good:
– Decent protein from chicken and cheese
– Calcium from the cheese
– Can add vegetables to boost nutrition
What to Know:
– Higher in calories from cream and cheese
– Contains dairy and gluten
– Moderate sodium (use low-sodium soup and broth to reduce)
My Take:
“Look, this is comfort food with cream and cheese. It’s not a diet recipe. But it’s way better than takeout, costs less, and I know exactly what’s in it. When I want to make it lighter, I use low-fat soup and less cheese. But usually? I just eat a reasonable portion and enjoy it.”
Final Thoughts
So that’s my go-to cheesy chicken broccoli rice casserole! I’ve probably talked your ear off at this point, but when you make a recipe this often, you have a lot to say about it.
This has saved weeknight dinners more times than I can count. It’s my answer to “what’s for dinner?” when I’m tired, don’t want takeout, and still want something that tastes really good. I’m happy because I’m not stressed about cooking, and I don’t have a week of leftovers staring at me.
Make it yours! Try different add-ins, swap in your favorite vegetables, adjust the garlic (though more is always better in my opinion). The best recipes are the ones you adapt to your family’s tastes.
If you make this, drop a comment and let me know what you think! I love hearing how recipes turn out in your kitchen. And if something doesn’t work, tell me that too—I’m here to help troubleshoot.
Happy cooking! And I hope your kitchen smells half as good as mine does right now.
Frequently Asked Questions
Can I use brown rice instead of white rice?
You can, but brown rice has a chewier texture and takes longer to cook. It might not absorb the sauce as well. If you use brown rice, make sure it’s fully cooked and slightly cooled. I prefer white rice for the creamy texture, but brown rice works if you’re watching your carbs.
My sauce came out watery—what happened?
Usually means you didn’t bake it long enough, or you added too much broth. Let the casserole bake for the full 20 minutes. The rice absorbs moisture as it cools. If it’s still watery, bake for an extra 5 minutes uncovered.
Can I make this ahead for a dinner party?
Yes! Assemble the casserole up to 24 hours ahead and store in the fridge. Bake it when you’re ready to serve. You might need to add 5-10 minutes to the baking time since it’s starting cold. This is great for meal prep.
Why did my top not brown?
Your oven might not be hot enough, or you didn’t use the panko/butter topping. Make sure your oven is preheated to 375°F. If you want extra browning, broil for the last 2 minutes, but watch it closely.
Can I use fresh broccoli?
Yes! Just chop it into small florets and blanch it in boiling water for 2-3 minutes before adding to the casserole. This ensures it’s tender after baking. Frozen broccoli is easier, but fresh tastes fresher.
How do I reheat leftovers without it getting dry?
Add a splash of milk or broth to the leftovers before reheating. This adds moisture back into the sauce. Microwave in 30-second intervals, stirring between. Or reheat in the oven at 350°F covered with foil.
Can I double this recipe?
Absolutely! Double everything and use a 9×13 inch baking dish. The cooking time will increase by about 5-10 minutes. I do this when I’m feeding a small group or meal-prepping for the week.
Pin This Recipe!


Cheesy Chicken Broccoli Rice Casserole
- Total Time: 30 minutes
- Yield: 2 servings 1x
Description
A small-batch, creamy comfort food casserole designed for 1-2 servings. It uses rotisserie chicken, frozen broccoli, and a cheesy topping for a quick, budget-friendly weeknight dinner without excessive leftovers.
Ingredients
- 1.5 cups cooked long-grain white rice or jasmine rice
- 1.5 cups diced rotisserie chicken
- 1 cup frozen broccoli, chopped
- 1 can (10.5 oz) cream of chicken soup
- 1/4 cup chicken broth
- 1/2 teaspoon garlic powder
- 1/2 teaspoon onion powder
- 1 teaspoon Dijon mustard
- 1 cup shredded sharp cheddar cheese
- 1/4 cup grated Parmesan cheese
- 2 tablespoons panko breadcrumbs
- 1 tablespoon melted butter
- 1/2 teaspoon freshly cracked black pepper
- 1/2 teaspoon salt (or to taste)
Instructions
- Preheat oven to 375°F (190°C) and grease an 8×8 inch baking dish.
- Prepare ingredients: Ensure rice is cooled, thaw and chop broccoli, and dice chicken.
- In a large mixing bowl, combine cooked rice, diced chicken, and chopped broccoli.
- Add cream of chicken soup, chicken broth, garlic powder, onion powder, Dijon mustard, salt, and pepper. Mix until evenly coated.
- Transfer mixture to the prepared baking dish and spread evenly.
- Sprinkle shredded cheddar and Parmesan cheese over the top.
- Mix panko breadcrumbs with melted butter and sprinkle over the cheese for a crispy topping.
- Bake for 15-20 minutes until cheese is bubbly and golden brown.
- Let rest for 5 minutes before serving to allow sauce to thicken.
Notes
Use sharp cheddar for better flavor and melting. If the sauce is too thick, add a splash of milk or broth. If too watery, bake for an extra 5 minutes. Let the casserole rest for 5 minutes after baking to set. Do not freeze as the dairy sauce may separate.
- Prep Time: 10 minutes
- Cook Time: 20 minutes
- Category: Main Course
- Cuisine: American
Nutrition
- Serving Size: Approximately 1/2 of
- Calories: 480
- Sugar: 4
- Sodium: 650
- Fat: 22
- Saturated Fat: 12
- Carbohydrates: 42
- Fiber: 3
- Protein: 28
Keywords: small batch casserole, chicken broccoli rice, weeknight dinner, rotisserie chicken recipes, comfort food, budget friendly dinner, 30 minute meals



