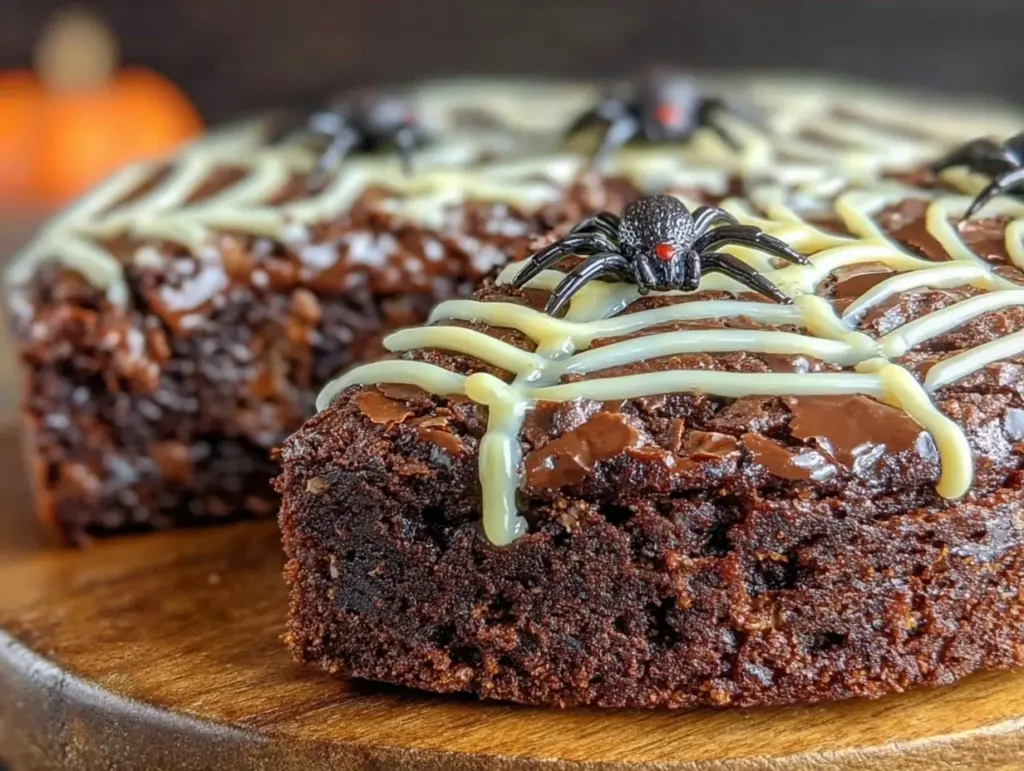
Last October, I stood in my kitchen, staring at a tray of cookies that looked less like a spooky treat and more like a baking failure. I was making a giant chocolate cookie cake for my niece’s party, intending to drizzle a delicate spiderweb design over the top. I had the idea, I had the ingredients, but I had absolutely no patience for the cooling time.
So, I did the unthinkable. I tried to pipe the white chocolate web onto the warm cookie. Big mistake. The white chocolate melted instantly, bleeding into the dark chocolate base. What was supposed to be a crisp, intricate web looked like a melted white blob. I was mortified. I scraped it off, threw it in the trash, and started over. But this time, I changed one thing: I let the cookie cake cool completely. And then I added one specific step that changed everything.
That night, I discovered the secret to a perfect spiderweb design isn’t just about the piping technique—it’s about the temperature of your cookie cake and the viscosity of your chocolate. It’s a simple adjustment, but it’s the difference between a cookie that looks like a disaster and one that looks like it came from a high-end bakery. I’ve made this Halloween Chocolate Spiderweb Cookie Cake three times since then, tweaking the ratio of white to dark chocolate until it was foolproof.
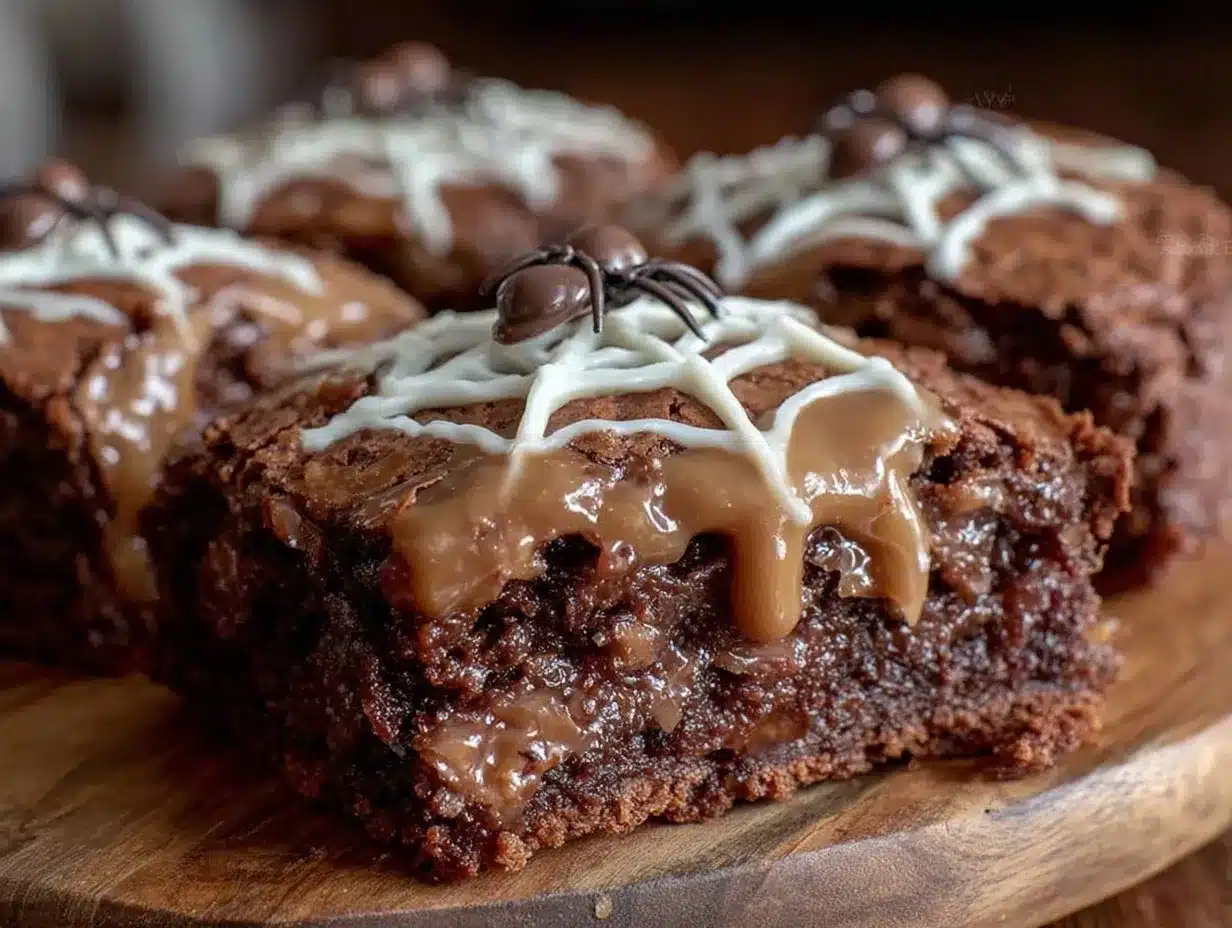
Here’s the thing about baking for parties: you want something that looks impressive but doesn’t require a degree in pastry arts. This cookie cake fits that bill perfectly. It’s essentially a giant, chewy chocolate chip cookie, but with a dramatic, spooky twist. The base is rich and fudgy, packed with semi-sweet chocolate chunks, and the top features a stark, beautiful white chocolate web that contrasts sharply against the dark background. It’s visually striking, easy to slice, and honestly? It’s the easiest dessert I’ve made all season.
I’ve tested this recipe with different chocolate brands, different cookie sizes, and even different piping tips. I’ve learned what works and what doesn’t. And I’m sharing it all with you so you can skip my mistakes and go straight to the “wow” factor. If you’re looking for a dessert that screams Halloween but tastes like comfort, this is it. It’s better than my brown butter chocolate chip cookies for parties because it’s a single, shareable unit that looks like you spent hours on it.
Why You’ll Love This Spiderweb Cookie Cake
There are about ten reasons I keep coming back to this recipe, but here are the big ones that make it a party staple.
It Looks Way Harder Than It Is — Seriously. The spiderweb design is mostly accidental magic. You’re just dragging a toothpick through two layers of chocolate. It takes 30 seconds. But when you pull that toothpick away, you get this intricate, lace-like pattern that makes people ask, “How did you do that?” Spoiler: You don’t need to be an artist. You just need patience.
It’s a Crowd-Pleaser — I’ve served this to picky eaters and chocolate snobs alike. The base is a classic chocolate chip cookie, but made larger and chewier. It’s familiar, so everyone feels comfortable eating it. But the web design adds that “special occasion” vibe. It’s perfect for Halloween, but honestly? It works for any fall gathering. It’s like my cranberry orange shortbread bars, but chocolate-focused and way more dramatic.
Zero Waste, Maximum Impact — Unlike a layered cake that requires frosting, filling, and structural integrity, this cookie cake is sturdy. You can bake it, decorate it, and transport it in the same pan. No fragile layers to collapse in the car. I’ve driven this across town in the backseat of my hatchback, and it didn’t even budge.
It Uses Simple Ingredients — You don’t need exotic flours or rare chocolates. Just butter, sugar, eggs, flour, baking soda, salt, and two types of chocolate. If you can make a standard chocolate chip cookie, you can make this. I’ve walked my teenage daughter through the entire process while we watched a scary movie. She didn’t burn the kitchen down, and the cookies were delicious.
Makes Amazing Leftovers — Actually, this is the best part. The cookie cake gets chewier as it sits. I deliberately make extra slices for the next day’s breakfast. Pair it with a glass of cold milk, and it’s basically a dessert-for-breakfast situation. My husband loves it so much he hides the leftovers in his desk drawer. Don’t let that happen to you.
This is my go-to when I need a dessert that looks impressive but doesn’t require me to stand over a stove for hours. It’s reliable, delicious, and makes everyone happy. And if you’re looking for other easy party treats, you might also enjoy these football party brownie bites for a smaller, bite-sized option.
Ingredients You’ll Need
Here’s the best part: you probably have most of this already. I’m particular about three ingredients here, and I’ll tell you exactly why.
Unsalted Butter (1 cup / 226g) — Softened to room temperature. This is crucial. If your butter is too cold, it won’t cream properly with the sugar, and your cookie cake will be dense. If it’s melted, it’ll spread too much. Aim for cool room temp—soft enough to leave an indent when you press it, but still solid.
Brown Sugar (1 cup / 200g) — Packed. This is the secret to the chewy texture. White sugar makes cookies crisp; brown sugar makes them soft and chewy. Don’t skimp on the amount. The molasses in brown sugar also adds a subtle caramel flavor that pairs beautifully with the dark chocolate.
Granulated Sugar (½ cup / 100g) — This helps with the spread and gives a slight crisp edge. I like the contrast between the soft center and the crisp edges.
Eggs (2 large) — Room temperature. They help bind everything together and add structure. Cold eggs can cause the butter to seize up slightly when mixed, so let them sit out for 30 minutes before you start.
Vanilla Extract (2 teaspoons) — Use real vanilla, not imitation. It makes a huge difference in chocolate desserts. I use pure vanilla bean paste sometimes for a speckled look, but regular extract works fine.
All-Purpose Flour (2 ½ cups / 315g) — Spoon and level method! Don’t scoop directly from the bag, or you’ll pack too much flour in, and your cookie cake will be dry. Spoon it into the measuring cup and level it off with a knife. This ensures the right ratio of flour to wet ingredients.
Baking Soda (1 teaspoon) — This helps the cookie cake rise slightly and brown. Make sure it’s not old. If it’s been sitting in your pantry for years, it might not work. Test it by adding a drop of vinegar—if it fizzes, it’s good.
Salt (1 teaspoon) — Essential for balancing the sweetness. Don’t skip it. It enhances the chocolate flavor.
Semi-Sweet Chocolate Chunks (2 cups / 340g) — I use Ghirardelli 60% Cacao chips or chunks. They melt nicely but hold their shape. You can also use a chopped chocolate bar for a more artisanal look. This goes *inside* the dough.
Dark Chocolate Chips or Chunks (1 cup / 170g) — This is for the base of the web design. Use a darker chocolate (70% or higher) for maximum contrast with the white chocolate. If you use milk chocolate, the web won’t pop as much.
White Chocolate Chips or Chunks (1 cup / 170g) — For the web design. I prefer white chocolate chips because they melt evenly. If you use chunks, chop them finely so they melt smoothly.
Vegetable Oil (1 tablespoon) — This is the one trick ingredient. Adding a tiny bit of oil to your melted white chocolate makes it more fluid and easier to pipe. It also helps the web design set with a slight sheen instead of a matte, chalky finish.
Equipment Needed
You don’t need fancy equipment for this. Here’s what I actually use.
12-Inch Round Springform Pan — This is ideal because it allows you to remove the cookie cake easily without flipping it over. If you don’t have one, a 12-inch pizza pan or a large round cake pan works, but you’ll need to line it well with parchment paper. The springform pan is worth the investment if you bake often.
Large Mixing Bowl — For the dough. I use a glass bowl because it’s easy to see how much dough I have.
Electric Hand Mixer or Stand Mixer — Creaming the butter and sugar by hand is possible but exhausting. I use my hand mixer for 2-3 minutes. It’s worth it for the texture.
Piping Bag or Ziploc Bag — For the white chocolate web. I use a small Ziploc bag and snip the corner. It’s cheaper and just as effective as a piping bag for this technique.
Toothpicks — For creating the web pattern. You’ll need a few, just in case you break one.
Offset Spatula — Optional, but helpful for spreading the melted chocolate evenly over the cookie cake. A regular spatula works too, just be gentle.
How to Make It: Step-by-Step
Alright, let’s make this! I’m walking you through exactly how I do it, including the little tricks I’ve picked up.
Step 1: Prep Your Pan and Oven (5 minutes)
Preheat your oven to 350°F (175°C). Line the bottom of your 12-inch springform pan with a circle of parchment paper. You don’t need to grease the sides, but a light spray of non-stick cooking spray helps ensure easy removal. This step is crucial—without parchment, the cookie cake might stick, and you’ll lose that beautiful web design when you try to lift it out.
Step 2: Cream the Butter and Sugars (3-4 minutes)
In a large bowl, beat the softened unsalted butter, brown sugar, and granulated sugar together on medium-high speed until light and fluffy. This should take about 3-4 minutes. The mixture will lighten in color and increase slightly in volume. Don’t rush this step. Proper creaming incorporates air, which helps the cookie cake rise and get that tender crumb. If you skip it, you’ll end up with a dense, flat cookie.
Step 3: Add Eggs and Vanilla (2 minutes)
Add the eggs one at a time, beating well after each addition. Scrape down the sides of the bowl with a spatula to ensure everything is incorporated. Add the vanilla extract and mix until combined. The mixture should look smooth and glossy.
Step 4: Mix Dry Ingredients (1 minute)
In a separate medium bowl, whisk together the flour, baking soda, and salt. This ensures the baking soda is evenly distributed, so you don’t get bitter spots in your cookie cake.
Step 5: Combine Wet and Dry (2 minutes)
Gradually add the dry ingredients to the wet ingredients, mixing on low speed until just combined. Be careful not to overmix. Overmixing develops gluten, which makes the cookie cake tough. Stop mixing as soon as you no longer see streaks of flour.
Step 6: Fold in Chocolate Chunks (2 minutes)
Using a spatula, gently fold in the semi-sweet chocolate chunks. Distribute them evenly throughout the dough. You want chunks in every bite. This is also a good time to add any other mix-ins you like, like chopped nuts or dried fruit, if you’re feeling fancy.
Step 7: Press Dough into Pan (3 minutes)
Transfer the dough to your prepared pan. Press it out evenly with your hands or a spatula. The dough will be thick, so wet your hands slightly to prevent sticking. Press it all the way to the edges. Bake for 20-25 minutes, or until the edges are golden brown and the center is set but still slightly soft. It will continue to cook as it cools.
Step 8: Cool Completely (Crucial Step!)
This is the most important part. Let the cookie cake cool in the pan for 10 minutes, then remove it from the pan and let it cool completely on a wire rack. If you try to decorate it while it’s warm, the chocolate will melt, and your web design will be a mess. I know it’s hard to wait, but patience pays off. Let it cool for at least 1 hour, preferably 2.
Step 9: Melt the Chocolate (5 minutes)
While the cookie cake cools, melt the dark chocolate and white chocolate separately. I use a microwave in 30-second intervals, stirring between each, until smooth. For the white chocolate, stir in the 1 tablespoon of vegetable oil. This makes it fluid and glossy. Pour the melted dark chocolate onto a small bowl or plate.
Step 10: Create the Web Design (10 minutes)
Here’s the magic moment. Take your cooled cookie cake and drizzle the melted dark chocolate over the top in a random, messy pattern. Don’t worry about being neat. Then, drizzle the white chocolate over the dark chocolate in the opposite direction. You want a chaotic mix of dark and white lines.
Now, take a toothpick and start from the center. Drag it outward to the edge, creating a radial line. Then, drag the toothpick in a spiral pattern, connecting the radial lines. You’re creating a spiderweb! If you mess up, just wait a minute for the chocolate to set slightly, then try again. The chocolate is forgiving.
Let the chocolate set completely at room temperature or in the fridge for 15 minutes. Once set, your cookie cake is ready to serve.
Expert Tips & Tricks
Here’s everything I’ve learned from making this dozens of times. These tips will save you from my mistakes.
Temperature Control is Key
The biggest mistake people make is decorating too soon. The cookie cake must be completely cool. If the center is even slightly warm, the chocolate will melt and lose its definition. I usually bake the cookie cake in the morning and decorate it in the evening. That’s the safest bet.
The Oil Trick for White Chocolate
White chocolate is thick and can be hard to pipe. Adding a teaspoon of vegetable oil (or coconut oil) thins it out without affecting the flavor. It also helps the chocolate set with a nicer shine. I tested this with and without oil, and the oil version is definitely superior for web design.
Don’t Overmix the Dough
As I mentioned, overmixing leads to tough cookies. Mix until just combined. It’s okay if there are a few small lumps of flour. They’ll disappear during baking.
Use a Toothpick, Not a Fork
A fork creates a jagged, uneven pattern. A toothpick gives you a fine, delicate line that looks like a real spiderweb. If you don’t have toothpicks, a thin skewer works too.
Chill Before Serving
For the cleanest slices, chill the cookie cake in the fridge for 30 minutes before cutting. The chocolate will be firm, and the cookie will hold its shape. Use a sharp knife, wiping it clean between cuts.
Variations & Substitutions
Once you’ve nailed the basic version, here’s how you can mix it up. I’ve tried all of these.
Double Chocolate
Add ¼ cup cocoa powder to the dry ingredients for a deeper chocolate flavor. Use dark chocolate for both the drizzle and the web for a monochromatic look. This is great for serious chocolate lovers.
Pumpkin Spice
Add 1 teaspoon pumpkin pie spice to the dry ingredients. Use orange chocolate for the web instead of white for a Halloween color scheme. It’s like a pumpkin pie in cookie form.
Red Velvet
Replace 2 tablespoons of flour with cocoa powder and add 1 teaspoon red food coloring to the wet ingredients. Use white chocolate for the web and red chocolate for the base. It’s festive and fun.
Nutty
Add 1 cup chopped pecans or walnuts to the dough. Toast the nuts first for extra flavor. This adds a nice crunch and balances the sweetness.
Gluten-Free
Use a 1:1 gluten-free flour blend. Make sure it contains xanthan gum, or add ½ teaspoon yourself. The texture will be slightly more crumbly, but still delicious.
Serving & Storage
How to Serve:
I usually serve this at room temperature. It’s soft, chewy, and the chocolate is at its most flavorful. Cut into wedges like a pizza. It’s perfect for Halloween parties, school events, or just a spooky Tuesday night.
Side Dishes:
Pair it with a glass of cold milk, a cup of coffee, or even a scoop of vanilla ice cream. The contrast of hot and cold is amazing.
Storage:
Store in an airtight container at room temperature for up to 5 days. The chocolate web might soften slightly in humid weather, but the flavor remains great. If it gets too soft, chill it briefly before serving.
Freezing:
You can freeze the cookie cake before decorating. Wrap it tightly in plastic wrap and foil. Thaw overnight in the fridge. Decorate after thawing. Do not freeze after decorating, as the chocolate will bloom and lose its shine.
Nutrition Information
I’m not a nutritionist, but here’s the breakdown if you’re tracking. Note that this is a rich, indulgent dessert, so portions matter.
Per Serving (based on 12 slices):
- Calories: 480
- Protein: 6g
- Carbs: 62g
- Fiber: 3g
- Sugar: 42g
- Fat: 24g
- Saturated Fat: 14g
- Cholesterol: 45mg
- Sodium: 280mg
It’s high in sugar and fat, as expected for a chocolate cookie cake. But it’s also made with real ingredients, no artificial flavors, and it’s homemade. I enjoy a slice with my morning coffee, and I feel good about it.
Final Thoughts
So that’s my Halloween Chocolate Spiderweb Cookie Cake! I hope you try it. It’s become my favorite fall baking project because it’s visually stunning but technically simple. The one trick—the temperature control and the oil in the white chocolate—makes all the difference.
Make it yours! Try different chocolate types, add nuts, or change the web pattern. The best recipes are the ones you adapt to your family’s tastes. If you make this, drop a comment and let me know what you think! I love hearing how recipes turn out in your kitchen.
Happy baking! And I hope your kitchen smells as good as mine does right now.
Frequently Asked Questions
Can I use milk chocolate instead of dark chocolate?
You can, but the contrast won’t be as dramatic. Dark chocolate (70% or higher) provides a stark background that makes the white web pop. If you use milk chocolate, the web might blend in too much. If you prefer a milder flavor, try using a bittersweet chocolate.
Why did my web design look messy?
This usually happens if the chocolate is too warm or if you drag the toothpick too quickly. Make sure the chocolate is fluid but not hot. Drag the toothpick slowly and steadily. If you mess up, wait for it to set and try again. It’s hard to ruin it completely.
Can I make this ahead of time?
Yes! Bake the cookie cake up to 2 days ahead. Store it in an airtight container. Decorate it the day of the party. This is actually better because the cookie has time to set and become chewy.
Can I use a different pan size?
A 10-inch pan will work, but the cookie cake will be thicker. Bake time may need to increase by 5-10 minutes. A 13×9 pan will make it thinner and crispier. Adjust baking time accordingly. The 12-inch springform is ideal for the perfect thickness.
Is there a way to make it healthier?
You can use whole wheat flour for half the all-purpose flour, or use dark chocolate chunks with lower sugar content. You can also reduce the sugar by ¼ cup, but it might affect the texture. It’s not a health food, but small tweaks can make it slightly lighter.
Pin This Recipe!
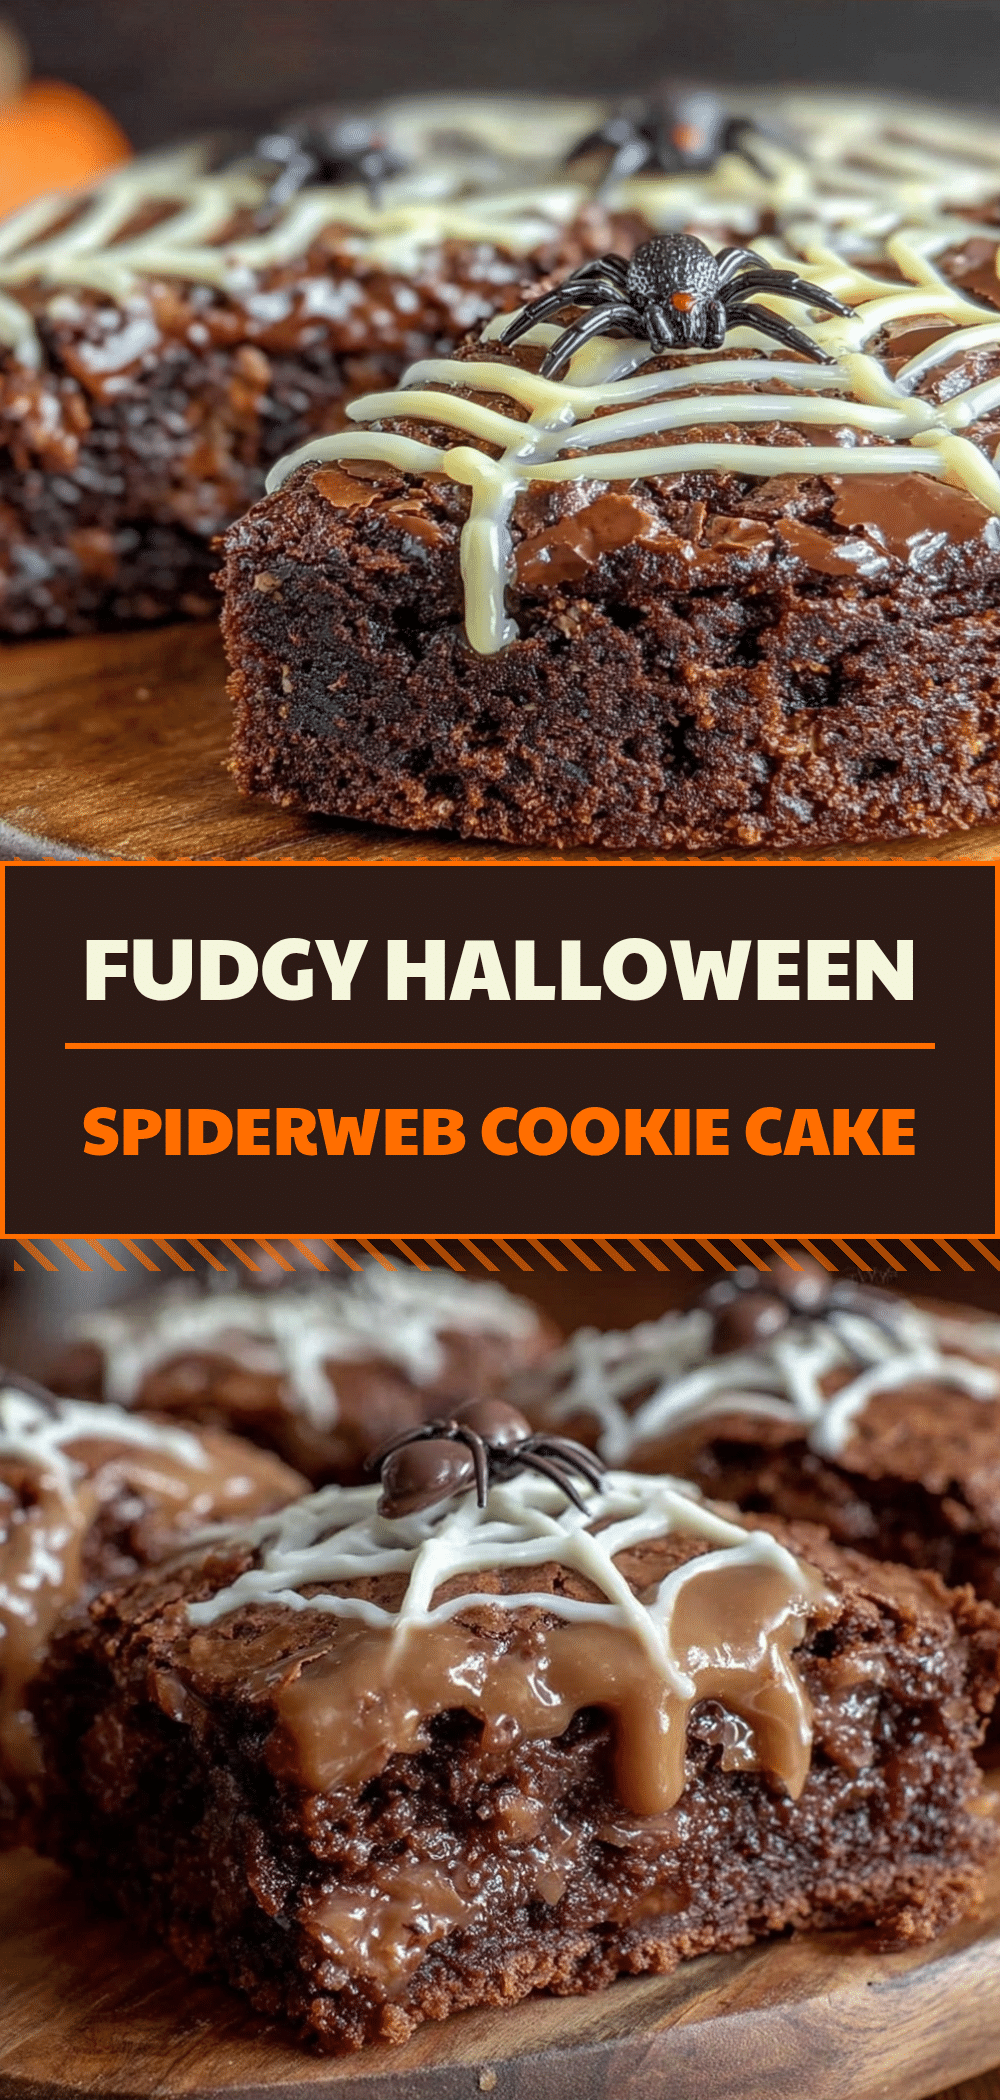
Halloween Chocolate Spiderweb Cookie Cake
- Total Time: 40 minutes
- Yield: 12 servings 1x
Description
A giant, chewy chocolate chip cookie cake decorated with a dramatic white chocolate spiderweb design. This dessert is visually striking, easy to make, and perfect for Halloween parties or fall gatherings.
Ingredients
- 1 cup (226g) unsalted butter, softened to room temperature
- 1 cup (200g) brown sugar, packed
- ½ cup (100g) granulated sugar
- 2 large eggs, room temperature
- 2 teaspoons vanilla extract
- 2 ½ cups (315g) all-purpose flour
- 1 teaspoon baking soda
- 1 teaspoon salt
- 2 cups (340g) semi-sweet chocolate chunks
- 1 cup (170g) dark chocolate chips or chunks (70% or higher)
- 1 cup (170g) white chocolate chips or chunks
- 1 tablespoon vegetable oil
Instructions
- Preheat oven to 350°F (175°C). Line the bottom of a 12-inch springform pan with parchment paper and lightly spray sides with non-stick spray.
- In a large bowl, beat softened butter, brown sugar, and granulated sugar on medium-high speed for 3-4 minutes until light and fluffy.
- Add eggs one at a time, beating well after each addition. Scrape down bowl sides. Add vanilla extract and mix until combined.
- In a separate medium bowl, whisk together flour, baking soda, and salt.
- Gradually add dry ingredients to wet ingredients on low speed, mixing only until just combined. Do not overmix.
- Gently fold in semi-sweet chocolate chunks until evenly distributed.
- Transfer dough to prepared pan. Press evenly to edges. Bake for 20-25 minutes until edges are golden brown and center is set but slightly soft.
- Cool in pan for 10 minutes, then remove from pan and cool completely on a wire rack (at least 1 hour, preferably 2).
- While cookie cools, melt dark chocolate and white chocolate separately in microwave intervals. Stir vegetable oil into melted white chocolate.
- Drizzle melted dark chocolate randomly over cooled cookie cake. Drizzle white chocolate over dark chocolate in opposite direction.
- Drag a toothpick from center outward to create radial lines, then drag in a spiral pattern to create web design.
- Let chocolate set completely at room temperature or in fridge for 15 minutes before serving.
Notes
The cookie cake must be completely cool before decorating to prevent the chocolate from melting. Adding vegetable oil to the white chocolate makes it more fluid and glossy for easier piping. For clean slices, chill the cake for 30 minutes before cutting.
- Prep Time: 15 minutes
- Cook Time: 25 minutes
- Category: Dessert
- Cuisine: American
Nutrition
- Serving Size: 1 slice (1/12 of cak
- Calories: 480
- Sugar: 42
- Sodium: 280
- Fat: 24
- Saturated Fat: 14
- Carbohydrates: 62
- Fiber: 3
- Protein: 6
Keywords: Halloween dessert, chocolate cookie cake, spiderweb cookies, easy party dessert, chocolate chip cookie cake, fall baking



