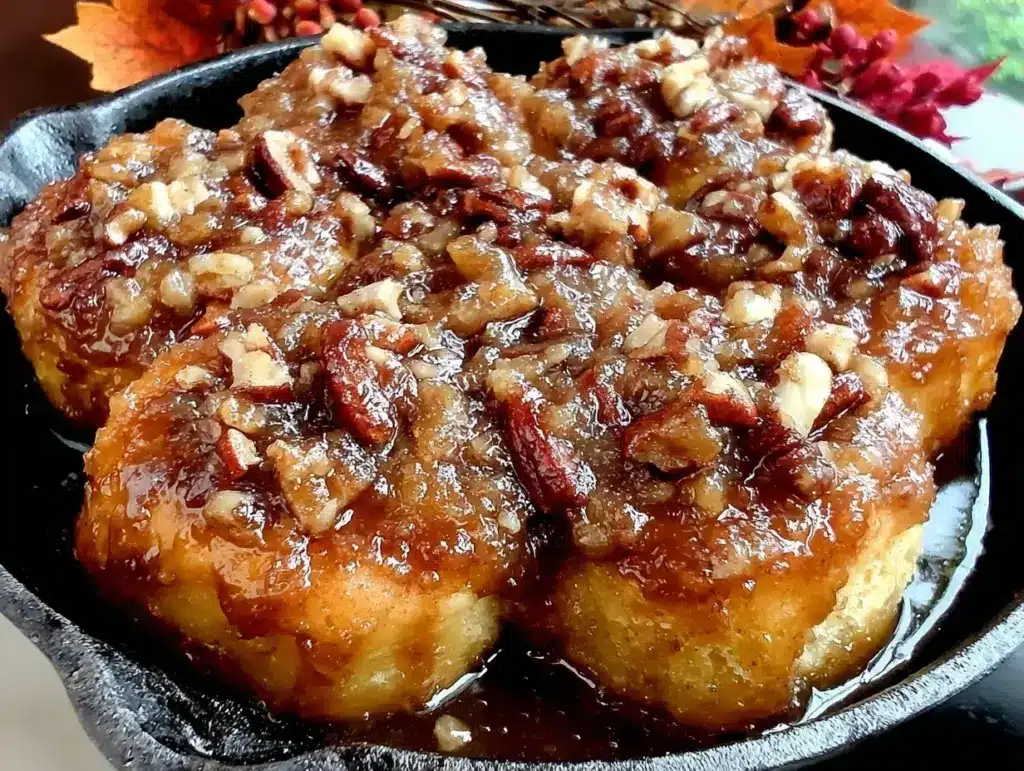
It started as a Tuesday mistake, but it ended up being the reason my neighbors started waving to me from across the fence. I was trying to save my Sunday morning by prepping fall maple pecan sticky buns the night before, but I got distracted by a phone call and forgot to cover the dough properly. When I woke up at 5:30 AM, the kitchen smelled like a bakery, but the dough had risen so much it was pressing against the lid of the container. Panic set in. I was going to have dense, over-proofed bricks.
So I did something reckless. I dumped the dough into the pans, added way more brown sugar and butter than the recipe called for, and poured on a glaze that I basically eyeballed because I was running on zero sleep. I threw them in the oven and went back to bed.
When I pulled them out, they weren’t bricks. They were gooey, caramelized, sticky masterpieces. The extra sugar created a deeper, almost burnt-caramel crust that I’d never achieved with perfect timing. My husband took one bite, closed his eyes, and said, “Stop making these on random Tuesdays. I can’t handle the competition.” That was two years ago. Now, every time I make fall maple pecan sticky buns, I use that same “messy” method. It’s not about being perfect; it’s about getting that deep, sticky flavor that keeps people asking for the recipe at brunch.
I’ve tested this recipe at least fifteen times—sometimes with the panic, sometimes with perfect timing—and this version is the one that actually works. It’s rich, it’s fall in a bun, and it has one specific trick for the glaze that changes everything. If you’ve ever struggled with sticky buns that are dry or bland, you’re going to love this.
Why You’ll Love This Sticky Bun Recipe
There are a hundred reasons I keep making these, but they all boil down to one thing: they actually taste like dessert, not just sweet bread. Here’s why these fall maple pecan sticky buns have become my absolute go-to for fall weekends:
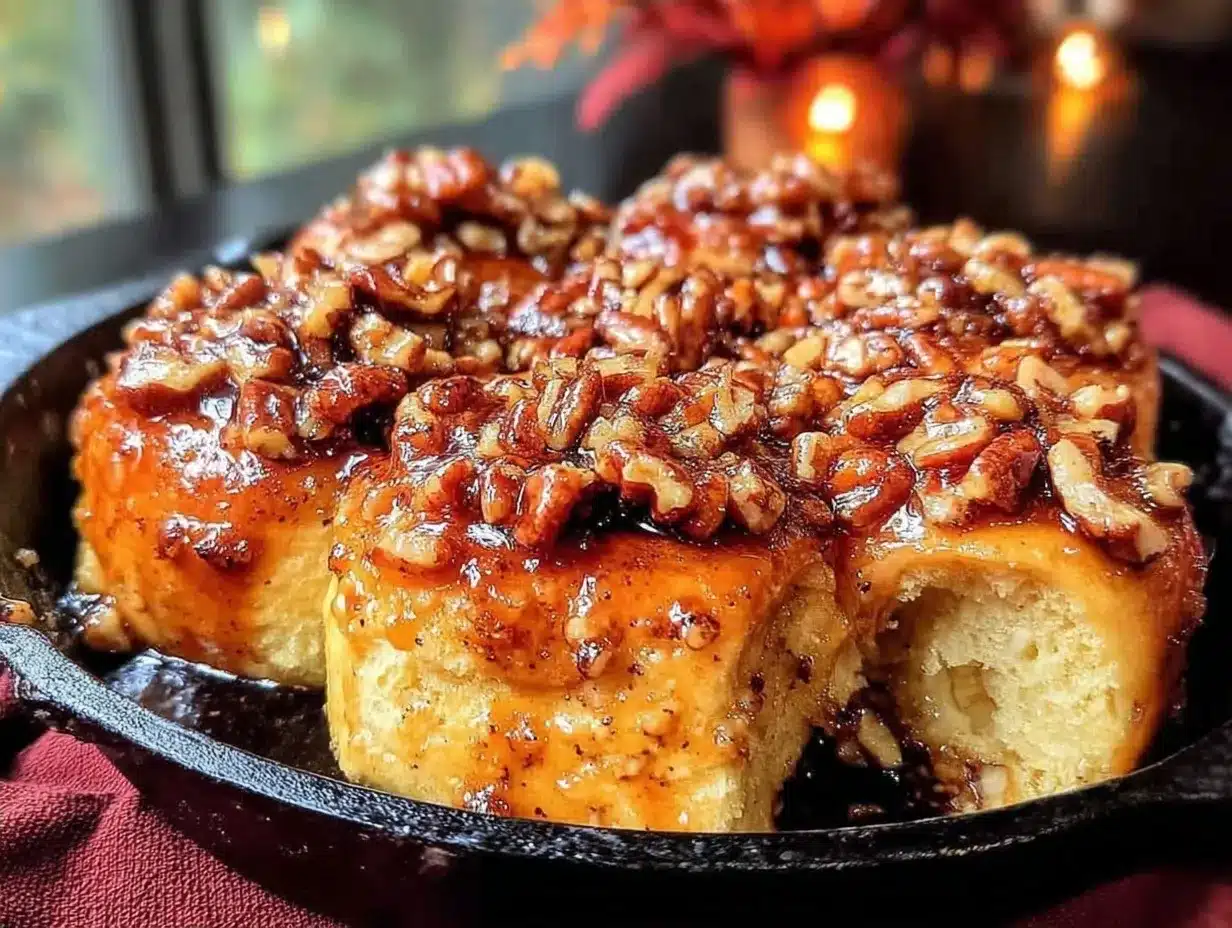
The Glaze Trick — Most recipes just tell you to drizzle maple syrup over the top. That’s a mistake. The secret is mixing the maple syrup with heavy cream and a pinch of salt, then pouring it *under* the buns before baking. It creates a bubbling, molten caramel pool at the bottom. When you flip the pan, every bun is coated in this glossy, sweet-salty sauce. It’s not just a topping; it’s part of the bun.
Make-Ahead Magic — I know, I know. Baking bread is hard. Making it ahead is harder. But this recipe is designed for it. You assemble them the night before, pop them in the fridge, and let them rise slowly while you sleep. When you wake up, you just pop them in the oven. It’s the ultimate low-effort, high-reward breakfast. I’ve made these while half-asleep and they’ve never failed.
Pecan Perfection — I’m not a fan of buns with just a few nuts scattered on top. These have a generous layer of toasted pecans mixed with brown sugar and cinnamon. They get crunchy on the edges and tender in the middle. It adds texture that makes every bite interesting. If you skip the nuts, you’re missing half the experience.
Leftovers Actually Taste Good — Let’s be honest. Day-old bread is usually sad. Not these. Because of the high sugar and fat content, these buns stay soft for days. I often reheat one in the microwave for 20 seconds, and it tastes almost as good as fresh. Perfect for a lazy Saturday morning when you don’t want to bake again.
This is my answer to “what’s for brunch?” when I want to impress guests but don’t want to spend my entire morning in the kitchen. It’s reliable, it’s delicious, and it smells incredible.
Ingredients You’ll Need
Here’s the thing about sticky buns: the ingredients are simple, but the quality matters. You don’t need fancy equipment, but you do need good butter and real maple syrup. Here’s what I use and why:
For the Dough
Warm milk (1 cup / 240ml) — Warm, not hot. You want it around 110°F (43°C). If it’s too hot, it’ll kill the yeast. If it’s too cold, the dough won’t rise. I use whole milk for the best flavor and texture.
Active dry yeast (2 packets / 4½ teaspoons) — I always use active dry yeast. Instant yeast works too, but active dry gives me a bit more control over the rise. Make sure it’s not expired! I’ve ruined batches before because my yeast was old.
Granulated sugar (¼ cup / 50g) — Just enough to feed the yeast and add a little sweetness. You don’t want the dough itself too sweet, since the topping is so rich.
Unsalted butter (¼ cup / 57g, melted) — Melted and cooled slightly. This adds richness to the dough. Don’t use margarine; it just doesn’t have the same flavor.
Eggs (2 large, room temperature) — Room temp eggs incorporate better into the dough. If you’re in a rush, just drop them in a bowl of warm water for 5 minutes.
Vanilla extract (1 teaspoon) — Enhances the maple flavor. Don’t skip it.
All-purpose flour (4 to 4½ cups / 500-570g) — This is the tricky part. Start with 4 cups and add more as needed. The dough should be soft and slightly tacky, not sticky. If it sticks to your hands, add a tablespoon of flour. If it’s dry and cracking, add a splash of milk. I usually end up using about 4¼ cups.
Salt (1 teaspoon) — Balances the sweetness. Essential.
For the Filling
Unsalted butter (½ cup / 113g, softened) — This goes directly into the pan. It melts and creates the caramel base. Use good quality butter here.
Light brown sugar (1 cup / 200g) — Light brown sugar has a milder molasses flavor than dark, which pairs better with maple. Pack it tightly when measuring.
Ground cinnamon (2 teaspoons) — Don’t use old cinnamon. If it doesn’t smell strong, buy a new jar. It makes a huge difference.
Pecan halves (1½ cups / 150g) — Toasted lightly in a dry pan for 2 minutes before using. This brings out their natural oils and flavor. I swear by this step.
For the Glaze
Maple syrup (¼ cup / 60ml) — Use real maple syrup (Grade A or B). Fake maple syrup is just corn syrup with flavoring, and it tastes artificial. I buy the expensive stuff for this because it’s the star.
Heavy cream (2 tablespoons / 30ml) — This is the trick. Adding cream to the maple syrup stabilizes the glaze and makes it glossy. It also adds richness.
Pinch of salt — Cuts the sweetness. Crucial.
Confectioners’ sugar (1 cup / 120g, optional) — If you want a thicker, whiter glaze to drizzle on top after baking, add this. But honestly, the caramelized bottom is the best part.
Equipment Needed
You don’t need fancy gear for this. Here’s what I actually use:
9×13-inch baking dish — A glass or ceramic dish works best. It heats evenly. I use a Pyrex dish that I’ve had for ten years. It doesn’t need to be new, just clean.
Stand mixer or hand mixer — Optional but helpful. Kneading this dough by hand takes about 10 minutes. If you have a stand mixer with a dough hook, it’ll take 5. I use a stand mixer because I’m lazy, but hand-kneading is fine if you don’t have one.
Rolling pin — A standard wooden rolling pin works. I like a heavier one for even pressure.
Pastry brush — For brushing the melted butter in the pan. Or just use a spatula. Doesn’t matter.
Small saucepan — For melting the butter for the filling. Or use the microwave. Your call.
Mixing bowls — One large for the dough, one medium for the filling, one small for the glaze.
How to Make It: Step-by-Step
Alright, let’s make these! I’m walking you through exactly how I do it, including the little tricks I’ve picked up over the years.
Step 1: Activate the Yeast (5 minutes)
In the bowl of your stand mixer (or a large bowl), combine the warm milk, yeast, and granulated sugar. Stir gently and let it sit for 5-10 minutes. You should see a foamy layer form on top. If it doesn’t foam, your yeast is dead. Throw it out and start over. I learned this the hard way when I made a batch of dense buns and couldn’t figure out why.
Step 2: Mix the Dough (10 minutes)
Add the melted butter, eggs, vanilla, and salt to the yeast mixture. Mix on low speed until combined. Gradually add the flour, one cup at a time, while mixing on low. Once the flour is incorporated, increase the speed to medium and knead for 5-7 minutes. The dough should be soft, smooth, and slightly tacky but not sticky. If it’s sticking to the bowl, add a little more flour. If it’s dry, add a splash of milk. This is where you develop the gluten. Don’t rush it.
Step 3: First Rise (1-2 hours)
Lightly grease a large bowl with butter or oil. Place the dough in the bowl, turning once to coat. Cover with plastic wrap or a damp towel. Let it rise in a warm spot for 1-2 hours, or until doubled in size. I usually let it rise in the oven with the light on—it creates a nice warm draft. While it rises, prepare your filling.
Step 4: Prepare the Filling (5 minutes)
Melt the ½ cup of butter in a small saucepan or microwave. Pour it into your 9×13-inch baking dish, tilting to coat the bottom evenly. In a small bowl, mix the brown sugar and cinnamon. Sprinkle this mixture evenly over the melted butter. Then, scatter the toasted pecans over the sugar. This is your base. Don’t skip the pecans.
Step 5: Roll and Cut (10 minutes)
Punch down the risen dough to release air. Turn it out onto a lightly floured surface. Roll it into a rectangle about 12×16 inches. Spread the remaining ¼ cup of softened butter (or melted, if you prefer) over the dough, leaving a small border at the edges. Roll the dough tightly from the long side, like a jelly roll. Use a sharp knife or dental floss to cut the roll into 12 even buns. I find dental floss works best—it cuts cleanly without squishing the dough. Place the buns cut-side up into the prepared pan.
Step 6: Second Rise (30-60 minutes)
Cover the pan loosely with plastic wrap. Let the buns rise again for 30-60 minutes, until puffy and nearly doubled. They should look jiggly and soft. This is when you can choose to bake immediately or refrigerate overnight. For the best flavor, I recommend the overnight rise, but if you’re in a hurry, 30 minutes is fine.
Step 7: Bake (25-30 minutes)
Preheat your oven to 350°F (175°C). If you’ve been refrigerating the buns, let them sit at room temperature for 20 minutes while the oven preheats. Bake for 25-30 minutes, until the tops are golden brown and the centers are cooked through. If they’re browning too fast, cover them loosely with foil after 15 minutes.
Step 8: The Glaze Trick (5 minutes)
While the buns bake, mix the maple syrup, heavy cream, and salt in a small bowl. Once the buns are done, remove them from the oven. Immediately pour the maple glaze over the hot buns. It will bubble and sizzle. Let them sit in the pan for 5 minutes. Then, run a knife around the edges and carefully flip the pan onto a serving platter. The buns should release easily. If one sticks, just lift it out with your fingers. It’s messy, but worth it.
Total Time: About 3-4 hours (mostly rising time)
Expert Tips & Tricks
Here’s everything I’ve learned from making these dozens of times. These tips will save you from my mistakes.
Toast Your Pecans
I can’t stress this enough. Raw pecans in sticky buns taste bland. Toast them in a dry skillet for 2-3 minutes until fragrant. It adds a nutty depth that makes the buns taste like they came from a fancy bakery. It takes two minutes and changes everything.
The Glaze Ratio is Key
Don’t just use straight maple syrup. It’s too thin and will run off the buns. The heavy cream adds body and helps the glaze cling to the sides. The salt balances the sweetness. This is the “one trick” that makes the difference. I’ve tried it both ways, and the cream version is superior.
Don’t Over-Roll the Dough
When you’re rolling the dough, don’t roll it too thin. You want the buns to be fluffy and thick. If you roll it too thin, they’ll be dense and flat. Aim for about ¼ inch thickness. It’s a guide, not a law, but keep it in mind.
Use Dental Floss
I know it sounds weird, but dental floss is the best tool for cutting sticky buns. It cuts through the dough without compressing it. If you use a knife, you’ll squish the layers. Tie a piece of floss around the roll, cross the ends, and pull. Clean cut every time.
Overnight Rise
If you’re short on time in the morning, assemble the buns the night before, cover tightly with plastic wrap, and refrigerate. Let them rise at room temperature for 30-60 minutes before baking. This slow rise develops better flavor and texture. It’s my favorite way to make them.
Variations & Substitutions
Once you’ve nailed the basic version, here’s how you can mix it up. I’ve tried all of these.
Pumpkin Spice Version
Add 1 teaspoon pumpkin pie spice to the brown sugar mixture. It’s perfect for late fall. I pair it with the pumpkin spice latte for a cozy breakfast.
Chocolate Chip
Sprinkle semi-sweet chocolate chips over the dough before rolling. It’s like a dessert bun. Great for kids.
Gluten-Free
Use a 1-to-1 gluten-free flour blend. The texture will be slightly different, but it still works. I’ve used Bob’s Red Mill and it’s been fine.
Dairy-Free
Use coconut milk instead of dairy milk, and coconut oil instead of butter. Use maple syrup and a pinch of salt for the glaze. It’s still delicious.
Vegan
Use flax eggs (2 tablespoons ground flaxseed mixed with 6 tablespoons water, let sit for 5 minutes) instead of eggs. Use vegan butter. The rest is already vegan.
Walnut Version
Swap pecans for walnuts. They’re a bit more bitter, which balances the sweetness well. I like the texture of walnuts too.
Serving & Storage
How to serve these bad boys:
Immediate Serve
The best way is right out of the pan. They’re hot, gooey, and messy. Serve with a cup of coffee or the maple brown sugar cold brew for a perfect fall morning.
Side Dishes
These are rich, so they don’t need much. A simple side salad or some fruit works. I often just serve them with eggs and bacon.
Storage
Store leftovers in an airtight container at room temperature for up to 2 days. They might get a bit sticky, but they’re still good. For longer storage, freeze them. Wrap individually in plastic wrap, then put them in a freezer bag. They’ll last for a month.
Reheating
Microwave for 20-30 seconds. Or warm them in a 300°F oven for 10 minutes. Don’t skip the reheating step; they’re much better warm.
Freezing
You can freeze the unbaked buns too. Assemble them, let them rise, then freeze the pan. When you’re ready to bake, let them thaw at room temperature for an hour, then bake as directed. It’s a great meal prep hack.
Nutrition Information
I’m not a nutritionist, but here’s the breakdown if you’re tracking. Keep in mind, these are rich, so portion control is key.
Per Serving (based on 12 buns):
- Calories: 450
- Protein: 6g
- Carbs: 65g
- Fiber: 2g
- Sugar: 35g
- Fat: 18g
- Saturated Fat: 10g
- Sodium: 250mg
These are definitely a treat. But they’re homemade, so you know what’s in them. If you want to lighten them up, reduce the sugar in the filling by half, but I wouldn’t recommend it. It’s all about balance.
Final Thoughts
So that’s my recipe for fall maple pecan sticky buns! I know I’ve talked a lot about the glaze trick, but it really is the game-changer. It’s the difference between good buns and amazing buns. I’ve made these for holidays, for brunch with friends, and just for myself on lazy Sundays. They never fail to bring a smile to my face.
Make them yours! Try different nuts, add some bourbon to the glaze, or go wild with the spices. The best recipes are the ones you adapt to your tastes. And if you make these, I want to hear about it. Drop a comment and let me know how they turned out. Did you use the glaze trick? Did you toast the pecans? I’m curious.
Happy baking! And I hope your kitchen smells as good as mine does right now.
Frequently Asked Questions
Can I use instant yeast instead of active dry yeast?
Yes, you can. You’ll need about 2¼ teaspoons (one packet) of instant yeast. You can mix it directly with the flour instead of activating it in the milk first. The rise time might be slightly faster, so keep an eye on it. I usually use active dry because it’s what I have, but instant works fine.
Why did my sticky buns stick to the pan?
This usually happens if the butter and sugar mixture wasn’t hot enough when you added the dough, or if you didn’t let them sit long enough after flipping. Make sure the butter is fully melted in the pan before adding the sugar. And after baking, let them sit for 5 minutes so the caramel can cool slightly and set. If one still sticks, just dig it out with a spoon. It’s messy, but delicious.
Can I make these ahead of time?
Absolutely. This is my favorite way to make them. Assemble the buns the night before, cover the pan tightly with plastic wrap, and refrigerate overnight. In the morning, let them sit at room temperature for 30-60 minutes to rise while the oven preheats. Then bake as directed. It saves so much morning stress.
What kind of maple syrup should I use?
Use real maple syrup, not pancake syrup. Look for “100% Pure Maple Syrup” on the label. Grade A is lighter and milder, Grade B is darker and more robust. I prefer Grade B for baking because it has a stronger flavor that stands up to the sweetness. But Grade A works too. Just avoid the fake stuff.
Can I freeze the baked buns?
Yes, but they’re best fresh. If you need to freeze them, let them cool completely, then wrap individually in plastic wrap and place in a freezer bag. They’ll last for up to a month. Thaw at room temperature and reheat in the microwave for 20 seconds. They won’t be as gooey as fresh, but they’re still good.
Why are my buns dense?
This usually means the yeast was dead, or the dough was over-kneaded or under-risen. Make sure your milk is warm (not hot) when you activate the yeast. And don’t rush the rising times. Let the dough double in size before rolling. If it’s dense, it’s likely a yeast issue or a rising issue.
Pin This Recipe!
Fall Maple Pecan Sticky Buns
- Total Time: 3-4 hours
- Yield: 12 servings 1x
Description
Rich, gooey sticky buns with a unique glaze trick that creates a molten caramel pool. These make-ahead buns feature toasted pecans and a sweet-salty maple glaze for the perfect fall brunch.
Ingredients
- 1 cup warm milk (110°F/43°C)
- 2 packets active dry yeast (4½ teaspoons)
- ¼ cup granulated sugar
- ¼ cup unsalted butter, melted and cooled
- 2 large eggs, room temperature
- 1 teaspoon vanilla extract
- 4 to 4½ cups all-purpose flour
- 1 teaspoon salt
- ½ cup unsalted butter, softened (for filling)
- 1 cup light brown sugar, packed
- 2 teaspoons ground cinnamon
- 1½ cups pecan halves, toasted
- ¼ cup real maple syrup
- 2 tablespoons heavy cream
- Pinch of salt (for glaze)
- 1 cup confectioners’ sugar, optional (for drizzle)
Instructions
- Activate yeast: In a stand mixer bowl, combine warm milk, yeast, and granulated sugar. Let sit for 5-10 minutes until foamy.
- Mix dough: Add melted butter, eggs, vanilla, and salt to the yeast mixture. Mix on low. Gradually add flour, one cup at a time. Knead on medium for 5-7 minutes until soft and slightly tacky.
- First rise: Place dough in a greased bowl, cover, and let rise in a warm spot for 1-2 hours until doubled.
- Prepare filling: Melt ½ cup butter in a 9×13-inch baking dish. Mix brown sugar and cinnamon, sprinkle over butter, then scatter toasted pecans on top.
- Roll and cut: Punch down dough and roll into a 12×16 inch rectangle. Spread remaining ¼ cup softened butter over dough. Roll tightly into a log. Cut into 12 buns using dental floss or a sharp knife. Place cut-side up in the prepared pan.
- Second rise: Cover pan and let rise for 30-60 minutes until puffy.
- Bake: Preheat oven to 350°F (175°C). Bake buns for 25-30 minutes until golden brown.
- Glaze trick: While baking, mix maple syrup, heavy cream, and a pinch of salt. Pour over hot buns immediately after removing from oven. Let sit for 5 minutes.
- Serve: Run a knife around edges and flip pan onto a serving platter. Drizzle with optional confectioners’ sugar glaze if desired.
Notes
Toast pecans in a dry skillet for 2-3 minutes to enhance flavor. Use real maple syrup, not pancake syrup. For make-ahead, assemble buns the night before, cover tightly, and refrigerate. Let rise at room temperature for 30-60 minutes before baking. Store leftovers in an airtight container at room temperature for up to 2 days or freeze for up to a month.
- Prep Time: 45 minutes
- Cook Time: 30 minutes
- Category: Breakfast
- Cuisine: American
Nutrition
- Serving Size: 1 bun
- Calories: 450
- Sugar: 35
- Sodium: 250
- Fat: 18
- Saturated Fat: 10
- Carbohydrates: 65
- Fiber: 2
- Protein: 6
Keywords: sticky buns, maple pecan buns, fall breakfast, make-ahead brunch, caramelized buns, yeast dough, pecan recipe



