I have a confession to make: I spent last Saturday morning in a flour-dusted panic, staring at a loaf pan that looked suspiciously like it was going to bake into a dense, sad brick. It was 6 AM. The coffee hadn’t even kicked in yet. But I knew, with that specific kind of culinary desperation, that if this didn’t work, my entire weekend would be ruined.
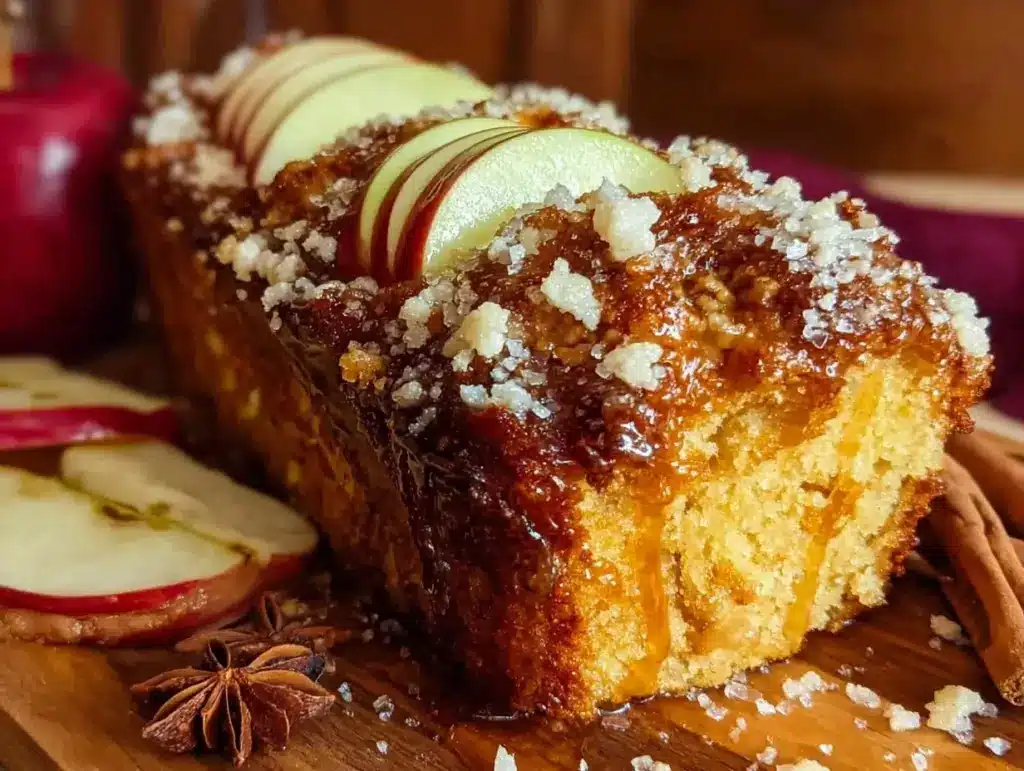
That panic was worth it. Because what came out of the oven was the Fall Brown Butter Apple Cider Donut Loaf, and it smelled like a cozy blanket and a woodstove. It was moist, tender, and packed with the sharp, tangy sweetness of reduced cider and the nutty, complex depth of browned butter. It’s the kind of bake that makes your neighbors knock on your door asking for the recipe, and honestly? I don’t mind sharing it. Not anymore.
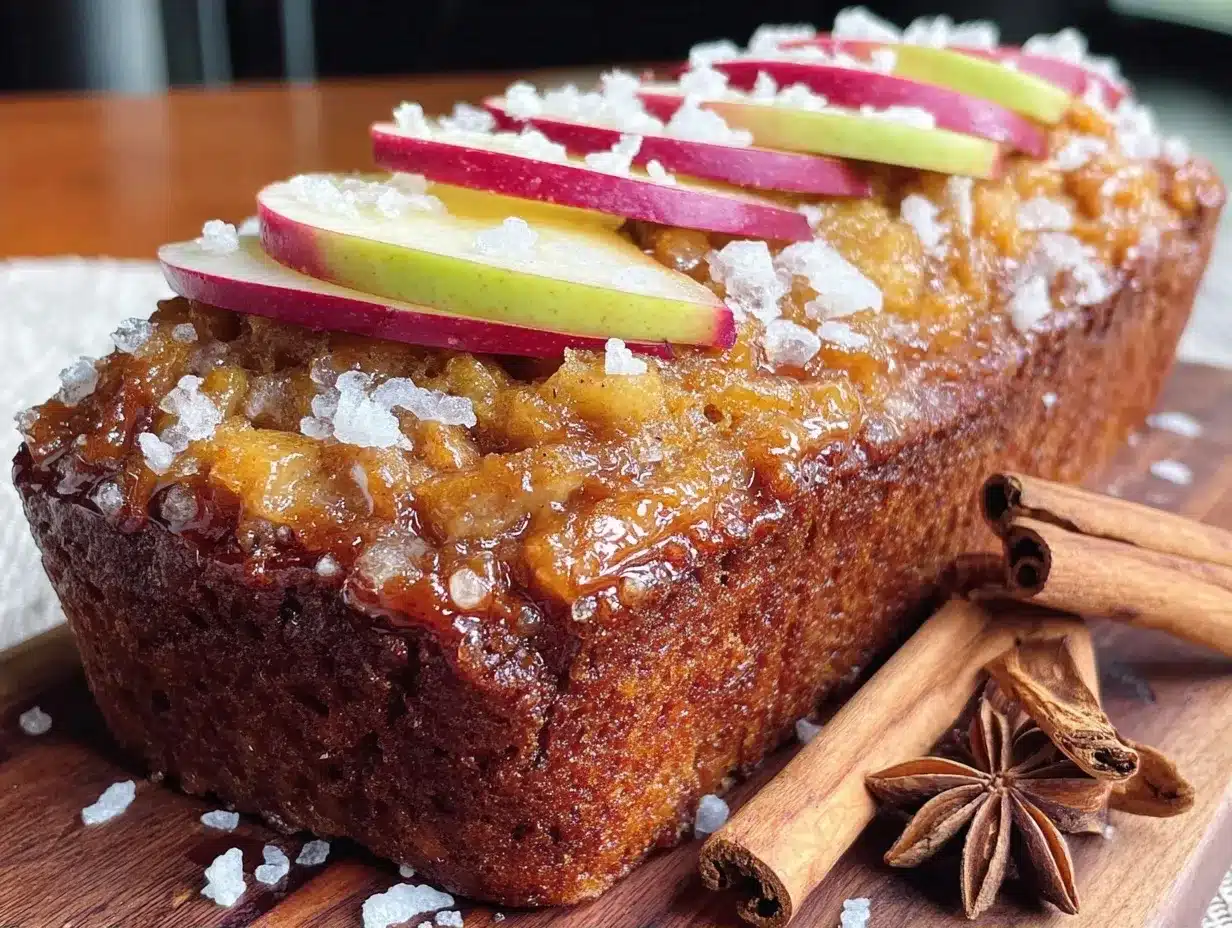
This isn’t your average apple cinnamon bread. It’s closer to a donut in texture—light, airy, and coated in a crisp cinnamon-sugar crust that crackles when you bite into it. The secret lies in two things: reducing the apple cider until it’s syrupy and potent, and browning that butter until it smells like hazelnuts. It’s a combination that screams “fall,” but in the best possible way. I’ve made this loaf three times in the last two weeks (yes, three times), and every single batch has disappeared before lunch. It’s become my go-to way to celebrate the season, especially when the apples at the farmers market are starting to look their absolute best.
If you’re looking for a way to use up that bushel of Honeycrisps or Cortlands you picked up, or if you just want to fill your kitchen with the most amazing smell in October, this is it. This Fall Brown Butter Apple Cider Donut Loaf is easy, forgiving, and absolutely delicious. Let’s get baking.
Why You’ll Love This Recipe
There are a lot of fall bakes out there. You’ve got your standard pumpkin bread, your gingerbread, your classic apple crisp. But this loaf? It’s different. It’s got personality. Here’s why it’s going to become a staple in your fall baking rotation:
- Donut-Style Texture — Most apple breads can be a bit dense, like a muffin. This one is light and tender, thanks to the creamed butter and sugar method and the acidity from the apple cider. It’s closer to a cake donut than a quick bread. I’ve compared it to baked cinnamon doughnuts, and honestly, the flavor profile is even better in loaf form.
- Deep, Complex Flavor — By reducing the cider and browning the butter, you’re concentrating the flavors. You get that nutty, toasted note from the butter and the intense apple sweetness from the syrup. It’s not just “apple flavor”; it’s sophisticated fall flavor.
- Perfectly Moist — I was worried it might dry out since I’m using reduced liquid, but the grated apple adds so much natural moisture that the loaf stays soft for days. In fact, it tastes even better the next day as the flavors meld together.
- Easy Weekender Project — You don’t need to be a pro baker to pull this off. The hardest part is waiting for the butter to brown and the cider to reduce. The rest is just mixing and pouring. If you can make one-bowl banana bread, you can nail this loaf.
- Great for Gifting — Wrapped in cellophane with a sprig of rosemary and a ribbon, this loaf makes an incredible hostess gift or neighborly treat. It looks fancy but is surprisingly simple to make.
This recipe captures that fleeting moment when fall is in full swing—the air is crisp, the apples are sweet, and everything just feels right. It’s a recipe to make while it’s at its best.
Ingredients You’ll Need
Here’s the thing about baking in the fall: the quality of your ingredients matters more than usual. Since there aren’t a dozen hidden flavors masking the taste, you need good stuff. Here’s what you need to grab from the farmers market or the grocery store.
For the Loaf
Unsalted butter (1 cup / 225g) — You’ll need a full cup for this one. Don’t use margarine. I use a high-fat butter like Plugra or Land O’Lakes because it browns evenly and tastes richer. You’ll brown half of it for the batter and save the rest for the glaze.
Apple cider (2 cups / 480ml) — This is the star. Do not use apple juice from a box. You need fresh-pressed apple cider. Look for it at the farmers market, local orchards, or the dairy section of the grocery store. The fresher, the better. We’re reducing this down to about ½ cup, so you want that pure, sharp apple flavor.
Apples (2 medium, about 300g) — I use a mix of Granny Smith and Honeycrisp. Granny Smith gives you the tartness and structure, while Honeycrisp adds sweetness and moisture. Peel them and grate them on the large holes of a box grater. Grating is better than dicing here—it melts into the batter and keeps the loaf moist.
All-purpose flour (2 ½ cups / 315g) — Spoon it into the cup and level it off. Don’t scoop directly from the bag, or you’ll pack it down and get a dense loaf. If you want a lighter crumb, you can swap ½ cup for cake flour, but AP works perfectly fine.
Baking powder (1 teaspoon) and baking soda (½ teaspoon) — These leaveners work together with the acidity in the cider and apples to give the loaf its lift. Make sure they’re fresh! Old leaveners are the reason baked goods turn out flat.
Salt (1 teaspoon) — Kosher salt is best. It balances the sweetness and highlights the apple flavor.
Granulated sugar (1 cup / 200g) — This provides structure and sweetness. Don’t reduce it; the sugar helps tenderize the crumb.
Light brown sugar (½ cup / 100g) — Packed. This adds that molasses note that pairs so well with the brown butter.
Eggs (2 large, room temperature) — Cold eggs can seize up your creamed butter and sugar. Take them out of the fridge 30 minutes before you start.
Vanilla extract (2 teaspoons) — Use real vanilla. The fake stuff tastes chemical and clashes with the delicate apple flavor.
For the Glaze & Coating
Powdered sugar (1 cup / 120g) — For the glaze. Make sure it’s sifted if it’s clumpy.
Milk or cream (1-2 tablespoons) — Just enough to thin the glaze to a drizzling consistency.
Cinnamon (1 tablespoon) — For the coating. Use a good quality cinnamon like Ceylon if you can find it; it’s sweeter and more aromatic.
Granulated sugar (½ cup / 100g) — For the coating.
Pinch of salt — In the coating too. It makes the cinnamon pop.
Equipment Needed
You don’t need a fancy kitchen to make this. Here’s what I actually use:
- Small saucepan — For reducing the apple cider. A 2-quart pan works well.
- Medium saucepan or skillet — For browning the butter. I use a stainless steel pan because I can see the color change clearly. A white ceramic bowl in the microwave works too if you’re watching it closely.
- Box grater — For grating the apples. This is non-negotiable for the texture.
- 9×5 inch loaf pan — Standard size. Grease it well and line the bottom with parchment paper for easy removal.
- Mixer — A hand mixer or stand mixer makes creaming the butter and sugar easier, but you can do it by arm if you’re strong.
- Wire rack — For cooling the loaf. It needs to cool completely before glazing.
How to Make It: Step-by-Step
Alright, let’s get into the kitchen. This recipe has a few steps, but they’re mostly passive (waiting for things to reduce or brown), so it’s not a lot of active work.
Step 1: Reduce the Apple Cider (Start this first!)
Pour the 2 cups of apple cider into your small saucepan. Bring it to a boil over medium-high heat, then reduce to a simmer. Let it bubble away for about 15-20 minutes, stirring occasionally. You want to reduce it until you have roughly ½ cup of syrupy, concentrated cider. It should coat the back of a spoon. Pour it into a heatproof bowl and let it cool completely. You don’t want hot cider in your batter—it can melt the butter or cook the eggs.
Step 2: Brown the Butter
While the cider reduces, cut your butter into cubes. Melt half of it (1 cup total, so ½ cup for this step) in your saucepan or skillet over medium heat. Swirl it occasionally. It will foam up, then subside. Watch closely. Once the foam clears, you’ll see brown specks at the bottom and smell a nutty, toasted aroma. This is brown butter. Immediately pour it into a heatproof bowl to stop the cooking. Scrape out all those brown bits—they’re pure flavor. Let it cool slightly so it’s warm but not hot.
Step 3: Prep the Dry Ingredients
Preheat your oven to 350°F (175°C). Grease your 9×5 loaf pan and line the bottom with parchment paper. In a medium bowl, whisk together the flour, baking powder, baking soda, and salt. Set aside.
Step 4: Cream the Butter and Sugars
In a large bowl (or stand mixer), beat the remaining ½ cup of softened unsalted butter with the granulated sugar and brown sugar. Beat on medium-high for about 3-4 minutes until the mixture is light, fluffy, and pale. This step incorporates air, which helps the loaf rise. It’s worth the elbow grease.
Step 5: Add Wet Ingredients
Add the eggs one at a time, beating well after each addition. Scrape down the sides of the bowl. Mix in the vanilla extract and the cooled, reduced apple cider. Beat until combined.
Step 6: Combine Everything
With the mixer on low, gradually add the dry ingredients to the wet ingredients. Mix just until no streaks of flour remain. Do not overmix! Overmixing leads to a tough loaf. Once the flour is incorporated, fold in the grated apples by hand with a spatula. The batter will be thick and fragrant.
Step 7: Bake
Pour the batter into the prepared loaf pan and smooth the top. Bake for 55-65 minutes. Test for doneness by inserting a toothpick into the center. It should come out clean or with just a few moist crumbs. If it’s wet with batter, bake for another 5 minutes. Remember, ovens vary, so keep an eye on it after the 50-minute mark.
Step 8: Cool and Glaze
Let the loaf cool in the pan for 10 minutes, then transfer it to a wire rack to cool completely. This is the hardest part. If you glaze it while it’s warm, the glaze will melt off. Once cool, whisk together the powdered sugar and enough milk/cream to make a thick but drizzle-able glaze. Drizzle it over the top of the loaf.
Step 9: The Cinnamon Sugar Coating
While the glaze is still wet, mix the cinnamon and granulated sugar in a shallow bowl. Sprinkle this mixture generously over the glazed top of the loaf. Press it in gently with your hands so it sticks. Let it sit for 10 minutes to set, then slice and serve.
Expert Tips & Tricks
I’ve made this loaf enough times to know where things can go wrong. Here’s how to avoid my mistakes:
- Don’t Rush the Cider Reduction — If you rush it, you won’t get enough flavor concentration. You need that syrupy intensity. If you only have apple juice, you can reduce it, but the flavor will be flatter. Fresh cider is key.
- Grate, Don’t Dice — I tried dicing the apples once. The result was chunks of apple in a bread, and the bread was dry around the chunks. Grating distributes the moisture evenly and gives you that tender crumb.
- Watch the Butter Like a Hawk — Brown butter goes from perfect to burnt in about 30 seconds. If it smells like burnt popcorn, you’ve ruined it. Start over. It’s better to err on the side of slightly under-browned than burnt.
- Room Temperature Ingredients — I can’t stress this enough. Cold eggs and cold butter will break your emulsion. Take them out early.
- Use a Scale — Baking is chemistry. Weighing your flour ensures you don’t add too much, which is the #1 cause of dry baked goods.
Variations & Substitutions
Once you’ve got the hang of this base, you can play around with it:
- Walnuts or Pecans — Fold in ½ cup of toasted, chopped nuts for extra crunch. I love walnuts with apple.
- Chai Spice — Swap the cinnamon for chai spice blend for a warmer, spicier flavor. This pairs beautifully with the apple cider.
- Maple Glaze — Replace the milk in the glaze with maple syrup for an even more autumnal taste.
- Mini Loaves — You can divide the batter into two mini loaf pans. Bake time will be reduced to about 35-40 minutes. Perfect for gifts!
- Gluten-Free — Use a 1:1 gluten-free flour blend. The texture might be slightly denser, but it still works.
Serving & Storage
This loaf is best served fresh, warm, with a cup of coffee or tea. It’s perfect for breakfast, brunch, or an afternoon snack. It also travels well, making it a great addition to a fall harvest charcuterie board or a potluck.
Storage: Store leftovers in an airtight container at room temperature for up to 3 days. The glaze will soften, but the loaf stays moist. You can also refrigerate it for up to 5 days, but let it come to room temperature before serving for the best texture.
Freezing: This loaf freezes well. Wrap it tightly in plastic wrap and then aluminum foil. It will keep for up to 3 months. Thaw overnight in the fridge and bring to room temperature before eating. I usually freeze half the loaf for later.
Nutrition Information
I’m not a nutritionist, but here’s the breakdown if you’re tracking. This is a treat, so enjoy it guilt-free!
- Calories: ~320 per slice
- Carbs: 45g
- Sugar: 28g
- Fat: 14g
- Protein: 4g
It’s rich in butter and sugar, obviously, but the apple adds some fiber. If you want to lighten it up, you can reduce the sugar in the batter by ¼ cup, though the texture might be slightly less tender.
Final Thoughts
This Fall Brown Butter Apple Cider Donut Loaf is everything I love about fall baking. It’s comforting, fragrant, and deeply satisfying. It’s the kind of recipe that makes you feel like you’ve accomplished something, even if you’re just sitting on your couch with a slice and a blanket.
I hope you try it. I hope your kitchen smells amazing. And I hope you make it on repeat, just like I have. If you do, let me know how it turns out! I love hearing from you.
Frequently Asked Questions
Can I use apple juice instead of cider?
You can, but the flavor won’t be as intense. Apple juice is filtered and pasteurized, so it lacks the complexity of fresh cider. If you must use juice, reduce it a bit longer to concentrate the flavor. But really, seek out fresh cider if you can.
Why is my loaf dense?
This usually happens if you overmix the batter or use too much flour. Make sure you’re spooning and leveling your flour, not scooping. Also, don’t overbeat the batter once you add the flour. Mix just until combined.
Can I make this ahead of time?
Yes! You can bake the loaf a day ahead and store it. The glaze and cinnamon sugar coating might soften, but you can refresh it by adding a fresh sprinkle of cinnamon sugar right before serving.
How do I know when the cider is reduced enough?
You want about ½ cup of liquid left from 2 cups. It should be syrupy and coat the back of a spoon. If it’s still watery, it won’t have enough flavor impact.
Can I freeze the loaf with the glaze on?
It’s better to freeze the loaf without the glaze. The glaze can become sticky and messy when thawed. Glaze it fresh when you’re ready to serve.
What kind of apples are best?
I recommend a mix of tart and sweet. Granny Smith for tartness and structure, Honeycrisp or Fuji for sweetness and moisture. Avoid Red Delicious—they don’t hold up well when baked and can be mealy.
Pin This Recipe!
Fall Brown Butter Apple Cider Donut Loaf
- Total Time: 85 minutes
- Yield: 10 servings 1x
Description
A moist, tender loaf with a donut-style texture, featuring the complex nutty depth of browned butter and the sharp, tangy sweetness of reduced apple cider, finished with a crisp cinnamon-sugar crust.
Ingredients
- 2 cups fresh-pressed apple cider
- 1 cup unsalted butter (divided)
- 2 ½ cups all-purpose flour
- 1 teaspoon baking powder
- ½ teaspoon baking soda
- 1 teaspoon kosher salt (divided)
- 1 cup granulated sugar (divided)
- ½ cup light brown sugar, packed
- 2 large eggs, room temperature
- 2 teaspoons vanilla extract
- 2 medium apples (mix of Granny Smith and Honeycrisp), peeled and grated
- 1 cup powdered sugar (for glaze)
- 1–2 tablespoons milk or cream (for glaze)
- 1 tablespoon cinnamon (for coating)
- ½ cup granulated sugar (for coating)
Instructions
- Pour 2 cups of apple cider into a small saucepan. Bring to a boil over medium-high heat, then reduce to a simmer. Simmer for 15-20 minutes until reduced to approximately ½ cup of syrupy cider. Pour into a heatproof bowl and let cool completely.
- While the cider reduces, melt ½ cup of the butter in a medium saucepan or skillet over medium heat. Swirl occasionally until the foam subsides, brown specks appear, and it smells nutty. Immediately pour into a heatproof bowl to stop cooking and let cool slightly.
- Preheat oven to 350°F (175°C). Grease a 9×5 inch loaf pan and line the bottom with parchment paper.
- In a medium bowl, whisk together the flour, baking powder, baking soda, and 1 teaspoon of salt. Set aside.
- In a large bowl or stand mixer, beat the remaining ½ cup of softened unsalted butter with the 1 cup granulated sugar and ½ cup brown sugar on medium-high for 3-4 minutes until light and fluffy.
- Add eggs one at a time, beating well after each addition. Mix in the vanilla extract and the cooled, reduced apple cider until combined.
- With the mixer on low, gradually add the dry ingredients to the wet ingredients. Mix just until no streaks of flour remain. Fold in the grated apples by hand.
- Pour batter into the prepared loaf pan and smooth the top. Bake for 55-65 minutes, or until a toothpick inserted into the center comes out clean.
- Let the loaf cool in the pan for 10 minutes, then transfer to a wire rack to cool completely.
- Whisk together the powdered sugar and 1-2 tablespoons of milk or cream to create a drizzle-able glaze. Drizzle over the cooled loaf.
- While the glaze is wet, mix the cinnamon, ½ cup granulated sugar, and a pinch of salt. Sprinkle generously over the glazed top and press gently to adhere. Let sit for 10 minutes to set before slicing.
Notes
Ensure apples are grated, not diced, for even moisture distribution. Do not overmix the batter to avoid a tough loaf. Brown butter carefully as it burns quickly. For best results, use fresh-pressed apple cider rather than filtered juice. The loaf can be frozen without glaze for up to 3 months.
- Prep Time: 20 minutes
- Cook Time: 65 minutes
- Category: Dessert
- Cuisine: American
Nutrition
- Serving Size: 1 slice
- Calories: 320
- Sugar: 28
- Sodium: 350
- Fat: 14
- Saturated Fat: 8
- Carbohydrates: 45
- Fiber: 1
- Protein: 4
Keywords: fall baking, apple cider, brown butter, donut loaf, seasonal recipe, autumn treats, cinnamon sugar



