
Last Tuesday, I came home from work feeling like my brain had been put through a cheese grater. I had twenty minutes to make dinner, three hungry kids, and a pantry that looked suspiciously like a wasteland. No, I didn’t have time for takeout (my wallet was already crying). I didn’t have time to run to the store. And I definitely didn’t have the energy to figure out a complicated new recipe.
So I opened the fridge and stared at a half-empty jar of coconut milk, a bag of frozen chicken thighs, and a sad-looking onion. That was it. That was the menu. I threw it together on a whim, expecting a mediocre, watery mess. Instead, thirty minutes later, I had the most incredible, fragrant, creamy curry sitting on the stove. My kids didn’t just eat it; they scraped their bowls clean. My husband asked if I’d been taking cooking classes behind his back.
I hadn’t. I just had the right ingredients and a simple method. That night sparked a routine. This dairy-free coconut milk chicken curry has become the anchor of our weeknight dinners for the last six months. It’s cheap, it’s gluten-free, it’s naturally dairy-free, and it tastes like I spent hours simmering it on low heat (even though it takes 30 minutes max). I’ve made this at least a dozen times since that Tuesday, tweaking the spice levels until it was perfect for my family’s tastes.
Here’s the thing about weeknight cooking: you need recipes that work every single time. You don’t need fancy techniques or obscure ingredients. You need something reliable. This curry is exactly that. It’s my answer to “what’s for dinner?” when I’m tired, broke, and running on empty. It’s comforting, it’s healthy-ish, and it makes the whole house smell amazing.
Why You’ll Love This Dairy-Free Coconut Milk Chicken Curry
I know what you’re thinking. “Another chicken curry? Really?” But hear me out. This isn’t your average, boring chicken curry. This is the one that gets requests. It’s the one that tastes better on day two. It’s the one that makes you feel like a gourmet chef without the gourmet price tag. Here’s why this recipe has earned a permanent spot in our rotation:
- Stupid Simple — Seriously, if you can chop an onion and open a can, you can make this. I’ve walked my teenage son through it over FaceTime while I was at the store. There’s no chopping frenzy, no delicate timing. Just dump, simmer, and eat.
- Pantry-Friendly — You probably have 80% of these ingredients already. Coconut milk, chicken, onions, garlic, basic spices. I keep the key items stocked just so I can make this on a whim. It’s the ultimate “I have nothing left in the fridge” meal.
- Budget-Smart — Feeds 4-6 people for under $15. That’s less than one meal at a takeout place. Chicken thighs are cheap, especially when you buy them frozen or on sale. Coconut milk is affordable, and you don’t need exotic spices. Just the basics.
- Kid-Approved — I’ve served this to my pickiest eater (who usually refuses anything with “too much flavor”) and he loved it. The coconut milk makes it creamy and mild, while the spices add warmth without being scary-hot. It’s the perfect middle ground.
- Makes Amazing Leftovers — Actually tastes better the next day. I deliberately make extra for lunch throughout the week. The flavors meld together overnight, and by day two, it’s even richer. I pack this for work lunches more than any other meal.
- Gluten-Free & Dairy-Free — Naturally free from dairy and gluten, so no substitutions needed. My gluten-free friend and my dairy-intolerant sister both request this version. It’s inclusive by design.
This is my go-to when I need dinner to just work. No complicated techniques, no weird ingredients, just reliable, delicious food that makes everyone happy. And best of all? It costs less than delivery.
Ingredients You’ll Need for Coconut Milk Chicken Curry
Here’s the best part: you probably have most of this already. I’m particular about three ingredients here, and I’ll tell you exactly why. This isn’t a shopping list; it’s a guide to making sure your curry turns out perfect every time.
For the Base
Chicken thighs (2 pounds / 900g) — Boneless, skinless. I use thighs because they stay juicy and don’t dry out like breasts. If you must use breasts, cut them into smaller chunks and watch the cooking time closely. I buy them frozen on sale and defrost them in the fridge overnight.
Coconut milk (2 cans / 13.5 oz each) — Full-fat, unsweetened. This is non-negotiable. Do not use “light” coconut milk if you want that rich, creamy texture. And definitely don’t use sweetened coconut milk from the cocktail section. Look for brands like Native Forest or Thai Kitchen. They’re cheap and reliable.
Yellow onion (1 medium, diced / about 200g) — Sweet onions work too, but yellow gives better depth. White onions are too sharp for this. I dice mine finely so it melts into the sauce.
Garlic (4 cloves, minced / about 2 tablespoons) — Fresh only. No jarred garlic in this recipe. It makes a huge difference in the flavor profile. Mince it yourself—it takes 2 minutes.
Ginger (1 tablespoon, fresh grated) — Fresh ginger adds a bright, zesty kick that pairs perfectly with coconut. If you don’t have fresh, you can use 1 teaspoon of ground ginger, but fresh is best.
For the Flavor

Curry powder (2-3 tablespoons) — This is your main spice. I use a generic brand like McCormick or Simply Organic. If you like it spicy, add an extra teaspoon. If you’re mild-averse, stick to 2 tablespoons. I’ve tried different brands, and it doesn’t matter much—just make sure it’s not expired.
Ground cumin (1 teaspoon) — Adds earthiness. Most people have this in their spice rack. If you don’t, you can skip it, but it adds depth.
Ground turmeric (1 teaspoon) — Gives that gorgeous yellow color and has anti-inflammatory properties. It’s mild, so don’t worry about overpowering the dish.
Chicken broth (1 cup / 240ml) — Low-sodium so I can control the salt. Vegetable broth works for a vegetarian version. I keep broth in the fridge or freezer so I always have some on hand.
Tomato paste (1 tablespoon) — This adds richness and a hint of acidity to balance the sweetness of the coconut milk. It’s a secret weapon for depth of flavor.
Salt and black pepper — To taste. I usually use about 1 teaspoon of salt, but adjust based on your broth and personal preference.
Optional Add-ins
Spinach (2 cups, fresh) — I throw this in at the end. It wilts right in and adds a boost of greens. My kids don’t even notice it’s there.
Red bell pepper (1, diced) — Adds sweetness and crunch. I chop it small so it cooks quickly.
Green onions (2, sliced) — For garnish. Adds a fresh, oniony bite at the end.
Lime juice (1 tablespoon) — A squeeze of lime right before serving brightens everything up. It’s the final touch that makes it taste restaurant-quality.
Equipment Needed
You don’t need fancy equipment for this. Here’s what I actually use.
Large skillet or Dutch oven — I use a 12-inch skillet. Needs to fit 2 pounds of chicken comfortably. My ancient cast iron skillet works fine, but a stainless steel or non-stick pot works too. Just make sure it has a lid for simmering.
Sharp knife — For chopping onions and garlic. Dull knives make you cry more—learned this the hard way.
Cutting board — Any size works. I use plastic for easier cleanup.
Wooden spoon — For stirring. Silicone works too. Don’t use metal on non-stick.
Measuring spoons — Pretty standard stuff. Dollar store versions work fine.
Can opener — For the coconut milk. Don’t forget this one!
Optional but nice:
- Garlic press — Saves time but not necessary. Mincing works fine.
- Microplane — For grating fresh ginger. If you don’t have one, just mince the ginger as finely as possible.
How to Make It: Step-by-Step
Alright, let’s make this! I’m walking you through exactly how I do it, including the little tricks I’ve picked up over time.
Step 1: Prep Your Ingredients (5 minutes)
Before you start cooking, chop your onion, mince your garlic, and grate your ginger. I know it seems fussy, but it makes the actual cooking way less stressful. Cut the chicken thighs into 1-inch chunks. Once you start cooking, things move fast, so having everything ready is key. Measure out your spices and have them within arm’s reach.
Step 2: Sear the Chicken (5 minutes)
Heat a tablespoon of oil (vegetable, canola, or coconut oil) in your large skillet over medium-high heat. Add the chicken chunks in a single layer (do this in batches if your pan is small—don’t crowd it). Sear for 2-3 minutes per side until golden brown. You don’t need to cook it through yet; you just want color. This step builds flavor. Remove the chicken to a plate and set aside.
Step 3: Sauté the Aromatics (3 minutes)
In the same pan, add the diced onion. Cook for 2-3 minutes until it starts to soften and smell sweet. Add the minced garlic and grated ginger. Cook for 1 minute, stirring constantly. The garlic should smell amazing but not brown—browned garlic tastes bitter. If the pan looks dry, add a splash of water or oil.
Step 4: Bloom the Spices (1 minute)
Add the curry powder, cumin, turmeric, and tomato paste. Stir constantly for about 1 minute. This “blooms” the spices, releasing their essential oils and making the flavor much more intense. It might smell a bit dry at first—that’s normal.
Step 5: Build the Sauce (5 minutes)
Pour in the chicken broth and scrape up any browned bits from the bottom of the pan. Those bits are flavor gold. Add the coconut milk and stir well. Bring the mixture to a gentle simmer. Let it cook for 3-4 minutes until it thickens slightly. The sauce should coat the back of a spoon.
Step 6: Simmer the Chicken (10 minutes)
Add the seared chicken back into the sauce. Reduce heat to low, cover the pan, and let it simmer for 10 minutes. The chicken will cook through and absorb the flavors. If you’re using chicken breasts, check them at 8 minutes to make sure they don’t overcook.
Step 7: Finish and Serve (2 minutes)
Remove the lid. If the sauce is too thin, let it simmer uncovered for another 2-3 minutes. If it’s too thick, add a splash of water or broth. Stir in the fresh spinach (if using) and let it wilt for 1 minute. Taste and adjust salt and pepper. Squeeze fresh lime juice over the top. Serve immediately over rice or with naan bread.
Total Time: About 30 minutes (10 minutes active, 20 minutes mostly hands-off)
Expert Tips & Tricks
Here’s everything I’ve learned from making this dozens of times. These tips will save you from my mistakes.
Don’t Skimp on the Coconut Milk
I know it sounds rich, but full-fat coconut milk is what makes this curry creamy and luxurious. Light coconut milk will give you a watery, disappointing sauce. If you’re worried about calories, just eat a reasonable portion. It’s worth it for the texture.
Sear the Chicken First
Don’t just boil the chicken in the sauce. Searing it first adds a layer of savory flavor (the Maillard reaction) that you can’t get any other way. It also gives the chicken a better texture—chewy, not rubbery.
Bloom Your Spices
Adding the spices to the hot oil for a minute before adding the liquids is the secret to a deep, complex curry flavor. Raw spices taste dusty. Bloomed spices taste aromatic. Trust me on this.
Adjust the Heat
Curry powder varies by brand. If you want it spicier, add red pepper flakes or a diced jalapeño with the onions. If you want it milder, use less curry powder and add a little honey to balance it out.
Common Mistakes (and how to avoid them)
- Mistake: Sauce is too watery
Fix: Let it simmer uncovered for a few more minutes, or add a teaspoon of cornstarch mixed with water to thicken it. - Mistake: Chicken is dry
Fix: You overcooked it. Use thighs next time, or check breasts earlier. Chicken thighs are forgiving; breasts are not. - Mistake: Curry tastes flat
Fix: It needs acid. Add a squeeze of lime juice or a teaspoon of vinegar. It brightens everything up.
Variations & Substitutions
Once you’ve nailed the basic version, here’s how you can mix it up. I’ve tried all of these.
Vegetarian Version
Skip the chicken and add 2 cans of chickpeas (drained) or 1 block of firm tofu (cubed and pressed). Sauté the tofu until golden before adding it to the sauce. I also like adding sweet potatoes—cubed and simmered with the sauce. It makes it heartier. If you’re looking for more vegetarian ideas, check out my vegan creamy coconut chickpea curry for another great plant-based option.
Spicy Version
Add 1-2 teaspoons of red curry paste along with the spices. Or dice a fresh jalapeño and sauté it with the onions. I like this version when I want a kick.
Creamier Version
Add a tablespoon of coconut cream or a splash of heavy cream (if you’re not strictly dairy-free) at the end. It makes it even richer.
With Vegetables
Add 1 cup of diced bell peppers, 1 cup of frozen peas, or 2 cups of spinach. I throw in whatever veggies I have lying around. It’s a great way to use up leftovers.
Dietary Modifications
- Gluten-Free — This recipe is naturally gluten-free. Just make sure your curry powder and broth are certified GF.
- Dairy-Free — Naturally dairy-free. Just ensure your coconut milk doesn’t contain any dairy additives (rare, but check the label).
- Low-Carb — Serve over cauliflower rice instead of regular rice. It cuts the carbs significantly.
Serving & Storage
How to Serve
I usually serve this straight from the skillet at the dinner table—it looks rustic and stays warm. But here are other ways I’ve enjoyed it:
- Over Basmati Rice — The classic choice. Fluffy, fragrant rice soaks up the sauce perfectly.
- With Naan Bread — For dipping. My kids love this even more than rice.
- With Quinoa — For a protein boost. It’s a bit nuttier but works well.
Toppings Bar:
When I have guests, I put out: fresh cilantro, sliced green onions, lime wedges, and red pepper flakes. Everyone customizes their bowl.
Storage Instructions
Refrigerator:
Store in an airtight container for up to 4 days. The sauce will thicken in the fridge—totally normal. It actually tastes better after a day or two as the flavors meld.
Reheating:
Best method: Add to a skillet with a splash of water or broth over low heat. Stir until heated through and creamy again.
Microwave method: Heat in 30-second intervals, stirring between. Add a splash of water if it’s too thick.
Never works: Trying to reheat in the pot you cooked it in without adding liquid. It always burns on the bottom. Ask me how I know.
Freezing:
This freezes well! I often double the batch and freeze half. Store in freezer-safe containers for up to 3 months. Thaw in the fridge overnight and reheat gently. The texture might change slightly, but it’s still delicious. If you’re meal-prepping, this is a great option. For more budget-friendly meal prep ideas, check out my loaded baked potato salad—another cheap, make-ahead favorite.
Pro Tip
If leftovers are drying out, stir in a tablespoon of coconut milk or a splash of water when reheating. Brings back that creamy texture.
Nutrition Information
I’m not a nutritionist, but here’s the breakdown if you’re tracking.
Per Serving (based on 6 servings):
– Calories: 380
– Protein: 28g
– Carbs: 12g
– Fiber: 3g
– Sugar: 4g
– Fat: 24g
– Saturated Fat: 16g
– Cholesterol: 75mg
– Sodium: 450mg
What’s Good:
– High protein from chicken
– Healthy fats from coconut milk
– Low carb (if you skip the rice)
– Packed with flavor without refined sugars
What to Know:
– Higher in calories from coconut milk
– Contains no gluten
– Moderate sodium (use low-sodium broth to reduce)
My Take:
“Look, this is comfort food with coconut milk. It’s not a diet recipe. But it’s way better than takeout, costs less, and I know exactly what’s in it. When I want to make it lighter, I serve it over cauliflower rice and load up on vegetables. But usually? I just eat a reasonable portion and enjoy it.”
Final Thoughts
So that’s my go-to dairy-free coconut milk chicken curry! I’ve probably talked your ear off at this point, but when you make a recipe this often, you have a lot to say about it. This has saved weeknight dinners more times than I can count. It’s my answer to “what’s for dinner?” when I’m tired, don’t want takeout, and still want something that tastes really good. My kids are happy, my husband’s happy, and I’m happy because I’m not stressed about cooking.
Make it yours! Try different add-ins, swap in your favorite vegetables, adjust the spice level. The best recipes are the ones you adapt to your family’s tastes. If you’re in the mood for something else creamy and coconutty, you might also enjoy this chicken tikka masala for a different twist on creamy curries.
If you make this, drop a comment and let me know what you think! I love hearing how recipes turn out in your kitchen. And if something doesn’t work, tell me that too—I’m here to help troubleshoot. Happy cooking! And I hope your kitchen smells half as good as mine does right now.
Frequently Asked Questions
Can I use chicken breasts instead of thighs?
You can, but they’re more likely to dry out. If you use breasts, cut them into smaller chunks and check them at 8 minutes instead of 10. Thighs are more forgiving and stay juicier, which is why I prefer them.
My sauce is too thin—what happened?
Usually means you didn’t let it simmer long enough to reduce. Let it cook uncovered for another 5-10 minutes. You can also add a teaspoon of cornstarch mixed with 1 tablespoon of water to thicken it quickly.
Can I make this ahead for a dinner party?
Absolutely! Make the sauce up to 2 days ahead and store in the fridge. Cook the chicken fresh right before serving (takes 10 minutes). Reheat the sauce gently and add the chicken. It’s a great way to reduce stress during a party.
Why did my curry taste bland?
It probably needed more salt or acid. Taste and add salt if needed. If it still tastes flat, add a squeeze of lime juice or a teaspoon of vinegar. Acid brightens up rich, creamy sauces.
Can I use light coconut milk?
You can, but the sauce will be thinner and less rich. I recommend full-fat for the best texture. If you’re watching calories, just eat a smaller portion.
How do I reheat leftovers without it getting dry?
Add a splash of water or coconut milk to a skillet, add your leftover curry, and heat gently over low heat, stirring frequently. The extra liquid brings back the creamy texture. Microwave sort of works but tends to dry it out. If you do microwave, definitely add a splash of liquid first and heat in short bursts.
Can I double this recipe?
Yes! Double everything and use your biggest pot. The cooking times stay the same. I do this when I’m meal-prepping or feeding a crowd. Just make sure your skillet is big enough for the sauce—you might need to use two pans or a very large skillet.
Pin This Recipe!
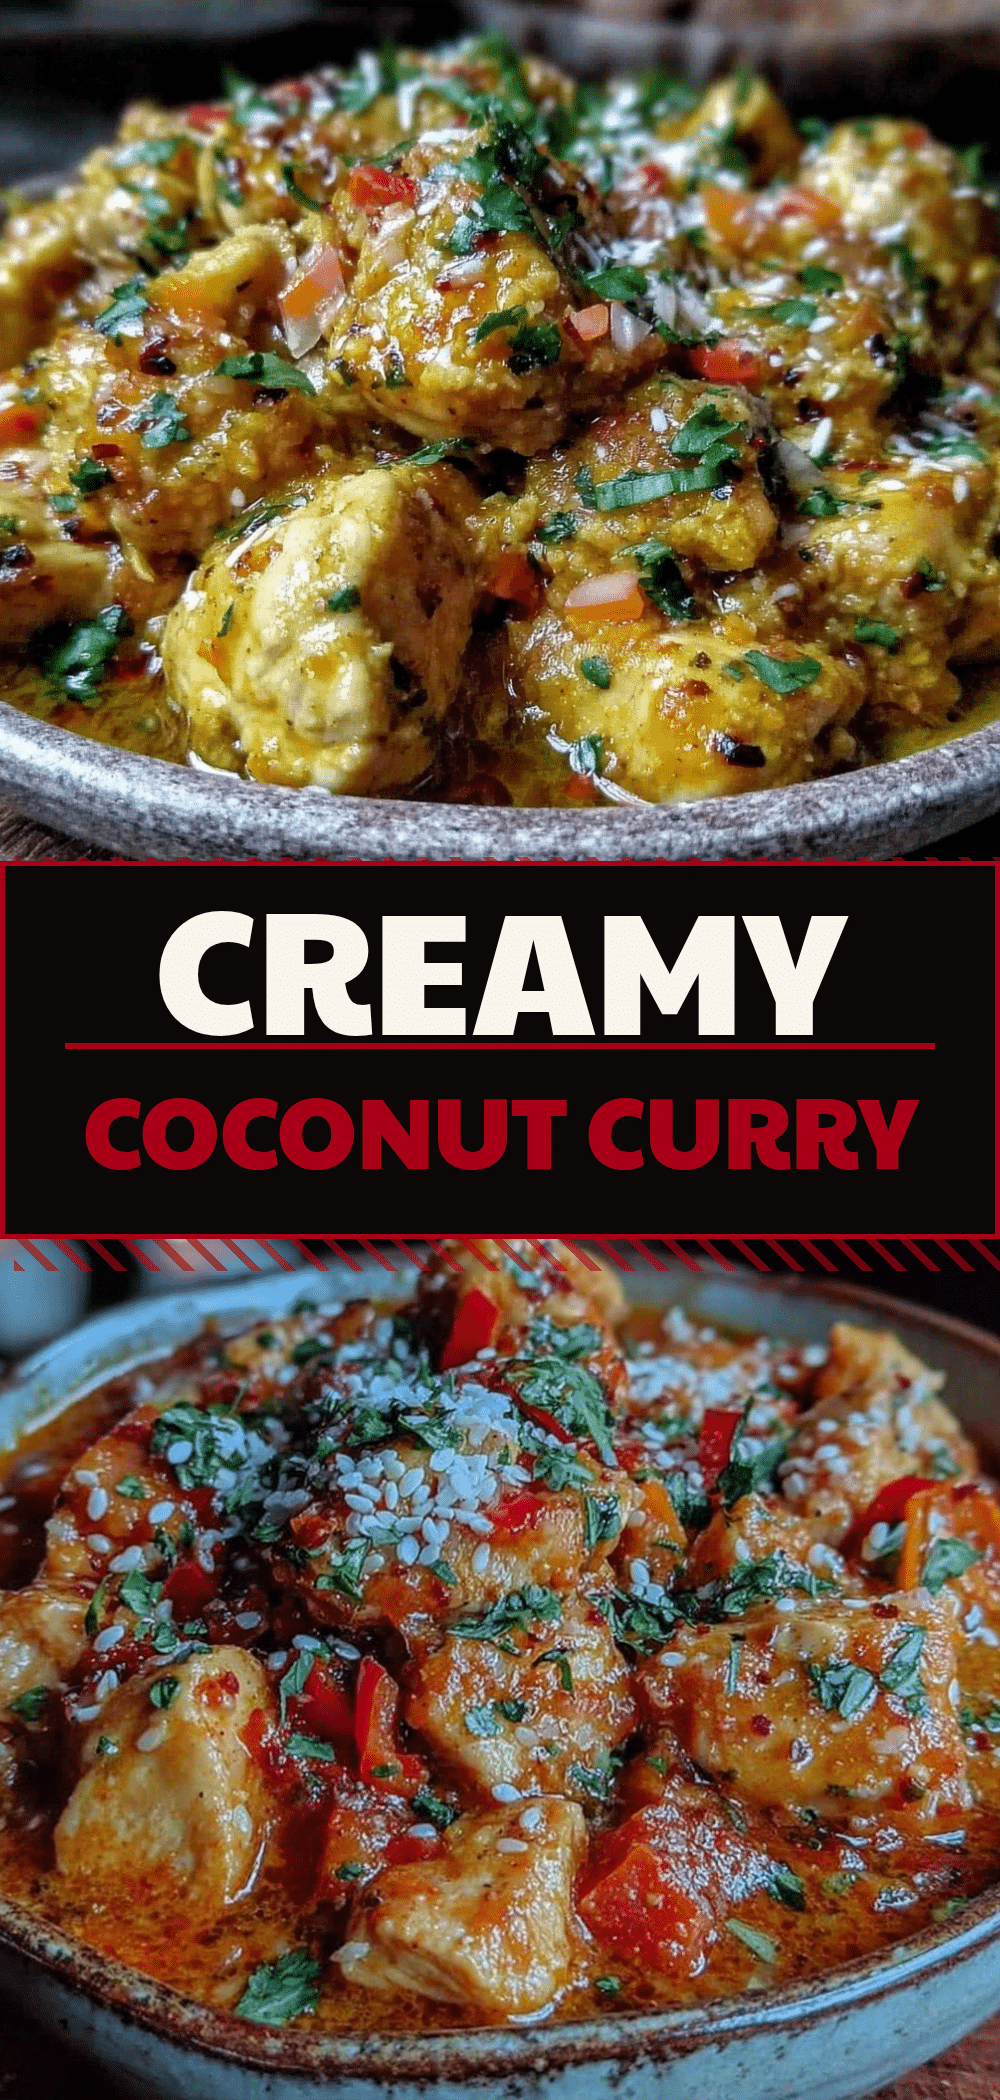

Dairy-Free Coconut Milk Chicken Curry: Cheap & Easy
- Total Time: 30 minutes
- Yield: 4-6 servings 1x
Description
A simple, budget-friendly, and naturally dairy-free chicken curry that comes together in 30 minutes using pantry staples. It’s creamy, kid-approved, and perfect for busy weeknights.
Ingredients
- 2 pounds boneless, skinless chicken thighs, cut into 1-inch chunks
- 2 cans (13.5 oz each) full-fat, unsweetened coconut milk
- 1 medium yellow onion, diced
- 4 cloves garlic, minced
- 1 tablespoon fresh ginger, grated
- 2–3 tablespoons curry powder
- 1 teaspoon ground cumin
- 1 teaspoon ground turmeric
- 1 cup low-sodium chicken broth
- 1 tablespoon tomato paste
- 1 tablespoon oil (vegetable, canola, or coconut)
- Salt and black pepper to taste
- Optional: 2 cups fresh spinach
- Optional: 1 red bell pepper, diced
- Optional: 2 green onions, sliced
- Optional: 1 tablespoon lime juice
Instructions
- Prep ingredients: Dice onion, mince garlic, grate ginger, and cut chicken into 1-inch chunks. Measure out spices.
- Sear chicken: Heat oil in a large skillet over medium-high heat. Sear chicken chunks in batches for 2-3 minutes per side until golden brown. Remove to a plate.
- Sauté aromatics: In the same pan, cook diced onion for 2-3 minutes until soft. Add garlic and ginger, cooking for 1 minute until fragrant.
- Bloom spices: Add curry powder, cumin, turmeric, and tomato paste. Stir constantly for 1 minute to release oils.
- Build sauce: Pour in chicken broth, scraping up browned bits. Add coconut milk and stir. Simmer for 3-4 minutes until slightly thickened.
- Simmer chicken: Return chicken to the pan. Reduce heat to low, cover, and simmer for 10 minutes until chicken is cooked through.
- Finish: Remove lid. If sauce is too thin, simmer uncovered for 2-3 minutes. Stir in spinach (if using) until wilted. Adjust seasoning with salt, pepper, and lime juice. Serve over rice or with naan.
Notes
Use full-fat coconut milk for the best creamy texture. Searing the chicken first adds depth of flavor. If the sauce is too thin, simmer uncovered or add a cornstarch slurry. If it tastes flat, add acid like lime juice or vinegar. Chicken thighs are preferred over breasts to prevent drying out.
- Prep Time: 10 minutes
- Cook Time: 20 minutes
- Category: Main Course
- Cuisine: Indian-inspired
Nutrition
- Serving Size: Approximately 1.5 cu
- Calories: 380
- Sugar: 4
- Sodium: 450
- Fat: 24
- Saturated Fat: 16
- Carbohydrates: 12
- Fiber: 3
- Protein: 28
Keywords: chicken curry, coconut milk curry, dairy-free, gluten-free, easy dinner, weeknight meals, budget-friendly, one-pot meal



