It was 6:45 PM on a Tuesday. The kind of Tuesday where the kids have been home from school for three hours, the dog has chewed up one of my slippers, and my brain has completely shut down. I stared into the refrigerator, hoping a miracle dinner would materialize, but all I found was a half-pound of ground beef, a bag of tortilla chips, and a block of cheddar that was starting to look a little sad.
I could have ordered pizza. I could have made toast. But I had this nagging feeling that if I made toast again, my middle schooler would stage a protest. So, I did what I do most nights when I’m running on empty: I threw everything in a pan and hoped for the best.
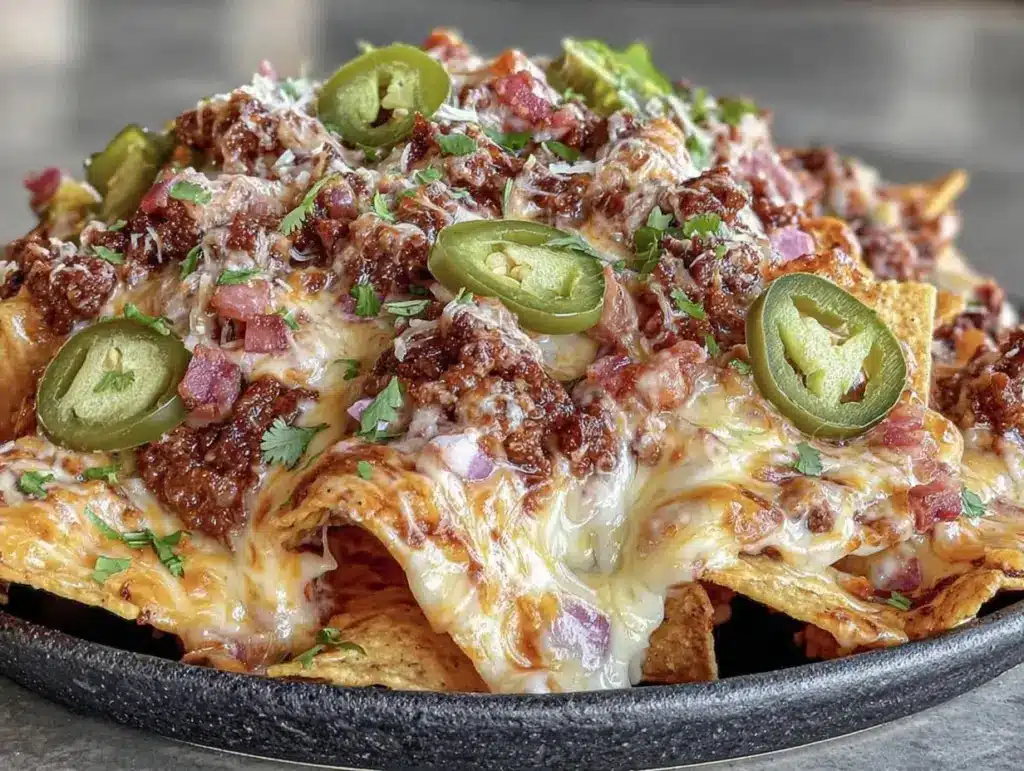
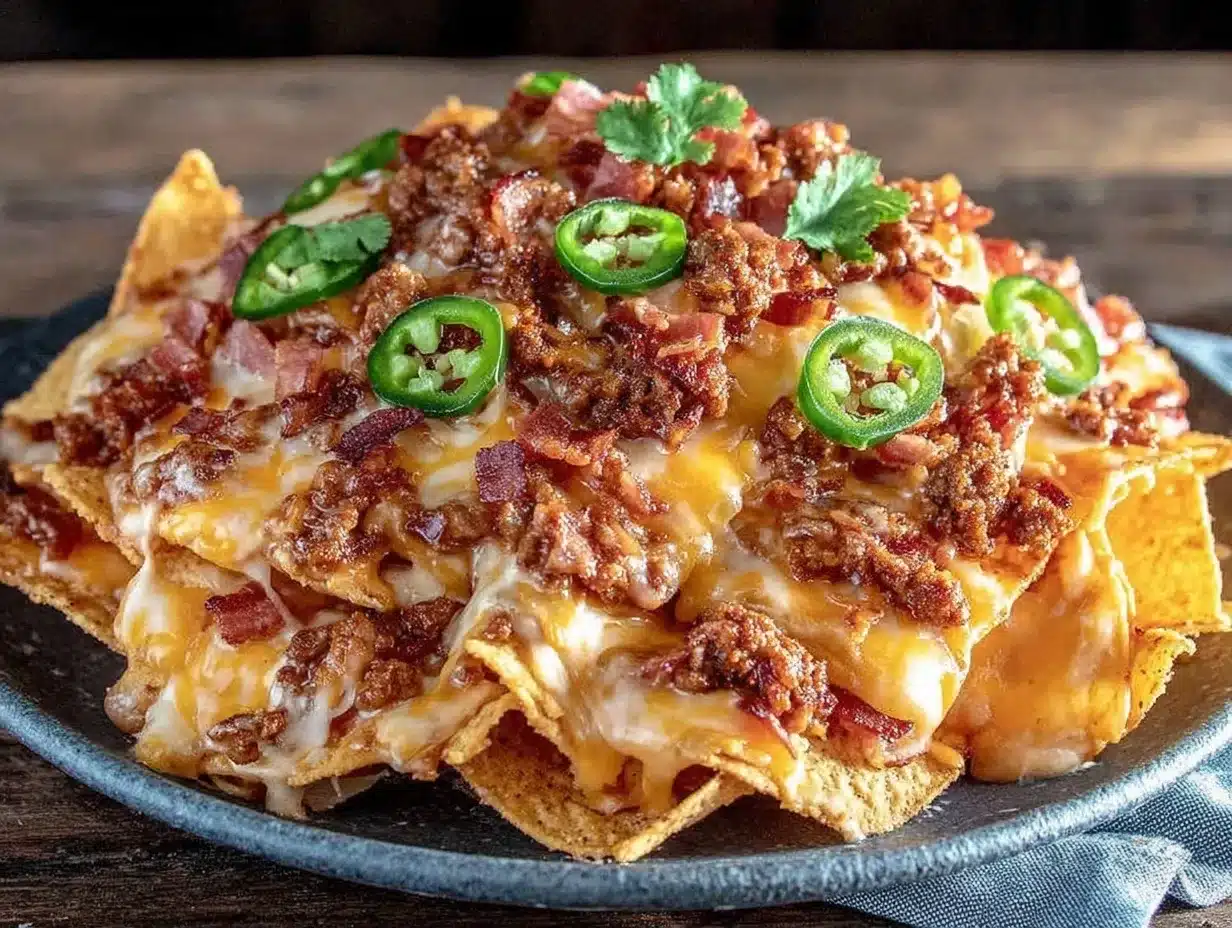
Those loaded cheesy nachos with ground beef turned out to be the best weeknight dinner I’d made in months. They were hot, cheesy, and tasted like a treat, but they cost less than $10 and took about 20 minutes from start to finish. My kids cleared their plates so fast I barely had time to scrape the pan. Since that night, these nachos have become our “Tuesday Savior.” If you’re looking for a way to feed a hungry family without spending hours in the kitchen or breaking the bank, you need this recipe in your rotation.
Why You’ll Love This Recipe
I’ve made dinner for my family of five for over ten years, and I’ve learned that the best meals are the ones that solve problems. This nacho recipe isn’t just about the food; it’s about the relief of having a hot meal on the table when you have nothing else to give. Here’s why this has become a staple in our house:
- Stupid Simple — Seriously, if you can brown meat and sprinkle cheese, you can make this. I’ve made this while helping my kids with homework. It’s that easy. No complex techniques, no fancy equipment.
- Lightning Fast — 20 minutes from start to finish. I know, I know, cooking usually takes longer, but because we’re using ground beef and pre-made chips, it’s one of the fastest dinners I can pull together. Perfect for when the hunger hits at 5:30 PM sharp.
- Budget-Smart — This feeds 4-6 people for under $15. That’s less than what we’d spend on a single large pizza delivery. I keep ground beef and chips in the pantry for exactly these moments.
- Kid-Approved — My picky eater, who usually refuses to eat “mixed” foods, loves picking at these. It’s essentially a deconstructed taco or a cheesy casserole, which is basically their favorite food groups in one bite.
- Makes Amazing Leftovers — And yes, you can have leftover nachos. I store the meat and cheese mixture separately from the chips so they don’t get soggy. Reheating the topping in the microwave and serving it over fresh chips the next day is surprisingly good.
This is my go-to when I need dinner to just work. No stress, no weird ingredients, just reliable, delicious food that makes everyone happy.
Ingredients You’ll Need
Here’s the best part: you probably have most of this already in your pantry or freezer. This recipe relies on affordable, pantry-staple ingredients that I always keep stocked. I’m particular about a few things here, but mostly, it’s about flexibility.
For the Base:
Ground beef (1 pound / 450g) — I use 80/20 lean ground beef because the fat adds flavor. If you’re watching calories, 90/10 works too, but you might need a splash of olive oil. Lean beef can dry out the nachos a bit.
Tortilla chips (1 large bag / about 10-12 oz) — I use restaurant-style chips because they’re sturdy enough to hold the toppings without breaking. Kettle chips work too, but they’re thicker and might get overwhelmed by the cheese. Avoid the thin, delicate chips unless you’re making individual servings.
Shredded Mexican blend cheese (2 cups / 200g) — This is usually a mix of cheddar, queso quesadilla, and Monterey Jack. It melts beautifully. I buy the bagged shredded cheese for convenience, but if you have time, grating your own cheddar and Monterey Jack makes a smoother, creamier sauce. Pro tip: buy block cheese and grate it yourself—it melts better and costs less.
For the Flavor:
Onion (1 medium, diced / about 150g) — Yellow onion is standard, but white onion works too. I dice it small so it cooks quickly and blends in with the meat. If you’re not a fan of onion texture, you can finely mince it or even use onion powder.
Garlic (3 cloves, minced / about 1 tablespoon) — Fresh garlic is non-negotiable for me. Jarred garlic has a weird metallic taste that clashes with the cheese. Fresh only. It adds that savory depth that makes the dish taste homemade.
Ground cumin (1 teaspoon) — This is the secret weapon. It gives the beef that warm, earthy taco flavor. Don’t skip it. It’s cheap and makes a huge difference.
Chili powder (1 teaspoon) — Adds a mild heat and color. If you like it spicier, add a pinch of cayenne or use a spicy chili powder blend.
Salt and black pepper — To taste. I usually use about ½ teaspoon salt and a good crack of pepper. Adjust based on your preference.
For the Toppings (The “Loaded” Part):
Jalapeños (½ cup, sliced) — Fresh or pickled. I prefer pickled jalapeños because they add a nice tangy crunch. If your kids are sensitive to heat, leave them off or use mild peppers.
Black beans (1 can / 15 oz, drained and rinsed) — This stretches the meal and adds protein. It’s a great way to make the nachos more filling without adding more meat. I use low-sodium cans and rinse them well to remove excess starch.
Tomatoes (2 medium, diced / about 300g) — Fresh Roma tomatoes add brightness and acidity to cut through the richness of the cheese. If you’re in winter and tomatoes are bland, skip them or use a little salsa.
Green onions (2-3 stalks, sliced) — For garnish. They add a fresh, oniony bite that looks pretty too.
Sour cream and salsa — For serving. I always put these on the side so everyone can customize their own bowl. My husband likes it extra sour; my kids like it mild.
Optional Add-ins:
I often keep a few extras on hand. Corn kernels (frozen, thawed) add a nice sweet crunch. Pico de gallo is a great shortcut if you don’t want to dice tomatoes. Guacamole is always welcome, though it adds cost.
Equipment Needed
You don’t need fancy equipment for this. Here’s what I actually use. Most of this is standard kitchen stuff, so you probably have it all.
Large skillet or frying pan — I use a 12-inch stainless steel skillet. It needs to be big enough to brown the beef and mix in the spices without splattering. Cast iron works great too, but stainless is easier to clean for me.
Baking sheet or large baking dish — You need something flat to spread the chips out. A rimmed baking sheet is ideal because it catches any drips. A 9×13 casserole dish works too, but you’ll have fewer crispy edges. I prefer the baking sheet for that contrast of soft meat and crunchy chips.
Wooden spoon or spatula — For stirring the beef mixture. Silicone works too. Don’t use metal on non-stick pans.
Colander — For draining the black beans. Or just use the lid to drain—I do this when I’m being lazy, but be careful of steam.
Sharp knife and cutting board — For chopping onions, tomatoes, and green onions. A dull knife makes chopping onions a nightmare—learned this the hard way with tears.
Measuring spoons — Pretty standard stuff. Dollar store versions work fine for this recipe.
How to Make It: Step-by-Step
Alright, let’s make this! I’m walking you through exactly how I do it, including the little tricks I’ve picked up over years of making this for my family.
Step 1: Prep Your Ingredients (5 minutes)
Before you start cooking, dice your onion, mince your garlic, and dice your tomatoes. Drain and rinse your black beans. Shred your cheese if you’re doing it yourself. I know it seems fussy, but it makes the actual cooking way less stressful. Once you start browning the beef, things move fast. Have everything ready to go.
Step 2: Brown the Beef (8-10 minutes)
Heat your large skillet over medium-high heat. Add the ground beef. Break it up with your wooden spoon as it cooks. You want to cook it until it’s no longer pink, about 8-10 minutes. If there’s a lot of grease, drain it off, but leave a little bit for flavor. This step is crucial—you want the meat cooked through and slightly crispy at the edges.
Step 3: Season the Meat (2 minutes)
Reduce the heat to medium. Add the diced onion to the beef. Cook for 2-3 minutes until the onion softens. Add the minced garlic, cumin, chili powder, salt, and pepper. Stir everything together and cook for 1 minute until the spices are fragrant. The smell should fill the kitchen—that’s when you know it’s ready. Taste and adjust salt if needed.
Step 4: Assemble the Nachos (3 minutes)
Preheat your oven to 375°F (190°C). Line a large baking sheet with parchment paper or foil for easy cleanup. Spread the tortilla chips in a single layer on the baking sheet. If you have a large sheet, do it in batches. Don’t overcrowd the chips, or they’ll get soggy. Sprinkle the seasoned beef evenly over the chips. Then, sprinkle the shredded cheese generously over the top. You want good coverage, so you get cheese in every bite.
Step 5: Bake (5-7 minutes)
Place the baking sheet in the oven and bake for 5-7 minutes, or until the cheese is melted and bubbly. Keep an eye on it—cheese can go from melted to burnt very quickly. You want it golden and gooey, not browned on the edges.
Step 6: Add Cold Toppings (2 minutes)
Remove the nachos from the oven. Immediately top with the black beans, diced tomatoes, and sliced jalapeños. The heat from the nachos will slightly warm the beans and tomatoes without cooking them, keeping them fresh. Sprinkle with sliced green onions.
Step 7: Serve
Serve immediately with sour cream and salsa on the side. These are best eaten hot and crispy. I usually serve them straight from the baking sheet at the dinner table—it looks rustic and keeps them warm. Grab your forks and dig in!
Total Time: About 20 minutes (10 minutes active, 10 minutes mostly hands-off)
Expert Tips & Tricks
Here’s everything I’ve learned from making this dozens of times. These tips will save you from my mistakes.
Don’t Skip the Single Layer
I know it’s tempting to pile the chips high, but a single layer ensures even cooking and crispy edges. If you pile them, the bottom ones get soggy from the steam. Use two baking sheets if you’re feeding a crowd.
Grate Your Own Cheese
Pre-shredded cheese contains cellulose to prevent clumping, which means it doesn’t melt as smoothly. Grating your own block of cheddar and Monterey Jack makes a huge difference in texture. It’s only 2 minutes of extra work, but the sauce is silkier.
Drain the Beef Grease
If your beef is very fatty, drain the excess grease before adding spices. Too much grease makes the chips soggy and the nachos greasy. You want the meat to stick to the chips, not float in oil.
Warm the Toppings
If you’re serving these as a main dish, you might want to warm the black beans separately in the microwave or on the stove before adding them. Cold beans on hot nachos can be a textural shock. It’s a small detail, but it matters.
Make-Ahead Strategy
You can prep the beef mixture ahead of time. Cook the beef and spices, let it cool, and store it in the fridge for up to 3 days. When you’re ready to eat, just assemble and bake. This saves active time on busy nights.
Variations & Substitutions
Once you’ve nailed the basic version, here’s how you can mix it up. I’ve tried all of these with my family.
Turkey Nachos
Swap ground beef for ground turkey. It’s leaner and lighter. I add a little extra olive oil to the pan to keep it moist. My kids don’t even notice the difference.
Veggie-Loaded
Add extra veggies to the beef mixture. Bell peppers, corn, and zucchini all work great. I toss them in with the onions. This is how I get my kids to eat more vegetables without realizing it.
Chicken Nachos
Use shredded rotisserie chicken instead of ground beef. Toss the chicken in the spices after heating it through. It’s faster since the chicken is already cooked. This is great for using up leftovers.
Bean-Only (Vegetarian)
Skip the meat entirely and use two cans of black beans. Season them heavily with cumin and chili powder. It’s filling and cheap. I make this version when I’m trying to eat less meat.
Spicy Version
Add diced green chilies to the beef mixture. Use a spicy cheese blend. Top with extra jalapeños and a drizzle of hot sauce. For my husband, who loves heat, this is the way to go.
Dietary Modifications:
Gluten-Free — Use certified gluten-free tortilla chips. Most chips are naturally gluten-free, but check the label to be sure. Everything else is naturally GF.
Dairy-Free — Use dairy-free cheese shreds. They’ve gotten much better in recent years. I use Violife or Daiya. It won’t melt exactly like dairy cheese, but it works.
Lower-Carb — This is tricky because chips are carb-heavy. You could try using fried zucchini chips or pork rinds as a base, but it’s not the same experience.
Serving & Storage
How to Serve:
I usually serve this straight from the skillet at the dinner table—it looks rustic and stays warm. But here are other ways I’ve enjoyed it:
- Side Dishes: A simple green salad with balsamic vinaigrette cuts through the richness. Or serve with loaded baked potato salad for a heavy, hearty meal. It’s like a taco party.
- Toppings Bar: When I have guests, I put out extra sour cream, salsa, guacamole, and jalapeños. Everyone customizes their bowl. It’s fun and interactive.
- Drink Pairing: I like a cold beer or a glass of watermelon mint sangria to balance the heat. It’s refreshing and light.
Storage Instructions:
Refrigerator:
Store the beef and cheese mixture in an airtight container for up to 3 days. Keep the chips separate. The chips will lose their crunch if stored with the wet ingredients.
Reheating:
Best method: Reheat the meat and cheese mixture in the microwave or on the stove. Serve over fresh chips.
Microwave method: If you have leftover assembled nachos, reheat in the microwave for 30-60 seconds. They won’t be crispy, but they’ll be warm.
Freezing:
Honestly, this doesn’t freeze well. The chips get soggy and the cheese separates. Make it fresh. If you have leftovers, store them in the fridge for up to 3 days.
Pro tip: If you’re making this for a party, double the batch. I always make extra because people go back for seconds. And if you’re meal prepping, the beef mixture is great to use in tacos later in the week.
Nutrition Information
I’m not a nutritionist, but here’s the breakdown if you’re tracking. This is comfort food, so it’s rich.
Per Serving (based on 6 servings):
- Calories: 450
- Protein: 22g
- Carbs: 35g
- Fiber: 4g
- Sugar: 3g
- Fat: 24g
- Saturated Fat: 10g
- Cholesterol: 55mg
- Sodium: 600mg
What’s Good:
Decent protein from the beef and beans. Calcium from the cheese. Fiber from the beans and veggies.
What to Know:
Higher in calories and fat from the cheese and chips. Sodium can be high, so use low-sodium beans and go easy on the salt.
My Take:
Look, this is loaded nachos. It’s not a diet recipe. But it’s way better than takeout, costs less, and I know exactly what’s in it. When I want to make it lighter, I use less cheese and more beans and veggies. But usually? I just eat a reasonable portion and enjoy it.
Final Thoughts
So that’s my go-to loaded cheesy nachos with ground beef! I’ve probably talked your ear off at this point, but when you make a recipe this often, you have a lot to say about it. This has saved weeknight dinners more times than I can count. It’s my answer to “what’s for dinner” when I’m tired, don’t want takeout, and still want something that tastes really good.
My kids are happy, my husband’s happy, and I’m happy because I’m not stressed about cooking. Make it yours! Try different add-ins, swap in your favorite vegetables, adjust the spice level. The best recipes are the ones you adapt to your family’s tastes.
If you make this, drop a comment and let me know what you think! I love hearing how recipes turn out in your kitchen. And if something doesn’t work, tell me that too—I’m here to help troubleshoot. Happy cooking! And I hope your kitchen smells half as good as mine does right now.
Frequently Asked Questions
Can I use ground turkey instead of beef?
Absolutely. Ground turkey is leaner and cooks faster. Just make sure to add a little olive oil to the pan so it doesn’t dry out. Season it the same way. My kids love it, and it’s a lighter option.
Why did my nachos get soggy?
Usually, this happens if you pile the chips too high or if the beef mixture is too wet. Make sure you drain the grease from the beef well. Also, spread the chips in a single layer so they crisp up evenly. If you’re adding cold toppings like tomatoes, add them right before serving, not before baking.
Can I make these ahead of time?
You can prep the beef mixture ahead of time. Cook it, season it, and store it in the fridge. When you’re ready to eat, just assemble and bake. Don’t assemble the whole tray ahead of time because the chips will absorb moisture and get soft.
What cheese is best for nachos?
I love a mix of cheddar for flavor and Monterey Jack for meltability. Mexican blend cheese works great too. Avoid pre-shredded cheese if you can—it doesn’t melt as smoothly. Grate your own for the best results.
Can I freeze leftover nachos?
I wouldn’t recommend it. The chips lose their crunch and the cheese separates when thawed. It’s best to make them fresh. If you have leftovers, store the meat and cheese mixture separately and serve over fresh chips the next day.
How do I reheat leftovers without them getting dry?
Reheat the meat and cheese mixture in the microwave or on the stove. Serve it over fresh chips. If you have assembled leftover nachos, microwave them for short bursts (30 seconds) and stir in between. They won’t be crispy, but they’ll be warm.
Can I make these in an air fryer?
Yes! Use a small air fryer basket. Spread the chips in a single layer, top with beef and cheese, and air fry at 350°F for 3-4 minutes. You might need to do this in batches. It’s a great option for smaller portions.
Pin This Recipe!
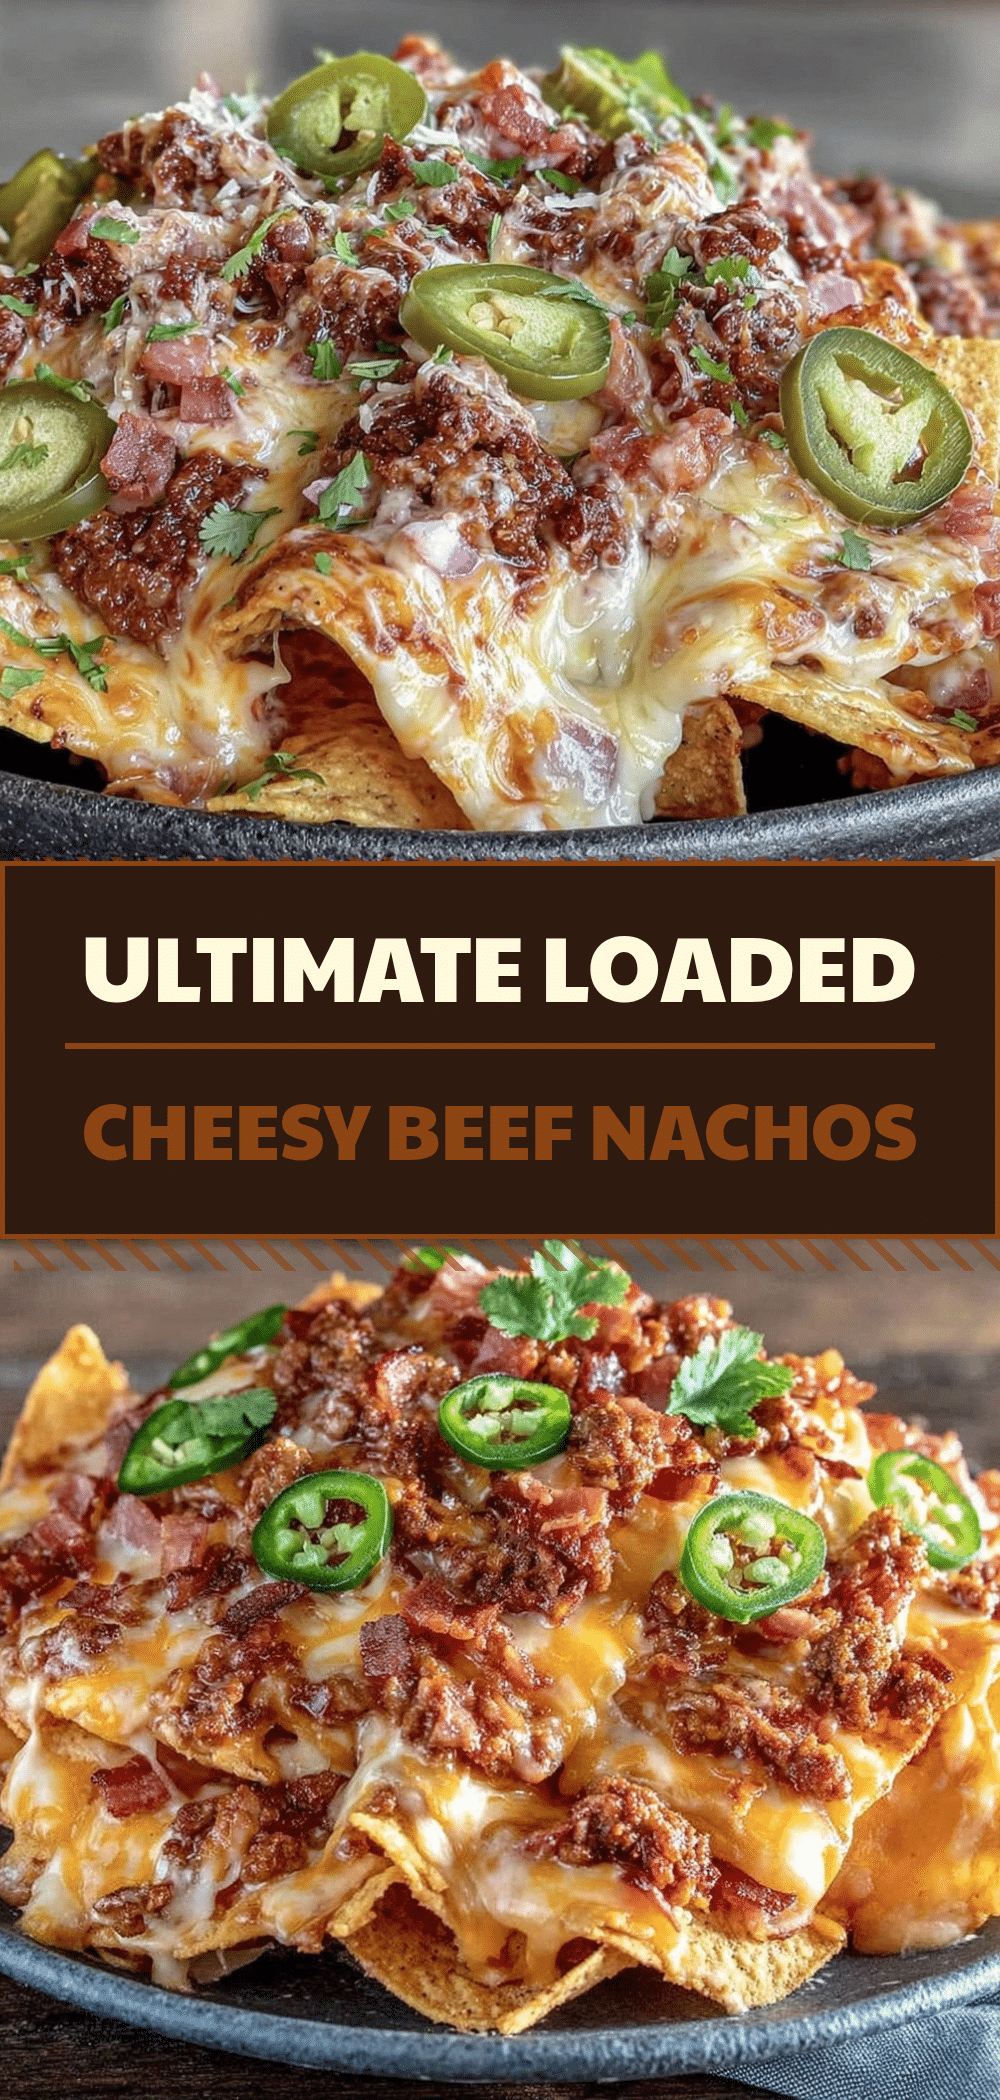

Loaded Cheesy Nachos with Ground Beef
- Total Time: 20 minutes
- Yield: 6 servings 1x
Description
A quick, budget-friendly, and kid-approved weeknight dinner featuring seasoned ground beef, melted cheese, and crispy tortilla chips, ready in just 20 minutes.
Ingredients
- 1 pound (450g) ground beef (80/20 lean recommended)
- 1 large bag (10–12 oz) tortilla chips (restaurant-style)
- 2 cups (200g) shredded Mexican blend cheese
- 1 medium yellow onion, diced
- 3 cloves garlic, minced
- 1 teaspoon ground cumin
- 1 teaspoon chili powder
- Salt and black pepper to taste
- 1 can (15 oz) black beans, drained and rinsed
- 2 medium Roma tomatoes, diced
- 1/2 cup sliced jalapeños (fresh or pickled)
- 2–3 stalks green onions, sliced
- Sour cream and salsa for serving
Instructions
- Preheat oven to 375°F (190°C). Line a large baking sheet with parchment paper or foil.
- Dice the onion, mince the garlic, and dice the tomatoes. Drain and rinse the black beans.
- Heat a large skillet over medium-high heat. Add ground beef and break it up with a wooden spoon. Cook for 8-10 minutes until no longer pink. Drain excess grease if necessary.
- Reduce heat to medium. Add diced onion to the beef and cook for 2-3 minutes until softened.
- Add minced garlic, cumin, chili powder, salt, and pepper. Stir and cook for 1 minute until fragrant.
- Spread tortilla chips in a single layer on the prepared baking sheet.
- Sprinkle the seasoned beef evenly over the chips, followed by the shredded cheese.
- Bake for 5-7 minutes until the cheese is melted and bubbly.
- Remove from oven and immediately top with black beans, diced tomatoes, jalapeños, and green onions.
- Serve immediately with sour cream and salsa on the side.
Notes
For best results, spread chips in a single layer to ensure crispiness. Grate your own cheese for better melting. Store beef mixture separately from chips to prevent sogginess. This recipe can be made with ground turkey or chicken as a substitution.
- Prep Time: 10 minutes
- Cook Time: 10 minutes
- Category: Main Course
- Cuisine: Mexican
Nutrition
- Serving Size: Approximately 1/6 of
- Calories: 450
- Sugar: 3
- Sodium: 600
- Fat: 24
- Saturated Fat: 10
- Carbohydrates: 35
- Fiber: 4
- Protein: 22
Keywords: nachos, ground beef, weeknight dinner, family meals, budget friendly, quick recipes, cheesy nachos, easy dinner



