It was 7:30 PM on a Tuesday, the kind of rainy, gray evening that makes you want to cancel all plans and stay in bed. I was standing in my kitchen, staring into the open fridge, feeling that specific brand of exhaustion that comes from a long work week. The kids were arguing over who got the good spot on the couch, and my husband was asking the dreaded question: “What’s for dinner?”
I wanted something warm. Something that hugged you from the inside out. Something that didn’t involve turning on the oven and heating up the entire house in July. That night, I decided to stop trying to make baked mac and cheese in a casserole dish. I grabbed a saucepan, some elbow macaroni, and the cheeses I had hiding in the back of the crisper drawer. I didn’t have a recipe. I just had a craving and a little bit of panic.
What came out of that pan wasn’t just dinner. It was comfort. It was the kind of creamy, gooey, cheesy magic that makes you close your eyes and sigh with relief. It was so good that my teenage son, who usually picks at his food, asked for “just one more bite” (which turned into a second bowl). That was two years ago. Since then, I’ve made this creamy stovetop mac and cheese with three cheeses probably fifty times. It’s become my emergency button for bad days, my go-to for potlucks, and the only thing that reliably gets my kids to eat vegetables (okay, maybe not, but it gets them to eat dinner without complaining).
This isn’t that powdery, artificial-tasting stuff from a box. This is real cheese. Real butter. Real milk. And it comes together in under 30 minutes. If you’ve been searching for a 3-cheese easy recipe that actually tastes like it was made by someone who cares, you’re in the right place. Let me show you how to make the best mac and cheese you’ll ever have, without the hassle of baking.
Why You’ll Love This Recipe
I’ve tested a lot of mac and cheese recipes over the years. Some are too dry. Some are too greasy. Some require a water bath and three different thermometers. This creamy stovetop mac and cheese with three cheeses you’ll make on repeat is different. It’s simple, it’s forgiving, and it delivers restaurant-quality results every single time.
Here’s why this recipe has earned a permanent spot in my weekly rotation:
- No Oven Required — Seriously. If you have a stovetop and a pot, you can make this. I make this on weeknights when I don’t want to heat up the kitchen, and I make it in winter when I want to save energy. It’s pure stovetop magic.
- Three Cheeses, Infinite Flavor — Using just one cheese often leads to a flat or grainy texture. By combining Cheddar, Gruyère, and Parmesan, you get sharpness, nuttiness, and savory depth all in one bite. It’s a flavor profile that keeps you coming back.
- Ready in 25 Minutes — From boiling water to the first cheesy bite, it takes less time than ordering takeout. I’ve timed it. It’s 10 minutes of prep and active cooking, and 15 minutes of boiling pasta. Perfect for busy nights.
- Zero Grainy Sauce — The biggest fear with homemade mac and cheese is a broken, oily sauce. I’ve cracked the code on temperature and timing so your sauce stays silky, smooth, and glossy. No more scraping burnt cheese off the bottom of the pot.
- Kid-Approved (and Adult-Devoured) — My picky eaters love it because it’s creamy and familiar. I love it because it’s made with real ingredients and doesn’t leave me feeling sluggish afterward. It’s a win-win.
There’s something deeply satisfying about stirring a pot of bubbling cheese sauce and watching it coat the pasta. It’s simple cooking at its best. No fancy techniques, no hard-to-find ingredients, just reliable, delicious food that makes everyone happy.
Ingredients You’ll Need
Here’s the best part: you probably have most of this already. I’m not asking you to go to three different specialty stores. This 3-cheese easy recipe relies on pantry staples and a good-quality cheese selection. I’m particular about three ingredients here, and I’ll tell you exactly why.
For the Pasta Base
Elbow Macaroni (1 pound / 450g) — I use standard elbow macaroni because its curve holds onto the sauce perfectly. Cavatappi or rotini work great too if you want a different shape. Avoid long pasta like spaghetti; you want that pocket-friendly shape. Buy a big box. You’ll be making this often.
Butter (4 tablespoons / 55g) — Unsalted is best so you can control the saltiness. I use European-style butter like Kerrygold when I have it, but regular salted butter works fine if you reduce the added salt later. This is the foundation of your roux.
For the Roux (The Thickener)

All-Purpose Flour (4 tablespoons / 30g) — This is what thickens the milk into a sauce. Don’t skip it, and don’t guess. Use a measuring spoon. If you use too much, it tastes like raw dough. If you use too little, it’s soup.
Whole Milk (2 cups / 480ml) — Full-fat milk is non-negotiable here. Skim milk will make your sauce thin and watery. 2% works in a pinch, but whole milk gives you that rich, luxurious mouthfeel. Warm it up slightly before adding to the roux to prevent lumps.
For the Three Cheeses
Sharp Cheddar Cheese (2 cups / 200g, shredded) — This is your main flavor driver. Buy a block of sharp cheddar and grate it yourself. Pre-shredded cheddar is coated in cellulose (anti-caking agent) which prevents it from melting smoothly. I learned this the hard way with a grainy sauce that looked like it had been through a war. Freshly grated melts like a dream.
Gruyère Cheese (1 cup / 100g, shredded) — This is the secret weapon. Gruyère is nutty, slightly sweet, and melts beautifully. It adds a sophistication that cheddar alone can’t provide. If you can’t find Gruyère, Fontina or Emmental are good substitutes. Avoid using more than half of your cheese as Gruyère, or it might overpower the dish.
Parmesan Cheese (½ cup / 50g, freshly grated) — This is your umami bomb. Parmesan adds a salty, savory punch that ties all the flavors together. Use the hard, aged Parmesan from the block, not the green shaker kind. It melts into the sauce and adds depth without being too dominant.
For the Flavor Boost
Garlic Powder (1 teaspoon) — Fresh garlic can burn easily in a roux, so I use garlic powder for a consistent, gentle flavor. It’s subtle but essential.
Smoked Paprika (½ teaspoon) — This adds a hint of smokiness that makes the mac and cheese taste like it was baked, even though it’s stovetop. It’s a tiny amount, but it makes a huge difference.
Mustard Powder (½ teaspoon) — Don’t worry, it won’t taste like mustard. Mustard powder enhances the cheese flavor and cuts through the richness. It’s a chef’s secret trick.
Salt and Black Pepper — To taste. Remember, your cheeses are already salty, so taste before adding extra salt.
Optional Add-ins — Cooked bacon bits, sautéed broccoli florets, or diced ham. I add these sometimes, but the plain version is so good I often skip them.
Equipment Needed
You don’t need fancy equipment for this. Here’s what I actually use. Most of this stuff is already in your kitchen.
- Large Saucepan or Dutch Oven (4-6 quart) — I use a 5-quart saucepan with a thick bottom. A thick bottom prevents scorching. My old stainless steel pot works perfectly. Avoid thin-bottomed pans; they heat unevenly.
- Large Pot for Pasta — Needs to hold 1 pound of pasta with plenty of room to boil. A standard 8-quart pot is ideal.
- Whisk — Essential for the roux. You need to whisk constantly to avoid lumps. A silicone whisk is great because it scrapes the sides of the pan.
- Sharp Grater — Box grater or microplane. I use a box grater for the cheddar and Gruyère, and a microplane for the Parmesan. Grating your own cheese is the most important step for texture.
- Wooden Spoon — For stirring the pasta and the final mix. Silicone works too. Don’t use metal if you have a non-stick pot.
- Measuring Cups and Spoons — Pretty standard stuff. Dollar store versions work fine, but invest in a good liquid measuring cup for the milk.
- Colander — For draining the pasta. Or just use the lid to drain—I do this when I’m lazy, but be careful of steam.
Tool Tip: Don’t have a Dutch oven? Any big pot works—doesn’t need to be fancy. The key is a heavy bottom to distribute heat evenly.
How to Make It: Step-by-Step
Alright, let’s make this! I’m walking you through exactly how I do it, including the little tricks I’ve picked up over dozens of test batches. This creamy stovetop mac and cheese with three cheeses is straightforward, but details matter.
Step 1: Prep Your Cheese (5 minutes)
Before you start cooking, shred your cheddar and Gruyère. If you’re using a block of Parmesan, grate that too. Place them in separate bowls or just keep them in their packaging until you need them. This is crucial because once you start cooking, things move fast. I set out my three cheeses right next to the stove so I don’t forget them. Trust me, you don’t want to be digging through the fridge while your sauce is simmering.
Step 2: Cook the Pasta (10 minutes)
Bring a large pot of salted water to a boil. The water should taste like the ocean—don’t be shy with the salt. Add the elbow macaroni and cook according to package directions until al dente (usually 8-10 minutes). IMPORTANT: Before draining, scoop out 1 cup of pasta water and set it aside. This starchy water is magic for the sauce. Drain the pasta and set it aside. Do not rinse the pasta! Rinsing removes the starch that helps the sauce cling.
Step 3: Make the Roux (5 minutes)
In your large saucepan, melt the butter over medium heat. Once it’s foamy, add the flour. Whisk constantly for about 1-2 minutes. You’re cooking out the raw flour taste. The mixture should look like a thick paste and smell slightly nutty. Don’t let it brown. If it turns dark, start over. This is the base of your sauce.
Step 4: Build the Sauce (5 minutes)
Gradually pour in the warm whole milk while whisking constantly. This is where you need to be patient. Whisk until the mixture is smooth and there are no lumps. Continue to cook and whisk for 3-4 minutes until the sauce thickens enough to coat the back of a spoon. It should look like thin gravy. If it gets too thick, add a splash of the reserved pasta water.
Step 5: Add the Cheese (3 minutes)
Remove the saucepan from the heat. This is critical. High heat makes cheese grainy. Let the sauce cool for 30 seconds, then add the shredded cheddar and Gruyère. Stir gently until melted. Then add the Parmesan. Stir until everything is smooth and glossy. The sauce should be thick and creamy. If it’s too thick, add more pasta water, a tablespoon at a time.
Step 6: Combine and Season (2 minutes)
Add the drained pasta to the cheese sauce. Toss everything together until the pasta is well coated. Taste and add salt and pepper as needed. Add the garlic powder, smoked paprika, and mustard powder. Toss again. The pasta should be shiny and coated in a rich, orange-hued sauce.
Step 7: Serve Immediately
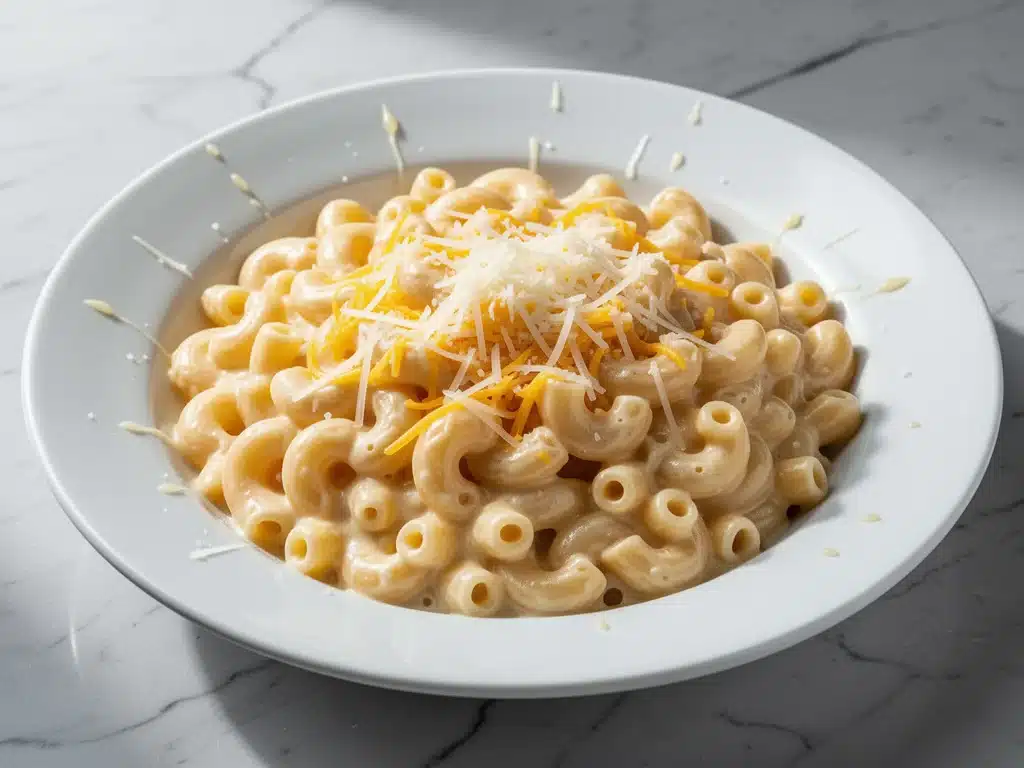
Mac and cheese is best served hot, right out of the pot. Serve it in bowls, topped with extra Parmesan or a sprinkle of paprika. It’s ready to eat!
Total Time: About 25-30 minutes (10 minutes active, 20 minutes mostly hands-off)
Expert Tips & Tricks
Here’s everything I’ve learned from making this dozens of times. These tips will save you from my mistakes.
The Golden Rules of Cheese Sauce
Grate Your Own Cheese — I cannot stress this enough. Pre-shredded cheese contains potato starch or cellulose to prevent clumping in the bag. These additives stop cheese from melting properly. You’ll end up with a greasy, clumpy sauce. Buy blocks and grate them. It takes 5 minutes and makes a world of difference.
Remove from Heat Before Adding Cheese — Cheese seizes up at high temperatures. Always remove your saucepan from the burner before adding the cheese. Let the residual heat melt it. If you’re worried it won’t melt, put it back on the lowest possible heat for 30 seconds, but usually, off-heat is perfect.
Warm Your Milk — Adding cold milk to a hot roux can cause lumps. Warm your milk in the microwave for 30-60 seconds before adding it. It helps the roux incorporate smoothly.
Save That Pasta Water — That starchy water is liquid gold. It helps adjust the consistency of the sauce and helps it cling to the pasta. Keep a measuring cup handy so you don’t forget.
Common Mistakes (and How to Fix Them)
Mistake: Sauce is too thick — Fix: Add warm milk or pasta water, a tablespoon at a time, whisking constantly.
Mistake: Sauce is too thin — Fix: Let it simmer on low heat for a few more minutes to reduce. Or add a little more shredded cheese.
Mistake: Cheese is grainy — Fix: Heat was too high. Next time, remove from heat before adding cheese. If it’s already grainy, whisk in a splash of cream or milk to try to smooth it out.
Mistake: Pasta is mushy — Fix: Cook pasta 1-2 minutes less than package directions. It will finish cooking in the hot sauce.
Variations & Substitutions
Once you’ve nailed the basic version, here’s how you can mix it up. I’ve tried all of these, and they’re all winners.
Protein Add-ins
Bacon Mac and Cheese — Cook 6-8 strips of bacon until crispy, crumble it, and stir it in at the end. Add the crispy bacon on top for garnish. This is my husband’s favorite version.
Chicken Mac and Cheese — Add 2 cups of diced cooked chicken (rotisserie works great) when you combine the pasta and sauce. It makes it a full meal.
Ham and Pea — Stir in 1 cup of diced ham and 1 cup of frozen peas (thawed) in the last minute. The peas add a nice pop of color and sweetness.
Vegetable Loaders
Broccoli Mac — Steam 2 cups of broccoli florets until tender-crisp, then stir them in with the pasta. It adds nutrition and texture.
Spinach Mac — Stir in 2 cups of fresh spinach at the end. It wilts instantly and adds a pop of green.
Dietary Modifications
Gluten-Free — Use gluten-free elbow macaroni. Everything else is naturally gluten-free. I’ve used Barilla gluten-free and it works great. Just watch the cooking time, as GF pasta can get mushy faster.
Dairy-Free — Replace butter with olive oil or dairy-free butter. Use dairy-free milk (oat milk works well for creaminess). Use dairy-free cheddar and Gruyère alternatives. It’s different, but there are good brands out there now.
Lighter Version — Use half-and-half instead of whole milk, and reduce the cheese by 25%. It’s still good, just less rich. I make this when I’m trying to be “healthy,” though let’s be honest, it’s still mac and cheese.
Serving & Storage
How to Serve: I usually serve this straight from the pot at the dinner table—it looks rustic and stays warm. But here are other ways I’ve enjoyed it:
- Garlic Bread — Obviously. You can’t have mac and cheese without garlic bread.
- Simple Green Salad — A crisp salad with bals vinaigrette cuts through the richness.
- Roasted Vegetables — Broccoli, green beans, or asparagus work well.
Toppings Bar: When I have guests, I put out: extra Parmesan, red pepper flakes, fresh chives, crispy bacon bits. Everyone customizes their bowl.
Storage Instructions:
Refrigerator: Store in an airtight container for up to 4 days. The sauce will thicken in the fridge—totally normal.
Reheating: Best method: Add to a skillet with a splash of milk or cream over low heat. Stir until heated through and creamy again. Microwave method: Heat in 30-second intervals, stirring between. Add a splash of milk if it’s too thick. Never works: Trying to reheat in the pot you cooked it in. It always burns on the bottom. Ask me how I know.
Freezing: Honestly, this doesn’t freeze well because of the dairy. The sauce separates when thawed. Make it fresh or store in the fridge for up to 4 days.
Pro tip: If leftovers are drying out, stir in a tablespoon of butter and a splash of milk when reheating. Brings back that creamy texture.
Nutrition Information
I’m not a nutritionist, but here’s the breakdown if you’re tracking.
Per Serving (based on 6 servings):
| Nutrient | Amount |
|---|---|
| Calories | 520 |
| Protein | 22g |
| Carbs | 55g |
| Fiber | 2g |
| Sugar | 6g |
| Fat | 24g |
| Saturated Fat | 14g |
| Cholesterol | 65mg |
| Sodium | 680mg |
| Calcium | 450mg |
What’s Good: High in protein and calcium from the cheese. Filling and satisfying.
What to Know: Higher in calories and saturated fat from the cheese and butter. Contains dairy and gluten. Moderate sodium.
My Take: Look, this is comfort food with cream and cheese. It’s not a diet recipe. But it’s way better than takeout, costs less, and I know exactly what’s in it. When I want to make it lighter, I use the half-and-half version and load up on vegetables. But usually? I just eat a reasonable portion and enjoy it.
Final Thoughts
So that’s my go-to creamy stovetop mac and cheese with three cheeses you’ll make on repeat! I’ve probably talked your ear off at this point, but when you make a recipe this often, you have a lot to say about it.
This has saved weeknight dinners more times than I can count. It’s my answer to “what’s for dinner” when I’m tired, don’t want takeout, and still want something that tastes really good. My kids are happy, my husband’s happy, and I’m happy because I’m not stressed about cooking.
Make it yours! Try different add-ins, swap in your favorite vegetables, adjust the spices. The best recipes are the ones you adapt to your family’s tastes.
If you make this, drop a comment and let me know what you think! I love hearing how recipes turn out in your kitchen. And if something doesn’t work, tell me that too—I’m here to help troubleshoot.
Happy cooking! And I hope your kitchen smells half as good as mine does right now.
Frequently Asked Questions
Can I use milk instead of heavy cream?
This recipe uses whole milk, not heavy cream. If you want to make it richer, you can substitute half the milk with half-and-half or light cream. But whole milk works perfectly for a creamy sauce without being too heavy.
Why did my sauce get grainy/lumpy?
The heat was too high when you added the cheese, which made it seize up. Cheese needs gentle heat. Always remove the pan from the burner before adding cheese, then stir it in off heat. If it’s already grainy, try whisking in a splash of warm milk—sometimes you can save it.
Can I make this ahead for a dinner party?
Sort of. Make the sauce up to 2 days ahead and store in the fridge. Cook the pasta fresh right before serving. Reheat the sauce gently and toss with hot pasta. It won’t be quite as good as fresh, but it’s close and saves you stress during the party. I do this all the time.
Can I use jarred garlic?
You can, but fresh tastes so much better in this recipe. Jarred garlic has a weird metallic taste that really shows up in cream sauces. If you must use it, use half the amount because it’s stronger. But honestly, mincing 6 cloves takes like 2 minutes. Buy pre-peeled garlic cloves if you want to save time.
How do I reheat leftovers without it getting dry?
Add a splash of milk or cream to a skillet, add your leftover pasta, and heat gently over low heat, stirring frequently. The extra liquid brings back the creamy texture. Microwave sort of works but tends to dry it out. If you do microwave, definitely add a splash of milk first and heat in short bursts, stirring between.
Can I double this recipe?
Absolutely! Double everything and use your biggest pot. The cooking times stay the same. I do this when I’m meal-prepping or feeding a crowd. Just make sure your saucepan is big enough for the sauce—you might need to use two pans or a very large pot.
Pin This Recipe!


Creamy Stovetop Mac and Cheese: 3-Cheese Easy Recipe
- Total Time: 25 minutes
- Yield: 6 servings 1x
Description
A rich, creamy stovetop mac and cheese made with sharp cheddar, Gruyère, and Parmesan. This easy recipe comes together in under 30 minutes without needing an oven, delivering restaurant-quality comfort food.
Ingredients
- 1 pound elbow macaroni
- 4 tablespoons unsalted butter
- 4 tablespoons all-purpose flour
- 2 cups whole milk, warmed
- 2 cups sharp cheddar cheese, freshly shredded
- 1 cup Gruyère cheese, freshly shredded
- ½ cup Parmesan cheese, freshly grated
- 1 teaspoon garlic powder
- ½ teaspoon smoked paprika
- ½ teaspoon mustard powder
- Salt and black pepper to taste
- Reserved pasta water as needed
Instructions
- Shred the cheddar and Gruyère cheeses and grate the Parmesan. Set aside in separate bowls.
- Bring a large pot of generously salted water to a boil. Add elbow macaroni and cook until al dente (8-10 minutes).
- Before draining, scoop out 1 cup of starchy pasta water and set aside. Drain the pasta and do not rinse.
- In a large saucepan or Dutch oven, melt butter over medium heat. Add flour and whisk constantly for 1-2 minutes until the mixture looks like a thick paste and smells nutty.
- Gradually pour in the warm whole milk while whisking constantly to prevent lumps. Cook and whisk for 3-4 minutes until the sauce thickens enough to coat the back of a spoon.
- Remove the saucepan from the heat. Let cool for 30 seconds, then stir in the shredded cheddar and Gruyère until melted. Add Parmesan and stir until smooth and glossy.
- Add the drained pasta to the cheese sauce. Toss to coat evenly.
- Season with garlic powder, smoked paprika, mustard powder, salt, and black pepper. Toss again.
- If the sauce is too thick, add reserved pasta water a tablespoon at a time until desired consistency is reached.
- Serve immediately while hot.
Notes
Grate your own cheese to avoid anti-caking agents that prevent smooth melting. Always remove the sauce from heat before adding cheese to prevent graininess. Warm the milk before adding to the roux to prevent lumps. Save pasta water to adjust sauce consistency. This recipe does not freeze well due to dairy separation.
- Prep Time: 10 minutes
- Cook Time: 15 minutes
- Category: Main Course
- Cuisine: American
Nutrition
- Serving Size: 1 serving
- Calories: 520
- Sugar: 6
- Sodium: 680
- Fat: 24
- Saturated Fat: 14
- Carbohydrates: 55
- Fiber: 2
- Protein: 22
Keywords: mac and cheese, stovetop mac and cheese, 3 cheese mac, easy dinner, comfort food, creamy mac and cheese, weeknight dinner, gluten-free option