It was 1998, and I was sixteen years old, standing in my grandmother’s kitchen on a sweltering July afternoon. The air conditioner had given up the ghost three days prior, leaving the house feeling like a steamed bun. Grandma was in the garden trying to save the zucchini, and I was supposed to be studying for chemistry. Instead, I found myself staring at a can of pineapple slices and a box of yellow cake mix, wondering if I could actually pull off something that looked fancy without burning the house down.
She walked in, wiped her sweaty forehead with the back of her wrist, and pointed at the stove. “Show me what you’ve got,” she said. Not “are you okay” or “did you eat.” Just “show me.”
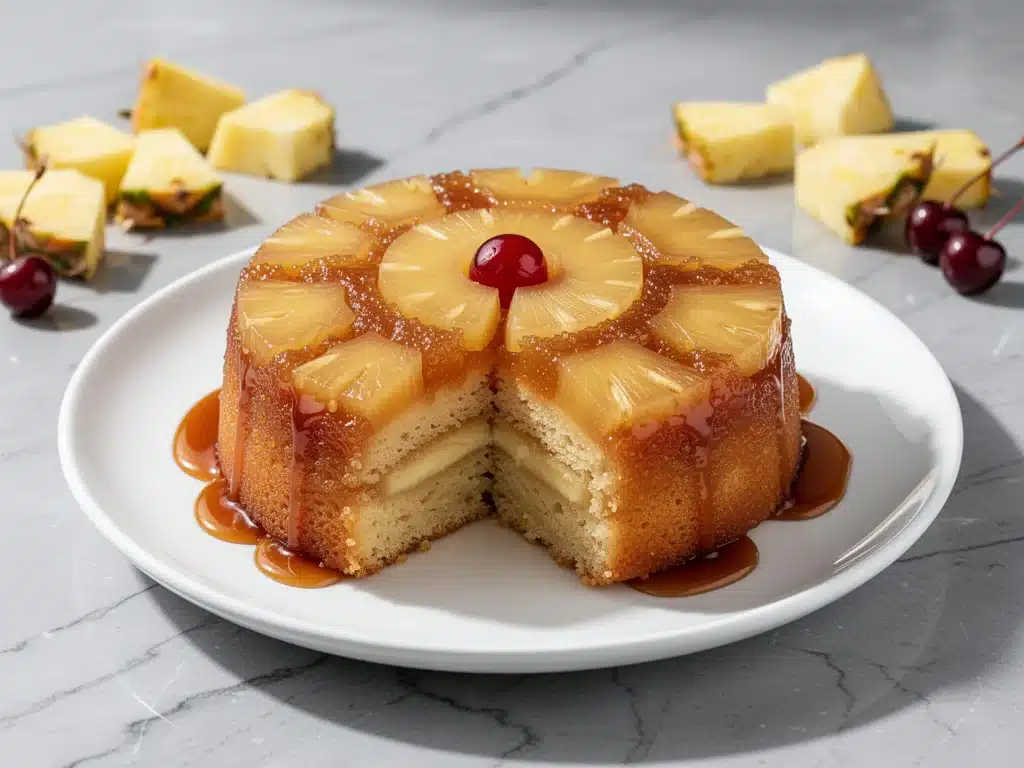
I made this pineapple upside-down cake with caramelized brown sugar topping that afternoon. I remember the smell hitting me the moment the cake came out of the oven—a rich, toasty sweetness that cut right through the humidity. It was sticky, golden, and impossibly easy. She took one bite, looked at me, and said, “Don’t ever change this recipe.” I haven’t. Not really.
That cake saved me from being grounded for skipping study hall, but it did something else. It taught me that sometimes the best desserts aren’t the ones with twelve steps and temperamental meringues. They’re the ones where you throw ingredients into a pan, flip it over, and watch magic happen. This recipe has been in my family for over thirty years, and I’ve tweaked it just enough to make it foolproof for you. It’s my go-to when I need to impress guests, comfort a friend, or just need a reason to turn the oven on.
Why You’ll Love This Pineapple Upside-Down Cake Recipe
There are a hundred reasons to make this cake, but let’s be real: you’re probably looking for something that tastes amazing but doesn’t require a degree in pastry arts. Here’s why this pineapple upside-down cake has earned a permanent spot in my rotation.
It’s Stupidly Simple — Seriously, if you can open a can and sprinkle sugar, you can make this. I’ve made this while holding a baby, while video-calling my mom, and while watching the Super Bowl. It doesn’t demand your full attention.
It Looks Like You Tried Hard — The caramelized pineapple rings create this gorgeous, glossy, restaurant-quality presentation. When you flip it onto the plate, everyone gasps. It feels like a dessert from a high-end bakery, but it’s basically a one-pan job.
It’s a Crowd-Pleaser — I’ve served this to my picky brother, my gluten-free neighbor (with a swap), and my dessert-obsessed sister-in-law. Everyone loves it. The combination of tart pineapple and sweet, buttery caramel is universally appealing. It’s the dessert equivalent of a warm hug.
Makes Amazing Leftovers — Actually, it tastes even better the next day. The flavors meld overnight, and the caramel softens into a rich sauce. I deliberately make this on Sunday so I have slices for Monday morning coffee.
Uses Pantry Staples — You probably already have the cake mix, the butter, and the brown sugar. You just need to grab a can of pineapple and maybe some cherries. It’s budget-friendly and accessible.
This is my answer to “what should I bring to the potluck?” or “I need to apologize to my in-laws.” It’s reliable, delicious, and makes your kitchen smell like heaven. No complicated techniques, no weird ingredients, just reliable, sweet comfort.
Ingredients You’ll Need
Here’s the best part: this recipe is incredibly forgiving. I’m particular about a few things, but for the most part, you’re working with basics. Let’s break down what you need and why it matters.
Butter (½ cup / 113g, unsalted) — This is the base of your caramel. I use unsalted so I can control the saltiness, but if all you have is salted, just omit the added salt in the batter. Softened or melted? Melted is easier for this recipe. You’re going to mix it with the brown sugar anyway.
Brown Sugar (1 cup / 200g, packed) — Dark brown sugar is my preference because it has more molasses, which gives that deep, toffee-like flavor. Light brown works too, but the caramel won’t be as rich. Pack it down when you measure it; loose sugar means less caramel.
Pineapple Slices (1 can / 20oz, heavy syrup) — Look for the can labeled “heavy syrup” or “extra light syrup.” You want the juicy ones. Do not buy fresh pineapple for this; it won’t caramelize the same way and can be too acidic. Drain the juice, but save it! We’ll use it in the batter.
Maraschino Cherries (12 whole, drained) — The classic red dot in the center of each pineapple ring. It’s tradition. If you hate cherries, skip them, but don’t say I didn’t warn you—it’s not the same without that pop of color and tartness.
Yellow Cake Mix (1 box / 15.25oz) — Yes, a box mix. Hear me out. It’s consistent, it’s easy, and it’s what my grandma used. But if you want to be fancy, you can use your favorite vanilla cake batter from scratch. I recommend Betty Crocker or Duncan Hines—they’re reliable.
Water (½ cup / 120ml) — To thin out the cake mix. Some people use milk for a richer cake, but water keeps it light and fluffy, which contrasts nicely with the heavy caramel.
Vegetable Oil (½ cup / 120ml) — Oil makes cakes moister than butter does. This is why the cake stays soft even after sitting in the fridge. Canola or light olive oil works fine. Don’t use olive oil if you want a neutral flavor.
Eggs (3 large) — Room temperature eggs blend better. If you’re in a rush, crack them into a bowl and let them sit on the counter for 15 minutes.
Optional: Vanilla Extract (1 teaspoon) — I always add a splash. It boosts the flavor of the cake mix, which can sometimes taste a bit flat on its own.
Equipment Needed
You don’t need fancy equipment for this. Here’s what I actually use.
10-inch Cast Iron Skillet — This is non-negotiable for me. Cast iron holds heat evenly and creates the best caramel. If you don’t have one, a 9×13 inch baking dish works, but the edges won’t get as crispy. I use my Lodge skillet, but any heavy-bottomed oven-safe skillet will do.
Mixing Bowls — One large bowl for the batter. You don’t need much equipment.
Whisk or Fork — To mix the batter. A whisk is better for incorporating air, making the cake lighter.
Spatula — For scraping the bowl and helping with the flip later.
Measuring Cups and Spoons — Standard stuff. Dollar store versions work fine.
Oven Mitts — Because your skillet is going to be hot. And your hands are valuable.
Plate — A large, flat plate to flip the cake onto. I use a large dinner plate. Make sure it’s bigger than your skillet!
Optional: Pastry Brush — If you’re worried about sticking, you can brush the skillet with a little extra butter, but the brown sugar mixture usually does the work.
How to Make It: Step-by-Step
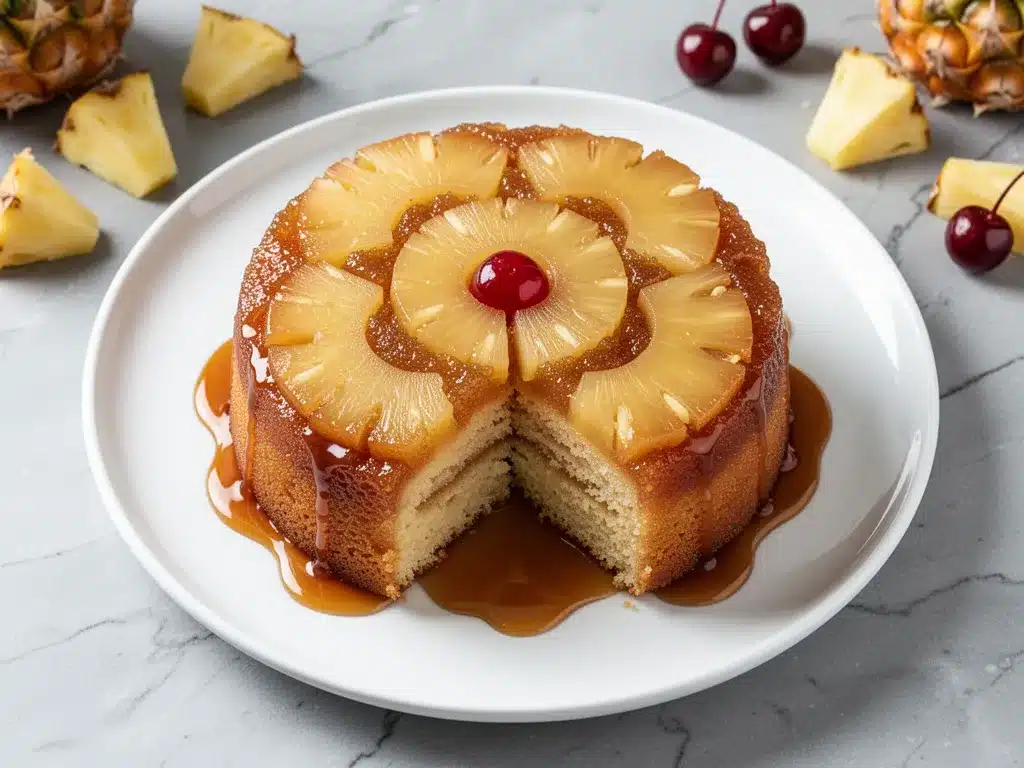
Alright, let’s make this! I’m walking you through exactly how I do it, including the little tricks I’ve picked up over the years. This pineapple upside-down cake with caramelized brown sugar topping is about 45 minutes from start to finish.
Step 1: Prep Your Oven and Skillet (5 minutes)
Preheat your oven to 350°F (175°C). This is crucial. If the oven isn’t hot enough, the caramel won’t set right. Grab your 10-inch cast iron skillet and place it on the stove. We’re going to make the caramel right in the pan.
Step 2: Make the Caramel Base (5 minutes)
Melt the butter in the skillet over medium heat. Once it’s bubbling, pour in the packed brown sugar. Stir constantly with a wooden spoon or spatula. It will look grainy at first, then smooth out into a thick, dark syrup. This takes about 3-4 minutes. Don’t walk away! If it burns, you’ll taste it. You want it to be a rich amber color, like a toffee bar.
Step 3: Arrange the Pineapple
Remove the skillet from the heat. Drain the pineapple slices well. Lay them in a single layer in the skillet, fitting them as tightly as you can. They’ll overlap slightly, and that’s fine. Place a maraschino cherry in the center of each ring. The heat from the pan will help the cherries stick slightly, but they’re mostly just for decoration. Take your time here—this is the “wow” factor moment.
Step 4: Mix the Batter (5 minutes)
In a large bowl, combine the cake mix, eggs, water (or reserved pineapple juice), oil, and vanilla. Whisk until smooth. It should look like a thick, glossy batter. If you’re using pineapple juice instead of water, you might need a tiny bit more liquid, so check the consistency. It should drop slowly from the whisk.
Step 5: Pour and Bake (35-40 minutes)
Pour the batter over the pineapple. It will look like it’s not going to cover everything, but it will spread out as it bakes. Use your spatula to gently spread it to the edges. Place the skillet in the preheated oven. Bake for 35-40 minutes. The cake is done when the top is golden brown and a toothpick inserted into the center comes out clean. If it’s browning too fast, cover it loosely with foil for the last 10 minutes.
Step 6: The Flip (The Moment of Truth)
Remove the skillet from the oven. Let it cool for exactly 10 minutes. This is critical. If you flip it immediately, the caramel will be too liquid and run everywhere. If you wait too long, it will harden and stick. Set a timer. After 10 minutes, place your large plate over the skillet. Holding both firmly (use oven mitts!), flip them over in one confident motion. Lift the skillet off. If any pineapple sticks, gently nudge it back into place with your fingers.
Step 7: Serve
Let it cool for another 10 minutes before slicing. Serve warm. It’s best with a dollop of whipped cream or a scoop of vanilla ice cream, but honestly, it’s delicious on its own. The caramel will be sticky and hot, so be careful!
Expert Tips & Tricks
Here’s everything I’ve learned from making this dozens of times. These tips will save you from my mistakes.
Don’t Skip the Cooling Time
This is the #1 mistake people make. The caramel is molten lava when it comes out of the oven. If you flip it too soon, you’ll have a sticky mess on your counter. Ten minutes is the sweet spot. Trust me.
Drain the Pineapple Well
Excess juice makes the bottom soggy. Lay the drained slices on a paper towel for a minute before arranging them. It’s an extra step, but it ensures a crisp caramel base.
Room Temperature Ingredients
Make sure your eggs and oil are at room temperature. Cold ingredients can cause the batter to seize or not mix evenly, leading to a dense cake.
Use a Heavy Skillet
Thin pans can create hot spots, burning the caramel. Cast iron or a thick stainless steel pan ensures even heating.
The Toothpick Test
Cake mix ovens vary. Start checking at 35 minutes. If the toothpick comes out with wet batter, give it 5 more minutes. If it comes out clean, it’s done.
Common Mistakes (and how to avoid them)
Mistake: Cake sticks to the pan. Fix: Make sure you used enough butter in the caramel, and don’t skip the cooling time. If it sticks, run a knife around the edge and let it sit for another 5 minutes.
Mistake: Cake is dry. Fix: Don’t overbake. Check early. Also, ensure you’re using oil, not butter, in the batter for moisture.
Mistake: Caramel is too hard. Fix: You might have cooked the brown sugar too long before adding the pineapple. Keep it on medium heat and watch it closely.
Variations & Substitutions
Once you’ve nailed the basic version, here’s how you can mix it up. I’ve tried all of these.
Cherry Upside-Down Cake
Skip the pineapple. Use a can of cherry pie filling instead. Spread it in the pan, add the batter, and bake as usual. It’s even sweeter and more intense.
Apple Cinnamon Version
Use thinly sliced apples instead of pineapple. Add a teaspoon of cinnamon to the brown sugar. It’s like a pie in cake form. Great for fall.
Pecan Praline
Add a layer of pecans over the caramel before adding the pineapple. Adds crunch and richness. My husband loves this version.
Gluten-Free
Use a gluten-free yellow cake mix. Everything else is naturally gluten-free. I’ve used King Arthur Gluten-Free Mix and it works great.
Dairy-Free
Use vegan butter and a dairy-free cake mix. The caramel might be slightly less glossy, but it’s still delicious. My lactose-intolerant friend requests this version.
Lighter Version
Use a sugar-free cake mix and diet soda instead of water and oil. It’s lighter, but the texture is different. I make this when I’m trying to be “healthy.”
Different Fruits
Peaches, pears, or even berries work. Just adjust the cooking time slightly. Berries will sink, so add them on top of the batter.
Serving & Storage
I usually serve this straight from the skillet at the dinner table—it looks rustic and stays warm. But here are other ways I’ve enjoyed it:
Side Dishes:
This is a dessert, so it doesn’t need sides. But if you’re having a full meal, pair it with something light. A simple green salad or some grilled chicken balances the sweetness.
Toppings Bar:
When I have guests, I put out: whipped cream, vanilla ice cream, caramel sauce (extra!), and chopped pecans. Everyone customizes their slice.
Wine Pairing:
Not a wine expert, but my wine-snob friend says a sweet Riesling or Moscato works great with this. It cuts through the sugar.
Storage Instructions:
Refrigerator: Store in an airtight container for up to 4 days. The cake will get firmer in the fridge. Let it come to room temperature before serving for the best texture.
Reheating: Best method: Microwave a slice for 20-30 seconds. It warms the caramel and softens the cake. Oven method: Reheat at 300°F for 10 minutes. It brings back that fresh-baked smell.
Freezing: Honestly, this doesn’t freeze well because of the caramel. It gets soggy when thawed. Make it fresh or store in the fridge for up to 4 days.
Meal Prep: Make the cake on Sunday. Slice it, store in the fridge, and grab a slice each morning. It’s perfect for breakfast with coffee.
Nutrition Information
I’m not a nutritionist, but here’s the breakdown if you’re tracking.
Per Serving (based on 8 servings):
– Calories: 450
– Protein: 4g
– Carbs: 65g
– Fiber: 1g
– Sugar: 45g
– Fat: 18g
– Saturated Fat: 8g
– Cholesterol: 65mg
– Sodium: 350mg
– Calcium: 80mg
What’s Good:
– It’s a treat, so enjoy it guilt-free.
– The pineapple adds a tiny bit of vitamin C.
– It’s filling, so one slice is usually enough.
What to Know:
– Higher in sugar and calories from the caramel and cake mix.
– Contains gluten and dairy.
– Moderate sodium.
My Take:
Look, this is comfort food with caramel and cake. It’s not a diet recipe. But it’s way better than store-bought, costs less, and I know exactly what’s in it. When I want to make it lighter, I use the sugar-free mix and skip the whipped cream. But usually? I just eat a reasonable portion and enjoy it.
Final Thoughts
So that’s my go-to pineapple upside-down cake! I’ve probably talked your ear off at this point, but when you make a recipe this often, you have a lot to say about it.
This has saved dinner parties more times than I can count. It’s my answer to “I need to bring something impressive but easy.” My family is happy, my guests are happy, and I’m happy because I’m not stressed about cooking.
Make it yours! Try different fruits, add nuts, or skip the cherries. The best recipes are the ones you adapt to your family’s tastes.
If you make this, drop a comment and let me know what you think! I love hearing how recipes turn out in your kitchen. And if something doesn’t work, tell me that too—I’m here to help troubleshoot.
Happy baking! And I hope your kitchen smells half as good as mine does right now.
Frequently Asked Questions
Q: Can I use fresh pineapple instead of canned?
A: You can, but it’s trickier. Fresh pineapple is more acidic and has more water. You’d need to slice it thin, salt it to draw out moisture, and cook it down with the brown sugar first. For ease and consistency, canned heavy syrup slices are best. They’re already cooked and soft.
Q: My cake stuck to the pan—what happened?
A: Usually means you flipped it too soon. The caramel needs to cool and thicken slightly. If it’s stuck, put the skillet back in the oven at 300°F for 5 minutes to soften the caramel, then try again. Or, just eat it out of the pan with a spoon. No judgment.
Q: Can I make this ahead for a dinner party?
A: Yes! Make it the day before. Let it cool, flip it, and store it covered in the fridge. Bring it to room temperature before serving, or warm it up in the microwave. It actually tastes better the next day as the flavors meld.
Q: Why did my cake sink in the middle?
A: Likely underbaked or too much leavening. Check your cake mix expiration date. Old baking powder/soda loses potency. Also, make sure you didn’t open the oven door too early. Give it the full 35-40 minutes.
Q: Can I use a different type of cake mix?
A: Vanilla or yellow cake mix is traditional. White cake mix works too but is milder. Chocolate cake mix? No, it clashes with the pineapple. Spice cake mix? Surprisingly good! Try it if you like cinnamon.
Q: How do I reheat leftovers without it getting dry?
A: Add a splash of milk or cream to a skillet, add your leftover cake, and heat gently over low heat, stirring frequently. The extra liquid brings back the creamy texture. Microwave sort of works but tends to dry it out. If you do microwave, definitely add a splash of milk first and heat in short bursts, stirring between.
Q: Can I double this recipe?
A: Absolutely! Double everything and use your biggest pot. The cooking times stay the same. I do this when I’m meal-prepping or feeding a crowd. Just make sure your skillet is big enough for the sauce—you might need to use two pans or a very large skillet.
Pin This Recipe!
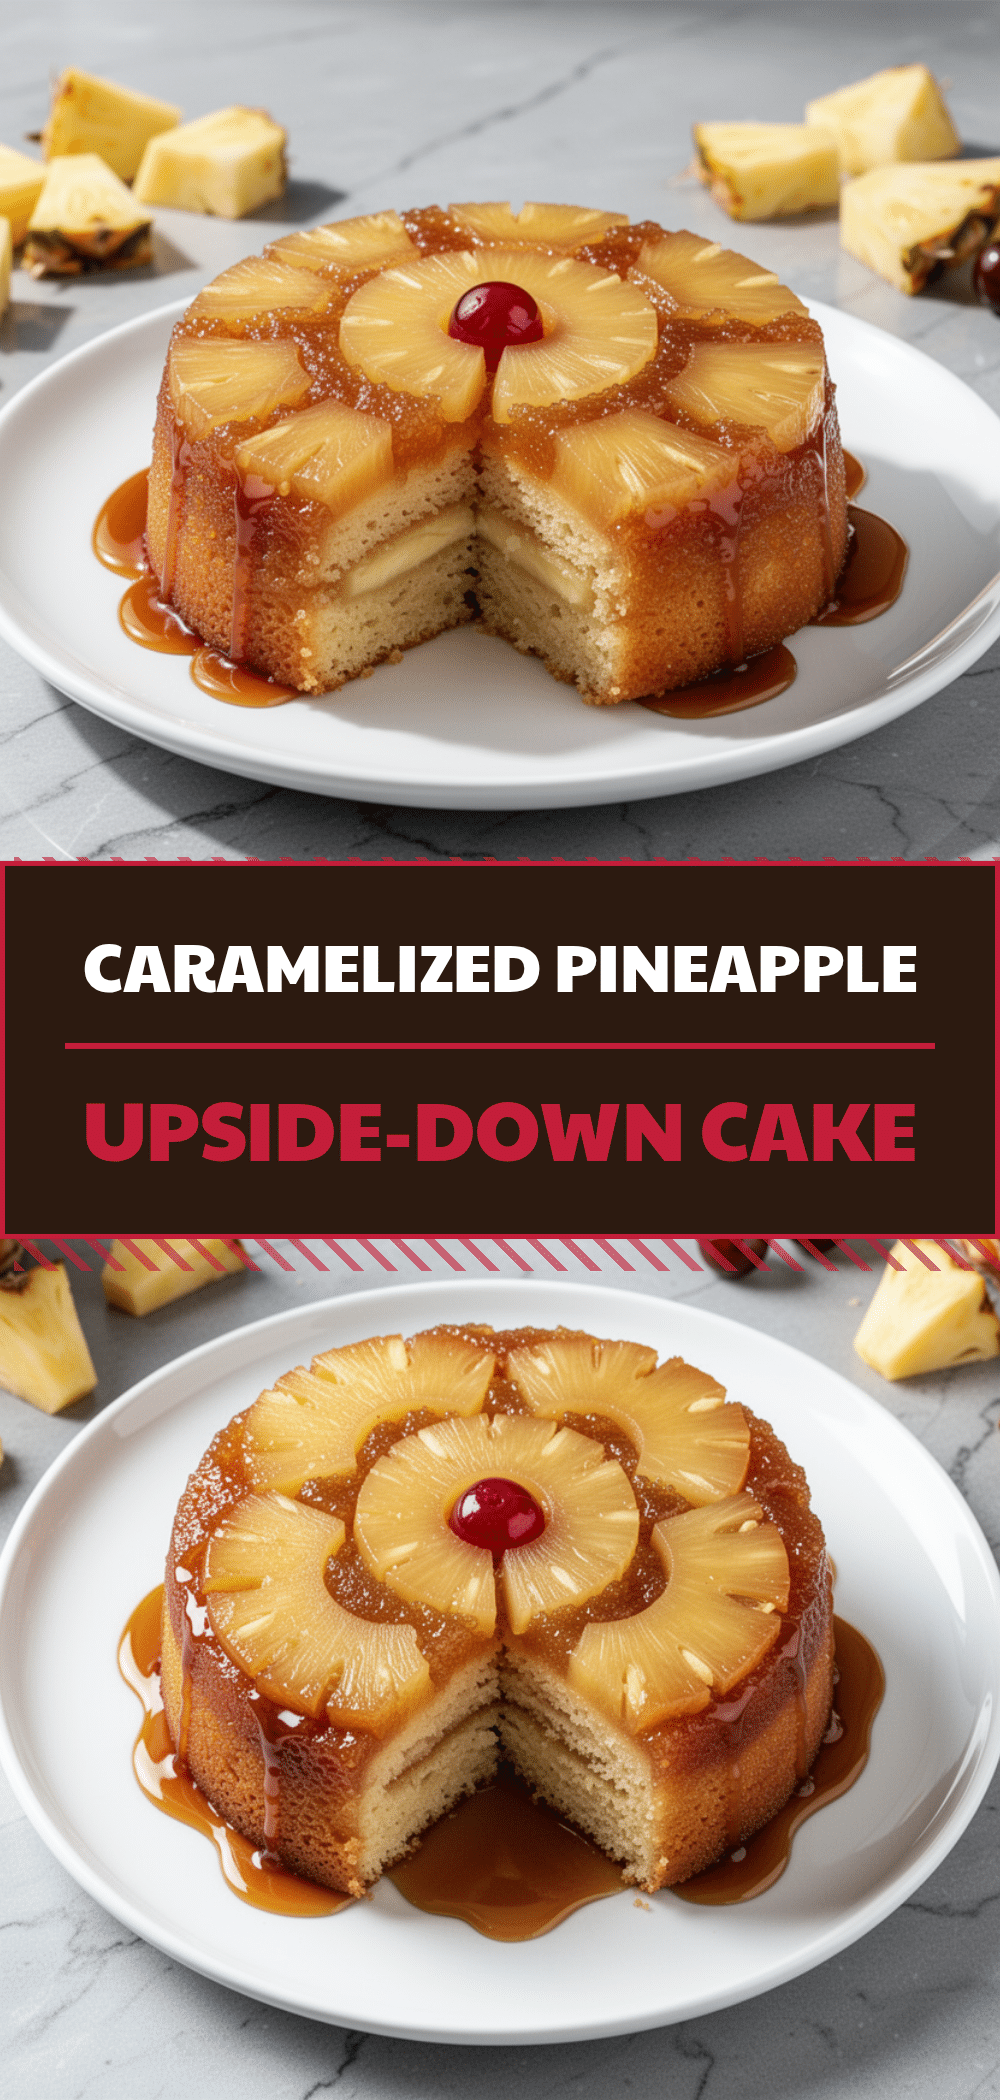
Pineapple Upside-Down Cake: Easy 6-Ingredient Dessert
- Total Time: 45 minutes
- Yield: 8 servings 1x
Description
A nostalgic, foolproof pineapple upside-down cake made with pantry staples. This easy dessert features a caramelized brown sugar topping and juicy pineapple slices, resulting in a sticky, golden, and universally loved treat.
Ingredients
- 1/2 cup (113g) unsalted butter, melted
- 1 cup (200g) packed brown sugar
- 1 can (20oz) pineapple slices in heavy syrup, drained
- 12 maraschino cherries, drained
- 1 box (15.25oz) yellow cake mix
- 1/2 cup (120ml) water (or reserved pineapple juice)
- 1/2 cup (120ml) vegetable oil
- 3 large eggs, room temperature
- 1 teaspoon vanilla extract (optional)
Instructions
- Preheat oven to 350°F (175°C).
- In a 10-inch cast iron skillet over medium heat, melt the butter. Add the packed brown sugar and stir constantly for 3-4 minutes until it forms a smooth, dark amber syrup.
- Remove skillet from heat. Arrange drained pineapple slices in a single layer in the skillet, fitting them tightly. Place a maraschino cherry in the center of each ring.
- In a large bowl, whisk together the cake mix, eggs, water (or pineapple juice), oil, and vanilla until smooth.
- Pour the batter over the pineapple and spread gently to the edges.
- Bake for 35-40 minutes, or until the top is golden brown and a toothpick inserted in the center comes out clean.
- Remove from oven and let cool for exactly 10 minutes.
- Place a large plate over the skillet and flip confidently in one motion. Lift the skillet off.
- Let cool for another 10 minutes before slicing and serving warm.
Notes
Do not skip the 10-minute cooling time before flipping, or the caramel will run. Ensure pineapple is drained well to prevent a soggy bottom. Room temperature ingredients help the batter mix evenly. The cake tastes even better the next day as flavors meld.
- Prep Time: 15 minutes
- Cook Time: 35-40 minutes
- Category: Dessert
- Cuisine: American
Nutrition
- Serving Size: 1 slice
- Calories: 450
- Sugar: 45
- Sodium: 350
- Fat: 18
- Saturated Fat: 8
- Carbohydrates: 65
- Fiber: 1
- Protein: 4
Keywords: pineapple upside-down cake, easy dessert, cast iron cake, caramelized pineapple, family recipe, comfort food, box mix dessert



