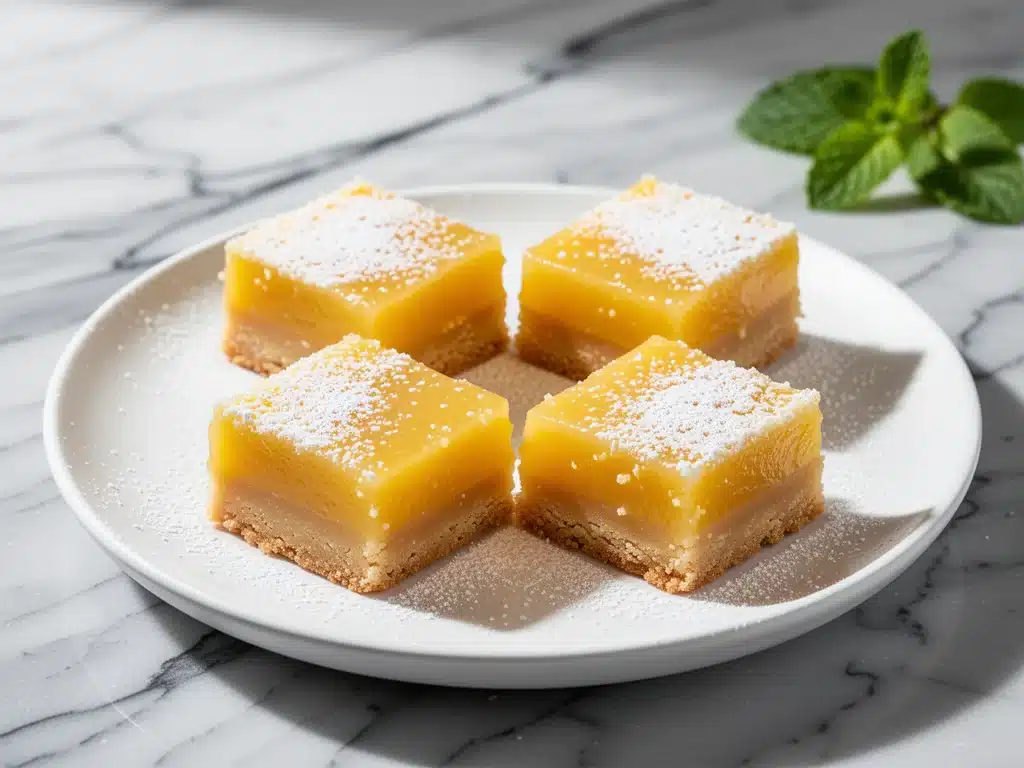
It’s 3 PM on a Tuesday, and I’m standing in my kitchen in a state of pure, unadulterated despair. My kid has a soccer practice in an hour, I have a deadline looming, and the fridge is mostly empty except for a sad lemon and a stick of butter that’s been there since last Christmas. I could make toast. I could microwave leftovers from three nights ago. Or I could make the one thing that always saves my sanity: gooey lemon bars.
Here’s the thing about lemon bars. They’re the ultimate comfort food paradox. They look delicate, almost elegant, sitting there with their dusting of powdered sugar like they belong in a fancy patisserie window. But inside? They’re messy. They’re tangy, sweet, and impossibly gooey. They demand a fork, a napkin, and zero self-control.
I’ve been making this specific version of gooey lemon bars with buttery shortbread crust for about five years now. It started as an accident. I was trying to make a lemon tart, but I used too much butter in the crust and not enough egg in the filling, and what came out of the oven wasn’t tart at all. It was a bar. A thick, dense, incredibly rich bar. I took one bite and knew I had accidentally invented my new favorite dessert. Since then, I’ve tested it dozens of times, tweaking the sugar ratios and the baking temperature, until I landed on this version. It’s the one I make on repeat. It’s the one I pack in Tupperware for potlucks (and hide the rest so my husband doesn’t eat it all). It’s the one that makes people stop mid-chew and ask, “Wait, you made these?”
This isn’t just another lemon bar recipe. It’s the one with the crust that actually holds together but melts in your mouth. It’s the filling that’s bright and zesty without being sour enough to make your jaw ache. It’s the dessert that turns a boring Tuesday into a celebration. And the best part? You don’t need fancy equipment or hard-to-find ingredients. Just a few staples, a whisk, and about 45 minutes of your time.
Why You’ll Love This Gooey Lemon Bars Recipe
There are about ten reasons I keep making this dessert, but here are the big ones. Once you try this version, you’ll probably kick yourself for ever buying the boxed mix or settling for dry, crumbly bars from the grocery store.
Stupid Simple — Seriously, if you can melt butter and whisk eggs, you can make these. I’ve walked my teenage daughter through it over FaceTime while she was at college. No complicated techniques, no tempering chocolate, no special molds. Just mix, pour, bake.
The Crust is the Star — Most lemon bar recipes treat the crust like an afterthought—a sad, hard base that you scrape off the bottom. Not this one. This buttery shortbread crust is sweet, tender, and substantial. It’s almost like a cookie in its own right. I’ve made this crust so many times I could do it with my eyes closed.
Gooey, Not Runny — I’ve seen recipes where the filling is so loose it slides off the plate. This version strikes the perfect balance. It’s soft and jiggly when you take it out of the oven, but it sets up perfectly as it cools. You get that beautiful, creamy texture that’s rich but not heavy.
Perfect Balance of Sweet and Tart — The key is using both lemon juice and lemon zest. The juice gives you the tang, but the zest gives you the aromatic lemon flavor that actually tastes like lemons. I’ve tasted versions that taste like yellow food coloring; this one tastes like sunshine.
Make-Ahead Friendly — These bars actually get better the next day. The flavors meld, the crust softens slightly, and the filling sets even more firmly. I often make them the night before a dinner party so I don’t have to stress in the morning. They keep well in the fridge for up to a week.
Budget-Smart — You probably have almost all of these ingredients already. Flour, butter, sugar, eggs, lemons. It’s cheaper than buying a dozen cupcakes and way more impressive. Plus, one batch feeds 12-16 people easily.
This is my go-to dessert when I need something that looks fancy but is actually easy. No complicated techniques, no weird ingredients, just reliable, delicious food that makes everyone happy. And if you’re looking for other easy dessert ideas, you might also enjoy trying my classic vanilla cake or these perfect chocolate chip cookies for when you need something different.
Ingredients You’ll Need
Here’s the best part: this recipe uses basic pantry staples. You don’t need any specialty items. I’m particular about two things here—the quality of the butter and the freshness of the lemons—and I’ll tell you exactly why.
For the Buttery Shortbread Crust
Unsalted butter (1 cup / 226g, softened) — This is non-negotiable. Use real butter, not margarine. I like to use European-style butter if I can find it because it has a higher fat content, which makes the crust richer. Soften it in the microwave for 10-15 seconds if you’re in a hurry, but don’t melt it.
Confectioners’ sugar (½ cup / 60g) — Also known as powdered sugar. Make sure it’s sifted if it’s clumpy. You don’t want gritty sugar in your crust. This is what gives the shortbread its tender, melt-in-your-mouth texture.
All-purpose flour (1 cup / 120g) — Standard flour works fine. Don’t substitute with whole wheat unless you want a denser, nuttier crust. This recipe is meant to be light and tender.
Salt (¼ teaspoon) — Just a pinch to balance the sweetness. Don’t skip it.
For the Gooey Lemon Filling
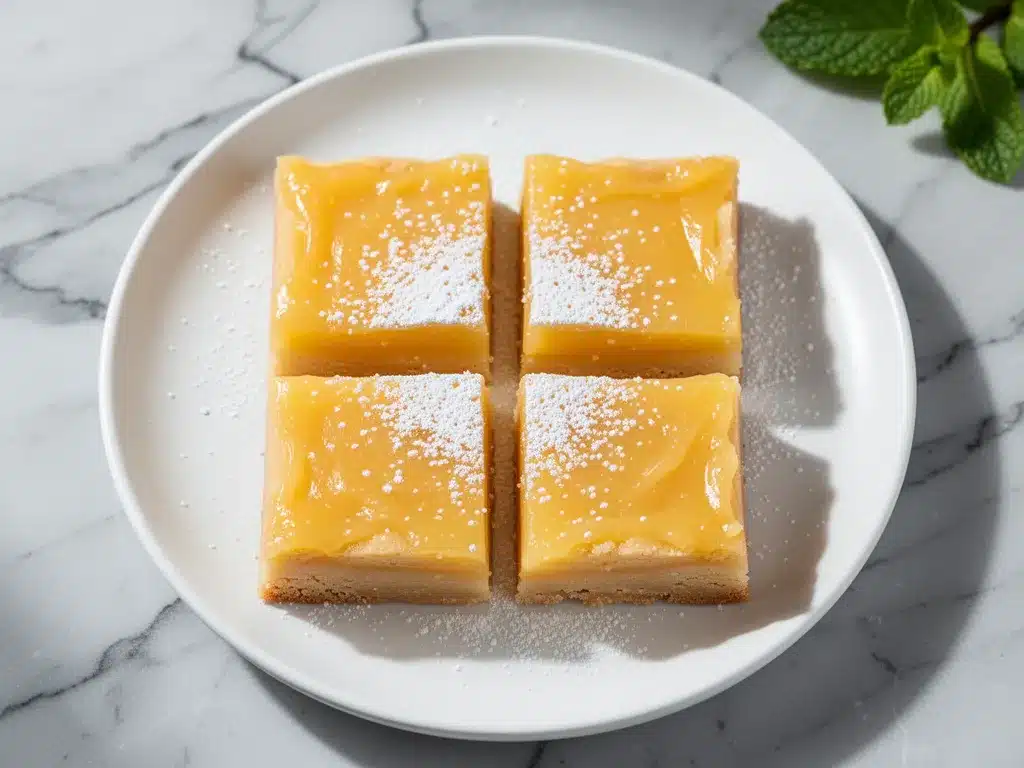
Granulated sugar (1 cup / 200g) — This is the main sweetener for the filling. You can use less if you prefer it tart, but I find 1 cup is the sweet spot for most palates.
Large eggs (3 large) — Room temperature eggs are best. They blend more evenly into the filling, preventing lumps. If you forgot to take them out, just run them under warm water for a few minutes.
Fresh lemon juice (½ cup / 120ml) — This is the most important ingredient. Use fresh-squeezed juice from 3-4 medium lemons. Bottled lemon juice tastes metallic and flat. It’s not worth the shortcut.
Lemon zest (2 tablespoons) — Zest from 2-3 lemons. Use a microplane or fine grater. Only use the yellow part of the peel; the white pith is bitter. This is where all the lemon flavor lives.
Vanilla extract (1 teaspoon) — Adds a subtle depth of flavor that rounds out the sharpness of the lemon. Pure vanilla, not imitation.
Confectioners’ sugar (1 cup / 120g) — For the filling, this helps stabilize the eggs and adds sweetness.
For the Topping
Confectioners’ sugar (½ cup / 60g) — Just for dusting. Don’t skip this step. It makes the bars look professional and adds a tiny bit of extra sweetness to cut the tartness.
Optional: Fresh mint leaves — For garnish. It looks pretty and adds a fresh aroma when you open the container.
Equipment Needed
You don’t need fancy equipment for this. Here’s what I actually use.
9×9-inch baking pan — This is the classic size for lemon bars. You can use an 8×8 if you want thicker bars, but the baking time will increase. Line it with parchment paper, leaving an overhang on the sides. This is crucial for lifting the bars out later.
Electric mixer or whisk — I use a hand mixer for the crust to cream the butter and sugar. For the filling, a whisk works fine, but a hand mixer ensures there are no lumps of egg or sugar.
Microplane grater — For the lemon zest. It’s the easiest tool for getting fine zest without the bitter white pith.
Measuring cups and spoons — Standard stuff. Be precise with the flour and sugar.
Sharp knife or pizza cutter — For cutting the bars. A sharp knife gives clean cuts. Dust the blade with powdered sugar between cuts for neat squares.
Cooling rack — Essential for letting the bars set properly.
How to Make It: Step-by-Step
Alright, let’s make this! I’m walking you through exactly how I do it, including the little tricks I’ve picked up over the years.
Step 1: Prep Your Pan and Oven (5 minutes)
Preheat your oven to 350°F (175°C). Line your 9×9-inch baking pan with parchment paper. Leave a 2-inch overhang on the long sides—that’s your handle for lifting the bars out later. Spray the parchment with non-stick spray just in case.
Step 2: Make the Crust (5 minutes)
In a medium bowl, mix the softened butter and confectioners’ sugar with an electric mixer on medium speed until smooth and creamy. This should take about 1-2 minutes. Add the flour and salt, and mix on low until just combined. Don’t overmix. The dough will look crumbly, like wet sand. That’s good.
Press the dough firmly into the bottom of the prepared pan. Use your fingers or the bottom of a measuring cup to pack it down evenly. You want a flat, solid base. No gaps, no thin spots.
Step 3: Bake the Crust (15 minutes)
Bake the crust for 15 minutes, or until the edges are lightly golden. It shouldn’t be dark brown. Remove it from the oven and leave the oven on. While the crust is baking, prepare the filling.
Step 4: Make the Filling (5 minutes)
In a large bowl, whisk together the granulated sugar and eggs until smooth and pale. This should take about 2-3 minutes. Whisk in the fresh lemon juice, lemon zest, and vanilla extract. Finally, whisk in the 1 cup of confectioners’ sugar until the mixture is completely smooth. There should be no lumps. Taste it—it should be very sweet and very tart. That’s what you want.
Step 5: Assemble and Bake (25-30 minutes)
Pour the filling over the hot crust. It will bubble a bit. Smooth the top with a spatula. Return the pan to the oven and bake for 25-30 minutes. The bars are done when the edges are set and puffed, but the center still has a slight jiggle when you shake the pan. It should look like a firm custard, not liquid.
Crucial Tip: Do not overbake! If the center is completely firm, the bars will be dry. They continue to cook as they cool.
Step 6: Cool and Chill (At least 2 hours)
Let the bars cool in the pan on a wire rack for 30 minutes. Then, refrigerate them for at least 2 hours, or ideally overnight. This is when the filling sets properly and becomes gooey and firm. If you cut them warm, they will be a mess.
Step 7: Cut and Serve
Lift the bars out of the pan using the parchment paper. Peel off the parchment. Use a sharp knife to cut into 12-16 squares. Dust generously with confectioners’ sugar. Serve immediately, or store in an airtight container in the fridge.
Expert Tips & Tricks
Here’s everything I’ve learned from making this dozens of times. These tips will save you from my mistakes.
Room Temperature Eggs — Cold eggs can cause the filling to separate or curdle slightly. Take them out of the fridge 30 minutes before you start. If you forget, run them under warm water for 5 minutes.
Don’t Skip the Zest — Lemon juice alone isn’t enough. The zest contains the essential oils that give lemon bars their signature aroma. Use a microplane for the finest zest. Avoid the white pith—it’s bitter.
The Jiggle Test — This is the hardest part for beginners. You have to trust your eyes. When you shake the pan, the center should wobble like Jell-O, not slosh like water. If it’s still liquid, give it 5 more minutes. If it’s set and puffed, pull it out.
Chill Before Cutting — I know it’s tempting to cut them right out of the oven, but don’t. The filling needs to set. If you cut them warm, they’ll be mushy. Chill them for at least 2 hours, but overnight is best.
Clean Cuts — Use a sharp knife. Dip it in hot water and wipe it dry between cuts. This prevents the filling from sticking to the blade and keeps your squares neat.
Dust Immediately Before Serving — Powdered sugar absorbs moisture. If you dust them too early, they’ll dissolve. Dust them right before you bring them to the table.
Variations & Substitutions
Once you’ve nailed the basic version, here’s how you can mix it up. I’ve tried all of these.
Lemon Blueberry Bars — Sprinkle 1 cup of fresh blueberries over the crust before pouring the filling. The berries burst and create beautiful pockets of color and flavor.
Lemon Raspberry Bars — Same as above, but use raspberries. The tartness of the raspberries pairs perfectly with the lemon.
Coconut Lemon Bars — Add ½ cup of shredded coconut to the crust mixture. It adds a nice tropical twist.
Gluten-Free — Use a 1:1 gluten-free flour blend in the crust. The filling is naturally gluten-free. The texture might be slightly more delicate, but it still works.
Dairy-Free — Use a vegan butter alternative in the crust. The filling is already dairy-free (eggs and lemons). The crust might not be as rich, but it’s still good.
Key Lime Variation — Substitute key lime juice for lemon juice. Use the zest of 4-5 key limes. It’s tangier and more tropical.
Serving & Storage
How to Serve: I usually serve these straight from the fridge. The cold temperature makes the filling firmer and the crust more cookie-like. They’re perfect with a cup of tea or coffee.
Side Dishes: These bars are rich, so they don’t need much. A simple black coffee or an espresso cuts through the sweetness perfectly. If you want something lighter, a few berries on the side are nice.
Storage Instructions: Store in an airtight container in the fridge for up to 5 days. Layer them with parchment paper to prevent sticking. They’re best eaten within 3 days, but they’ll last longer.
Freezing: Yes, you can freeze them! Bake, cool, and chill completely. Wrap the whole pan in plastic wrap and then aluminum foil. Freeze for up to 3 months. Thaw in the fridge overnight before dusting with powdered sugar. The texture might be slightly softer after thawing, but the flavor is still great.
Pro Tip: If you’re bringing them to a potluck, bring the dusting sugar with you and dust them on-site. It looks much better than dusting them at home.
Nutrition Information
I’m not a nutritionist, but here’s the breakdown if you’re tracking. Keep in mind that these are rich, sweet bars, so portion control is key.
Per Bar (based on 16 bars):
- Calories: 280
- Protein: 3g
- Carbs: 38g
- Fiber: 0g
- Sugar: 28g
- Fat: 14g
- Saturated Fat: 8g
- Cholesterol: 50mg
- Sodium: 120mg
What’s Good: They’re naturally gluten-free (if you use GF flour), vegetarian, and contain no artificial colors or flavors.
What to Know: They’re high in sugar and saturated fat due to the butter and sugar content. Enjoy them as a special treat, not a daily snack. If you’re watching your sugar, reduce the granulated sugar in the filling to ¾ cup.
Final Thoughts
So that’s my go-to gooey lemon bars with buttery shortbread crust! I’ve probably talked your ear off at this point, but when you make a recipe this often, you have a lot to say about it.
This has saved my dessert game more times than I can count. It’s my answer to “what do I bring to the party?” or “what can I make for a quick treat?” My family is obsessed, my friends beg me for the recipe, and I’m happy because it’s so easy to make.
Make it yours! Try adding berries, swap in key limes, or adjust the sugar to your taste. The best recipes are the ones you adapt to your family’s tastes. And if you’re feeling adventurous, try making a batch of lemon poppy seed muffins to go with them for a full lemon-themed breakfast.
If you make this, drop a comment and let me know what you think! I love hearing how recipes turn out in your kitchen. And if something doesn’t work, tell me that too—I’m here to help troubleshoot.
Happy baking! And I hope your kitchen smells half as good as mine does right now.
Frequently Asked Questions
Can I use bottled lemon juice?
You can, but I don’t recommend it. Bottled lemon juice tastes flat and metallic. It lacks the bright, fresh flavor that real lemons provide. If you’re in a pinch, you can use it, but the bars won’t taste as good. Fresh juice is worth the effort.
Why did my filling turn out runny?
Usually, this means the bars weren’t baked long enough, or they weren’t chilled long enough. The filling needs time to set in the fridge. If it’s still runny after chilling, you might have used too much lemon juice or not enough eggs. Next time, measure carefully and chill for at least 4 hours.
Can I make these ahead of time?
Absolutely! In fact, they’re better the next day. Make them 1-2 days ahead, store them in the fridge, and dust with powdered sugar right before serving. They keep well for up to 5 days in the fridge.
Can I freeze lemon bars?
Yes! Bake, cool, and chill completely. Wrap the pan tightly in plastic wrap and foil. Freeze for up to 3 months. Thaw in the fridge overnight. The texture might be slightly softer, but the flavor is still delicious.
Why did my crust get soggy?
This can happen if the crust isn’t baked long enough before adding the filling, or if the filling is too wet. Make sure to bake the crust for the full 15 minutes until it’s lightly golden. Also, ensure your filling isn’t too liquidy before pouring it on.
Can I use a glass pan instead of metal?
You can, but glass conducts heat differently. It might take a few minutes longer to bake. Keep an eye on the crust and filling to avoid overbaking. Metal pans are generally better for even baking.
How do I store leftover lemon bars?
Store them in an airtight container in the fridge. Layer them with parchment paper to prevent sticking. They’ll stay fresh for up to 5 days. Do not leave them out at room temperature for more than 2 hours.
Pin This Recipe!
Gooey Lemon Bars: Best Easy Shortbread Crust Recipe
- Total Time: 45 minutes
- Yield: 16 servings 1x
Description
Rich, tangy, and impossibly gooey lemon bars with a buttery shortbread crust that melts in your mouth. This easy dessert is perfect for potlucks or a quick treat.
Ingredients
- 1 cup (226g) unsalted butter, softened
- 1/2 cup (60g) confectioners’ sugar, sifted
- 1 cup (120g) all-purpose flour
- 1/4 teaspoon salt
- 1 cup (200g) granulated sugar
- 3 large eggs, room temperature
- 1/2 cup (120ml) fresh lemon juice
- 2 tablespoons lemon zest
- 1 teaspoon vanilla extract
- 1 cup (120g) confectioners’ sugar (for filling)
- 1/2 cup (60g) confectioners’ sugar (for dusting)
- Optional: Fresh mint leaves for garnish
Instructions
- Preheat oven to 350°F (175°C). Line a 9×9-inch baking pan with parchment paper, leaving a 2-inch overhang on the long sides, and spray with non-stick spray.
- In a medium bowl, mix softened butter and 1/2 cup confectioners’ sugar with an electric mixer until smooth and creamy (1-2 minutes).
- Add flour and salt, mixing on low until just combined. The dough should look like wet sand.
- Press the dough firmly and evenly into the bottom of the prepared pan.
- Bake the crust for 15 minutes until edges are lightly golden. Remove from oven but leave oven on.
- In a large bowl, whisk granulated sugar and eggs until smooth and pale (2-3 minutes).
- Whisk in fresh lemon juice, lemon zest, and vanilla extract.
- Whisk in 1 cup confectioners’ sugar until completely smooth with no lumps.
- Pour filling over the hot crust and smooth the top.
- Bake for 25-30 minutes until edges are set and puffed, but the center still has a slight jiggle.
- Cool in the pan on a wire rack for 30 minutes.
- Refrigerate for at least 2 hours, or ideally overnight, until the filling is set.
- Lift bars out using parchment paper, peel off paper, and cut into 12-16 squares.
- Dust generously with confectioners’ sugar immediately before serving.
Notes
Use fresh-squeezed lemon juice for the best flavor; bottled juice tastes metallic. Ensure eggs are at room temperature to prevent curdling. Do not overbake; the center should jiggle slightly. Chill thoroughly before cutting for clean slices. Dust with powdered sugar right before serving to prevent dissolving.
- Prep Time: 20 minutes
- Cook Time: 45 minutes
- Category: Dessert
- Cuisine: American
Nutrition
- Serving Size: 1 bar
- Calories: 280
- Sugar: 28
- Sodium: 120
- Fat: 14
- Saturated Fat: 8
- Carbohydrates: 38
- Protein: 3
Keywords: lemon bars, shortbread crust, gooey lemon bars, easy dessert, make-ahead dessert, lemon dessert, buttery crust



