I have a confession. Last Thursday, I came home from work exhausted, my brain completely fried, and stared at my fridge like it owed me money. We had zero groceries. Just a half-empty jar of soy sauce, some sad-looking carrots, and two chicken breasts that were looking at me judgmentally. I didn’t want to order takeout—my budget can’t handle the “I’m too tired to cook” tax—and I definitely didn’t want to wash a bunch of dishes for a fancy dinner I wouldn’t even enjoy.
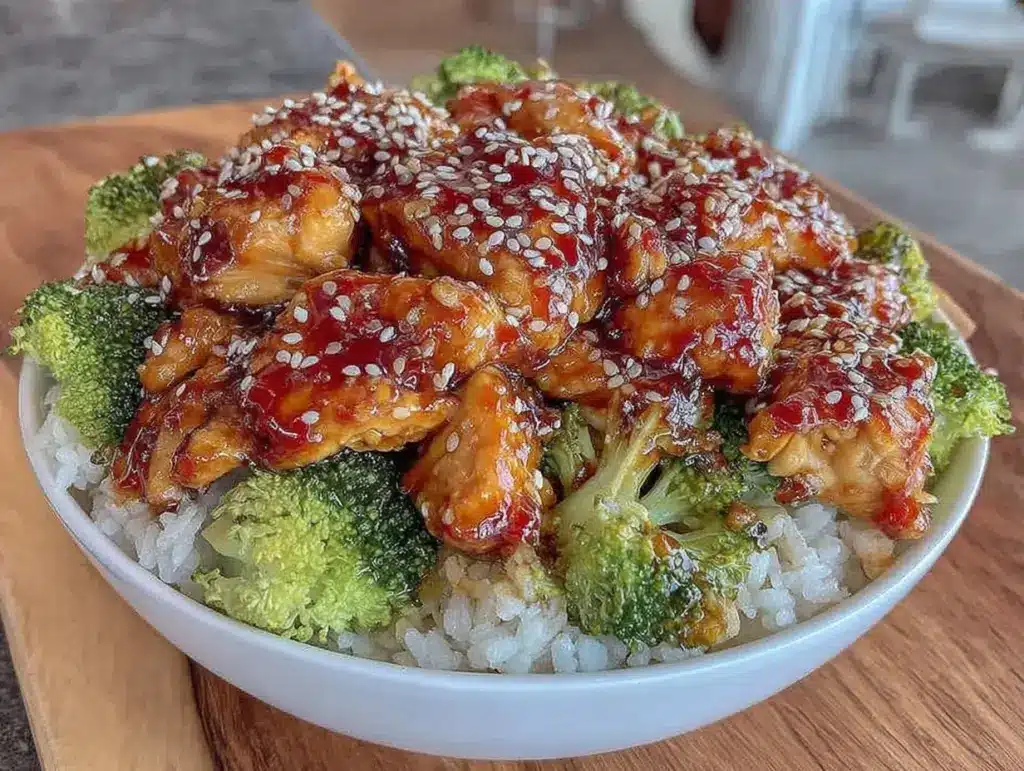
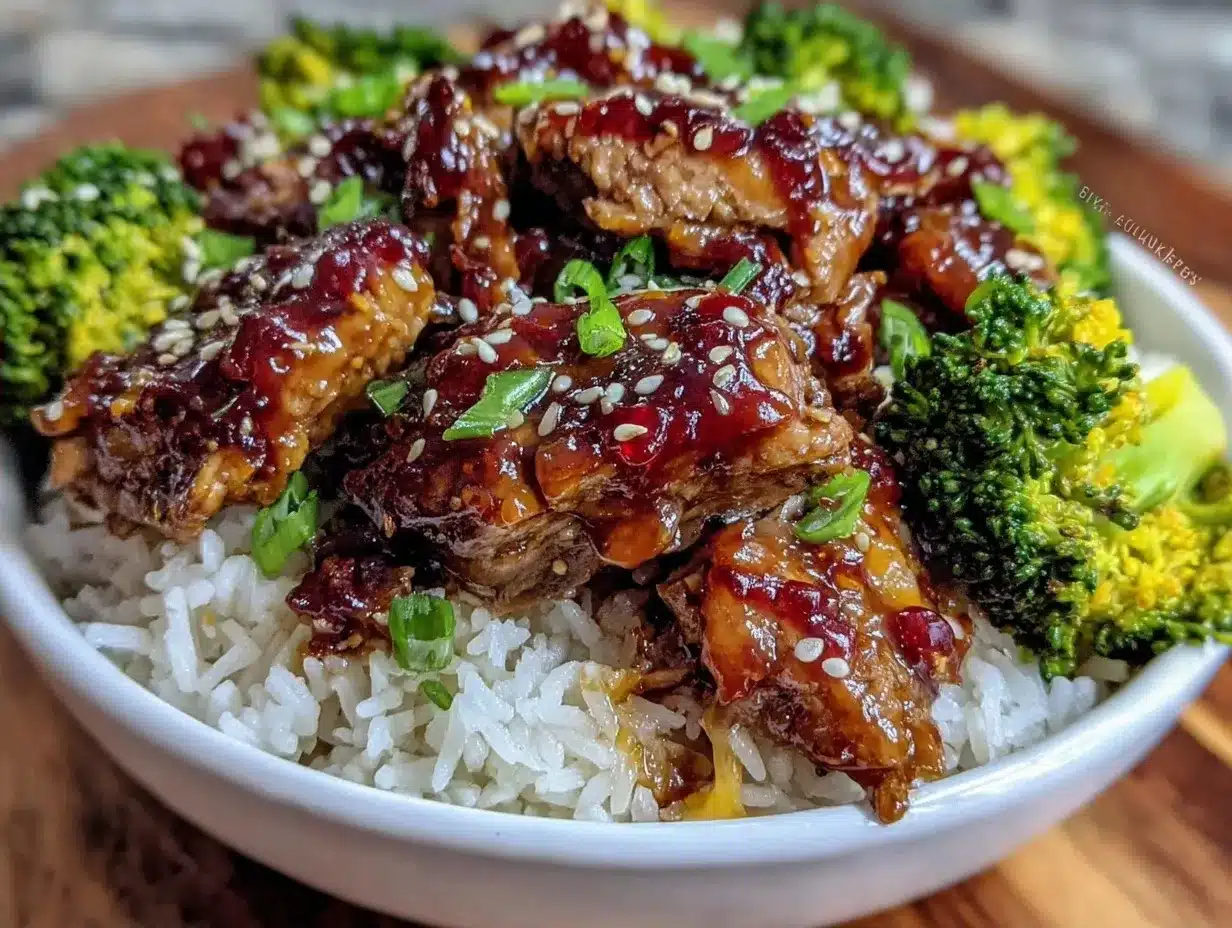
So I did what I always do when the clock is ticking and the pantry is empty: I made meal prep chicken teriyaki rice bowls. It’s not just a dinner; it’s my saving grace. In about 20 minutes, I had glazed chicken, fluffy rice, and quick-pickled veggies ready to go. The best part? I made a huge batch on Sunday, and by Thursday night, I was still eating the leftovers, and my kids didn’t even realize they were eating the same thing again. They just liked that it was easy.
If you’re drowning in the “what’s for dinner?” question five nights a week and your wallet is crying for mercy, this recipe is your new best friend. It’s cheap, it’s customizable, and it tastes way better than anything coming out of a cardboard box. Let me walk you through exactly how I make this work for my family of four (and sometimes six, when guests show up).
Why You’ll Love This Recipe
Look, I’ve tried a hundred different meal prep ideas. Some are too fancy, some take all weekend, and some taste like cardboard by Wednesday. This chicken teriyaki rice bowl recipe is different. It’s the one that actually works for real life. Here’s why it’s earned a permanent spot in my weekly rotation:
- Stupid Simple — Seriously. If you can boil water and stir a sauce, you can make this. I’ve made this while answering work emails and helping with math homework. It’s that forgiving.
- Budget-Friendly — This is the real deal. Feeding four people costs about $15-$18. That’s less than one trip to the drive-thru. You’re using chicken thighs (cheaper and juicier than breasts) and rice, which is basically pennies per serving.
- Meal Prep Magic — This is where the magic happens. I make a big batch on Sunday, and it lasts for 4-5 days. It’s not just about saving time; it’s about not having to think about dinner when I’m tired. Plus, it reheats perfectly. I’ve tried microwaving it, and it doesn’t dry out like pasta does.
- Kid-Approved — My picky eater who usually refuses anything with “brown sauce” loves this. The teriyaki is sweet, not spicy, and the rice is bland enough to balance it out. If they don’t like the veggies, they just pick them out, and I’m not stressed about it.
- Pantry Staple Heavy — You probably already have 80% of these ingredients. Soy sauce, ginger, garlic, rice, chicken. It’s not a recipe that requires a special trip to a specialty store.
This is my go-to when I need dinner to just work. No complicated techniques, no weird ingredients, just reliable, delicious food that makes everyone happy and keeps the bank account happy.
Ingredients You’ll Need
Here’s the best part: you probably have most of this already. I’m particular about a few things here, mostly because I’ve learned the hard way what works and what doesn’t. I don’t like wasting money on things that don’t deliver.
For the Chicken & Sauce
Chicken thighs (2 pounds / 900g) — Boneless, skinless. I use thighs because they’re cheaper and stay juicy. Breast meat dries out too fast in the oven or pan. If you must use breast, cut it small and don’t overcook it.
Soy sauce (½ cup / 120ml) — Use regular soy sauce, not the low-sodium stuff if you can help it. The flavor is better. I use Kikkoman because it’s consistent. If you’re watching sodium, use low-sodium but add a pinch more salt later.
Brown sugar (¼ cup / 50g) — This gives that sticky, caramelized teriyaki glaze. White sugar works, but brown has a deeper molasses flavor that I love. Don’t skip it; it’s what makes it taste like restaurant takeout.
Rice vinegar (2 tablespoons / 30ml) — Adds tang to cut the sweetness. White vinegar works in a pinch, but rice vinegar is milder and more authentic.
Fresh ginger (1 tablespoon, grated) — Yes, fresh. Grated, not powdered. Powdered ginger tastes dusty in this sauce. I buy fresh ginger root because it lasts forever in the fridge. If you’re really lazy, jarred minced ginger works, but fresh is better.
Garlic (3 cloves, minced) — Fresh garlic is non-negotiable. Jarred garlic has a weird metallic taste that really shows up in simple sauces like this.
Cornstarch (1 tablespoon) — This thickens the sauce. It’s what makes it cling to the chicken instead of pooling at the bottom of the bowl. Mix it with a little cold water first to make a slurry, then add it.
For the Rice Base
Long-grain white rice (2 cups dry / 400g) — Jasmine rice is my favorite because it’s fragrant and fluffy. Short-grain sushi rice is stickier, which is also good, but jasmine is easier to find and cheaper. Just don’t use instant rice; the texture is wrong.
Water (4 cups / 960ml) — For cooking the rice. The ratio is usually 1:2 for rice to water.
For the Veggies (The “Stretch” Factor)
Broccoli florets (2 cups) — Frozen or fresh. I use frozen half the time because it’s cheaper and pre-cut. Steam it in the microwave while the chicken cooks.
Carrots (1 large, julienned or shredded) — Adds crunch and color. I use a peeler to make ribbons, which cook faster and look nicer than chunks.
Green onions (3-4 stalks, sliced) — For garnish. Saves money if you only use the white and light green parts, and save the dark green parts for my next chicken chili recipe.
Sesame seeds (1 tablespoon) — Toasted is best, but raw works. Adds a nice nutty crunch. Optional, but I think it makes the bowl look finished.
Equipment Needed
You don’t need fancy equipment for this. Here’s what I actually use, and what you can skip.
Large skillet or wok — I use a 12-inch non-stick skillet. It needs to be big enough to fit all the chicken in one layer. If you crowd the pan, the chicken steams instead of searing. If you don’t have a 12-inch pan, use two skillets.
Rice cooker — I know, it’s another appliance, but if you eat rice often, it’s worth it. It’s set-it-and-forget-it. If you don’t have one, a heavy-bottomed pot with a tight lid works perfectly.
Medium saucepan — For simmering the sauce. Or you can use a small bowl and microwave it in 30-second intervals, stirring in between. I do this when I’m lazy.
Sharp knife and cutting board — For chopping the chicken and veggies. A dull knife is dangerous and frustrating. I have a cheap knife from Walmart that I sharpen regularly, and it works fine.
Microwave-safe bowl — For steaming the broccoli. Or use a steamer basket over the rice pot. I multitask like a pro.
Mason jars or glass containers — For storing. Glass is better because the sauce doesn’t stain, and it reheats evenly. Plastic works, but I’ve had issues with orange stains from the soy sauce and turmeric (if you add it). Don’t ask me how I know.
How to Make It: Step-by-Step
Alright, let’s make this! I’m walking you through exactly how I do it, including the little tricks I’ve picked up over the years.
Step 1: Cook the Rice (15-20 minutes)
Rinse your rice! This is crucial. Put the rice in a fine-mesh strainer and rinse under cold water until the water runs clear. This removes excess starch and prevents gummy rice. Add the rice and water to your pot or rice cooker. Cook according to package directions. If using a pot, bring to a boil, then reduce to low heat, cover, and simmer for 18 minutes. Remove from heat and let it sit, covered, for 10 minutes. Fluff with a fork.
Step 2: Make the Teriyaki Sauce (5 minutes)
While the rice cooks, mix your sauce. In a small bowl or measuring cup, whisk together the soy sauce, brown sugar, rice vinegar, minced garlic, and grated ginger. Whisk until the sugar is mostly dissolved. In a separate tiny bowl, mix the cornstarch with 2 tablespoons of cold water to make a slurry. Set both aside.
Step 3: Prep the Chicken (5 minutes)
Pat your chicken thighs dry with paper towels. Moisture is the enemy of browning. Cut them into bite-sized pieces, about 1-inch chunks. Season with a little salt and pepper. I don’t marinate this because the sauce is already flavorful, and I’m trying to keep it quick.
Step 4: Cook the Chicken (8-10 minutes)
Heat a large skillet over medium-high heat with a tablespoon of oil. Add the chicken pieces in a single layer. Don’t overcrowd the pan! If you have to cook in batches, do it. You want a nice golden brown crust. Cook for 3-4 minutes per side until cooked through (internal temp of 165°F). Remove chicken from the pan and set aside on a plate.
Step 5: Thicken the Sauce (2 minutes)
Reduce the heat to medium. Pour the soy sauce mixture into the same skillet with the chicken drippings. Let it simmer for 1 minute. Then, stir the cornstarch slurry again (it settles fast) and pour it into the sauce. Stir constantly. The sauce will thicken and bubble within 30-60 seconds. It should coat the back of a spoon. If it’s too thin, add a little more slurry. If it’s too thick, add a splash of water.
Step 6: Combine and Steam Veggies (5 minutes)
Return the chicken to the skillet and toss it in the sauce until fully coated. Remove from heat. Meanwhile, steam your broccoli and carrots. I throw frozen broccoli and carrot ribbons into a microwave-safe bowl with a splash of water, cover, and microwave for 3-4 minutes. They should be tender-crisp.
Step 7: Assemble and Store
Divide the rice among your containers. Top with the chicken and sauce, then add the veggies. Sprinkle with sesame seeds and green onions. Let them cool completely before putting lids on. This prevents condensation, which makes the rice soggy. Store in the fridge for up to 4 days.
Expert Tips & Tricks
Here’s everything I’ve learned from making this dozens of times. These tips will save you from my mistakes.
Toast Your Sesame Seeds — If you have an extra minute, toast the sesame seeds in a dry pan for 2 minutes until they smell nutty. It’s a small detail, but it makes the dish feel fancy. I usually just sprinkle them raw because I’m rushing.
Don’t Skip the Rice Rinse — I know it’s an extra step, but unwashed rice is gummy. Gummy rice is sad rice. Rinse it until the water is clear. It takes 30 seconds.
Use Chicken Thighs — I cannot stress this enough. Breast meat dries out in the fridge and reheats. Thighs stay juicy. It’s cheaper, too. Win-win.
Double the Sauce — The sauce is the flavor. If you like it saucier, double the sauce recipe. It keeps well in the fridge for a week, so you can just pour it over rice and chicken later.
Cool Before Refrigerating — Hot food in the fridge raises the temperature of other food and creates condensation. Let your bowls sit on the counter for 20-30 minutes before lidding them. I use this time to clean up.
Common Mistake: Sauce is too thin — This happens if you don’t let the cornstarch slurry cook long enough. Keep stirring for a full minute after adding it. The sauce should be glossy and thick, not watery.
Common Mistake: Rice is mushy — You used too much water or didn’t let it rest. The resting step is key. It lets the moisture redistribute. Don’t skip it.
Variations & Substitutions
Once you’ve nailed the basic version, here’s how you can mix it up. I’ve tried all of these, and they all work.
Veggie-Loaded Version — Add bell peppers, snap peas, or edamame. I love adding edamame for extra protein. Just throw it in with the broccoli to steam. This is how I get my kids to eat more vegetables without complaining.
Spicy Teriyaki — Add 1 teaspoon of sriracha or chili flakes to the sauce. My husband likes it with a kick. It adds a nice heat that balances the sweetness.
Pineapple Teriyaki — Add ½ cup of crushed pineapple to the sauce. It adds a tropical sweetness and makes it taste like Hawaiian pizza vibes. It’s surprisingly good.
Gluten-Free — Use tamari instead of soy sauce. Everything else is naturally gluten-free. I use tamari and it tastes identical.
Rice Alternatives — Use cauliflower rice for a low-carb version. It’s not the same texture, but it works. Or use quinoa for more protein. Quinoa takes a little longer to cook, so plan ahead.
Protein Swap — You can use shrimp instead of chicken. Cook the shrimp for 2-3 minutes in the pan, then add the sauce. It’s faster and tastes great. Or use tofu for a vegetarian version. Press the tofu first, then pan-fry it until crispy.
Serving & Storage
How to Serve:
I usually serve this straight from the container if I’m eating it at my desk. But at home, I like to plate it up. It looks rustic and colorful. I add a drizzle of sesame oil and extra green onions. It’s simple, but it feels like a real meal.
Side Dishes:
This bowl is complete on its own, so you don’t need much else. But if you want sides, try a simple green salad with rice vinegar dressing, or some easy grilled cheese if you’re craving something crunchy. For dessert, I sometimes pair it with something light, like these 3-ingredient strawberry shortcakes if we’re feeling fancy.
Storage Instructions:
Store in airtight containers in the fridge for up to 4 days. The rice will firm up in the fridge, which is normal. The sauce will keep the chicken moist.
Reheating:
Best method: Microwave with a splash of water or broth. Cover it with a damp paper towel to steam it. Heat for 1-2 minutes, stirring in between. This keeps the rice fluffy.
Oven method: Place in an oven-safe dish, add a splash of water, cover with foil, and heat at 350°F for 15 minutes. This is good if you’re reheating a big batch.
Freezing:
Honestly, this doesn’t freeze well. The rice gets weird and mushy when thawed, and the veggies lose their crunch. Make it fresh or store in the fridge. If you must freeze, freeze the chicken and sauce separately from the rice and veggies. Thaw in the fridge and cook fresh rice.
Pro Tip:
Double the batch. Really. Cook 4 cups of rice and 4 pounds of chicken. Freeze half the chicken and sauce in portions. You’ll thank me when you have a hot meal ready in 10 minutes on a crazy Tuesday.
Nutrition Information
I’m not a nutritionist, but here’s the breakdown if you’re tracking. This is per serving (based on 4 servings).
| Nutrient | Amount |
|---|---|
| Calories | 520 |
| Protein | 35g |
| Carbs | 65g |
| Fat | 10g |
| Fiber | 3g |
| Sodium | 900mg |
What’s Good:
Decent protein from the chicken. The veggies add fiber. It’s balanced enough to keep you full.
What to Know:
Higher in sodium due to soy sauce. Use low-sodium soy sauce to cut that down. The carbs are from rice, which is fuel. If you’re watching carbs, reduce the rice portion and double the veggies.
My Take:
Look, this is comfort food. It’s not a diet recipe. But it’s way better than takeout, costs less, and I know exactly what’s in it. When I want to make it lighter, I use less sauce and more broccoli. But usually? I just eat a reasonable portion and enjoy it.
Final Thoughts
So that’s my go-to meal prep chicken teriyaki rice bowls! I’ve probably talked your ear off at this point, but when you make a recipe this often, you have a lot to say about it.
This has saved weeknight dinners more times than I can count. It’s my answer to “what’s for dinner” when I’m tired, don’t want takeout, and still want something that tastes really good. My kids are happy, my husband’s happy, and I’m happy because I’m not stressed about cooking.
Make it yours! Try different add-ins, swap in your favorite vegetables, adjust the sauce sweetness. The best recipes are the ones you adapt to your family’s tastes. If you make this, drop a comment and let me know what you think! I love hearing how recipes turn out in your kitchen. And if something doesn’t work, tell me that too—I’m here to help troubleshoot.
Happy cooking! And I hope your kitchen smells half as good as mine does right now.
Frequently Asked Questions
Can I use chicken breast instead of thighs?
You can, but thighs are better. Breast meat dries out faster, especially when reheated. If you use breast, cut it into smaller pieces and don’t overcook it. Remove it from the pan as soon as it hits 165°F. Thighs are more forgiving and cheaper, so I stick with them.
How do I reheat the rice without it getting dry?
Add a splash of water or broth to the bowl before microwaving. Cover it with a damp paper towel or a microwave-safe lid. This creates steam, which rehydrates the rice. Heat in 30-second intervals, stirring in between. This keeps it fluffy.
Can I make the sauce ahead of time?
Yes! The sauce keeps in the fridge for up to a week. In fact, the flavors meld together and taste better after a day. I often make a big batch of sauce on Sunday and use it for this recipe, or pour it over roasted vegetables.
Why is my sauce too thin?
The cornstarch slurry needs time to thicken. Keep stirring it in the pan for a full minute after adding it. If it’s still thin, mix a little more cornstarch with water and add it. If it’s too thick, add a splash of water.
Can I freeze this meal prep?
I don’t recommend freezing the whole bowl. The rice and veggies get weird. If you must, freeze the chicken and sauce separately. Thaw in the fridge and cook fresh rice and veggies. The texture will be better.
What if my kids don’t like ginger?
Start with half the amount of ginger. You can always add more. Ginger is subtle in this sauce; it adds depth but isn’t overpowering. If they still hate it, you can use a tiny pinch of powdered ginger, but fresh is better.
Can I use brown rice instead of white?
Yes, but brown rice takes longer to cook (about 45 minutes) and has a nuttier, chewier texture. It’s healthier, but the taste is different. If you switch to brown rice, adjust your cooking time accordingly.
Pin This Recipe!
Meal Prep Chicken Teriyaki Rice Bowls
- Total Time: 35 minutes
- Yield: 4 servings 1x
Description
A budget-friendly, kid-approved meal prep recipe featuring juicy chicken thighs in a sweet and savory teriyaki glaze, served over fluffy rice with steamed veggies. Ready in about 20 minutes and perfect for saving weeknight dinners.
Ingredients
- 2 pounds boneless, skinless chicken thighs
- 1 tablespoon salt and pepper (for seasoning chicken)
- 1 tablespoon oil (for cooking chicken)
- ½ cup soy sauce
- ¼ cup brown sugar
- 2 tablespoons rice vinegar
- 3 cloves garlic, minced
- 1 tablespoon fresh ginger, grated
- 1 tablespoon cornstarch
- 2 tablespoons cold water (for cornstarch slurry)
- 2 cups long-grain white rice (Jasmine preferred)
- 4 cups water (for rice)
- 2 cups broccoli florets (frozen or fresh)
- 1 large carrot, julienned or shredded
- 3–4 stalks green onions, sliced
- 1 tablespoon sesame seeds (toasted or raw)
Instructions
- Rinse the rice under cold water until the water runs clear to remove excess starch.
- Cook the rice with water in a rice cooker or pot (bring to boil, simmer 18 minutes, rest 10 minutes, then fluff).
- In a small bowl, whisk together soy sauce, brown sugar, rice vinegar, minced garlic, and grated ginger until sugar is dissolved.
- In a separate tiny bowl, mix cornstarch with 2 tablespoons of cold water to create a slurry.
- Pat chicken thighs dry and cut into 1-inch chunks. Season with salt and pepper.
- Heat oil in a large skillet over medium-high heat. Cook chicken in a single layer for 3-4 minutes per side until golden brown and cooked through (165°F). Remove chicken and set aside.
- Reduce heat to medium. Pour the soy sauce mixture into the skillet with chicken drippings and simmer for 1 minute.
- Stir the cornstarch slurry again and pour into the sauce. Stir constantly for 30-60 seconds until the sauce thickens and coats the back of a spoon.
- Return chicken to the skillet and toss to coat in the sauce. Remove from heat.
- Steam broccoli and carrots (microwave with a splash of water for 3-4 minutes or use a steamer basket) until tender-crisp.
- Assemble bowls by dividing rice among containers, topping with chicken and sauce, adding veggies, and sprinkling with sesame seeds and green onions.
- Let cool completely before storing in airtight containers in the fridge for up to 4 days.
Notes
Use chicken thighs for juiciness; breast meat dries out when reheated. Rinse rice thoroughly to prevent gumminess. Let bowls cool completely before refrigerating to prevent condensation. Sauce can be doubled and stored in the fridge for a week. For a spicy version, add sriracha or chili flakes. For gluten-free, use tamari instead of soy sauce.
- Prep Time: 15 minutes
- Cook Time: 20 minutes
- Category: Main Course
- Cuisine: Asian
Nutrition
- Serving Size: 1 bowl per serving
- Calories: 520
- Sugar: 18
- Sodium: 900
- Fat: 10
- Saturated Fat: 2
- Carbohydrates: 65
- Fiber: 3
- Protein: 35
Keywords: chicken teriyaki, meal prep, rice bowls, family dinner, budget meals, easy dinner, chicken thighs, teriyaki sauce, healthy lunch



