It’s 7:30 PM on a Tuesday. The house is quiet, the kids are finally asleep, and I’m standing in my kitchen with a singular, desperate craving for chocolate. Not cake. Not cookies. Something dense, fudgy, and deeply chocolatey that doesn’t require a trip to the store or a two-hour baking session. I opened the pantry, stared at the half-empty bag of flour and the dusty box of cocoa powder, and decided to make brownies. Just a few. Enough for one person, maybe two if I’m sharing with my husband (though let’s be honest, he’s asleep).
I’ve made my fair share of small batch desserts over the years—from brown butter chocolate chip cookies to quick banana breads—but nothing compares to the specific magic of a small batch fudgy brownie. There’s something deeply satisfying about making a treat just for yourself (or your immediate family) without committing to a full nine-by-13 pan that will sit in the fridge for weeks.
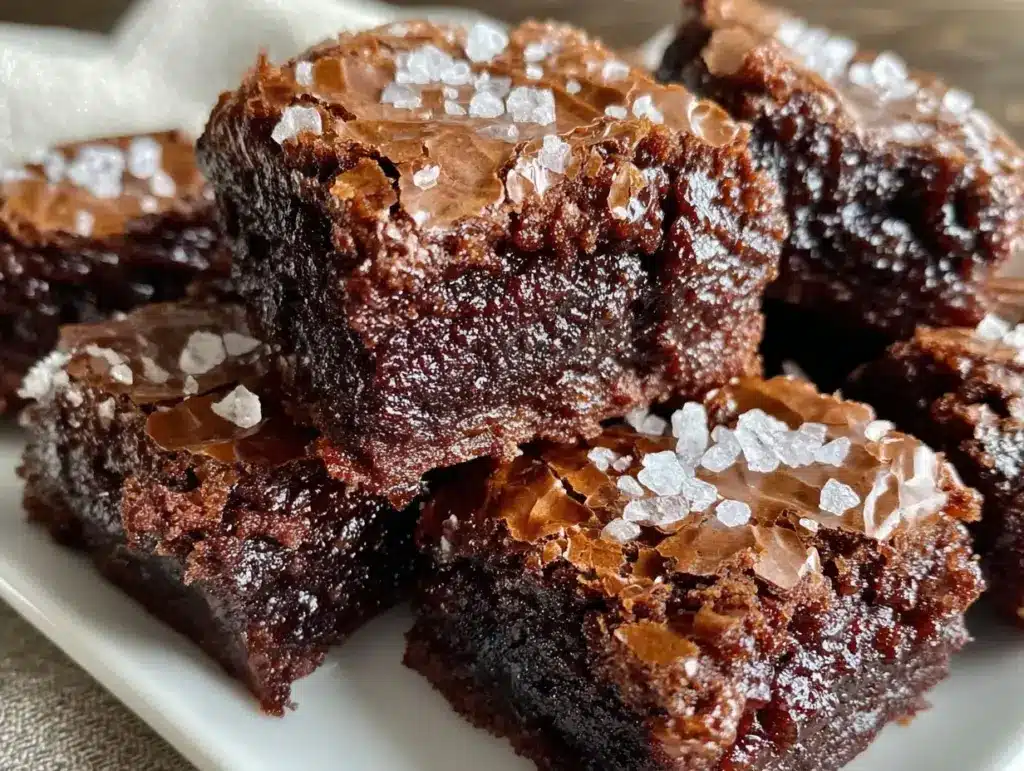
This recipe is my go-to for late-night cravings, rainy Sundays, or when I just need a little sweet comfort without the guilt of a giant pan. The secret? It’s all in the technique for those shiny, crackly tops. You know the kind—the ones that look like they came from a high-end bakery but are actually made in your regular non-stick pan in under 30 minutes. I’ve tested this method dozens of times, tweaking the sugar-to-butter ratio and the whisking time until I hit that perfect balance of crisp exterior and gooey, molten center.
These aren’t just brownies; they’re a mood. A quick, delicious, chocolatey mood. And the best part? You don’t need a mixer. You don’t need fancy ingredients. Just a few staples and about 15 minutes of active time. If you’ve been looking for a way to satisfy a chocolate craving without the fuss, this small batch fudgy brownie recipe is exactly what you need.
Why You’ll Love This Small Batch Brownie Recipe
Let’s be real: most brownie recipes are designed for parties. They’re meant to feed a crowd. But life isn’t always about crowds. Sometimes it’s about you, a mug of tea, and a small square of pure chocolate joy. Here’s why this specific small batch version has taken over my kitchen:
- Perfectly Portioned — This recipe makes just 4-6 brownies. No leftovers staring at you from the fridge for days. No frozen brownie blocks. Just fresh, warm, fudgy goodness when you want it.
- Shiny Crackly Tops (For Real) — I’m not kidding about the tops. They get this incredibly glossy, crinkly surface that shatters slightly when you bite in. It’s the hallmark of a great brownie, and I’ve cracked the code on how to get it without a stand mixer.
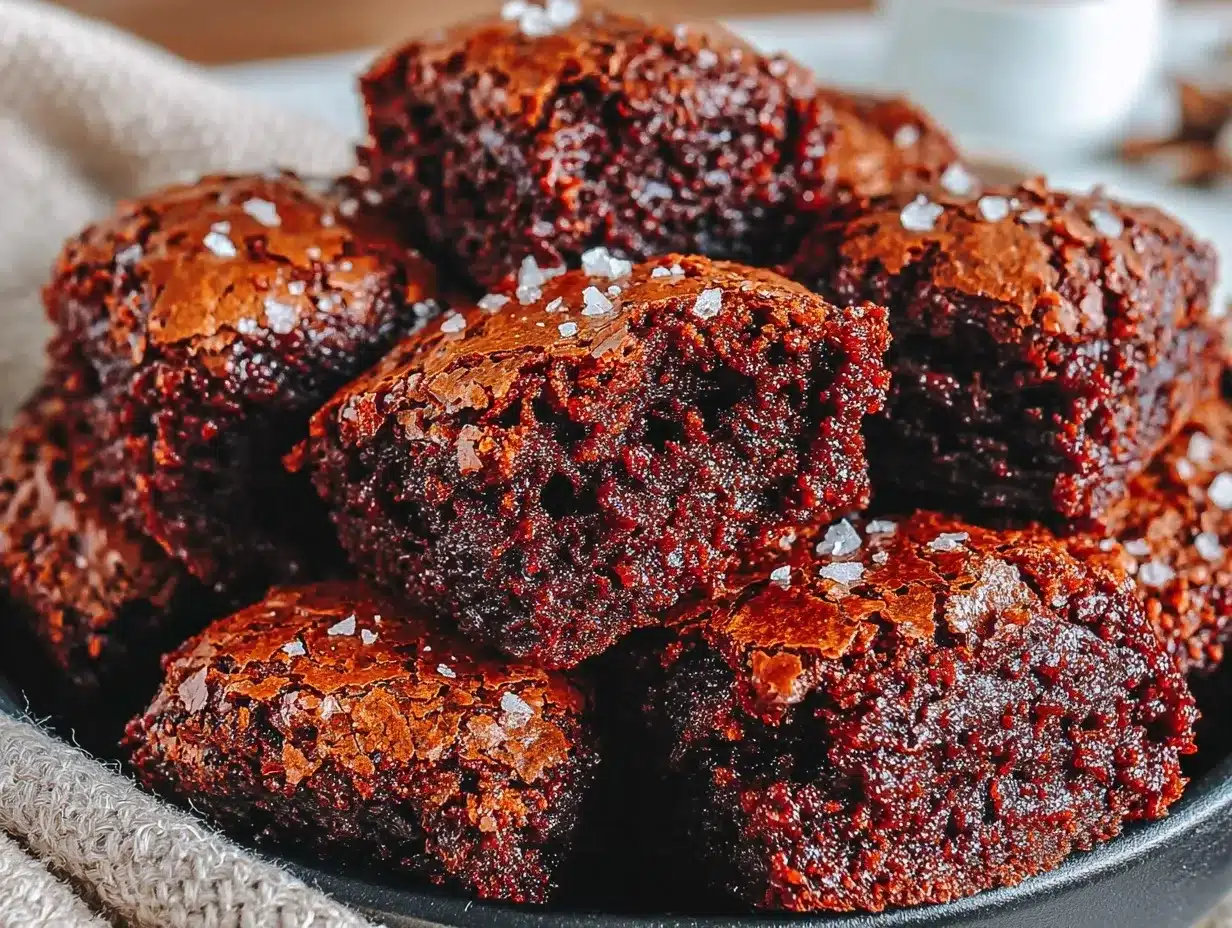
- Fudgy, Not Cakey — Some small batch recipes turn out dry or crumbly because there’s not enough fat to bind them. This one is dense, moist, and deeply chocolatey. It’s the texture of a truffle, not a cupcake.
- One Bowl, No Mixer — Seriously. One bowl. One whisk. Melt the butter, mix the sugar, add the eggs, dump in the dry stuff. Done. Cleanup takes longer than the baking.
- Ready in 25 Minutes — From preheating the oven to the first bite, it’s under 30 minutes. It’s faster than ordering takeout, and unlike takeout, you know exactly what’s in it.
- Flexible Add-Ins — Want nuts? Go for it. Want chocolate chips? Sure. Want to keep it pure? Perfect. This base is a blank canvas for your cravings.
This is my answer to “what’s for dessert?” when I don’t want to think about it. It’s reliable, it’s delicious, and it makes me feel like a baker even when I’m running on zero sleep. Plus, the smell alone is worth it. Your whole house will smell like a chocolate factory.
Ingredients You’ll Need
Here’s the best part: you probably have almost all of this in your pantry right now. I’m particular about a few things here, but honestly, this is a simple list. No weird flours or expensive chocolates required.
For the Base
Unsalted Butter (½ cup / 115g) — I use high-quality butter. It’s the main flavor carrier here. Don’t skimp on quality. Melt it completely; don’t try to soften it.
Granulated Sugar (¾ cup / 150g) — This is key for the shiny tops. The sugar dissolves into the melted butter and eggs, creating that crinkly crust. Don’t swap for brown sugar if you want the crackly top—brown sugar makes it chewier, not crispier.
Dark Chocolate (2 oz / 60g) — I use a semi-sweet chocolate bar (like Ghirardelli or Lindt), chopped. You can use chocolate chips, but bars melt more evenly and give a richer flavor. This adds density and fudginess.
Eggs (2 large, room temperature) — Room temp eggs emulsify better with the butter and sugar. If you forget, just put them in a bowl of warm water for 5 minutes.
Vanilla Extract (1 teaspoon) — Pure vanilla, please. I use Nielsen-Massey. It adds that warm, comforting background note that makes chocolate taste like *chocolate*.
For the Dry Mix
All-Purpose Flour (½ cup / 65g) — Just regular flour. Don’t use cake flour; you want structure. Spoon it into the measuring cup and level it off—don’t scoop, or you’ll pack it down and get dry brownies.
Cocoa Powder (⅓ cup / 30g) — Unsweetened cocoa powder. I prefer Dutch-processed (like Hershey’s Special Dark or Guittard) because it’s darker and less acidic, but regular natural cocoa works too.
Salt (¼ teaspoon) — Fine sea salt. This isn’t optional. Salt makes the chocolate taste more chocolatey. It’s science.
Optional Add-Ins — ½ cup chocolate chips, chopped walnuts, or pecans. I usually add chocolate chips for extra gooeyness, but nuts add a nice crunch. Skip them if you want pure fudgy simplicity.
Equipment Needed
You don’t need fancy equipment for this. Here’s what I actually use:
8×8 Inch Square Pan — This is the perfect size for a small batch. It gives you the right depth for fudgy centers. Line it with parchment paper for easy removal.
Microwave-Safe Bowl or Small Saucepan — For melting the butter and chocolate. I use a microwave bowl because it’s faster, but a double boiler works too.
Mixing Bowl — A medium-sized bowl is fine. Nothing needs to be whisked until stiff peaks form, so a large bowl isn’t necessary.
Whisk — A simple balloon whisk is perfect. You’re just combining ingredients, not aerating them.
Spatula — A silicone spatula for scraping the bowl clean. You want every bit of that chocolate batter.
Knife or Pantry Shears — For chopping the chocolate bar if you’re not using chips.
How to Make It: Step-by-Step
Alright, let’s make these! I’m walking you through exactly how I do it, including the little tricks that ensure those shiny tops.
Step 1: Prep Your Pan and Oven (5 minutes)
Preheat your oven to 350°F (175°C). This is crucial—oven temperature affects the rise and the texture. Line your 8×8 inch pan with parchment paper, leaving an overhang on the sides. This makes it easy to lift the brownies out once they’re done. I spray the parchment with a little non-stick spray just to be safe.
Step 2: Melt the Butter and Chocolate (3 minutes)
Place the butter and chopped chocolate in a microwave-safe bowl. Microwave in 30-second intervals, stirring in between, until completely smooth. If you’re using a saucepan, melt them over low heat, stirring constantly. Don’t burn the chocolate! It should be glossy and smooth. Set it aside to cool slightly for a minute.
Step 3: Whisk the Sugar and Eggs (2 minutes)
In your mixing bowl, whisk the granulated sugar and eggs together vigorously. This is the secret step. You want to whisk for about 1-2 minutes until the mixture looks slightly pale and glossy. This dissolves some of the sugar and incorporates air, which helps create that crackly top. It’s not about making a mousse, just getting it well combined and shiny.
Step 4: Combine Wet and Dry (3 minutes)
Pour the melted butter and chocolate mixture into the egg and sugar mixture. Whisk until combined. Then, add the vanilla extract. Next, sift in the flour, cocoa powder, and salt. (I know, sifting is extra, but it prevents lumps. If you’re lazy, just whisk the dry ingredients in separately and add them slowly.) Fold the dry ingredients into the wet until *just* combined. Do not overmix! You want a thick, glossy batter. If you see streaks of flour, that’s fine. Stop mixing.
Step 5: Add Mix-Ins and Bake (20-25 minutes)
Stir in your chocolate chips or nuts if using. Pour the batter into your prepared pan. Spread it out evenly. Bake for 20-25 minutes. Here’s the test: insert a toothpick into the center. It should come out with a few moist crumbs clinging to it, not completely clean. If it’s clean, they’re overbaked and will be dry. If it’s wet batter, they need more time. I usually check at 20 minutes.
Step 6: Cool Completely (30+ minutes)
This is the hardest part. Let the brownies cool in the pan on a wire rack. They will continue to set as they cool. If you cut them hot, they’ll be mushy. Wait at least 30 minutes, but ideally an hour. Lift them out using the parchment overhang, slice into squares, and enjoy.
Expert Tips & Tricks
Here’s everything I’ve learned from making these dozens of times. These tips will save you from my mistakes.
Whisk the Sugar and Eggs — I can’t stress this enough. The shiny top comes from the sugar dissolving into the eggs and butter. If you skip this step, you’ll get a matte, cakey top. Whisk until it looks like a thin syrup.
Don’t Overbake — Small batch brownies bake fast because they’re thin. It’s easy to leave them in too long. Pull them out when the toothpick has moist crumbs. They will firm up as they cool.
Room Temperature Eggs — Cold eggs can seize the melted chocolate, creating lumps. Room temp eggs blend in smoothly. Plan ahead or use the warm water trick.
Use Good Chocolate — Since there are only 2 ounces of chocolate, its quality shines through. Don’t use the cheapest chips. Use a good semi-sweet bar.
Cool Completely — I know, I know. But hot brownies are a disaster. They’re too soft to cut and lose that fudgy texture. Patience pays off.
Variations & Substitutions
Once you’ve nailed the basic version, here’s how you can mix it up. I’ve tried all of these.
Nutty Brownies — Add ½ cup chopped walnuts or pecans. Toast the nuts first for extra flavor. My husband loves this version.
Double Chocolate — Add ½ cup chocolate chips to the batter. For extra intensity, use 1 ounce of dark chocolate and 1 ounce of milk chocolate.
Sea Salt Finish — Sprinkle flaky sea salt (like Maldon) on top right after baking. The contrast of salt and sweet is incredible.
Gluten-Free — Swap the all-purpose flour for a 1:1 gluten-free flour blend. It works perfectly. I’ve used Bob’s Red Mill and King Arthur.
Dairy-Free — Use vegan butter and dairy-free chocolate chips. They hold up well in this recipe. The texture is slightly different but still delicious.
Vegan — Replace eggs with two flax eggs (2 tbsp ground flax + 6 tbsp water). Let sit for 5 minutes. The brownies will be slightly more cake-like but still fudgy.
Serving & Storage
How to Serve:
I usually serve these warm, with a scoop of vanilla ice cream or a dollop of whipped cream. But they’re also great at room temperature. They pair wonderfully with a cup of black coffee or a glass of cold milk.
Side Dishes:
These are a dessert on their own, but if you’re serving them with dinner, they go well with classic strawberry shortcake if you’re doing a dessert buffet. Or just enjoy them plain.
Storage:
Store leftovers in an airtight container at room temperature for up to 3 days. They actually get fudgier after a day as the moisture redistributes. Don’t refrigerate them unless you have to—it dries them out.
Freezing:
Yes, you can freeze them! Wrap individual brownies in plastic wrap, then put them in a freezer bag. They’ll last for 2 months. Thaw at room temperature for 30 minutes. Reheat in the microwave for 10 seconds for a warm, gooey treat.
Nutrition Information
I’m not a nutritionist, but here’s the breakdown if you’re tracking. This is a rich treat, so portion control is key.
Per Serving (based on 4 brownies):
– Calories: 320
– Protein: 4g
– Carbs: 42g
– Fiber: 2g
– Sugar: 30g
– Fat: 16g
– Saturated Fat: 9g
– Cholesterol: 65mg
– Sodium: 120mg
What’s Good:
– Good source of iron from the cocoa powder
– Provides a quick energy boost from the sugar
– Satisfies chocolate cravings without a full cake
What to Know:
– High in sugar and saturated fat
– Not suitable for low-sugar or dairy-free diets without modifications
My Take:
Look, this is a dessert. It’s meant to be enjoyed. It’s not a health food. But it’s homemade, so you control the ingredients. When I make these, I eat one square and savor it. It’s enough to satisfy the craving without overdoing it.
Final Thoughts
So that’s my small batch fudgy brownie recipe! It’s simple, it’s delicious, and it’s perfect for those moments when you need a little chocolate fix without the commitment of a big batch. I’ve made these on rainy afternoons, late-night work sessions, and lazy weekends. They never fail to deliver.
This recipe has saved me from buying overpriced bakery brownies more times than I can count. It’s my answer to “I want something sweet” when I’m tired. My kids love them, my husband loves them, and I love the fact that I can make them in 15 minutes.
Make it yours! Add nuts, add chips, add sea salt. The base is flexible, so experiment until you find your perfect version. And if you make this, drop a comment and let me know what you think! I love hearing how recipes turn out in your kitchen.
Happy baking! And I hope your kitchen smells half as good as mine does right now.
Frequently Asked Questions
Q: Can I use a different pan size?
A: You can, but the baking time will change. If you use a 9×9 pan, the brownies will be thinner and bake faster (check at 15 minutes). If you use a loaf pan, they’ll be thicker and need more time. The 8×8 is ideal for this small batch.
Q: Why didn’t my brownies get shiny tops?
A: Usually, this means you didn’t whisk the sugar and eggs enough. The sugar needs to dissolve into the eggs to create that crinkly crust. Also, make sure you’re using granulated sugar, not brown sugar.
Q: Can I make these ahead of time?
A: Yes! Bake them up to 2 days ahead. Store in an airtight container at room temperature. They actually taste better the next day as they set.
Q: Why are my brownies dry?
A: Overbaking is the most common cause. Pull them out when the toothpick has moist crumbs, not clean. Also, make sure you’re measuring your flour correctly (spoon and level, don’t scoop).
Q: Can I use milk chocolate instead of dark?
A: You can, but it will be sweeter and less intense. I recommend sticking to semi-sweet or dark for the best flavor balance. If you use milk chocolate, reduce the sugar by 2 tablespoons.
Q: Do I need to sift the dry ingredients?
A: It’s not strictly necessary, but it helps remove lumps and ensures even distribution. If you’re in a hurry, just whisk the dry ingredients together well before adding.
Q: Can I freeze the batter?
A: No, the eggs won’t hold up well in the freezer. It’s best to bake them fresh. But you can definitely freeze the baked brownies!
Pin This Recipe!
Small Batch Fudgy Brownies: 5-Step Shiny Crackly Tops
- Total Time: 40 minutes
- Yield: 4 servings 1x
Description
A quick, fudgy small batch brownie recipe that yields 4-6 servings with shiny, crackly tops. Made in one bowl with no mixer required, these dense chocolate brownies are ready in under 30 minutes.
Ingredients
- 1/2 cup (115g) unsalted butter
- 3/4 cup (150g) granulated sugar
- 2 oz (60g) dark chocolate, chopped
- 2 large eggs, room temperature
- 1 teaspoon vanilla extract
- 1/2 cup (65g) all-purpose flour
- 1/3 cup (30g) unsweetened cocoa powder
- 1/4 teaspoon fine sea salt
- Optional: 1/2 cup chocolate chips, chopped walnuts, or pecans
Instructions
- Preheat oven to 350°F (175°C). Line an 8×8 inch square pan with parchment paper, leaving an overhang on the sides, and spray with non-stick spray.
- Melt the butter and chopped chocolate together in a microwave-safe bowl in 30-second intervals, stirring until smooth. Alternatively, melt over low heat in a saucepan. Set aside to cool slightly.
- In a medium mixing bowl, vigorously whisk the granulated sugar and eggs for 1-2 minutes until the mixture is pale, glossy, and slightly thickened.
- Pour the melted butter and chocolate mixture into the egg and sugar mixture. Whisk to combine, then add the vanilla extract.
- Sift in the flour, cocoa powder, and salt. Fold the dry ingredients into the wet mixture until just combined. Do not overmix. Stir in optional add-ins if using.
- Pour the batter into the prepared pan and spread evenly. Bake for 20-25 minutes, or until a toothpick inserted into the center comes out with moist crumbs (not wet batter).
- Let the brownies cool completely in the pan on a wire rack for at least 30 minutes (ideally an hour) to set before lifting out and slicing.
Notes
For shiny crackly tops, whisk the sugar and eggs vigorously until glossy. Do not overbake; the toothpick should have moist crumbs. Room temperature eggs are crucial for smooth emulsion. Cool completely before cutting to ensure fudgy texture. Can be stored in an airtight container at room temperature for up to 3 days or frozen for 2 months.
- Prep Time: 15 minutes
- Cook Time: 25 minutes
- Category: Dessert
- Cuisine: American
Nutrition
- Serving Size: 1 brownie
- Calories: 320
- Sugar: 30
- Sodium: 120
- Fat: 16
- Saturated Fat: 9
- Carbohydrates: 42
- Fiber: 2
- Protein: 4
Keywords: small batch brownies, fudgy brownies, easy brownies, one bowl brownies, crackly top brownies, quick dessert, chocolate brownies



