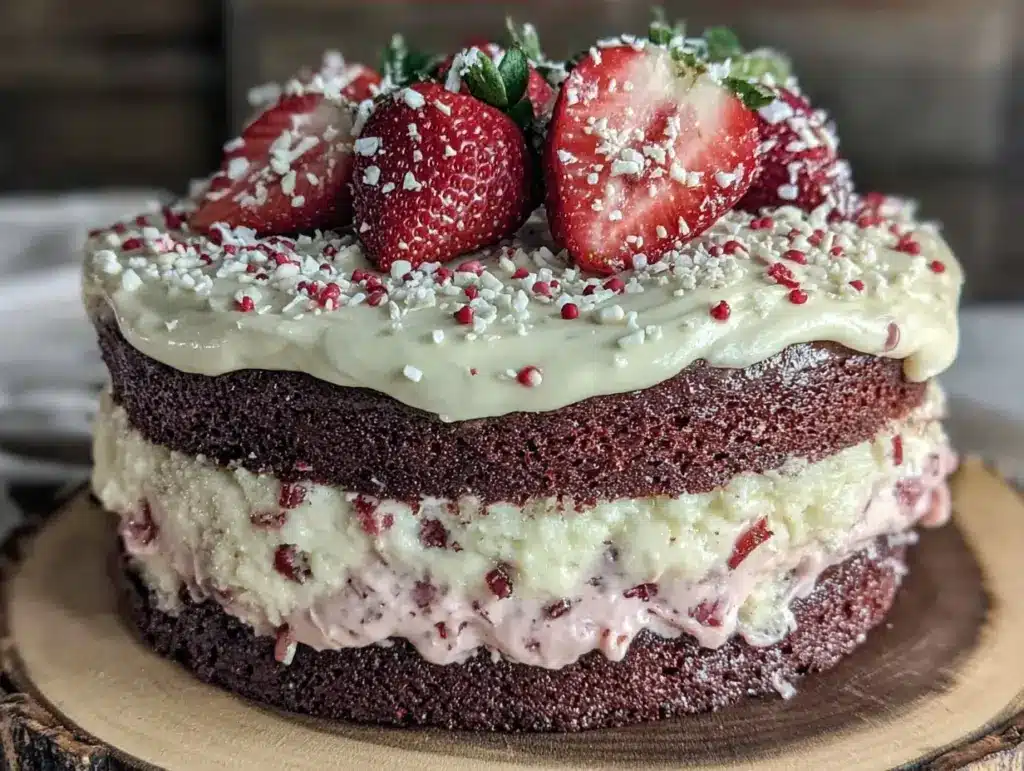
There is a specific kind of nostalgia that hits me when I smell vanilla extract hitting warm butter. It’s not just about the sugar rush (though that helps). It’s about those Saturday mornings in the late 90s, wearing oversized pajamas, waiting for my mom to finish the last layer of a cake that was supposed to be simple but always ended up being an event. That cake was always Neapolitan. Red, white, and pink. The classic trio.
But here’s the thing: store-bought Neapolitan cake is basically a sponge candy wrapper for disappointment. It’s dry, the frosting is too sweet, and the strawberry part tastes like artificial red dye and regret. I wanted to bring that childhood comfort back, but I also wanted it to actually taste good. I didn’t want to spend hours making three separate cakes or dealing with temperamental ganache.
So I tweaked the method. I focused on a super moist vanilla base, split it into three, and created a fresh strawberry buttercream that uses real fruit instead of powder or jam. The result? A cake that feels like a bakery treat but comes together with just five core ingredients. It’s lighter, brighter, and honestly? Better than anything I used to buy.
This Neapolitan layer cake has become my go-to for birthdays, summer picnics, and just because I need a sugar fix that doesn’t leave me feeling heavy and guilty afterward. It’s essentially classic strawberry shortcake but in a more elegant, sliceable form. It fuels your day without feeling like diet food—just pure, joyful comfort.
Why You’ll Love This Recipe
I’ve made this cake about a dozen times in the last six months, and every single time, people ask for the recipe. Here’s why it keeps coming back to the top of my list:
It Uses Real Strawberries — Most “strawberry” cakes use extract. I use fresh, mashed berries. You can taste the actual fruit. It’s tart, sweet, and vibrant. It’s the same principle as the fudgy brownies where simple, high-quality ingredients shine, but applied to a creamy frosting.
Five Ingredients, Maximum Flavor — I’m not talking about five types of flour. I mean five main components: butter, sugar, eggs, flour, and strawberries. That’s it. No weird stabilizers, no gelatin, no food dye tubes. Just good stuff.
It’s Surprisingly Light — Because we’re using a fruit-based buttercream instead of a heavy fondant or stiff royal icing, this cake feels airy. You can eat two slices and still feel ready to go for a walk. It’s not that heavy, cloying dessert that sits in your stomach like a brick.
Perfect for Beginners — Layer cakes scare people. They think they need a spirit level and a degree in engineering. This one is forgiving. If the layers aren’t perfect, who cares? It’s a rustic, homemade look that people actually prefer over the “perfect” bakery look.
Meal Prep Friendly — This cake actually tastes better the next day. The flavors meld together. I often make it on Sunday afternoon and it’s still amazing for Wednesday’s dessert. It keeps well in the fridge for up to four days.
This is my answer to “what’s for dessert?” when I want something special but don’t want to spend my entire evening in the kitchen. It’s reliable, delicious, and makes everyone happy.
Ingredients You’ll Need
Here’s the best part: you probably have most of this already. This isn’t a recipe that requires a trip to three different specialty stores. It’s pantry-friendly with one fresh ingredient that does all the heavy lifting.
Unsalted Butter (1 cup / 225g) — Room temperature is non-negotiable. If it’s cold, it won’t cream with the sugar properly, and your cake will be dense. I leave it out while I prep everything else. Salted butter works if you reduce the added salt in the recipe, but unsalted gives you more control.
Granulated Sugar (1 ½ cups / 300g) — Standard white sugar. Don’t try to substitute with brown sugar for the base—it changes the texture too much. The sugar provides structure and moisture. I use Domino, but any good quality brand works.
Eggs (4 large) — Room temperature eggs incorporate better into the batter. If you’re in a rush, crack them into a bowl and let it sit in warm water for 5 minutes. Cold eggs can cause the butter to seize up.
All-Purpose Flour (2 cups / 250g) — Spoon and level method! Don’t scoop directly from the bag, or you’ll pack too much flour in and get a dry cake. I always use Gold Medal or King Arthur for consistent results.
Fresh Strawberries (1 ½ cups / about 200g, hulled and mashed) — This is the star. Use ripe, red strawberries. If they’re pale or hard, the flavor will be weak. I usually buy a pint of organic berries and pick the best ones for the frosting, using the slightly less perfect ones for the cake batter if I’m feeling lazy (but fresh is best for both).
Pantry Staples (Baking powder, salt, vanilla extract) — You likely have these. Use 1 teaspoon of baking powder and ½ teaspoon of salt per batch of batter. For vanilla, use pure extract. I don’t use imitation, but if that’s all you have, it’ll work in a pinch.
Optional Garnish — Fresh strawberry slices or a dusting of powdered sugar for presentation. I love the contrast of red berries on white frosting.
Equipment Needed
You don’t need fancy equipment for this. Here’s what I actually use:
Stand Mixer or Hand Mixer — Creaming the butter and sugar takes about 3-4 minutes. Doing it by hand is possible but requires serious arm strength. I use my KitchenAid, but a good hand mixer works fine.
Three 8-inch Round Cake Pans — This is key. You need three equal-sized pans. If you don’t have three, you can bake two batches, but that takes longer. I have a set from Walmart that works perfectly. Grease and flour them, or line the bottoms with parchment paper for easy removal.
Wire Cooling Rack — Essential. You need to cool the cakes completely before frosting, or the buttercream will melt. I stack my racks to save counter space.
Spatula (Offset) — An offset spatula makes spreading the frosting much easier and less stressful. A regular rubber spatula works, but you’ll need to be very careful.
Mashing Tool — A fork or potato masher for the strawberries. No need for a food processor; we want some texture.
Sifter or Sieve — For the flour and baking powder. It ensures no lumps and a lighter cake. I use a simple wire sieve.
How to Make It: Step-by-Step
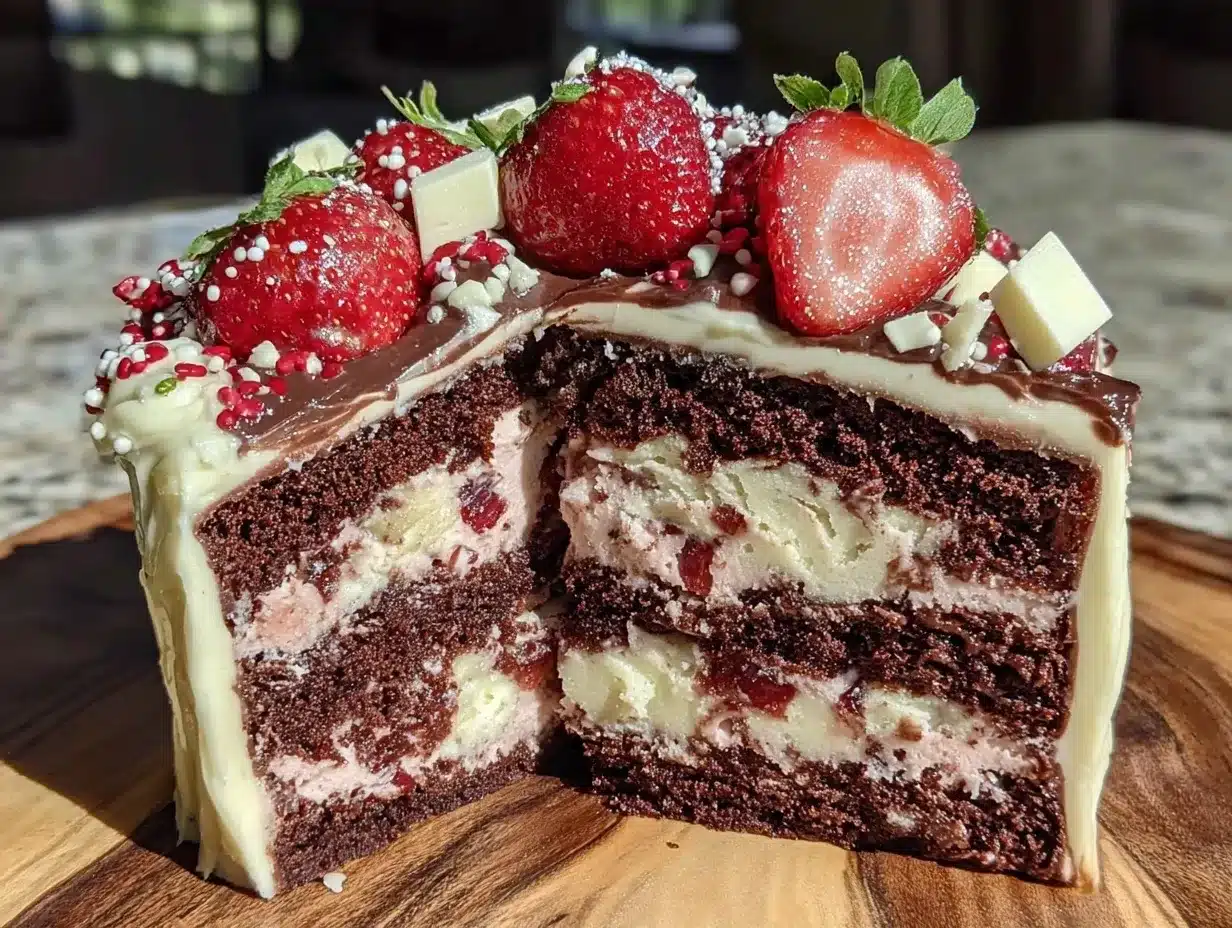
Alright, let’s make this! I’m walking you through exactly how I do it, including the little tricks I’ve picked up over the years.
Step 1: Prep Your Pans and Oven (5 minutes)
Preheat your oven to 350°F (175°C). Grease your three 8-inch cake pans with butter or non-stick spray. Dust with flour, tapping out the excess. Or, for extra insurance, line the bottoms with parchment paper circles. This guarantees the cakes won’t stick.
Step 2: Cream the Butter and Sugar (3-4 minutes)
In your mixer bowl, beat the room-temperature butter and sugar on medium-high speed until light and fluffy. This is the most important step for a tender cake. It should look pale and creamy, not yellow and dense. Scrape down the sides of the bowl with a spatula to ensure everything is incorporated.
Step 3: Add Eggs and Vanilla (2 minutes)
Add the eggs one at a time, beating well after each addition. Add the vanilla extract. The mixture might look slightly curdled at this point—that’s normal. Just keep mixing until it comes back together. It should look glossy.
Step 4: Mix Dry Ingredients (1 minute)
In a separate bowl, whisk together the flour, baking powder, and salt. Gradually add the dry ingredients to the wet mixture on low speed. Mix just until combined. Do not overmix! Overmixing develops gluten, which makes cake tough. Stop as soon as you see no more streaks of flour.
Step 5: Divide the Batter
Divide the batter equally among your three prepared pans. I use a kitchen scale to ensure each pan gets exactly the same amount (about 280g per pan). This ensures even baking. Smooth the tops with a spatula.
Step 6: Bake (25-30 minutes)
Bake at 350°F for 25-30 minutes. The cakes are done when a toothpick inserted into the center comes out clean or with just a few moist crumbs. The edges should pull away slightly from the pan. Rotate the pans halfway through baking for even browning.
Step 7: Cool Completely (1 hour)
Let the cakes cool in the pans for 10 minutes, then turn them out onto a wire rack. Let them cool completely to room temperature. This is crucial. If you frost warm cakes, the buttercream will melt and slide off.
Step 8: Make the Fresh Strawberry Buttercream
While cakes cool, mash your fresh strawberries until they’re a chunky puree. You want about 1 cup of mashed berries. In a clean bowl, beat 1 cup of softened butter until creamy. Gradually add 3 cups of powdered sugar, one cup at a time. Add the mashed strawberries and 1 teaspoon of vanilla. Beat on high for 2-3 minutes until light and fluffy. If it’s too runny, add more powdered sugar. If it’s too thick, add a teaspoon of milk.
Step 9: Assemble the Cake
Place one cake layer on a serving plate. Spread a generous layer of strawberry buttercream on top. Add the second layer, spread more frosting, then add the third layer. Use the remaining frosting to cover the top and sides. Smooth it out or leave it rustic—it’s up to you.
Step 10: Garnish and Serve
Top with fresh strawberry slices or a dusting of powdered sugar. Slice and enjoy. It’s best served the same day, but leftovers keep well in the fridge.
Expert Tips & Tricks
Here’s everything I’ve learned from making this dozens of times. These tips will save you from my mistakes.
Room Temperature Ingredients Are Key
I cannot stress this enough. Cold butter and eggs will not emulsify properly. Your cake will be dense and heavy. Plan ahead and let your butter sit out for an hour before you start.
Don’t Overmix the Batter
Once you add the flour, mix until just combined. Overmixing leads to a tough cake. It’s better to have a few tiny flour lumps than a dense brick.
Use Ripe Strawberries
The flavor of your buttercream depends entirely on the strawberries. If they’re not sweet and fragrant, the frosting will taste bland. Taste a berry before you mash it. If it’s not good, don’t use it.
Chill Before Slicing
If you’re serving this at a party, chill the assembled cake for 30 minutes before slicing. It helps the layers set and makes for cleaner slices. Just bring it back to room temperature for 15 minutes before serving for the best texture.
Food Coloring (Optional)
Traditional Neapolitan cake has red, white, and pink layers. My version uses a white vanilla base and strawberry frosting. If you want the classic look, divide the batter: leave one plain, add pink food gel to one, and add red gel to the third. But honestly? The fresh strawberry flavor is so good, I don’t feel the need to use dye.
Variations & Substitutions
Once you’ve nailed the basic version, here’s how you can mix it up. I’ve tried all of these.
Chocolate Layers
Swap ¼ cup of flour for ¼ cup of unsweetened cocoa powder in one of the layers. It adds a nice chocolate contrast to the strawberry.
Red Velvet Style
Add 1 tablespoon of cocoa powder and 1 teaspoon of red food coloring to one layer. It gives a subtle red velvet flavor without being too intense.
Gluten-Free
Use a 1:1 gluten-free flour blend. The texture will be slightly more crumbly, but it still tastes great. I’ve used Bob’s Red Mill with good results.
Vegan
Replace butter with vegan butter (like Earth Balance) and eggs with flax eggs (1 tablespoon ground flaxseed + 3 tablespoons water per egg). The frosting will be slightly less rich, but still delicious.
Fruit Swap
Can’t find strawberries? Use fresh raspberries or blackberries. They work beautifully in the buttercream. Just strain out the seeds if you want a smoother frosting.
Serving & Storage
How to Serve:
I usually serve this straight from the fridge, but let it sit at room temperature for 20 minutes before slicing. It tastes better at room temperature—the buttercream softens and the flavors open up. Pair it with a cup of coffee or a glass of cold milk.
Side Dishes:
This cake stands alone, but if you want to add something, try a simple green salad or some fresh fruit. It’s light enough that it doesn’t need heavy sides.
Storage Instructions:
Store in an airtight container in the refrigerator for up to 4 days. The cake will firm up in the fridge, so let it come to room temperature before eating. It does not freeze well because the buttercream can separate when thawed. Make it fresh or store in the fridge.
Pro Tip:
If you’re making this ahead, assemble the cake the night before. The layers meld together overnight, and the frosting sets perfectly. It’s actually better the next day.
Nutrition Information
I’m not a nutritionist, but here’s the breakdown if you’re tracking. Keep in mind that this is a dessert, so it’s higher in sugar and fat, but the fresh strawberries add some fiber and vitamins.
Per Serving (based on 12 slices):
- Calories: 380
- Protein: 4g
- Carbs: 52g
- Fiber: 1g
- Sugar: 40g
- Fat: 18g
- Saturated Fat: 11g
What’s Good: It’s a simple recipe with no artificial additives. The fresh strawberries provide natural sweetness and some vitamin C. It’s not a diet food, but it’s made with real ingredients.
What to Know: It’s higher in calories due to the butter and sugar. If you’re watching your intake, a smaller slice is plenty. I usually cut my slices into 16 pieces instead of 12 to keep portions reasonable.
Final Thoughts
So that’s my take on the Neapolitan layer cake! I’ve probably talked your ear off at this point, but when you make a recipe this often, you have a lot to say about it.
This has saved my dessert game more times than I can count. It’s my answer to “what’s for dessert?” when I want something special but don’t want to spend my entire evening in the kitchen. My kids are happy, my husband’s happy, and I’m happy because I’m not stressed about cooking.
Make it yours! Try different fruits, swap in your favorite chocolate, or adjust the sweetness. The best recipes are the ones you adapt to your family’s tastes. If you make this, drop a comment and let me know what you think! I love hearing how recipes turn out in your kitchen. And if something doesn’t work, tell me that too—I’m here to help troubleshoot.
Happy baking! And I hope your kitchen smells half as good as mine does right now.
Frequently Asked Questions
Can I use frozen strawberries for the buttercream?
You can, but you need to thaw and drain them first. Frozen strawberries release a lot of water, which can make the buttercream runny. Mash them, then press them through a sieve to remove excess liquid before adding to the butter. Fresh is always better, but frozen works in a pinch.
Why did my cake sink in the middle?
Usually, this means the cake was underbaked or the oven temperature was too high. Make sure you test with a toothpick. Also, don’t open the oven door too early in the baking process. The sudden drop in temperature can cause cakes to collapse.
Can I make this cake ahead of time?
Yes! Bake the layers a day ahead, wrap them tightly in plastic wrap, and store at room temperature. Make the frosting the day of or the night before. Assemble the cake the day you plan to serve it. It keeps well in the fridge for up to 4 days.
Can I use strawberry jam instead of fresh strawberries?
You can, but the flavor won’t be as bright and fresh. Jam is also sweeter and has a different texture. If you use jam, reduce the powdered sugar in the recipe slightly to balance the sweetness. Fresh berries are definitely the way to go for that “better than takeout” taste.
How do I get clean slices?
Use a sharp knife and wipe it clean between each cut. You can also dip the knife in hot water and dry it before cutting. This helps the knife glide through the frosting and cake smoothly. Chilling the cake for 30 minutes before slicing also helps.
Can I add food coloring to the layers?
Absolutely. Divide the batter into three portions. Leave one plain (white), add pink gel coloring to one, and red gel coloring to the third. Gel coloring is best because it doesn’t add extra liquid to the batter. But remember, my version focuses on fresh strawberry flavor, so the color comes from the fruit in the frosting, not the cake layers.
Pin This Recipe!
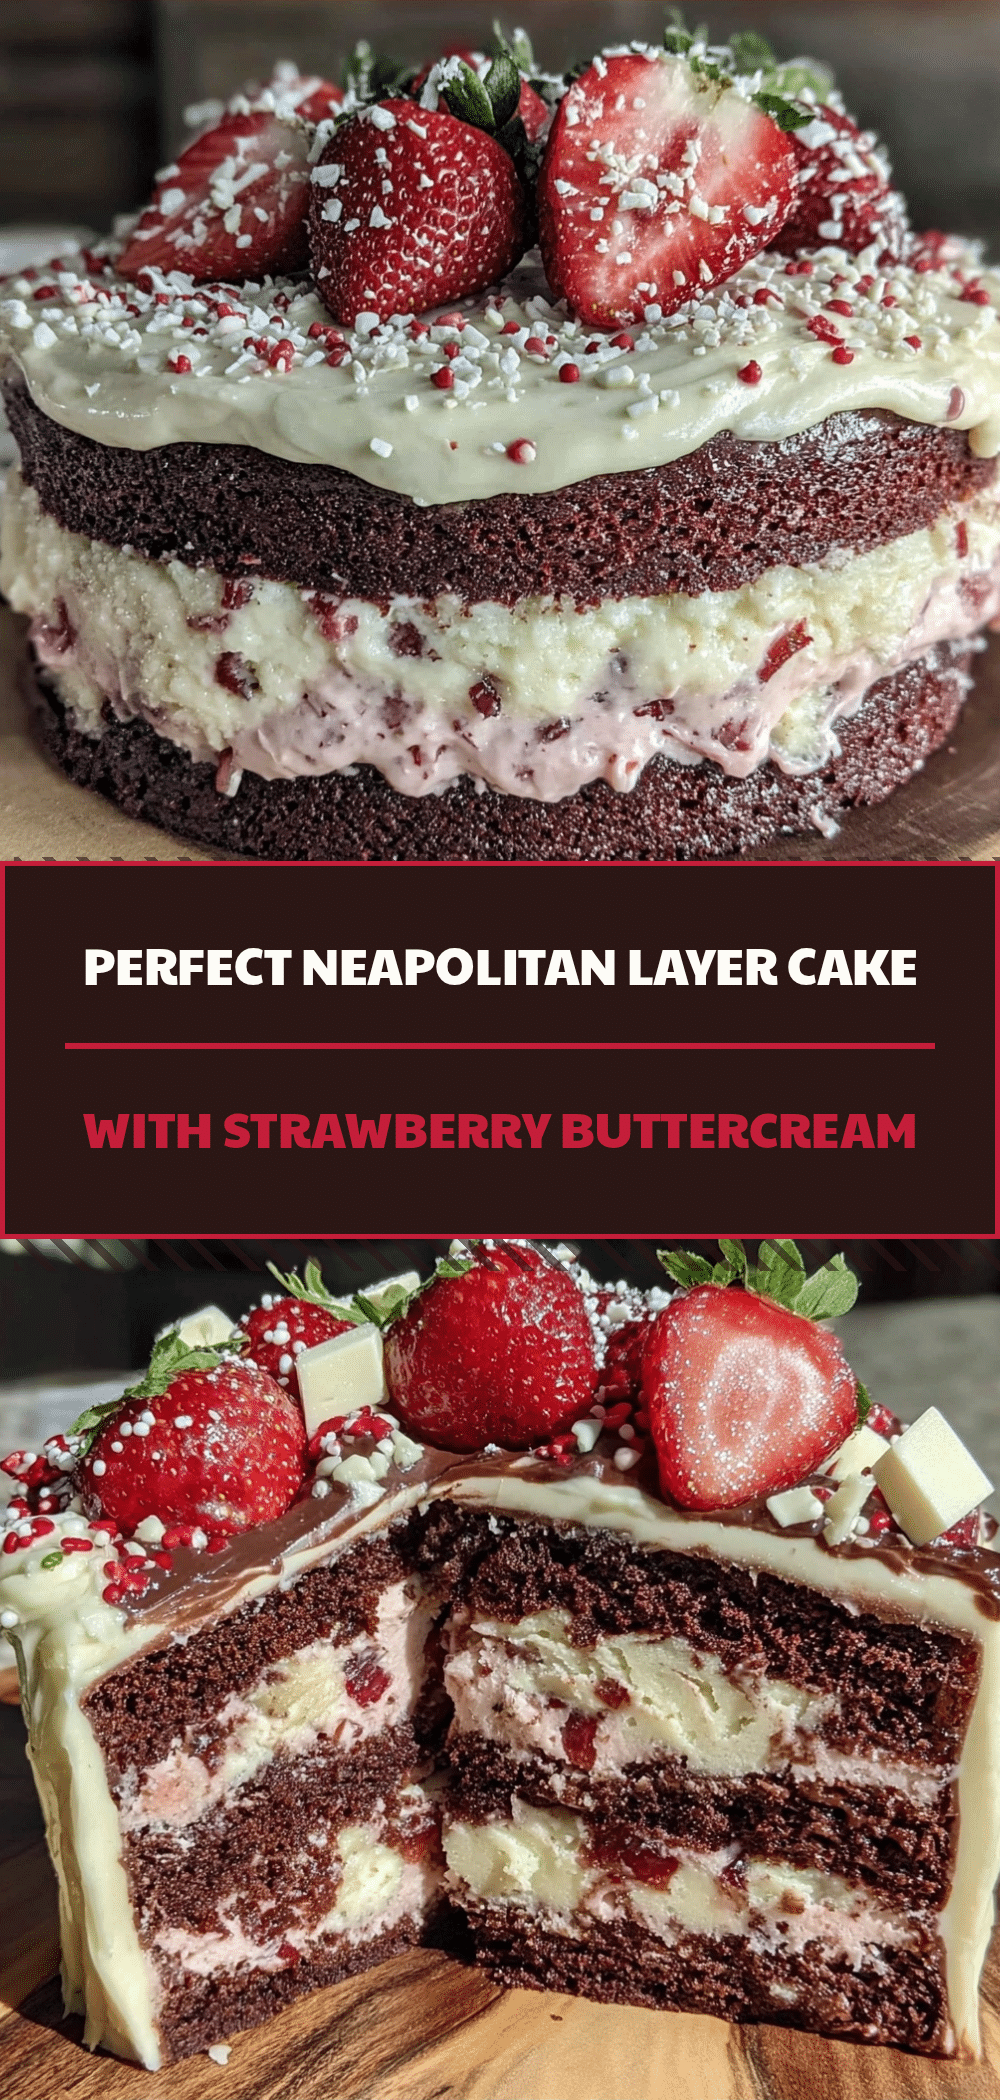
Neapolitan Layer Cake: 5-Ingredient Fresh Strawberry Buttercream
- Total Time: 1 hour 30 minutes
- Yield: 12 servings 1x
Description
A nostalgic, moist vanilla layer cake split into three parts and topped with a vibrant, fresh strawberry buttercream. This recipe uses real fruit instead of artificial dyes or extracts for a lighter, brighter dessert that is perfect for beginners.
Ingredients
- 1 cup (225g) unsalted butter, room temperature
- 1 ½ cups (300g) granulated sugar
- 4 large eggs, room temperature
- 2 cups (250g) all-purpose flour
- 1 ½ cups (200g) fresh strawberries, hulled and mashed
- 1 teaspoon baking powder
- ½ teaspoon salt
- 1 teaspoon vanilla extract
- 3 cups powdered sugar (for buttercream)
- 1 cup softened butter (for buttercream)
- Optional: Fresh strawberry slices or powdered sugar for garnish
Instructions
- Preheat oven to 350°F (175°C). Grease three 8-inch round cake pans with butter or non-stick spray, dust with flour, and line bottoms with parchment paper.
- In a mixer bowl, beat room-temperature butter and granulated sugar on medium-high speed for 3-4 minutes until light and fluffy. Scrape down the sides.
- Add eggs one at a time, beating well after each addition, then add vanilla extract. Mix until glossy.
- In a separate bowl, whisk together flour, baking powder, and salt. Gradually add dry ingredients to the wet mixture on low speed, mixing just until combined. Do not overmix.
- Divide batter equally among the three prepared pans (approx. 280g per pan) and smooth tops.
- Bake for 25-30 minutes, rotating pans halfway through, until a toothpick inserted in the center comes out clean.
- Let cakes cool in pans for 10 minutes, then turn out onto a wire rack to cool completely.
- While cakes cool, mash fresh strawberries into a chunky puree.
- In a clean bowl, beat 1 cup softened butter until creamy. Gradually add 3 cups powdered sugar, then add mashed strawberries and 1 teaspoon vanilla. Beat on high for 2-3 minutes until light and fluffy.
- Assemble the cake by placing one layer on a plate, spreading a generous layer of buttercream, adding the second layer, more frosting, and finally the third layer. Cover top and sides with remaining frosting.
- Garnish with fresh strawberry slices or powdered sugar. Chill for 30 minutes before slicing if desired.
Notes
Ensure all ingredients are at room temperature for proper emulsification. Do not overmix the batter to avoid a tough cake. The cake tastes better the next day as flavors meld. Store in an airtight container in the refrigerator for up to 4 days. Do not freeze as the buttercream may separate.
- Prep Time: 30 minutes
- Cook Time: 30 minutes
- Category: Dessert
- Cuisine: American
Nutrition
- Serving Size: 1 slice
- Calories: 380
- Sugar: 40
- Fat: 18
- Saturated Fat: 11
- Carbohydrates: 52
- Fiber: 1
- Protein: 4
Keywords: Neapolitan cake, strawberry buttercream, layer cake, fresh strawberry dessert, easy baking, vanilla cake, homemade cake



