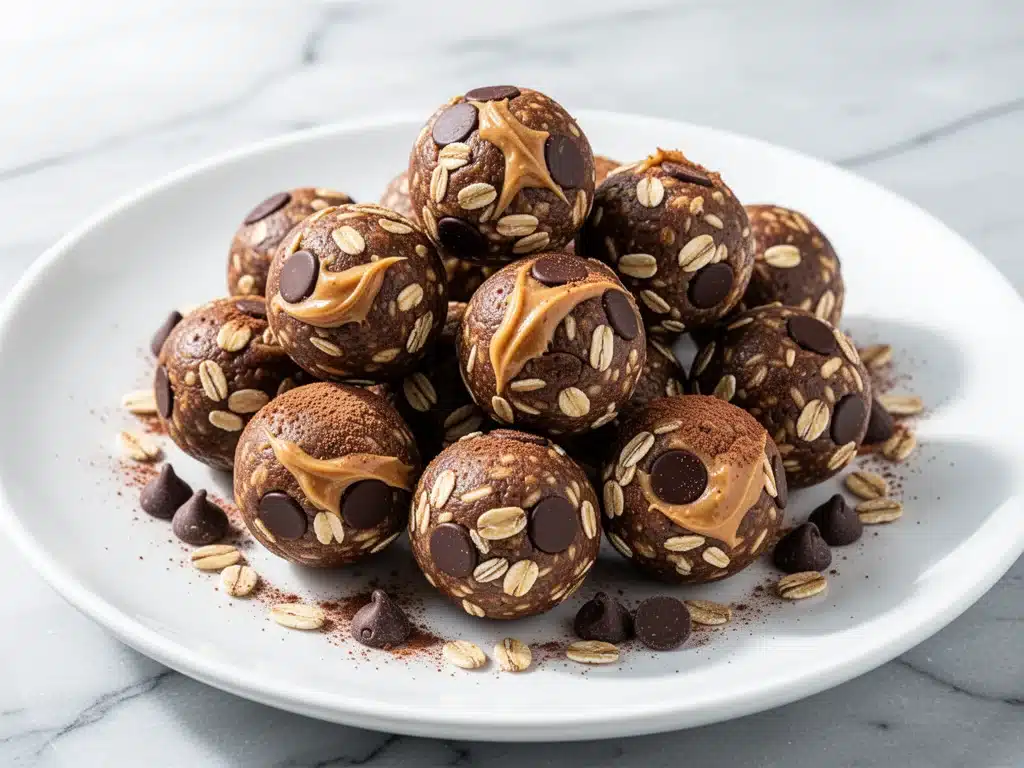
It’s 3:30 PM on a Tuesday. You’re staring at your computer screen, and your brain has officially checked out. Your stomach is making noises that are definitely audible in a quiet office, and the vending machine in the hallway is calling your name with its bag of salty chips and empty calories. I’ve been there. More times than I care to admit.
Last month, I was in the thick of a deadline that required me to be “on” for eight hours straight after a 6 AM meeting. I tried the usual tricks: a sad granola bar from my desk drawer, a cup of coffee that did nothing but make my hands shake, and eventually, a sugar crash so severe I considered napping under my desk. That’s when I remembered the container in my fridge. The one with the little chocolatey balls that smell like a dessert but hit like a meal.
These high-protein chocolate peanut butter no-bake energy bites have literally saved my workdays. They are my secret weapon against the 3 PM hunger pangs. I keep a batch in the fridge every single week. They’re cold, they’re satisfying, and they give me the sustained energy I need without the sugar crash that comes with a candy bar. My kids love them too, which means I’m not just fueling my own brain; I’m keeping the little monsters happy during their afternoon homework sessions.
What I love most is how simple they are. You don’t need an oven. You don’t need to dirty a dozen pans. You just mix, roll, and chill. It’s the kind of recipe that feels like cheating because it’s so easy, but the result is genuinely delicious and nutritious. If you’ve been looking for a way to snack smarter without sacrificing flavor, this is it. I’ve made these probably fifty times now, tweaking the ratios until they were perfect, and I’m sharing that perfected version with you.
Why You’ll Love This Recipe
There are a dozen reasons I keep coming back to this specific combo of oats, peanut butter, and chocolate, but here are the big ones that make it a staple in my kitchen:
Zero Baking Required — Seriously, if you can stir a bowl, you can make these. No preheating, no waiting for cookies to bake, no cleaning a baking sheet. I throw these together in about 15 minutes, and they’re ready to eat (or freeze) shortly after. It’s perfect for those days when I don’t have the mental energy to cook.
Actually Filling — I’m not talking about a “snack” that leaves you hungry ten minutes later. These bites have protein, healthy fats, and fiber. They stick to your ribs. I had one before a long hike last weekend, and I didn’t need another snack for four hours. That’s huge for someone with an active family.
Pantry-Friendly Ingredients — You probably have 80% of these ingredients already. Peanut butter, oats, honey, chocolate chips. If you have those, you can make dinner’s dessert or tomorrow’s breakfast. I keep these staples stocked specifically so I can whip up a batch on a whim.
Meal Prep Magic — I make a double batch every Sunday. They last all week in the fridge, and I can freeze extras for months. It’s one less decision I have to make during the week. When I’m rushing out the door, I grab two bites and go. It’s my go-to when I need breakfast to just work.
Healthy-ish Indulgence — Look, they taste like cookie dough. But because they’re packed with protein and healthy fats, they satisfy that chocolate craving without the guilt. My husband thinks they’re a treat, but I know they’re helping him stay full until dinner. Win-win.
This is my go-to when I need a snack that’s both delicious and functional. No complicated techniques, no weird health-food tastes, just reliable, delicious food that makes everyone happy.
Ingredients You’ll Need
Here’s the best part: this recipe doesn’t require a trip to a specialty health food store. Most of these are pantry staples. I’m particular about a few things here, and I’ll tell you exactly why they matter.
For the Base
Old-Fashioned Rolled Oats (2 cups / 160g) — Don’t use instant oats; they turn into mush. Don’t use steel-cut; they’re too hard. Old-fashioned gives you that chewy, substantial texture. I buy the large canisters to save money—it’s way cheaper than the small boxes.
Creamy Peanut Butter (½ cup / 128g) — I use natural peanut butter (just peanuts and salt) if I can find it, but regular Jif or Skippy works fine too. The key is that it needs to be soft. If your natural peanut butter is separated and hard, microwave it for 15 seconds to soften it up. If it’s too stiff, you won’t be able to roll the balls.
Honey (⅓ cup / 110g) — This is the binder that holds everything together. It adds sweetness and helps the mixture stick. Maple syrup works too if you want to keep it vegan, but honey gives a better chew. I like to warm my honey slightly if it’s cold—it pours much easier.
Vanilla Extract (1 teaspoon) — Just a splash to round out the flavors. Don’t skip it; it makes the peanut butter taste more like a dessert.
For the Protein and Texture
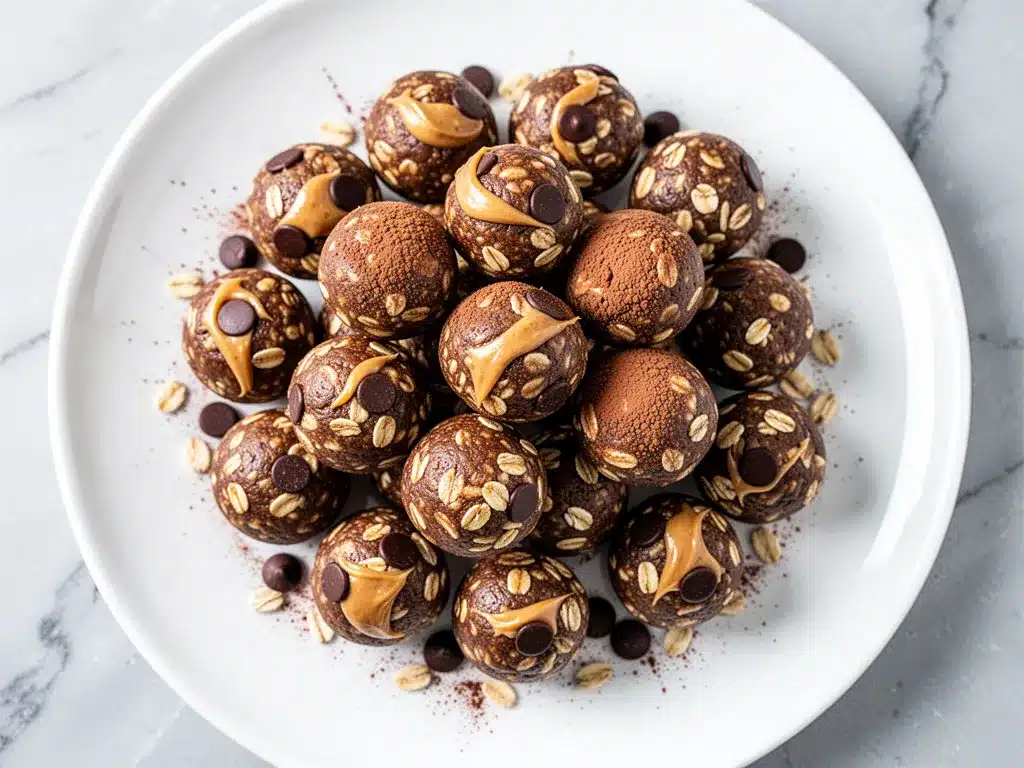
Protein Powder (½ scoop / about 15-20g) — This is what makes them “high-protein.” I use vanilla whey or a plant-based vanilla protein. Chocolate protein powder works too, but then you might want to reduce the chocolate chips. I’ve tested this with both, and they both work great. Just make sure it’s a fine powder; gritty protein powder ruins the texture.
Chia Seeds (2 tablespoons / 15g) — These add a little extra protein, fiber, and omega-3s. They also help absorb moisture so the bites aren’t too sticky. You can skip them if you want, but I think they add a nice subtle crunch.
Mini Chocolate Chips (½ cup / 85g) — Mini chips are crucial. Regular chips are too big and make the bites uneven. Mini chips distribute evenly, so you get a bit of chocolate in every bite. I buy the big bags of mini chips; they’re cheaper per ounce.
Pinch of Salt — Always add a pinch. It enhances the peanut butter flavor and balances the sweetness. Even if your peanut butter is salted, add a little extra.
Optional Add-ins
Dark Chocolate Chunks — If you want to feel fancy, swap half the mini chips for small chunks of dark chocolate. It adds a richer, more gourmet flavor.
Crushed Pretzels — For a sweet-and-salty kick, mix in ¼ cup of crushed pretzels. It’s a game-changer if you love salty snacks.
Flaxseed Meal — Another boost of fiber and omega-3s. I add this when I’m trying to be extra healthy, but it’s not necessary.
Equipment Needed
You don’t need fancy equipment for this. Here’s what I actually use:
Large Mixing Bowl — I use a 4-quart bowl. It needs to be big enough to mix everything without making a mess. A glass bowl is nice because you can see what’s happening, but plastic works fine.
Spatula — A sturdy silicone spatula is best for folding the ingredients together. You need something that can handle the sticky peanut butter mixture.
Measuring Cups and Spoons — Standard stuff. Dollar store versions work fine for this. Accuracy matters here because the ratio of wet to dry ingredients determines if the bites hold together.
Baking Sheet or Tray — You need a flat surface to roll the balls on. I line mine with parchment paper or a silicone mat to prevent sticking. This makes cleanup instant.
Small Bowl — For melting the chocolate chips if you want to drizzle them on top. A microwave-safe bowl works perfectly.
Ice Cream Scoop or Cookie Scoop — This is a pro tip. Instead of eyeballing the size of each ball, use a small scoop. It ensures they’re all the same size, which makes them look professional and bake (or chill) evenly. I have a tiny 1-tablespoon scoop that’s perfect for this.
How to Make It: Step-by-Step
Alright, let’s make this! I’m walking you through exactly how I do it, including the little tricks I’ve picked up over the years.
Step 1: Prep Your Dry Ingredients (2 minutes)
In your large mixing bowl, combine the rolled oats, protein powder, chia seeds, and salt. Whisk them together with a fork or your spatula to break up any clumps in the protein powder. This ensures you don’t get a mouthful of dry powder later. If you’re using the optional crushed pretzels, add them now.
Step 2: Mix the Wet Ingredients (1 minute)
Add the creamy peanut butter, honey, and vanilla extract to the dry ingredients. If your peanut butter is stiff, you might need to work it in with your hands or a sturdy spoon. Stir until everything is well combined. The mixture should look like wet sand. If it seems too dry and crumbly, add another teaspoon of honey. If it’s too sticky and won’t hold together, add another tablespoon of oats.
Step 3: Fold in the Chocolate (1 minute)
Stir in the mini chocolate chips. Use a folding motion to distribute them evenly. At this point, the mixture should be thick and sticky. It’s time to get your hands dirty. Wet your hands slightly with water (this prevents sticking) and mix it all together for a minute. You want every oat to be coated.
Step 4: Chill the Mixture (15-30 minutes)
This step is optional but highly recommended. Cover the bowl and put it in the fridge for 15-30 minutes. Cold mixture is much easier to roll. If you try to roll them right away, they’ll stick to your hands and fall apart. I usually mix them in the morning and chill them while I work. If you’re in a huge rush, you can skip this, but just be prepared for a stickier process.
Step 5: Roll the Bites (10 minutes)
Take a small amount of mixture (about 1 tablespoon) and roll it between your palms to form a ball. Keep rolling until it’s smooth. Place it on your prepared baking sheet. Repeat with the rest of the mixture. You should get about 20-24 bites depending on how big you make them. If the mixture starts to stick to your hands, wet them again. Work quickly so the peanut butter doesn’t melt from your body heat.
Step 6: Optional Chocolate Drizzle
If you want to make these look fancy, melt the remaining mini chocolate chips (or use a different color) in the microwave in 15-second intervals, stirring in between. Drizzle the melted chocolate over the chilled bites. This adds a nice visual appeal and an extra hit of chocolate. Let them sit for 5 minutes until the chocolate sets.
Step 7: Store and Enjoy
Transfer the bites to an airtight container. They’re ready to eat immediately, but they taste best after they’ve chilled for a few hours. The flavors meld together, and the texture becomes more cohesive.
Total Time: About 25 minutes (10 minutes active, 15 minutes chilling)
Expert Tips & Tricks
Here’s everything I’ve learned from making these dozens of times. These tips will save you from my mistakes.
Wet Your Hands
This is the #1 tip for rolling. Peanut butter and honey are sticky. If you roll them dry, you’ll have a mess on your hands and broken balls. Dip your fingertips in water or rub them with a little oil before shaping each ball. It makes the process so much smoother.
Don’t Skip the Chill
I know it’s tempting to eat them right away, but chilling the mixture is crucial. It firms up the peanut butter and oats, making them easier to handle. If you skip this, you’ll spend half your time cleaning peanut butter off your fingers.
Protein Powder Matters
Not all protein powders absorb moisture the same way. Whey protein tends to make the mixture drier, so you might need a bit more honey. Plant-based proteins (like pea or rice protein) can be grittier, so make sure you whisk it well into the oats. If the mixture feels too dry after adding the protein, add liquid one teaspoon at a time.
Uniform Size
Use a cookie scoop if you have one. It ensures every bite is the same size, which means they have the same nutritional profile and look uniform in your container. It’s a small thing, but it makes a big difference in presentation.
Freeze for Later
These freeze beautifully. Once you’ve rolled them and they’re firm, put them in a freezer bag. They’ll last for up to 3 months. I keep a bag in the freezer for days when I’m too tired to make a fresh batch. You can eat them frozen (they taste like ice cream bites) or thaw them in the fridge.
Variations & Substitutions
Once you’ve nailed the basic version, here’s how you can mix it up. I’ve tried all of these.
Almond Butter Version
Swap the peanut butter for almond butter. It has a milder, slightly sweeter flavor. I love this version for a change of pace. It works exactly the same way.
Trail Mix Bites
Add ¼ cup of chopped walnuts or pecans and ¼ cup of dried cranberries. It adds crunch and chew. This is my favorite version for hiking because it’s more filling.
Coconut Chocolate
Replace half the oats with unsweetened shredded coconut. Add ¼ cup of mini coconut chips. It gives a tropical twist that’s surprisingly good.
Lower Sugar
Use unsweetened applesauce instead of half the honey. It reduces the sugar content but still helps bind the mixture. The bites will be less sweet, so you might want to add a few more chocolate chips to compensate.
Gluten-Free
Just make sure your oats are certified gluten-free. Everything else in this recipe is naturally gluten-free. I use GF oats, and they work perfectly.
Vegan
Use a plant-based protein powder and maple syrup or agave instead of honey. Use dairy-free chocolate chips. The result is just as delicious and satisfying.
Serving & Storage
How to Serve:
I usually keep these in a container on the counter (if my kids don’t eat them all first) or in the fridge. They’re perfect for:
- Breakfast on the go: Grab two with your coffee.
- Post-workout snack: The protein helps recovery.
- Afternoon slump: Better than a candy bar.
- Lunchbox treat: Kids love them, and they don’t melt as easily as chocolate bars.
Storage Instructions:
Refrigerator: Store in an airtight container for up to 1 week. They stay firm and fresh. If your kitchen is very warm, keep them in the fridge to prevent the peanut butter from melting.
Freezer: Store in a freezer-safe bag or container for up to 3 months. No need to thaw if you like them cold.
Room Temperature: You can keep them out for a day or two, but I don’t recommend it. The peanut butter can go rancid faster at room temp, and they might get too soft.
Pro Tip: If you’re meal prepping for the week, make a double batch. They freeze so well that you’ll always have a backup ready.
Nutrition Information
I’m not a nutritionist, but here’s the breakdown if you’re tracking. Please note that this varies based on the specific protein powder and peanut butter you use.
Per Serving (based on 20 bites, 1 bite each):
- Calories: 110
- Protein: 5g
- Carbs: 10g
- Fiber: 1.5g
- Sugar: 6g
- Fat: 6g
- Saturated Fat: 1.5g
What’s Good: Decent protein for a snack, healthy fats from peanut butter, fiber from oats. It’s a balanced snack that keeps you full.
What to Know: Higher in calories than a piece of fruit, but much more sustaining. Contains nuts and dairy (if using whey protein).
My Take: Look, this is a snack with protein and chocolate. It’s not a diet food, but it’s way better than a cookie. When I want to make it lighter, I reduce the chocolate chips and increase the oats. But usually? I just eat a reasonable portion and enjoy it.
Final Thoughts
So that’s my go-to high-protein chocolate peanut butter no-bake energy bites! I’ve probably talked your ear off at this point, but when you make a recipe this often, you have a lot to say about it.
This has saved my afternoons more times than I can count. It’s my answer to “what’s a good snack?” when I’m tired, don’t want to cook, and still want something that tastes really good. My kids are happy, my husband’s happy, and I’m happy because I’m not stressed about finding a healthy option.
Make it yours! Try different nut butters, swap in your favorite chocolate chips, or add some crunch with nuts. The best recipes are the ones you adapt to your family’s tastes.
If you make this, drop a comment and let me know what you think! I love hearing how recipes turn out in your kitchen. And if something doesn’t work, tell me that too—I’m here to help troubleshoot.
Happy snacking! And I hope your kitchen smells half as good as mine does right now.
Frequently Asked Questions
Can I use crunchy peanut butter?
Yes, you can! It adds a nice texture, but the bites might be slightly harder to roll because of the chunks. I usually mix crunchy and creamy to get the best of both worlds. If you use all crunchy, just make sure you press the balls firmly so they hold together.
Why did my bites fall apart?
Usually, this means the mixture was too dry. You didn’t have enough binder (honey or peanut butter). Next time, add another teaspoon of honey or a tablespoon of peanut butter until it sticks together when you pinch it. Also, make sure you chilled the mixture long enough.
Can I make these ahead for a party?
Absolutely! They’re perfect for parties. Make them a day ahead so they’re fully chilled. Keep them in the fridge until you’re ready to serve. They hold up well for a few hours on a table, especially if it’s not too hot.
How do I store them if I don’t have an airtight container?
Use a ziplock bag, but squeeze out as much air as possible. Or wrap them tightly in plastic wrap. The key is to keep them from drying out and absorbing other smells from your fridge.
Can I use almond flour instead of oats?
You can, but the texture will be different. Almond flour is finer, so the bites will be more cake-like and less chewy. You might also need less binder because almond flour absorbs less moisture than oats. I haven’t tested this extensively, so start with a small batch if you want to try it.
Are these safe for kids with nut allergies?
No, this recipe contains peanut butter. You can substitute with sunflower seed butter (SunButter) for a nut-free version. It works surprisingly well and has a similar texture. Just make sure the rest of your ingredients are also nut-free.
Can I double this recipe?
Yes, double everything and use a larger bowl. The mixing process stays the same. I do this when I’m meal-prepping for the week. Just make sure you have enough space in your fridge or freezer for all the bites.
Pin This Recipe!
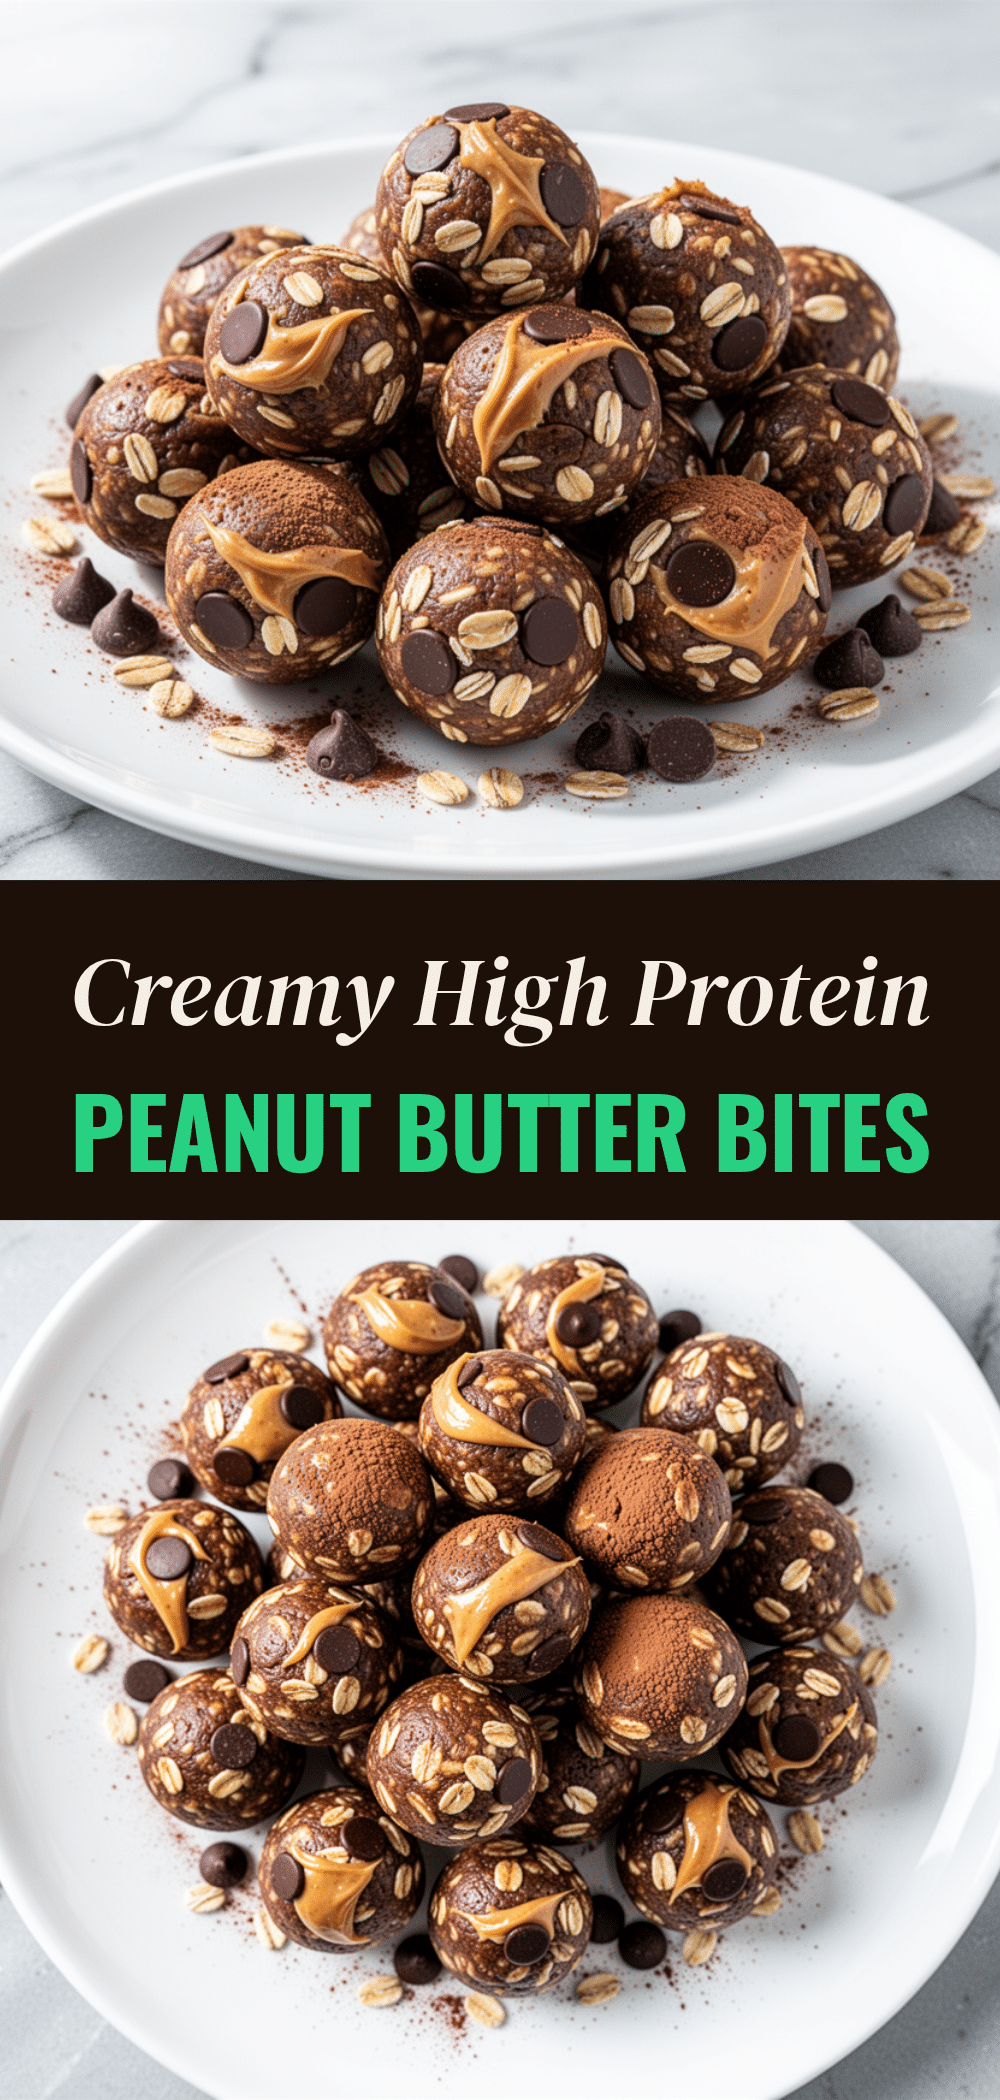
High-Protein Chocolate Peanut Butter No-Bake Energy Bites
- Total Time: 25 minutes
- Yield: 20 servings 1x
Description
These no-bake energy bites are a simple, high-protein snack made with oats, peanut butter, and chocolate chips. They provide sustained energy without a sugar crash and are perfect for meal prep or quick afternoon snacks.
Ingredients
- 2 cups old-fashioned rolled oats
- ½ cup creamy peanut butter
- ⅓ cup honey
- 1 teaspoon vanilla extract
- ½ scoop vanilla or plant-based protein powder
- 2 tablespoons chia seeds
- ½ cup mini chocolate chips
- Pinch of salt
Instructions
- In a large mixing bowl, combine the rolled oats, protein powder, chia seeds, and salt. Whisk to break up any clumps.
- Add the creamy peanut butter, honey, and vanilla extract to the dry ingredients. Stir until well combined; the mixture should resemble wet sand.
- Fold in the mini chocolate chips. If the mixture is too dry, add more honey; if too sticky, add more oats.
- Cover the bowl and chill in the refrigerator for 15-30 minutes to firm up the mixture.
- Wet your hands slightly with water to prevent sticking. Take about 1 tablespoon of mixture and roll it into a ball.
- Place the balls on a baking sheet lined with parchment paper. Repeat until all mixture is used (yields 20-24 bites).
- Optional: Melt remaining chocolate chips and drizzle over the chilled bites. Let sit for 5 minutes until set.
- Store in an airtight container in the fridge for up to 1 week or in the freezer for up to 3 months.
Notes
Use old-fashioned rolled oats, not instant or steel-cut. If using natural peanut butter, ensure it is softened. Wet your hands when rolling to prevent sticking. Chilling the mixture is highly recommended for easier handling. These can be frozen for up to 3 months.
- Prep Time: 15 minutes
- Cook Time: 0 minutes
- Category: Snack
- Cuisine: American
Nutrition
- Serving Size: 1 bite
- Calories: 110
- Sugar: 6
- Fat: 6
- Saturated Fat: 1.5
- Carbohydrates: 10
- Fiber: 1.5
- Protein: 5
Keywords: no-bake, energy bites, high protein, peanut butter, chocolate, healthy snack, meal prep, gluten-free option, vegan option



