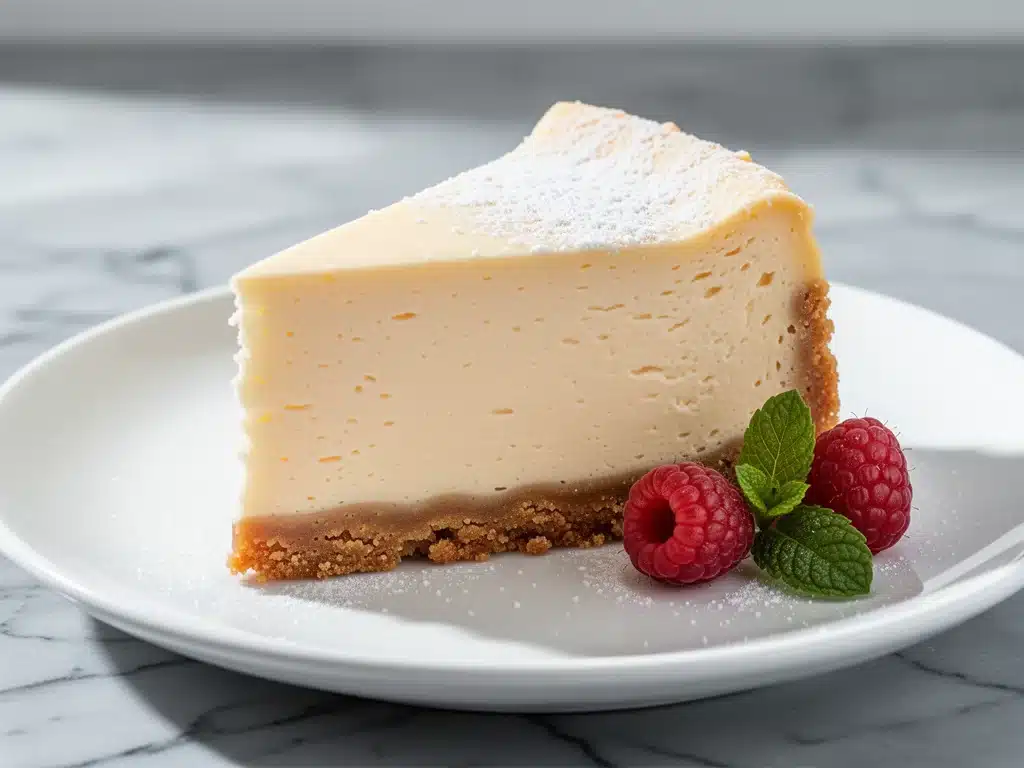
I still remember the exact moment I realized this ultra-creamy New York cheesecake was a problem. It was my sister’s birthday, and I had brought a slice to the table. My nephew, who usually only eats chicken nuggets and white bread, took one bite, stopped mid-chew, and looked at me with wide eyes. He didn’t say anything. He just went back for a second slice. Then a third. By the time the party ended, the entire pan was gone, and my sister was staring at me like I’d just performed magic.
That’s the thing about this ultra-creamy New York cheesecake with graham cracker crust everyone always asks for. It doesn’t just taste good. It stops people in their tracks. It’s dense, rich, and impossibly smooth, with a crust that actually holds up instead of crumbling into dust. I’ve made this cheesecake more times than I can count—maybe 30 times? I’ve burned it, cracked it, overmixed it, and underbaked it. But through all those failures, I finally cracked the code on how to make it perfectly every single time.
People think New York cheesecake is intimidating. They think you need a water bath, a springform pan you don’t own, and a degree in pastry arts. But here’s the truth: this recipe is actually straightforward. It’s about technique, not fancy equipment. Once you learn the tricks to avoid cracks and get that signature creamy texture, you’ll never buy cheesecake from a bakery again. And trust me, the bakery ones can’t compete with this.
I’ve tested this recipe with different creams, different sugars, and different baking methods. This is the one that works. It’s the one my family requests for holidays, birthdays, and random Tuesdays when we need a win. If you’re ready to make the best cheesecake of your life, let’s get into it.
Why You’ll Love This Ultra-Creamy New York Cheesecake
There are about ten reasons I keep coming back to this ultra-creamy New York cheesecake with graham cracker crust everyone always asks for, but here are the big ones that make it worth the effort.
It’s Actually Creamy — Not dense and heavy like some New York styles, but light, airy, and smooth. The texture is like eating a cloud that happens to be delicious. I’ve had cheesecakes that are so dense you need a steak knife to cut them. This one? It melts in your mouth. I’ve had friends close their eyes just to feel the texture.
No Cracks, Guaranteed — The #1 fear with cheesecake is the crack. I’ve spent years perfecting the cooling process and the baking temperature to ensure this ultra-creamy New York cheesecake with graham cracker crust everyone always asks for comes out smooth every time. No cracks. No fissures. Just a beautiful, smooth top.
Make-Ahead Friendly — This is my secret weapon for entertaining. You make it the day before, let it chill overnight, and it tastes even better the next day. I can host a dinner party, worry about the main course, and know the dessert is already done. It’s the ultimate stress-reliever.
Simple Ingredients — You don’t need exotic flours or rare ingredients. Just cream cheese, sugar, eggs, vanilla, and graham crackers. If you can go to the grocery store, you can make this. I’ve made this with ingredients I had on hand from my pantry staples list, and it still turned out amazing.
Customizable Toppings — While it’s perfect on its own, it’s also a blank canvas. Add fresh berries, chocolate ganache, caramel drizzle, or keep it classic with just a dollop of whipped cream. I love serving it with a simple berry compote, but it’s equally good plain.
Impressive but Easy — It looks like something from a high-end patisserie, but the steps are simple. You mix, you bake, you chill. No complex techniques or specialized skills required. I’ve taught this recipe to teenagers, and they’ve nailed it every time.
This ultra-creamy New York cheesecake with graham cracker crust everyone always asks for is my go-to when I want to impress without stressing. It’s reliable, delicious, and always a crowd-pleaser. Whether it’s a holiday dinner, a birthday party, or just a Tuesday night treat, this cheesecake delivers every single time.
Ingredients You’ll Need
Here’s the best part: you probably have most of this already. This ultra-creamy New York cheesecake with graham cracker crust everyone always asks for relies on simple, high-quality ingredients. I’m particular about a few things here, and I’ll tell you exactly why.
For the Graham Cracker Crust
Graham cracker crumbs (1 ½ cups / 150g) — Use real graham crackers, not the pre-made crumbs if you can help it. Crush them in a food processor for the finest texture. I buy Nabisco boxes and crush them myself. It takes two minutes and tastes way better.
Unsalted butter (6 tablespoons / 85g, melted) — Real butter is non-negotiable here. Margarine makes the crust greasy and sad. I use Kerrygold or any high-quality European butter. Melt it completely before mixing.
Granulated sugar (2 tablespoons / 25g) — Just a little sweetness to balance the butter. Don’t skip it, but don’t add more or the crust will be too sweet.
Salt (¼ teaspoon) — A pinch of salt enhances the flavor of the butter and graham crackers. Don’t overlook this step.
For the Ultra-Creamy Filling
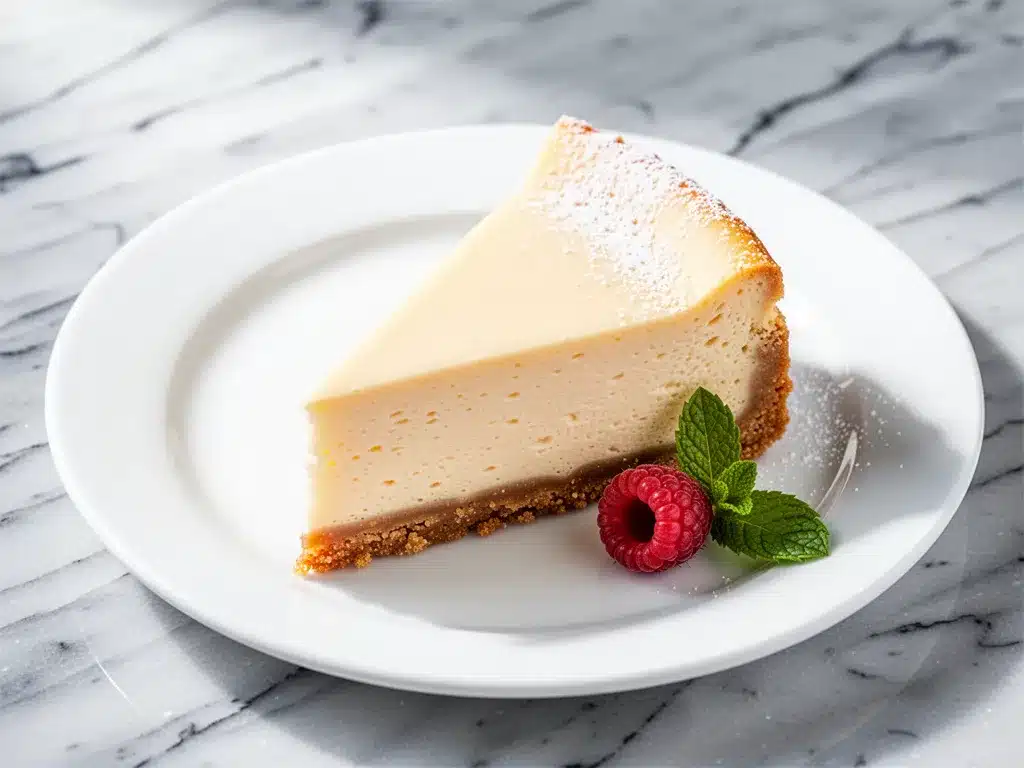
Full-fat cream cheese (32 ounces / 900g, 4 blocks) — This is the star. Use full-fat, brick-style cream cheese, not the tub stuff. I always use Philadelphia. Let it come to room temperature for at least an hour before you start. Cold cream cheese leads to lumps.
Granulated sugar (1 cup / 200g) — The standard amount for sweetness. I’ve tried reducing it, but it affects the texture. Trust me, don’t reduce the sugar.
Sour cream (1 cup / 240g) — This is the secret to the ultra-creamy texture. It adds tang and moisture. I use full-fat sour cream, not the light version. Light sour cream makes the cheesecake dense.
Vanilla extract (2 teaspoons) — Use real vanilla, not imitation. I use Nielsen-Massey or any pure vanilla extract. It makes a huge difference in flavor.
Large eggs (4 large) — Room temperature eggs are crucial. Cold eggs can cause the mixture to curdle. I take them out of the fridge 30 minutes before baking.
Heavy cream (2 tablespoons / 30ml) — A little bit of heavy cream adds richness and helps create that silky texture. Don’t skip it.
All-purpose flour (2 tablespoons / 15g) — This is optional but recommended. It helps stabilize the cheesecake and prevents cracking. I always use it.
For the Topping (Optional)
Fresh berries (1 cup / 150g) — Strawberries, raspberries, or blueberries. I love a mixed berry topping. Wash and dry them thoroughly.
Whipped cream (½ cup / 120ml) — Homemade is best, but store-bought works in a pinch. I make mine with heavy cream, sugar, and vanilla.
Chocolate ganache (½ cup / 120ml) — For chocolate lovers. Melt chocolate chips with heavy cream and pour over the chilled cheesecake.
Caramel sauce (½ cup / 120ml) — Store-bought or homemade. Drizzle over slices for a sweet touch.
Personal Tips
Room Temperature is Key — I can’t stress this enough. Let your cream cheese, eggs, and sour cream come to room temperature. It takes about an hour for cream cheese, and 30 minutes for eggs. This prevents lumps and ensures a smooth batter.
Don’t Overmix — Once you add the eggs, mix on low speed just until combined. Overmixing incorporates air, which causes cracks. I use a stand mixer on low speed, or a hand mixer if I’m being lazy.
Quality Matters — Good cream cheese and real vanilla make a difference. Cheap ingredients lead to a mediocre cheesecake. Invest in the good stuff.
Equipment Needed
You don’t need fancy equipment for this. Here’s what I actually use.
9-inch Springform Pan — This is essential for New York cheesecake. It allows you to remove the cake without damaging it. I use a heavy-duty springform pan to prevent leaks. Wrap the outside in foil if you’re using a water bath.
Stand Mixer or Hand Mixer — A stand mixer is ideal for beating the cream cheese smoothly. I use my KitchenAid, but a hand mixer works fine too. Just be careful not to overmix.
Food Processor — For crushing graham crackers into fine crumbs. If you don’t have one, use a rolling pin and a zip-top bag. It takes more effort, but it works.
Rubber Spatula — For scraping down the sides of the bowl and folding in ingredients. I use a silicone spatula because it’s flexible and easy to clean.
Wire Cooling Rack — For cooling the cheesecake gradually. Placing it on a rack allows air to circulate and prevents condensation.
Aluminum Foil — To wrap the springform pan if using a water bath. Heavy-duty foil is best to prevent tears.
Knife or Offset Spatula — For running around the edge of the cheesecake to loosen it from the pan. A thin knife works well.
Optional but Nice:
Water Bath Pan — A large roasting pan for the water bath. If you don’t have one, you can skip the water bath if you follow the low-and-slow baking method.
Strainer — For straining the batter if you want an extra-smooth texture. I skip this step unless I’m feeling fancy.
Tool Tips:
Don’t Have a Springform Pan? — You can use a regular 9-inch round pan, but you’ll need to line it with parchment paper and invert the cake onto a plate. It’s messier, but it works.
I’m Obsessed with My Silicone Spatula — It’s cheap, flexible, and gets every bit of batter out of the bowl. Worth the $3 investment.
How to Make It: Step-by-Step
Alright, let’s make this ultra-creamy New York cheesecake with graham cracker crust everyone always asks for! I’m walking you through exactly how I do it, including the little tricks I’ve picked up.
Step 1: Prep Your Pan and Oven (5 minutes)
Preheat your oven to 325°F (165°C). This low temperature is crucial for even baking and preventing cracks. Grease the bottom of your 9-inch springform pan with butter. Line the bottom with a circle of parchment paper for easy removal. Wrap the outside of the pan tightly with two layers of heavy-duty aluminum foil if you’re using a water bath. This prevents water from seeping in.
Step 2: Make the Graham Cracker Crust (5 minutes)
In a medium bowl, combine the graham cracker crumbs, melted butter, sugar, and salt. Mix until it looks like wet sand. Press this mixture firmly into the bottom of the prepared springform pan. Use the bottom of a measuring cup to pack it down evenly. You want a solid, compact crust. Bake for 10 minutes, then remove and let it cool while you make the filling.
Step 3: Beat the Cream Cheese (3 minutes)
In the bowl of a stand mixer fitted with the paddle attachment, beat the room-temperature cream cheese on medium-low speed until smooth and creamy. Scrape down the sides and bottom of the bowl with a rubber spatula. This step is crucial for a lump-free batter. It should look like smooth frosting.
Step 4: Add Sugar and Sour Cream (2 minutes)
Add the granulated sugar and sour cream to the cream cheese. Mix on low speed until just combined. Scrape down the bowl again. Add the vanilla extract and mix briefly. Don’t overmix here. You want everything smooth, not airy.
Step 5: Incorporate the Eggs (2 minutes)
Add the eggs one at a time, mixing on low speed just until each egg is incorporated. Add the heavy cream and flour, and mix gently until combined. Stop mixing as soon as the batter is smooth. Overmixing at this stage incorporates air, which leads to cracks. The batter should be thick and creamy.
Step 6: Pour and Bake (1 hour 15 minutes)
Pour the batter over the cooled crust. Smooth the top with a spatula. Place the springform pan in a large roasting pan. If using a water bath, pour hot water into the roasting pan until it reaches halfway up the sides of the springform pan. Bake at 325°F (165°C) for 1 hour and 15 minutes. The edges should be set, but the center should still jiggle slightly like Jell-O when you shake the pan. This is key for a creamy texture.
Step 7: Cool Gradually (1 hour)
Turn off the oven and crack the door open slightly. Let the cheesecake cool in the oven for 1 hour. This gradual cooling prevents cracks from thermal shock. After an hour, remove the cheesecake from the oven and let it cool completely on a wire rack at room temperature.
Step 8: Chill Overnight (8+ hours)
Once cooled, cover the cheesecake loosely with plastic wrap and refrigerate for at least 8 hours, preferably overnight. This chilling time is essential for the flavors to meld and the texture to set. Don’t skip this step. I know it’s tempting to eat it right away, but patience pays off.
Step 9: Serve and Enjoy
Run a thin knife around the edge of the cheesecake to loosen it from the pan. Release the springform ring. Transfer to a serving plate. Top with fresh berries, whipped cream, or chocolate ganache if desired. Slice with a sharp knife dipped in hot water for clean cuts. Serve and enjoy!
Expert Tips & Tricks
Here’s everything I’ve learned from making this ultra-creamy New York cheesecake with graham cracker crust everyone always asks for dozens of times. These tips will save you from my mistakes.
Room Temperature is Non-Negotiable
This is the #1 tip. Your cream cheese, eggs, and sour cream must be at room temperature. Cold ingredients lead to lumps and uneven mixing. I set my cream cheese out on the counter two hours before I start. If I forget, I microwave it in 10-second bursts until it’s soft but not melted.
Don’t Overmix the Batter
Once you add the eggs, mix on low speed just until combined. Overmixing incorporates air bubbles, which expand in the oven and cause cracks. I mix until smooth, then stop. The batter should look thick and creamy, not fluffy.
Low and Slow Baking
Baking at 325°F (165°C) is crucial. High heat causes the edges to cook too fast, leading to cracks. The low temperature allows the center to cook gently, resulting in that ultra-creamy texture. Patience is key.
The Jiggle Test
Don’t bake until the center is completely firm. It should still jiggle slightly like Jell-O when you shake the pan. It will continue to cook from residual heat as it cools. If you bake it until it’s firm, it will be dry and dense.
Gradual Cooling
Letting the cheesecake cool in the turned-off oven with the door cracked prevents thermal shock, which causes cracks. This step is often skipped, but it’s essential for a smooth top.
Chill Overnight
Chilling for at least 8 hours allows the flavors to meld and the texture to set. The cheesecake tastes better the next day. I know it’s hard to wait, but trust me, it’s worth it.
Sharp Knife for Slicing
Dip a sharp knife in hot water and wipe it dry before each cut. This ensures clean, neat slices. Wipe the knife between cuts to keep them pristine.
Common Mistakes (and how to avoid them):
Mistake: Cracks on top
Fix: Avoid overmixing, bake at low temperature, and cool gradually. If cracks appear, cover them with whipped cream or fruit. No one will know.
Mistake: Dense, heavy texture
Fix: Ensure cream cheese is fully beaten and smooth. Don’t overmix after adding eggs. Use full-fat ingredients.
Mistake: Crumbly crust
Fix: Pack the crust firmly into the pan. Use enough butter to hold it together. Bake the crust briefly before adding the filling.
Pro Tricks I’ve Learned:
For Extra Smoothness
Strain the batter through a fine-mesh sieve before pouring it into the pan. This removes any small lumps of cream cheese. It’s an extra step, but it guarantees a silky texture.
For Richer Flavor
Add a teaspoon of lemon zest to the batter. The brightness cuts through the richness and adds complexity. I love this trick for a subtle citrus note.
For Make-Ahead Convenience
Make the cheesecake 2-3 days ahead. It stores well in the fridge and tastes even better as the flavors develop. I often make it on Sunday for a Wednesday dinner party.
Variations & Substitutions
Once you’ve nailed the basic ultra-creamy New York cheesecake with graham cracker crust everyone always asks for, here’s how you can mix it up. I’ve tried all of these.
Chocolate Cheesecake
Add ½ cup unsweetened cocoa powder to the dry ingredients. Reduce sugar by 2 tablespoons. Use chocolate graham crackers for the crust. My husband loves this version—it’s rich and decadent.
Strawberry Swirl
Make a strawberry puree by blending fresh strawberries with sugar. Swirl ½ cup into the batter before baking. Use a knife to create a marble effect. This is my favorite for spring and summer.
Oreo Cheesecake
Replace graham cracker crumbs with crushed Oreo cookies (remove the filling first). Add ½ cup chocolate chips to the batter. It’s like a dessert in itself. I make this for parties—it’s always a hit.
Key Lime Cheesecake
Replace vanilla extract with 2 tablespoons key lime juice and 1 teaspoon zest. Use graham crackers as usual. The tartness is refreshing and unique. I serve this with whipped cream and lime slices.
Gluten-Free Version
Use gluten-free graham crackers for the crust. Ensure all other ingredients are certified gluten-free. The texture is the same. I’ve used gluten-free flour for the batter, and it works great.
Dairy-Free Option
Replace cream cheese with dairy-free cream cheese alternatives (like Kite Hill). Use coconut cream instead of sour cream and heavy cream. Use dairy-free butter for the crust. It’s different but still tasty. My lactose-intolerant friend requests this version.
Different Toppings:
Berry Compote
Simmer mixed berries with sugar and lemon juice until thickened. Cool and spoon over slices. This is my go-to for a fresh, fruity topping.
Chocolate Ganache
Melt chocolate chips with heavy cream and pour over the chilled cheesecake. Let it set for 30 minutes. Rich and indulgent.
Caramel Drizzle
Store-bought or homemade caramel sauce. Drizzle over slices for a sweet touch. I love this with the classic version.
Whipped Cream and Berries
Simple and elegant. Top with homemade whipped cream and fresh berries. This is my favorite for a light, refreshing finish.
Serving & Storage
I usually serve this ultra-creamy New York cheesecake with graham cracker crust everyone always asks for straight from the fridge. It’s best cold, with a sharp knife dipped in hot water for clean cuts. But here are other ways I’ve enjoyed it:
How to Serve:
I often serve it with a simple berry compote or whipped cream. But it’s also delicious plain. The flavor is rich enough on its own. I like to garnish with a mint leaf for a pop of color.
Side Dishes:
Since cheesecake is a dessert, it doesn’t need sides. But I love serving it with a cup of coffee or tea. It’s the perfect pairing. I also enjoy it with a glass of red wine for a sophisticated finish.
Toppings Bar:
When I have guests, I put out: fresh berries, whipped cream, chocolate ganache, caramel sauce, and crushed nuts. Everyone customizes their slice. It’s fun and interactive.
Storage Instructions:
Refrigerator:
Store in an airtight container or covered with plastic wrap for up to 5 days. The cheesecake will keep well in the fridge. I usually keep it in the springform pan, covered with foil.
Freezing:
This ultra-creamy New York cheesecake with graham cracker crust everyone always asks for freezes well. Wrap the entire cheesecake (or individual slices) tightly in plastic wrap, then in aluminum foil. Freeze for up to 2 months. Thaw in the fridge overnight before serving. The texture remains creamy and delicious.
Pro tip:
If you’re making it ahead, freeze it before adding toppings. Add fresh toppings after thawing. This prevents sogginess and keeps the presentation fresh.
Nutrition Information
I’m not a nutritionist, but here’s the breakdown if you’re tracking. Per serving (based on 12 servings):
Calories: 450
Protein: 8g
Carbs: 35g
Fiber: 1g
Sugar: 28g
Fat: 32g
Saturated Fat: 19g
Cholesterol: 110mg
Sodium: 320mg
Calcium: 120mg
What’s Good:
Decent protein from cream cheese. Calcium from the dairy. Can be made lighter with substitutions.
What to Know:
Higher in calories and fat from cream cheese and butter. Contains dairy and gluten. Moderate sugar content.
My Take:
Look, this is a rich, indulgent dessert. It’s not a health food. But it’s way better than store-bought, costs less, and I know exactly what’s in it. When I want to make it lighter, I use the dairy-free version or reduce the sugar slightly. But usually? I just eat a reasonable slice and enjoy it.
Final Thoughts
So that’s my ultra-creamy New York cheesecake with graham cracker crust everyone always asks for! I’ve probably talked your ear off at this point, but when you make a recipe this often, you have a lot to say about it.
This has saved my desserts more times than I can count. It’s my answer to “what’s for dessert” when I want to impress without stressing. My family loves it, my friends beg for it, and I love making it. It’s reliable, delicious, and always a win.
Make it yours! Try different toppings, swap in your favorite fruits, or experiment with variations. The best recipes are the ones you adapt to your tastes. If you make this, drop a comment and let me know what you think! I love hearing how recipes turn out in your kitchen. And if something doesn’t work, tell me that too—I’m here to help troubleshoot.
Happy baking! And I hope your kitchen smells half as good as mine does right now.
Frequently Asked Questions
Can I use low-fat cream cheese?
You can, but the texture will be different. Low-fat cream cheese has more water and less fat, which can make the cheesecake dense and grainy. I strongly recommend using full-fat cream cheese for the best results. If you must use low-fat, reduce the sour cream and add a bit more flour to compensate.
Why did my cheesecake crack?
Cracks are usually caused by overmixing, baking at too high a temperature, or cooling too quickly. To prevent cracks, mix gently, bake at 325°F, and cool gradually in the turned-off oven. If cracks appear, cover them with whipped cream or fruit. No one will know!
Can I make this ahead for a party?
Absolutely! This ultra-creamy New York cheesecake with graham cracker crust everyone always asks for is perfect for making ahead. Make it 2-3 days before your party. Store it in the fridge, covered. It tastes even better after a day or two as the flavors meld. Just add toppings right before serving.
How do I store leftovers?
Store leftovers in an airtight container or covered with plastic wrap in the fridge for up to 5 days. You can also freeze slices for up to 2 months. Wrap tightly in plastic and foil. Thaw in the fridge overnight before serving.
Can I use a water bath?
Yes, a water bath helps prevent cracks by providing gentle, even heat. Wrap the springform pan in foil to prevent leaks. Place it in a roasting pan and pour hot water into the pan until it reaches halfway up the sides. If you don’t have a water bath, just follow the low-and-slow baking method and gradual cooling.
Can I use a different pan size?
You can, but the baking time will change. For a 10-inch pan, increase the baking time by 10-15 minutes. For a 6-inch pan, decrease the time by 15-20 minutes. The jiggle test is your best guide—bake until the edges are set but the center still jiggles slightly.
Is this recipe suitable for vegetarians?
Yes, this ultra-creamy New York cheesecake with graham cracker crust everyone always asks for is naturally vegetarian. It contains dairy and eggs, but no meat or gelatin. It’s perfect for vegetarian diets.
Pin This Recipe!
Ultra-Creamy New York Cheesecake: Best Easy Recipe
- Total Time: 9 hours 35 minutes
- Yield: 12 servings 1x
Description
This ultra-creamy New York cheesecake features a dense, rich, and impossibly smooth texture with a sturdy graham cracker crust. It is designed to be crack-free, make-ahead friendly, and straightforward to make with simple ingredients.
Ingredients
- 1 ½ cups (150g) graham cracker crumbs
- 6 tablespoons (85g) unsalted butter, melted
- 2 tablespoons (25g) granulated sugar
- ¼ teaspoon salt
- 32 ounces (900g) full-fat brick-style cream cheese, room temperature
- 1 cup (200g) granulated sugar
- 1 cup (240g) full-fat sour cream, room temperature
- 2 teaspoons pure vanilla extract
- 4 large eggs, room temperature
- 2 tablespoons (30ml) heavy cream
- 2 tablespoons (15g) all-purpose flour
- Optional toppings: fresh berries, whipped cream, chocolate ganache, or caramel sauce
Instructions
- Preheat oven to 325°F (165°C). Grease the bottom of a 9-inch springform pan and line with parchment paper. Wrap the outside of the pan tightly with two layers of heavy-duty aluminum foil.
- In a medium bowl, combine graham cracker crumbs, melted butter, 2 tablespoons sugar, and salt. Mix until it resembles wet sand. Press firmly into the bottom of the prepared pan. Bake for 10 minutes, then remove and let cool.
- In a stand mixer fitted with the paddle attachment, beat the room-temperature cream cheese on medium-low speed until smooth and creamy. Scrape down the sides and bottom of the bowl.
- Add the 1 cup of granulated sugar and sour cream to the cream cheese. Mix on low speed until just combined. Add vanilla extract and mix briefly.
- Add eggs one at a time, mixing on low speed just until each is incorporated. Add heavy cream and flour, mixing gently until combined. Stop mixing as soon as the batter is smooth to avoid incorporating air.
- Pour the batter over the cooled crust and smooth the top. Place the springform pan in a large roasting pan. Pour hot water into the roasting pan until it reaches halfway up the sides of the springform pan (water bath).
- Bake at 325°F (165°C) for 1 hour and 15 minutes. The edges should be set, but the center should still jiggle slightly like Jell-O when shaken.
- Turn off the oven and crack the door open slightly. Let the cheesecake cool in the oven for 1 hour to prevent thermal shock.
- Remove the cheesecake from the oven and let it cool completely on a wire rack at room temperature.
- Cover loosely with plastic wrap and refrigerate for at least 8 hours, preferably overnight.
- To serve, run a thin knife around the edge to loosen, release the springform ring, and slice with a sharp knife dipped in hot water. Top with desired toppings.
Notes
Ensure all dairy ingredients (cream cheese, sour cream, eggs) are at room temperature to prevent lumps. Do not overmix the batter after adding eggs to avoid incorporating air, which causes cracks. The cheesecake must be chilled overnight for the best texture and flavor. If cracks appear, they can be covered with whipped cream or fruit.
- Prep Time: 20 minutes
- Cook Time: 1 hour 15 minutes
- Category: Dessert
- Cuisine: American
Nutrition
- Serving Size: 1 slice
- Calories: 450
- Sugar: 28
- Sodium: 320
- Fat: 32
- Saturated Fat: 19
- Carbohydrates: 35
- Fiber: 1
- Protein: 8
Keywords: New York cheesecake, creamy cheesecake, graham cracker crust, easy cheesecake recipe, no crack cheesecake, dessert, baking



