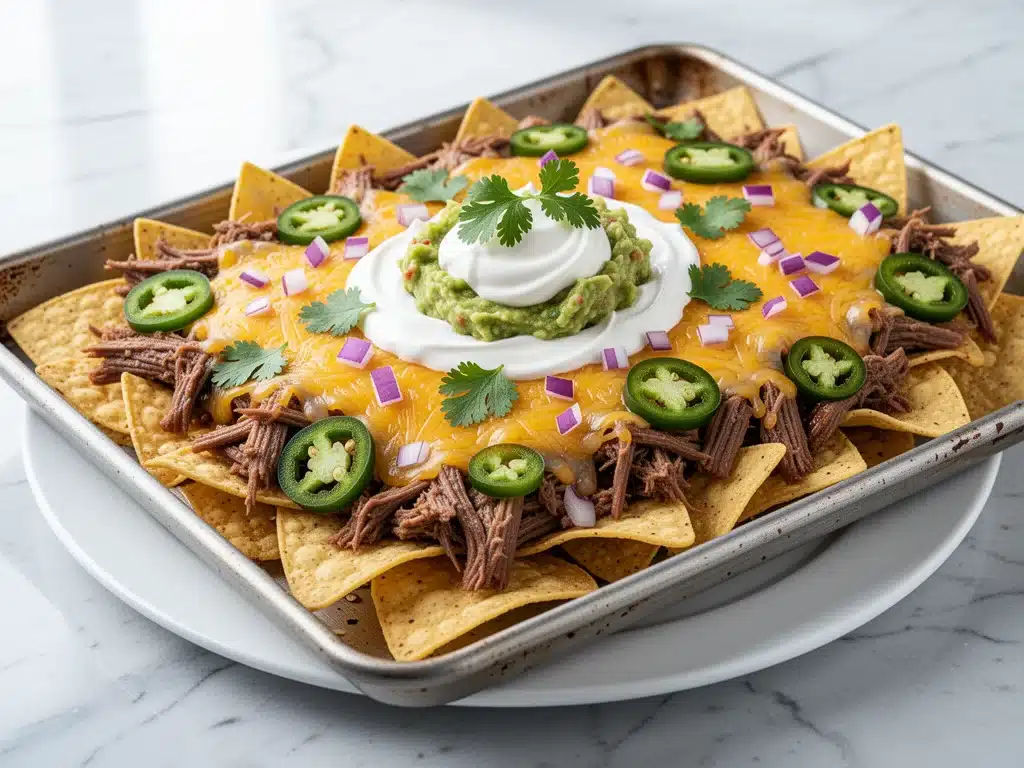
Last year, during the championship game, I made the classic mistake of trying to build nachos plate by plate. You know the drill. You’re in the kitchen, the game is on, and you’re frantically layering chips, cheese, and beans onto individual dinner plates while your guests are already halfway through the first half. By the time I got back to the couch, the bottom layer of chips was soggy, the cheese had congealed, and I had a stack of dirty dishes but zero happy guests. It was a disaster. I realized right then that traditional nacho building was not only inefficient but also guaranteed disappointment.
That was the moment I decided to stop making nachos the “hard way” and started experimenting with the sheet pan method. I’m not talking about those sad, single-serving oven nachos you see in magazines. I’m talking about a massive, communal, cheesy, crunchy, loaded masterpiece that feeds a crowd without turning you into a slave in the kitchen. This Football Sunday Sheet Pan Nachos recipe has completely changed how I host game day. It’s the easiest game day dip and snack combo you’ll ever make, and it’s become the centerpiece of every football gathering I’ve hosted since.
Here’s the thing about sheet pan nachos: they’re not just convenient; they’re superior. The entire batch cooks at once, meaning every chip gets that perfect golden-brown crunch, and the cheese melts into a unified pool of deliciousness rather than cold spots and burnt edges. Plus, cleanup is a breeze because you just toss the parchment paper. I’ve tested this method dozens of times, tweaking the cheese blends, the spice levels, and the topping ratios, and I’ve finally landed on the perfect formula. It’s crunchy, it’s cheesy, it’s loaded with flavor, and it’s ready before the national anthem finishes. If you’re looking for a reliable, crowd-pleasing snack that actually holds up under pressure (and hungry mouths), this is it.
Why You’ll Love This Sheet Pan Nacho Recipe
I’ve made nachos for everyone from my picky nephew to my food-obsessed friends, and this sheet pan version is hands-down the best. It solves the biggest problem with party food: keeping it hot and crunchy. Here’s why this recipe has earned a permanent spot in my game day rotation:
- Feeds an Army — Seriously, one sheet pan feeds 8-10 people easily. I’ve hosted gatherings of 20 and made two pans back-to-back. It’s the ultimate batch-cooking hack for parties.
- Zero Soggy Chips — Because everything bakes together at a high temperature, the chips stay crisp until the very last bite. No more mushy bottoms from sitting under a warm lamp for an hour.
- Minimal Active Time — You spend about 15 minutes chopping and layering, and then the oven does all the heavy lifting. You can actually watch the game instead of staring at the stove.
- Customizable Chaos — I love that you can throw in whatever you have. Leftover chicken? Go for it. Extra jalapeños? Absolutely. It’s a canvas for your cravings.
- Easy Cleanup — Line your sheet pan with parchment paper or foil. When you’re done, you just peel it off and throw it away. No scrubbing baked-on cheese from pans. This is a lifesaver.
- Budget-Friendly — Tortilla chips, ground beef, beans, and cheese are staples. You can make a gourmet-feeling snack for under $20, which is way cheaper than ordering pizza for a crowd.
This is my go-to when I need food to just work. No complicated techniques, no weird ingredients you have to hunt for, just reliable, delicious food that makes everyone happy. It’s the kind of recipe that turns a chaotic Sunday into a relaxed, fun afternoon.
Ingredients You’ll Need
Here’s the best part: you probably have most of this already in your pantry or fridge. I’m particular about three ingredients here—the chips, the cheese, and the meat—but I’ll tell you exactly why they matter.
For the Base
Tortilla chips (1 large bag / about 12-14 oz) — I use thick, restaurant-style corn chips. They hold up better under the weight of toppings. Flimsy chips turn to mush too fast. I always keep a bag of these stocked just so I can make this on a whim.
Ground beef (1 pound / 450g) — 80/20 blend is perfect. You want enough fat for flavor. Lean beef can be dry. Brown it with spices first, don’t just dump it on cold.
Black beans (1 can / 15 oz, drained and rinsed) — Adds texture and keeps it filling. If you’re short on time, canned is fine. If you have dry beans, cooked and seasoned, that’s even better.
For the Cheese & Flavor
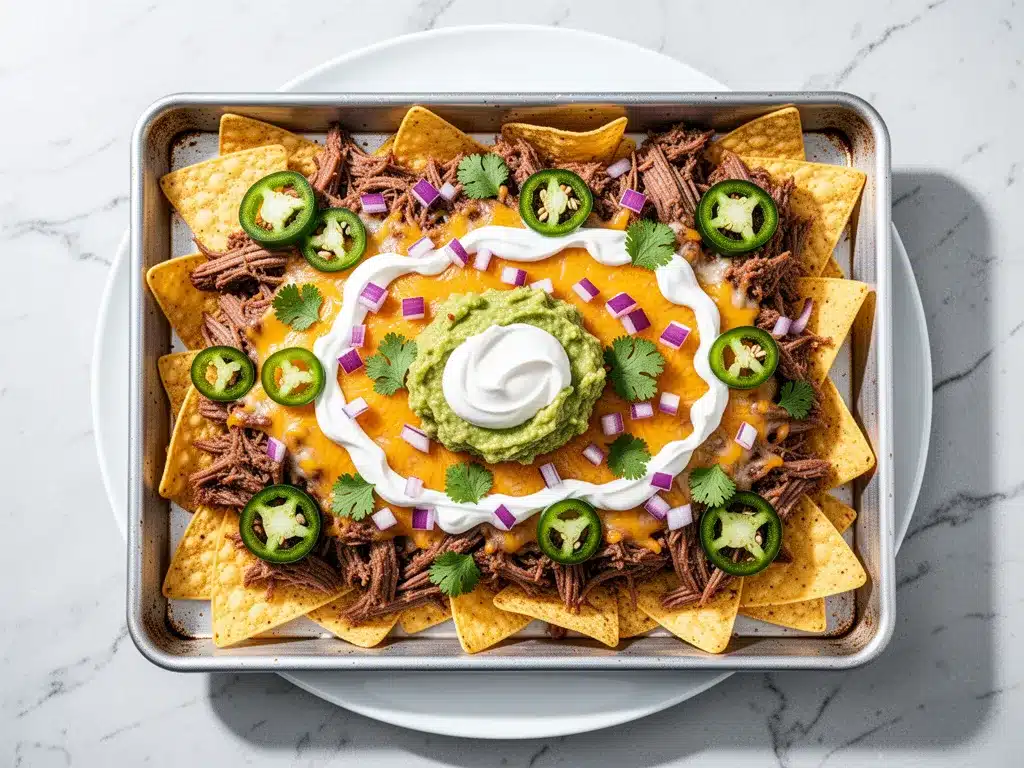
Cheddar cheese (2 cups / 200g, shredded) — Sharp cheddar gives the best flavor. Buy the block and shred it yourself. Pre-shredded cheese has cornstarch that prevents it from melting smoothly. Trust me on this.
Monterey Jack cheese (1 cup / 100g, shredded) — This is the melting cheese. It creates that gooey, stringy texture. Mixing it with cheddar gives you both flavor and melt.
Enchilada sauce (1 cup / 240ml) — This is the secret weapon. It keeps the chips moist and adds a deep, savory flavor. Red or green sauce works, but red is classic. Don’t skip this step.
Taco seasoning (2 tablespoons) — Or use a homemade blend of cumin, chili powder, paprika, garlic powder, and salt. Store-bought is fine if you’re lazy, but homemade tastes fresher.
The Toppings
Jalapeños (½ cup, sliced) — Fresh is best. If you can’t handle the heat, use pickled jalapeños for a tangier kick. Or omit entirely if you’re feeding kids.
Black olives (½ cup, sliced) — I know some people hate them, but I love the salty contrast. Use what you like.
Green onions (3-4 stalks, sliced) — Adds a fresh, sharp bite to cut through the rich cheese. Add these after baking so they stay bright.
Cilantro (½ cup, chopped) — Fresh cilantro is non-negotiable for me. It brightens up the whole dish. If you’re one of those people who thinks cilantro tastes like soap, skip it or use parsley.
Sour cream (½ cup) — For serving. Cool and creamy against the hot nachos.
Guacamole (½ cup) — Or just sliced avocados. Adds richness and healthy fats.
Salsa (½ cup) — Pico de gallo works great if you want a fresh tomato crunch. Salsa roja is good if you want more heat.
Equipment Needed
You don’t need fancy equipment for this. Here’s what I actually use:
Large sheet pan — I use a half-sheet pan (18×13 inches). It gives you enough surface area for a single, even layer. Two smaller pans work too, but one big pan is easier to manage.
Parchment paper or aluminum foil — Essential for easy cleanup. I prefer parchment because cheese doesn’t stick to it as much.
Large skillet — For browning the ground beef. 12-inch cast iron or stainless steel works best.
Sharp knife and cutting board — For slicing jalapeños and green onions. Dull knives make you cry more—learned this the hard way with onions.
Box grater — For shredding your own cheese. Takes 3 minutes and makes a huge difference in the final texture.
Measuring cups and spoons — Pretty standard stuff. Dollar store versions work fine.
Spatula — For spreading the meat and beans evenly.
Optional but nice: Garlic press — If you’re adding fresh garlic to the meat, this saves time. Microplane — For zesting lime if you want to add a citrus kick.
How to Make It: Step-by-Step
Alright, let’s make this! I’m walking you through exactly how I do it, including the little tricks I’ve picked up over the years.
Step 1: Prep Your Oven and Pan (5 minutes)
Preheat your oven to 400°F (200°C). Line your large sheet pan with parchment paper or foil. I like to leave a little overhang on the sides so you can lift the nachos out if needed, but it’s not necessary. Having the oven ready early ensures everything cooks evenly from the start.
Step 2: Cook the Meat (8-10 minutes)
While the oven heats, heat a large skillet over medium-high heat. Add the ground beef and cook, breaking it up with a spoon, until browned and no longer pink. Drain excess fat if there’s too much (but leave a little for flavor). Stir in the taco seasoning and a splash of water (about 2 tablespoons) to create a sauce-like consistency. Let it simmer for 2 minutes so the flavors meld. Set aside.
Step 3: Build the Base Layer
Spread the tortilla chips in a single, even layer on the prepared sheet pan. Don’t crowd them too much; you want them flat so they crisp up. If you have a huge bag, you might need two pans, but try to keep it to one layer per pan for best results.
Step 4: Add the Wet Ingredients
Spread the cooked beef mixture evenly over the chips. Then, scatter the drained black beans over the top. Pour the enchilada sauce in a thin, even layer. You don’t want to drown the chips, just coat them. This step adds moisture and flavor without making the chips soggy before they hit the oven.
Step 5: The Cheese Layer
Generously sprinkle the shredded cheddar and Monterey Jack cheese over everything. I mean generous. You want to cover every nook and cranny. The cheese is the glue that holds this whole thing together, so don’t be shy. If you’re using other cheeses like pepper jack or queso fresco, add them now too.
Step 6: Bake Until Golden
Place the sheet pan in the preheated oven and bake for 10-12 minutes. Watch closely! You want the cheese to be fully melted and bubbling, and the edges of the chips to be golden brown. If you like them extra crispy, you can broil for the last 1-2 minutes, but keep an eye on it because cheese burns fast.
Step 7: Add Fresh Toppings
Remove the pan from the oven. Immediately scatter the sliced jalapeños, black olives, and green onions over the hot cheese. The residual heat will wilt the onions slightly and release their aroma. Then, drizzle with sour cream and dollop with guacamole. Add salsa last so it doesn’t soak into the chips too quickly.
Total Time: About 25 minutes (10 minutes active, 15 minutes mostly hands-off). Perfect for getting ready right before kickoff.
Troubleshooting Tips
Chips not crispy? Make sure you’re using thick, restaurant-style chips. Thin chips absorb moisture too fast. Also, don’t overload the pan; overcrowding steams the chips instead of baking them.
Cheese not melting? Your oven might be running cool. Use an oven thermometer to check. Or, try grating your cheese finer so it melts faster.
Too salty? Taste your enchilada sauce and beans first. If they’re already salty, skip adding extra salt to the meat. Tortilla chips are also salty, so balance is key.
Expert Tips & Tricks
Here’s everything I’ve learned from making this dozens of times. These tips will save you from my mistakes.
Shred Your Own Cheese
This is the #1 tip. Pre-shredded cheese contains anti-caking agents that make it melt poorly and can result in a grainy sauce. Grate your own from a block—it takes 3 minutes and makes a huge difference in the creaminess. My husband can tell when I’ve been lazy and used pre-shredded.
Don’t Skip the Enchilada Sauce
Many recipes skip this, but it’s crucial. It keeps the chips from drying out in the oven and adds a deep, savory flavor that plain cheese lacks. It’s the secret to that restaurant-style taste.
Use Thick Chips
Thin, grocery store chips will turn to mush under the weight of the toppings. Look for “restaurant-style” or “thick cut” tortilla chips. Brands like Siete or simple corn chips work best. If you use gluten-free chips, make sure they’re sturdy enough to hold up.
Add Toppings After Baking
Never put fresh veggies like onions, tomatoes, or avocado in the oven. They’ll burn or get weirdly soft. Add them right after the nachos come out. The heat from the cheese will warm them slightly, which is perfect.
Keep Them Warm
If you’re serving these at a party, keep the sheet pan in a low oven (200°F) until everyone is ready to eat. Or, cover loosely with foil to retain heat. They’re best served straight from the oven.
Variations & Substitutions
Once you’ve nailed the basic version, here’s how you can mix it up. I’ve tried all of these.
Chicken Nachos
Swap the ground beef for shredded rotisserie chicken. Toss the chicken with taco seasoning and a little olive oil before adding it to the pan. My husband prefers this version—it’s lighter but still satisfying.
Vegetarian Nachos
Omit the meat and add extra beans, roasted corn, and sautéed peppers and onions. You can also add a layer of refried beans for extra creaminess. This is how I get my vegetarian friends to feel included.
Seafood Nachos
This is a bit more adventurous, but delicious. Add cooked shrimp or flaked white fish (like cod or tilapia) after baking. Top with a lime crema instead of sour cream. It’s fresh and bright.
Spicy Jalapeño Bomb
Add diced jalapeños to the cheese layer before baking. Use pepper jack cheese instead of Monterey Jack. And serve with a spicy salsa on the side. For those who love heat, this is the way to go.
Bacon Lover’s
Add crispy, crumbled bacon on top after baking. The salty, smoky crunch pairs perfectly with the cheese. I usually cook the bacon in the oven while the nachos bake, so everything finishes at once.
Dietary Modifications
Gluten-Free: Use certified gluten-free tortilla chips. Everything else is naturally gluten-free. Dairy-Free: Use dairy-free cheese shreds (like Violife or Daiya) and skip the sour cream. You can use cashew cream or coconut yogurt as a substitute. Lower-Carb: This is tough because chips are the base, but you can try using large lettuce leaves as “chips” or using baked cheese crisps. It’s not the same, but it works if you’re watching carbs.
Serving & Storage
How to Serve:
I usually serve these straight from the sheet pan at the dinner table—it looks rustic and stays warm. But here are other ways I’ve enjoyed them:
Side Dishes:
These nachos are a meal in themselves, but if you need sides, try some baked buffalo chicken dip for extra protein, or some crispy baked zucchini fries for a veggie crunch. A simple green salad with lime vinaigrette also cuts through the richness nicely.
Toppings Bar:
When I have guests, I put out: extra sour cream, guacamole, salsa, chopped cilantro, and hot sauce. Everyone customizes their bowl.
Storage Instructions:
Refrigerator: Store leftovers in an airtight container for up to 3 days. The chips will soften over time, which is unavoidable with dairy-based toppings.
Reheating: Best method: Spread on a sheet pan and bake at 350°F for 10 minutes to crisp up the chips. Microwave: Heat in 30-second intervals, but the chips will get chewy. Never works: Trying to reheat in the toaster oven—it takes too long and dries everything out.
Freezing:
Honestly, this doesn’t freeze well. The chips get soggy when thawed, and the dairy separates. Make it fresh. If you have leftovers, eat them within a few days.
Nutrition Information
I’m not a nutritionist, but here’s the breakdown if you’re tracking. Keep in mind that nachos are a treat, so enjoy them guilt-free!
Per Serving (based on 1/8 of the pan):
Calories: 380
Protein: 18g
Carbs: 32g
Fiber: 4g
Sugar: 2g
Fat: 22g
Saturated Fat: 9g
Cholesterol: 45mg
Sodium: 650mg
Calcium: 300mg
What’s Good:
Decent protein from the beef and cheese. Calcium from the dairy. Fiber from the beans and chips.
What to Know:
Higher in calories and sodium. Use low-sodium beans and lean beef to reduce. Load up on veggies to boost nutrition.
My Take:
Look, this is game day food. It’s not a diet recipe. It’s meant to be shared, enjoyed, and savored. When I want to make it lighter, I use more veggies and less cheese, but usually? I just eat a reasonable portion and enjoy the crunch.
Final Thoughts
So that’s my Football Sunday Sheet Pan Nachos! I’ve probably talked your ear off at this point, but when you make a recipe this often, you have a lot to say about it. This has saved my game days more times than I can count. It’s my answer to “what’s for snacks?” when I’m tired, don’t want to order out, and still want something that tastes really good. My kids are happy, my husband’s happy, and I’m happy because I’m not stressed about cooking.
Make it yours! Try different add-ins, swap in your favorite vegetables, adjust the spice level. The best recipes are the ones you adapt to your family’s tastes. If you make this, drop a comment and let me know what you think! I love hearing how recipes turn out in your kitchen. And if something doesn’t work, tell me that too—I’m here to help troubleshoot.
Happy cooking! And I hope your kitchen smells half as good as mine does right now.
Frequently Asked Questions
Can I use leftover meat instead of ground beef?
Absolutely! Shredded chicken, pulled pork, or even leftover steak works great. Just warm it up with some taco seasoning before adding it to the pan. It saves time and uses up leftovers, which is a win-win.
Why did my nachos turn out soggy?
Usually, this happens if the chips are too thin or if you added too much wet sauce. Make sure you’re using thick, sturdy chips. Also, don’t drown the nachos in enchilada sauce; a light drizzle is enough. And always bake them at a high temperature to crisp up the chips.
Can I make this ahead of time?
You can prep the toppings and assemble the nachos up to 2 hours ahead, but don’t bake them until you’re ready to serve. If you bake them and let them sit, the chips will absorb the moisture and get soggy. For best results, bake right before game time.
Can I freeze these nachos?
I don’t recommend it. The tortilla chips will become soft and chewy when thawed, and the cheese sauce can separate. It’s best to make them fresh. If you have leftovers, store them in the fridge and reheat in the oven to restore some crispiness.
What cheese melts best for nachos?
A mix of cheddar and Monterey Jack is ideal. Cheddar provides the sharp flavor, while Monterey Jack melts smoothly and creates that stringy texture. Pepper jack is great if you want spice. Avoid pre-shredded cheese as it doesn’t melt as well.
Can I make these in the air fryer?
Yes, but you’ll need to make smaller batches. Fill your air fryer basket with a single layer of chips and toppings. Cook at 350°F for 3-5 minutes. It’s great for individual servings, but for a crowd, the sheet pan method is still the way to go.
Pin This Recipe!
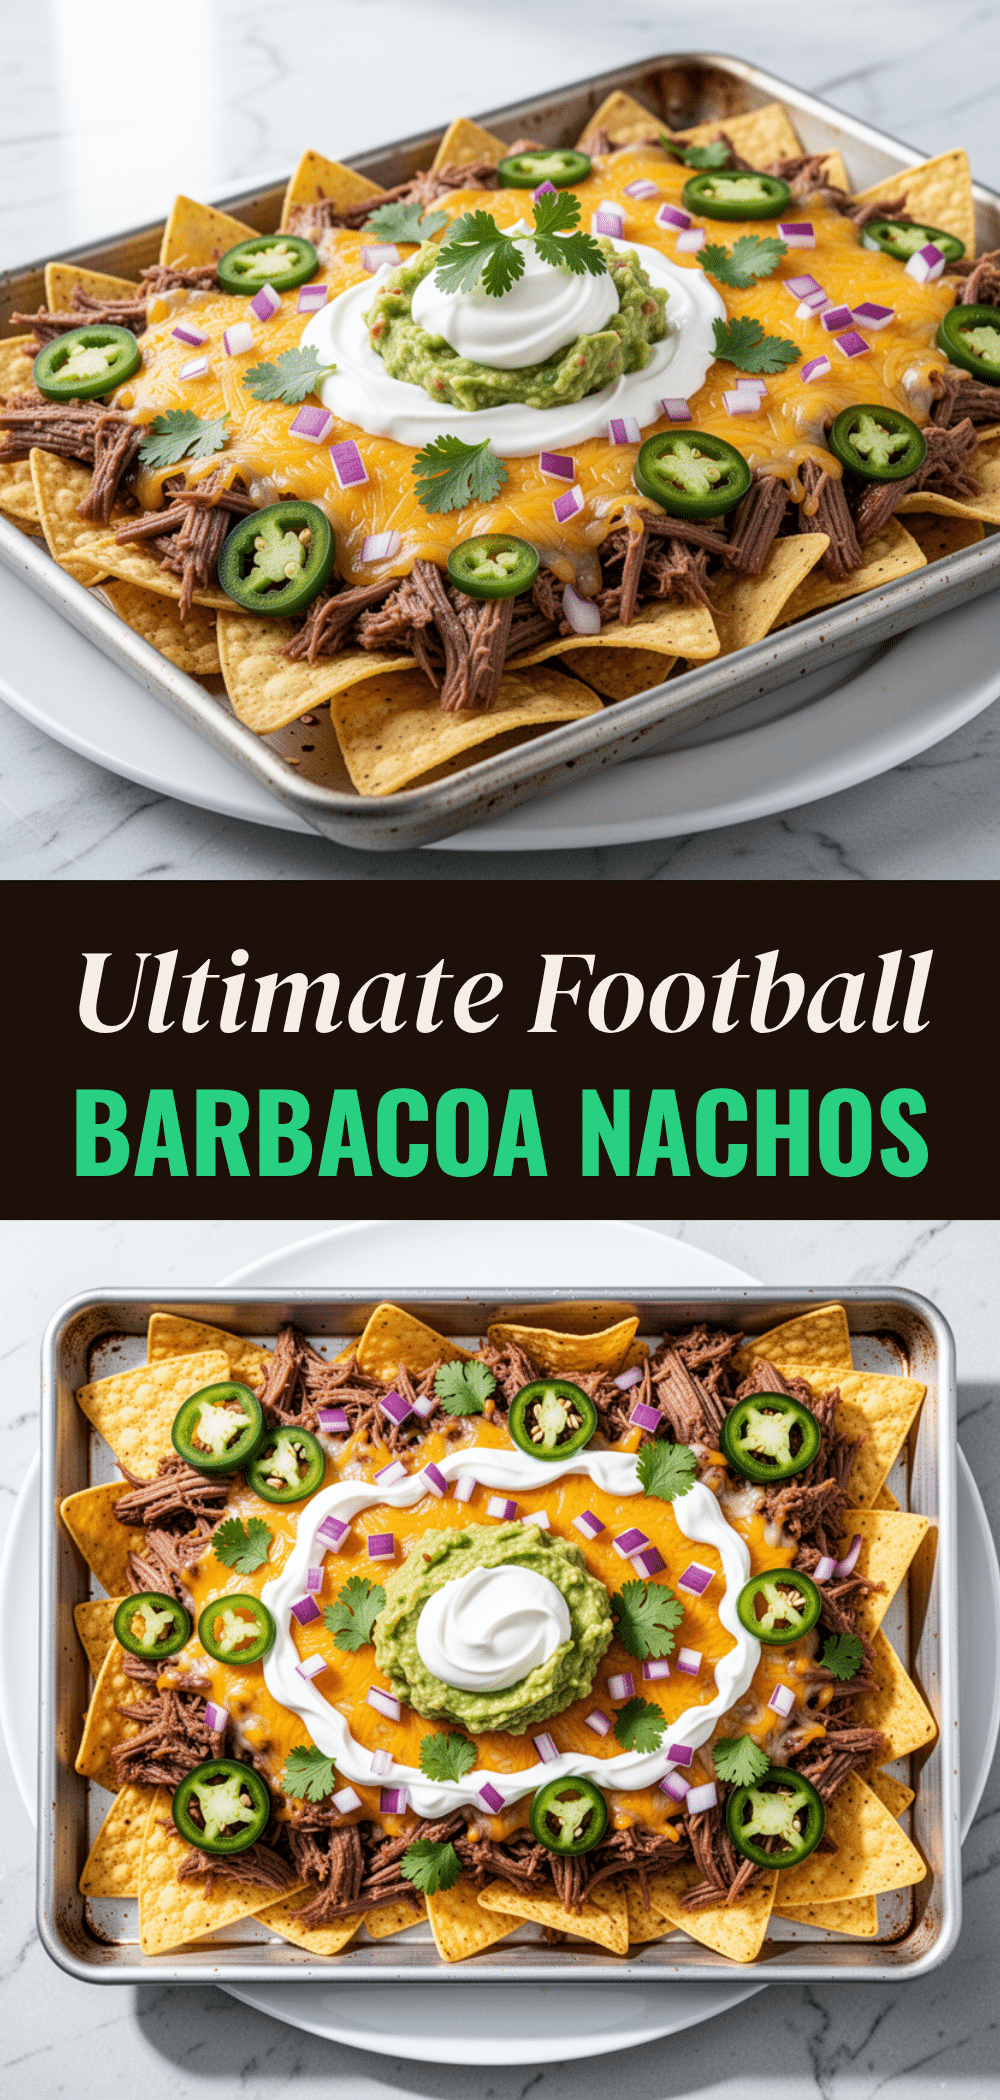
Football Sunday Sheet Pan Nachos: Easy Game Day Dip
- Total Time: 25 minutes
- Yield: 8-10 servings 1x
Description
A massive, communal, and crunchy sheet pan nacho recipe that feeds a crowd without turning you into a slave in the kitchen. This easy game day dip stays hot and crisp, making it the perfect centerpiece for football gatherings.
Ingredients
- 1 large bag (12–14 oz) thick, restaurant-style corn tortilla chips
- 1 pound (450g) ground beef (80/20 blend)
- 1 can (15 oz) black beans, drained and rinsed
- 2 cups (200g) sharp cheddar cheese, shredded
- 1 cup (100g) Monterey Jack cheese, shredded
- 1 cup (240ml) enchilada sauce (red or green)
- 2 tablespoons taco seasoning (or homemade blend)
- ½ cup sliced jalapeños
- ½ cup sliced black olives
- 3–4 stalks green onions, sliced
- ½ cup chopped fresh cilantro
- ½ cup sour cream
- ½ cup guacamole or sliced avocados
- ½ cup salsa or pico de gallo
Instructions
- Preheat oven to 400°F (200°C). Line a large half-sheet pan (18×13 inches) with parchment paper or foil.
- Heat a large skillet over medium-high heat. Add ground beef and cook, breaking it up, until browned. Drain excess fat if necessary, leaving some for flavor.
- Stir taco seasoning and 2 tablespoons of water into the beef. Simmer for 2 minutes to meld flavors, then set aside.
- Spread tortilla chips in a single, even layer on the prepared sheet pan.
- Spread the cooked beef mixture evenly over the chips, followed by the black beans.
- Pour the enchilada sauce in a thin, even layer over the beans and chips.
- Generously sprinkle the shredded cheddar and Monterey Jack cheese over everything, covering all nooks and crannies.
- Bake for 10-12 minutes until the cheese is melted and bubbling and chip edges are golden brown. Optionally broil for 1-2 minutes for extra crispiness.
- Remove from oven and immediately scatter jalapeños, black olives, and green onions over the hot cheese.
- Drizzle with sour cream, dollop with guacamole, and add salsa last to prevent sogginess.
Notes
Shred your own cheese to avoid anti-caking agents that prevent smooth melting. Use thick, restaurant-style chips to prevent sogginess. Add fresh toppings like onions and cilantro after baking to keep them bright. Keep finished nachos warm in a 200°F oven if serving at a party. Do not freeze, as chips will become soggy.
- Prep Time: 10 minutes
- Cook Time: 15 minutes
- Category: Appetizer
- Cuisine: Mexican
Nutrition
- Serving Size: 1/8 of the pan
- Calories: 380
- Sugar: 2
- Sodium: 650
- Fat: 22
- Saturated Fat: 9
- Carbohydrates: 32
- Fiber: 4
- Protein: 18
Keywords: sheet pan nachos, game day food, football snacks, easy appetizer, crowd pleaser, cheesy nachos, party dip



