Last Tuesday, I was standing in my kitchen at 6:45 PM, staring at the clock with that specific kind of panic every parent knows. Dinner was already handled (it was one of my one-pot creamy cajun sausage pasta), but the kids had already started the “dessert negotiation” phase. You know the one. It’s loud, it’s repetitive, and it usually ends with me promising something that doesn’t exist yet. My seven-year-old wanted cake. My ten-year-old wanted cookies. My husband just wanted something sweet that didn’t involve me spending forty minutes at the oven.
I opened the fridge. I opened the pantry. I had heavy cream, I had peanut butter, I had chocolate chips, and I had a box of graham crackers. I also had zero time and zero energy to bake. So, I threw together what I thought would be a quick compromise. I mixed the peanut butter and cream, layered it with chocolate, crumbled some crackers, and popped it in the fridge. Twenty minutes later, I pulled it out. It wasn’t perfect. It was lumpy. It was messy.
But then my kids took a bite. And then they took another. And then they stopped asking for cake. That was the moment I realized I had accidentally created the best weeknight dessert hack of my life. This no-bake peanut butter chocolate pie has saved me more times than I can count. It’s cheap, it’s fast, and it tastes like a vacation from actual cooking. I’ve made this pie at least fifteen times in the last six months, tweaking the ratios until it was creamy enough to melt in your mouth but sturdy enough to actually slice.
If you’re a busy parent, a student living on a budget, or just someone who wants dessert without the fuss, this is your new best friend. It’s the ultimate budget meal-prep dessert because you can make it on Sunday, slice it all week, and nobody will ever know you didn’t turn on the oven.
Why You’ll Love This Recipe
There are about ten reasons I keep making this no-bake peanut butter chocolate pie, but here are the big ones that keep me coming back to it week after week.
- Zero Oven Required — Seriously, if you can use a whisk and a spatula, you can make this. I’ve made this while wearing pajamas, watching TV, and helping my kids with homework. No baking means no heating up the kitchen in the summer, and no waiting for it to cool down in the winter.
- Stupid Simple Ingredients — You probably have 90% of this already in your pantry. Peanut butter, chocolate chips, heavy cream, graham crackers. That’s it. No fancy gadgets, no trip to the specialty store. It’s pantry-friendly in the best way possible.
- Lightning Fast Prep — From start to finish, it takes about 15 minutes of active work. The rest is just chilling time in the fridge. I can throw this together in the time it takes to boil water for pasta.
- Meal-Prep Friendly — This is the secret weapon for busy weeknights. I make this on Sunday afternoon, and it lasts in the fridge for up to five days. That’s five nights of “I don’t have dessert ready” stress completely eliminated. It actually tastes better the next day as the flavors meld together.
- Kid-Approved (and Picky-Eater Safe) — My kids think this is fancy restaurant dessert. It’s sweet, it’s crunchy, it’s chocolatey. If you have picky eaters, this is a safe bet because it doesn’t have any weird textures or healthy veggie surprises hiding in it.
- Budget-Smart — Feeds 8-10 people for under $10. That is less than a single takeout order. I’ve calculated this. I use store-brand peanut butter and chocolate chips, and it tastes just as good as the expensive stuff. Real talk: nobody can tell the difference.
This is my go-to when I need dinner to just work. No complicated techniques, no weird ingredients, just reliable, delicious food that makes everyone happy. It’s the dessert equivalent of a warm hug.
Ingredients You’ll Need
Here’s the best part: you probably have most of this already. I’m particular about a few things here, but mostly, this is a pantry-staple party. I keep these items stocked just so I can make this on a whim.
For the Graham Cracker Crust
Graham crackers (1.5 cups, crushed / about 150g) — I use the classic honey graham crackers. Don’t get the chocolate ones; they’re too sweet. You want the plain, slightly sweet crunch. If you’re short on time, you can buy pre-crushed crumbs, but honestly, crushing them in a bag with a rolling pin takes two minutes and feels therapeutic.
Unsalted butter (6 tablespoons, melted / 85g) — This binds the crust. Use real butter, not margarine. It makes a huge difference in flavor. Melt it in the microwave or a small pot. It doesn’t need to be hot, just melted.
Granulated sugar (2 tablespoons / 25g) — Just a little bit to help it crisp up and add sweetness. If your graham crackers are already super sweet, you can skip this, but I recommend keeping it.
Cinnamon (½ teaspoon) — Optional, but it adds that “baked pie” smell without the baking. It makes the kitchen smell like a bakery, which is a nice bonus for busy weeknights.
For the Peanut Butter Filling
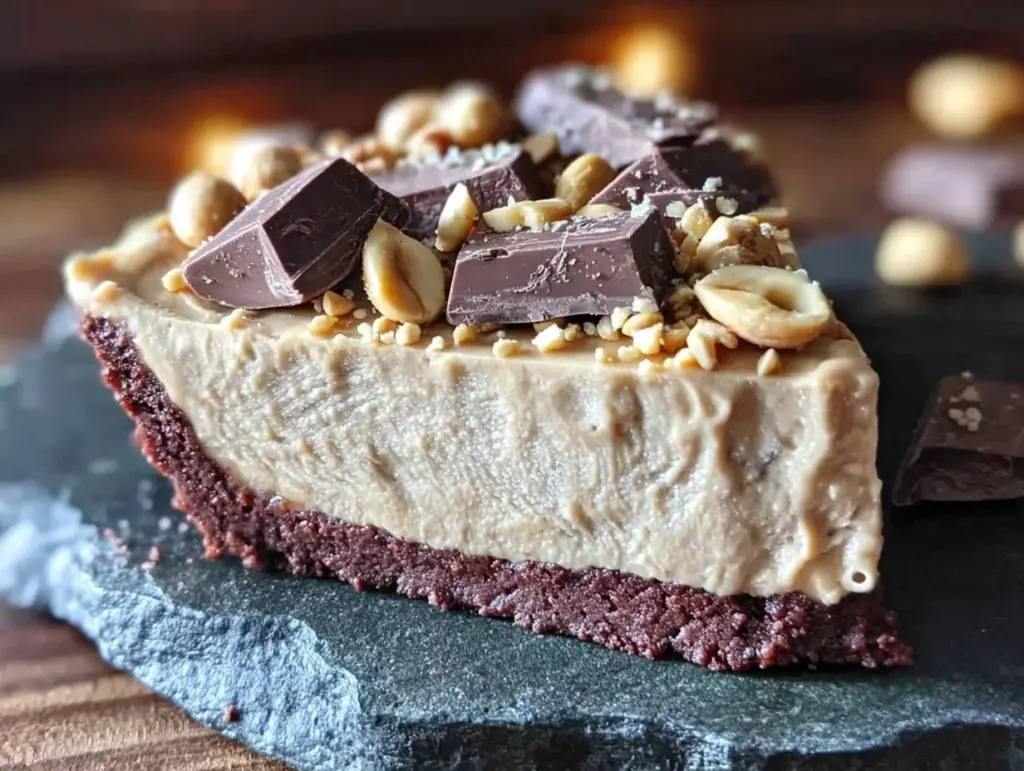
Creamy peanut butter (1 cup / 250g) — This is the star. Use regular Jif or Skippy, or a natural brand if you don’t mind stirring it well first. Avoid the “no-stir” natural butters if they’re oily; you want a smooth, creamy texture. I always buy the store brand to keep costs down. It works perfectly.
Heavy cream (2 cups / 480ml) — Full-fat only. This is what makes it a pie, not a pudding. Half-and-half won’t whip up stiff enough. You need that fat content to hold the structure. Take it out of the fridge 10 minutes before you start so it’s not ice cold.
Powdered sugar (1 cup / 120g) — Also called confectioners’ sugar. It dissolves instantly in the cream, so you don’t get gritty bits. Granulated sugar won’t work here; it won’t melt. Don’t skip this, or it’ll be too thin.
Vanilla extract (1 teaspoon) — Pure vanilla, if you can. It rounds out the peanut butter flavor. I use the brown bottle stuff from the grocery store; it’s cheap and works fine.
For the Chocolate Topping
Semi-sweet chocolate chips (1 cup / 170g) — I like the contrast of semi-sweet against the sweet peanut butter. Milk chocolate is too sweet for my taste. Dark chocolate is too bitter. Semi-sweet is the Goldilocks zone. You can also chop up a chocolate bar if you’re feeling fancy, but chips melt evenly.
Heavy cream (2 tablespoons / 30ml) — Just a splash to thin out the chocolate chips into a ganache. It makes the topping glossy and spreadable.
Salt (a tiny pinch) — This is the secret weapon. A pinch of salt in the chocolate topping cuts the sweetness and makes the chocolate taste richer. It’s a game-changer.
Optional Add-ins — I sometimes sprinkle crushed peanuts or a drizzle of extra peanut butter on top for crunch. If I have leftover salted caramel ice cream ingredients lying around, I might drizzle a little caramel on top too, but it’s not necessary.
Equipment Needed
You don’t need fancy equipment for this. Here’s what I actually use.
9-inch Pie Dish — I use a glass Pyrex dish. It’s cheap, it’s easy to clean, and you can see the layers. A ceramic dish works too, but glass is better for chilling because it conducts cold well. If you don’t have a pie dish, a 9×9 square baking pan works fine. Just adjust the slicing accordingly.
Large Mixing Bowl — Something big enough to hold 2 cups of cream. Glass or stainless steel is best because it’s sturdy. Plastic works if you’re careful.
Electric Hand Mixer or Stand Mixer — You can do this by hand, but your arm will hate you. An electric mixer takes 3 minutes. If you’re feeling athletic, use a whisk and arm strength, but I recommend the machine. I use my old hand mixer from Target that costs $15. It still works fine.
Small Saucepan or Microwave-Safe Bowl — For melting the chocolate chips. The microwave is faster, but the saucepan gives you more control. I usually just nuke it in 30-second intervals.
Spatula — A rubber spatula is essential for scraping the bowl clean. You want every bit of that peanut butter cream. Wasteful? No. Thrifty? Yes.
Ziploc Bag and Rolling Pin — For crushing the graham crackers. It’s fun for kids to help with this step. Just put the crackers in the bag, seal it tight, and smash away.
Knife — A sharp knife for slicing. I wipe the knife with a warm, wet paper towel between slices to get clean cuts. It’s a trick my mom taught me.
How to Make It: Step-by-Step
Alright, let’s make this! I’m walking you through exactly how I do it, including the little tricks I’ve picked up.
Step 1: Crush the Graham Crackers (5 minutes)
Put your graham crackers in a large Ziploc bag. Squeeze out as much air as you can and seal it tight. Now, grab a rolling pin, a heavy pan, or even a bottle of wine if you’re feeling fancy. Smash those crackers until they’re fine crumbs. You want them to look like sand, not chunks. If you have big chunks, they won’t bind together well, and your pie will fall apart. Transfer the crumbs to a medium bowl.
Step 2: Make the Crust (2 minutes)
Add the melted butter, sugar, and cinnamon to the crumbs. Stir it with a fork until it looks like wet sand. It should hold together when you squeeze it in your hand. If it’s too dry, add a teaspoon more butter. If it’s too wet, add a few more crumbs. Press this mixture firmly into the bottom and up the sides of your pie dish. Use the bottom of a measuring cup to pack it down tight. This step is crucial for a sturdy crust. Put the crust in the fridge while you make the filling. It’ll set up nicely.
Step 3: Whip the Peanut Butter Cream (5 minutes)
In your large mixing bowl, combine the heavy cream, powdered sugar, vanilla, and creamy peanut butter. Beat it on medium-high speed with your electric mixer. Start slow so the sugar doesn’t fly everywhere, then crank it up. You’ll see it thicken after about 2 minutes. Keep beating until you have stiff peaks. This means when you lift the beaters, the cream stands up straight and doesn’t droop. It should look like thick frosting. Don’t overbeat it into butter, but don’t underbeat it into soup. Aim for stiff, glossy peaks.
Step 4: Assemble the Pie (5 minutes)
Take the pie dish out of the fridge. Spoon the peanut butter cream onto the crust. Spread it out evenly with a spatula. Try to get it into the corners. Smooth the top so it’s flat. This is the part where you feel like a professional pastry chef, even though you’re just using a spatula. Pop it back in the fridge for 15 minutes to let the filling set a bit.
Step 5: Make the Chocolate Ganache (3 minutes)
While the filling sets, make the topping. Put the chocolate chips in a small microwave-safe bowl. Add the 2 tablespoons of heavy cream. Microwave it in 30-second intervals, stirring in between. After 1 minute, it should be mostly melted. Stir it well. It will come together into a smooth, glossy sauce. If it’s still too thick, add another 10 seconds. Stir in that tiny pinch of salt. Taste it—it should be rich and chocolatey.
Step 6: Top and Chill (30+ minutes)
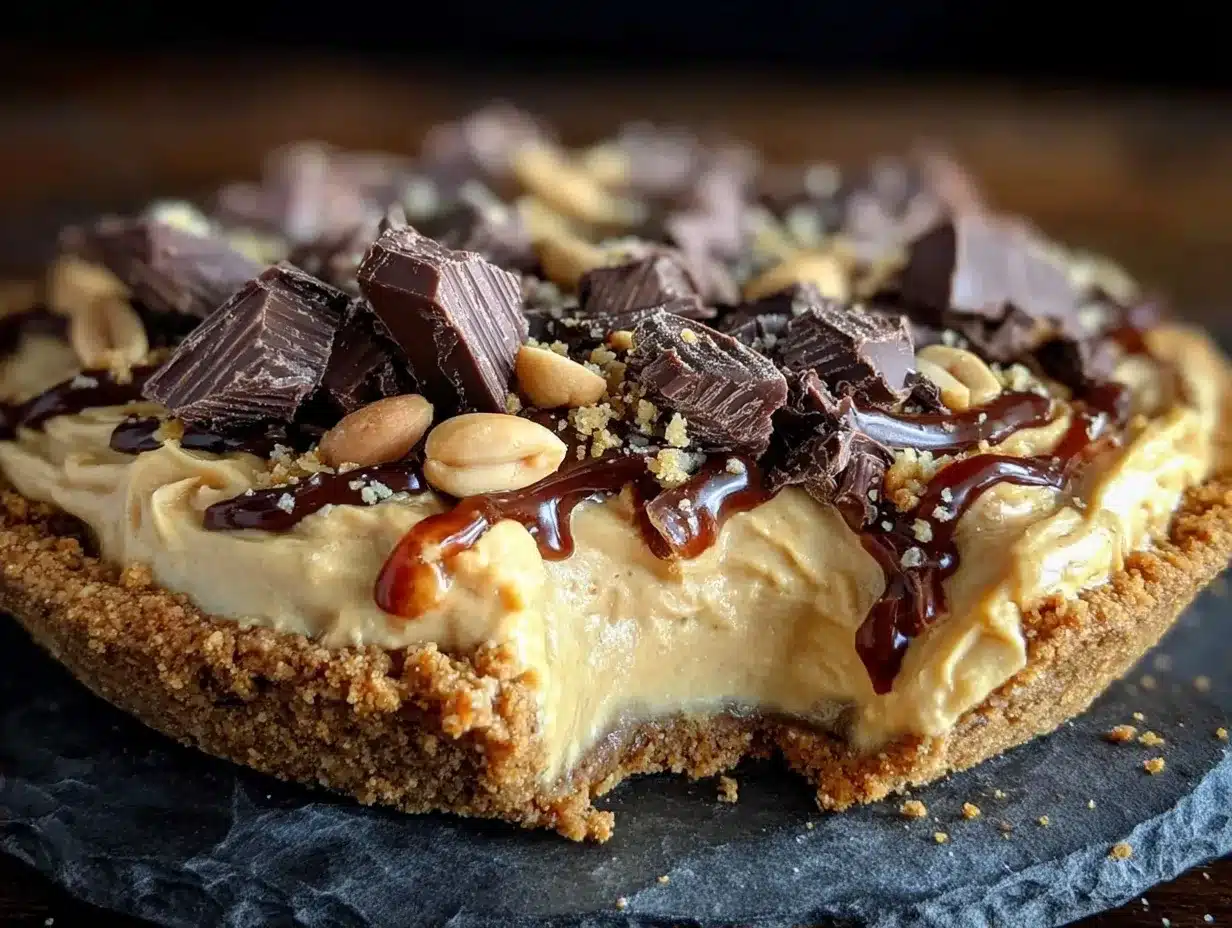
Take the pie out of the fridge. Pour the warm chocolate ganache over the peanut butter filling. Use a spatula to spread it to the edges. You want full coverage. If you’re feeling artistic, you can swirl it with a knife, but flat is fine too. Now, the waiting game. Put it in the fridge for at least 30 minutes, but ideally 2 hours. The longer it chills, the easier it is to slice. If you cut it too soon, it’ll be messy. Patience is key.
Step 7: Serve
When you’re ready to eat, take it out. Slice it with a sharp knife. I like to serve it with a dollop of whipped cream if I have extra, but it’s rich enough on its own. Dust with a little extra cinnamon or crushed peanuts if you want to show off. Serve it cold. It’s best straight from the fridge.
Total Time: About 45 minutes (15 minutes active, 30 minutes chilling)
Expert Tips & Tricks
Here’s everything I’ve learned from making this dozens of times. These tips will save you from my mistakes.
Don’t Skip the Chill Time
This is the #1 tip. If you cut this pie immediately, it will be a mess. The peanut butter cream needs time to firm up, and the chocolate needs time to set. I know it’s hard to wait, but 30 minutes minimum is non-negotiable for clean slices. If you’re in a huge rush, put it in the freezer for 15 minutes, but the fridge is better for even setting.
Use Room Temperature Peanut Butter
If your peanut butter is cold and stiff from the fridge, it will be hard to mix into the cream. Take it out 15 minutes before you start. If you’re using natural peanut butter that has separated, make sure to stir it well before measuring. You want the oil incorporated so the texture is smooth.
Whip the Cream Properly
Make sure your bowl and beaters are cold. If you’re in a hurry, put your mixing bowl in the freezer for 10 minutes before you start. Cold cream whips faster and holds its shape better. If the cream is warm, it’ll never get stiff peaks, and your pie will be soupy.
Save That Crust
If you have leftover graham cracker crumbs, store them in an airtight container. They’ll last for weeks. I often make extra crust to press into small ramekins for individual no-bake cheesecakes. It’s a great way to use up leftovers.
Chocolate Ganache Consistency
If your ganache is too thick to spread, add another teaspoon of cream. If it’s too thin, let it cool for a few minutes and stir. It should be the consistency of warm honey. If it’s too runny, it’ll slide off the pie. If it’s too thick, it’ll crack when you slice it.
Variations & Substitutions
Once you’ve nailed the basic version, here’s how you can mix it up. I’ve tried all of these.
Chocolate Peanut Butter Cup Style
Add a layer of mini peanut butter cups in the middle of the pie. Crush them up and sprinkle them between the peanut butter layer and the chocolate layer. It adds texture and more peanut butter flavor. My kids love this version.
Salted Caramel Drizzle
Drizzle store-bought or homemade salted caramel sauce over the top before serving. It adds a fancy touch and cuts the sweetness. I buy the cheap caramel sauce from the baking aisle, and it works perfectly.
Gluten-Free
Use gluten-free graham crackers. Most brands work fine, but check the label. Make sure your chocolate chips are certified gluten-free if you’re serious about it. Everything else is naturally gluten-free.
Dairy-Free
Use coconut cream instead of heavy cream. It won’t whip as stiff, so you might need to chill the coconut cream overnight and use the solid part. Use dairy-free chocolate chips and vegan peanut butter (some natural butters have palm oil, which is fine, but check labels). It’s different but still tasty. My lactose-intolerant friend requests this version.
Lower Sugar
Use sugar-free chocolate chips and reduce the powdered sugar in the filling to ½ cup. It’s less sweet, but still good. I make this when I’m trying to be “healthy,” though let’s be honest, it’s still a dessert.
Protein-Packed
Add a scoop of vanilla protein powder to the peanut butter cream. It changes the texture slightly (makes it denser), but it adds protein. I use a whey protein isolate because it mixes better. It’s not as light and fluffy, but it’s more filling.
Serving & Storage
How to Serve:
I usually serve this straight from the pie dish at the dinner table—it looks rustic and stays cold. But here are other ways I’ve enjoyed it:
- Individual Cups — I sometimes make this in small glass jars or mason jars for a cute presentation. It’s great for lunchboxes or potlucks.
- With Fruit — Sliced strawberries or bananas on top add freshness and cut the richness. It’s a nice contrast.
- With Coffee — This pairs well with a hot cup of coffee or tea. It’s not too heavy, so it’s a good evening treat.
Storage Instructions:
Refrigerator:
Store in the fridge in an airtight container or covered with plastic wrap for up to 5 days. It actually gets firmer and better after day one. I make this on Sunday, and it’s gone by Wednesday.
Freezing:
You can freeze this pie! Wrap it tightly in plastic wrap and then foil. It’ll last for up to 2 months. Thaw it in the fridge overnight. The texture might be slightly different, but it’s still delicious. I freeze individual slices for quick desserts.
Reheating:
Don’t reheat this. It’s a cold pie. Eat it cold. If you’re feeling ambitious, you can serve it slightly softened, but straight from the fridge is best.
Pro Tip:
If you’re meal-prepping, make two batches. One for immediate eating, one for freezing. It saves you from the “what’s for dessert?” panic later in the week. I always have a backup pie in the freezer.
Nutrition Information
I’m not a nutritionist, but here’s the breakdown if you’re tracking. This is a rich dessert, so portion control is key.
| Per Serving (1/8 of pie) | Amount |
|---|---|
| Calories | 380 |
| Protein | 8g |
| Carbs | 35g |
| Fiber | 2g |
| Sugar | 28g |
| Fat | 24g |
| Saturated Fat | 12g |
| Cholesterol | 45mg |
| Sodium | 220mg |
What’s Good:
– Decent protein from peanut butter
– Calcium from the cream and cheese
– Quick to make, saving you time and money on takeout
What to Know:
– Higher in calories and fat due to cream and chocolate
– Contains dairy and gluten
– Moderate sodium (use low-sodium butter if concerned)
My Take:
Look, this is comfort food with cream and chocolate. It’s not a diet recipe. But it’s way better than store-bought dessert, costs less, and I know exactly what’s in it. When I want to make it lighter, I use less chocolate and more fruit on top. But usually? I just eat a reasonable slice and enjoy it.
Final Thoughts
So that’s my go-to no-bake peanut butter chocolate pie! I’ve probably talked your ear off at this point, but when you make a recipe this often, you have a lot to say about it. This has saved weeknight dinners more times than I can count. It’s my answer to “what’s for dessert” when I’m tired, don’t want takeout, and still want something that tastes really good. My kids are happy, my husband’s happy, and I’m happy because I’m not stressed about cooking.
Make it yours! Try different add-ins, swap in your favorite chocolate, adjust the peanut butter (though more is always better in my opinion). The best recipes are the ones you adapt to your family’s tastes. If you make this, drop a comment and let me know what you think! I love hearing how recipes turn out in your kitchen. And if something doesn’t work, tell me that too—I’m here to help troubleshoot.
Happy cooking! And I hope your kitchen smells half as good as mine does right now.
Frequently Asked Questions
Can I use crunchy peanut butter instead of creamy?
Yes, you can! It adds a nice crunch to the filling. I like creamy for a smoother texture, but crunchy is great if you like a bit of bite. Just make sure it’s well-mixed before you add it to the cream. If it’s too thick, you might need to whip the cream a bit longer.
Why did my pie fall apart when I sliced it?
Usually, this means it didn’t chill long enough. The peanut butter cream needs time to set. If you cut it too soon, it’ll be soft and messy. Let it chill for at least 2 hours, or overnight if you can. Also, make sure you pressed the crust down firmly in Step 2. A loose crust will crumble.
Can I make this ahead for a dinner party?
Absolutely! This is perfect for making ahead. You can make it 1-2 days before the party. Just keep it covered in the fridge. It actually tastes better after sitting for a day because the flavors meld together. I make this all the time for potlucks because it travels well (if you’re careful).
Can I use cool whip instead of heavy cream?
You can, but the texture will be different. Cool whip is lighter and airier, but it doesn’t have the rich, creamy flavor of whipped heavy cream. If you use Cool Whip, fold it in gently after mixing the peanut butter and sugar. It’ll be softer, so chill it longer. I prefer heavy cream for the best flavor, but Cool Whip is a convenient shortcut.
How do I store leftovers?
Store leftovers in an airtight container in the fridge for up to 5 days. You can also freeze individual slices for up to 2 months. Thaw in the fridge overnight. It’s best eaten cold, straight from the fridge.
Can I double this recipe?
Yes! Double everything and use a larger pie dish (like a 10-inch or 9×13 pan). The cooking times stay the same. I do this when I’m feeding a crowd or meal-prepping. Just make sure your mixing bowl is big enough for the cream.
What if I don’t have graham crackers?
You can use any crunchy cookie! Oreos (crushed), vanilla wafers, or even digestives work well. Just crush them up and mix with butter. The flavor will change slightly, but it’ll still be delicious. I’ve used crushed pretzels for a salty-sweet twist, and it was amazing.
Pin This Recipe!
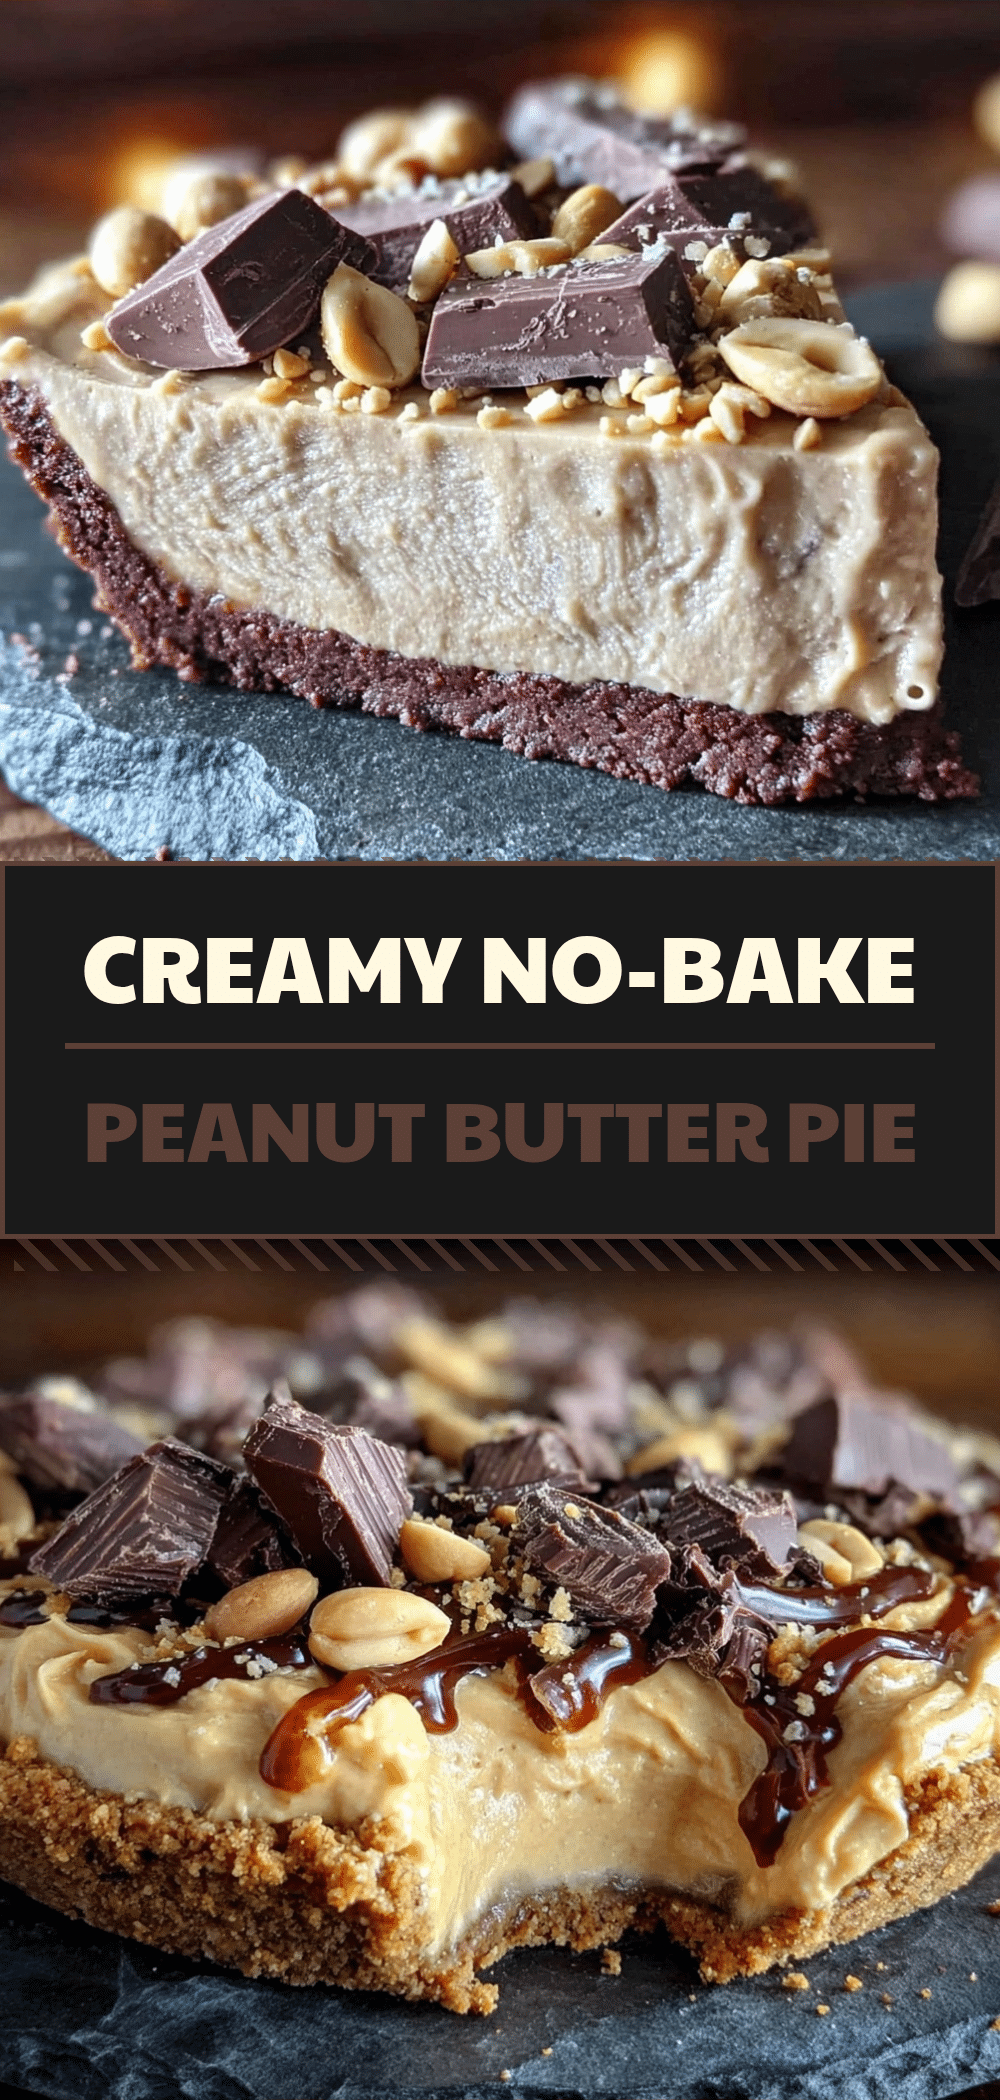
No-Bake Peanut Butter Chocolate Pie
- Total Time: 45 minutes
- Yield: 8 servings 1x
Description
A quick, budget-friendly, no-bake dessert that combines a graham cracker crust with a creamy peanut butter filling and a rich chocolate ganache topping. Perfect for busy weeknights and meal prep.
Ingredients
- 1.5 cups graham crackers, crushed (about 150g)
- 6 tablespoons unsalted butter, melted (85g)
- 2 tablespoons granulated sugar (25g)
- 1/2 teaspoon cinnamon
- 1 cup creamy peanut butter (250g)
- 2 cups heavy cream, cold (480ml)
- 1 cup powdered sugar (120g)
- 1 teaspoon vanilla extract
- 1 cup semi-sweet chocolate chips (170g)
- 2 tablespoons heavy cream (for ganache)
- 1 pinch salt
Instructions
- Crush graham crackers into fine crumbs using a rolling pin in a sealed bag.
- Mix crushed crackers with melted butter, sugar, and cinnamon until it resembles wet sand.
- Press the crust mixture firmly into the bottom and up the sides of a 9-inch pie dish. Chill in the fridge.
- In a large mixing bowl, combine heavy cream, powdered sugar, vanilla, and peanut butter.
- Beat with an electric mixer on medium-high speed until stiff peaks form.
- Spread the peanut butter cream evenly over the chilled crust.
- Chill the pie for 15 minutes to let the filling set slightly.
- Microwave chocolate chips and 2 tablespoons of heavy cream in 30-second intervals, stirring until smooth.
- Stir in a pinch of salt.
- Pour the chocolate ganache over the peanut butter filling and spread to the edges.
- Refrigerate for at least 30 minutes, ideally 2 hours, until firm.
- Slice and serve cold.
Notes
Ensure the pie chills for at least 30 minutes, preferably 2 hours, to ensure clean slices. Use cold heavy cream for best whipping results. Peanut butter should be at room temperature for easier mixing. Store in the fridge for up to 5 days or freeze for up to 2 months.
- Prep Time: 15 minutes
- Cook Time: 0 minutes
- Category: Dessert
- Cuisine: American
Nutrition
- Serving Size: 1/8 of pie
- Calories: 380
- Sugar: 28
- Sodium: 220
- Fat: 24
- Saturated Fat: 12
- Carbohydrates: 35
- Fiber: 2
- Protein: 8
Keywords: no-bake, peanut butter, chocolate pie, budget dessert, meal prep, easy dessert, family friendly, weeknight dinner